In this lesson you will learn step by step, how to change a color of the car on image in Gimp. In the end you can made more different colors of your car or other objects on image. But this method doesn't work with white and black color. This lesson taken from www.tutorima.com
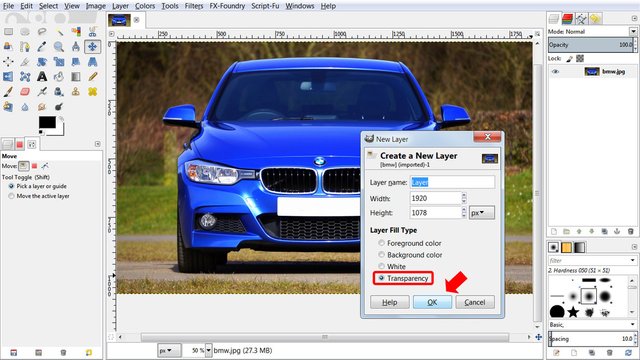
In the the start you may watch this video tutorial and then following by steps. You may download this photo of car from Pixabay on this link: https://pixabay.com/en/bmw-car-vehicle-transporta...Then open this photo in Gimp and create a new layer. Then check that a new layer, which you create is transparent.

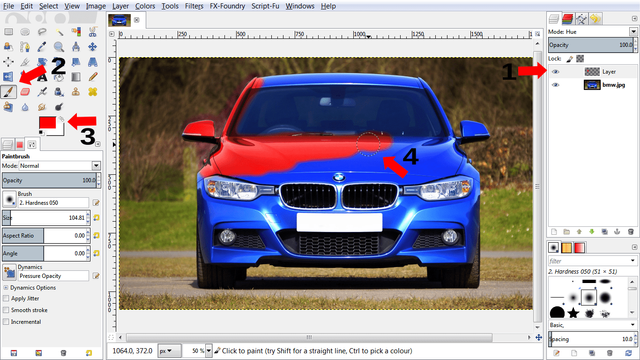
Choose the brush tool and color, then paint your car in layer which we created.

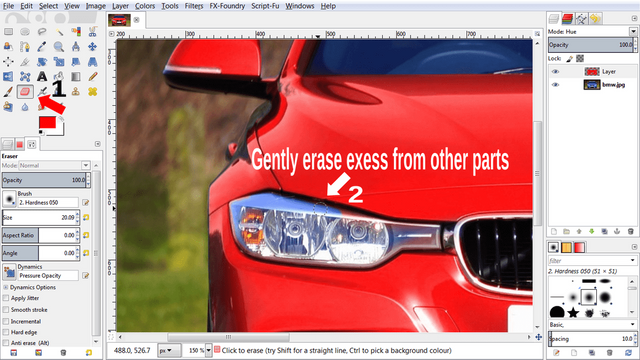
Then in the panel tools find the eraser and erase the excess. You may use select tools like on video in the start, but if you don't know how to work with select tools, just use eraser tool for erase excess.

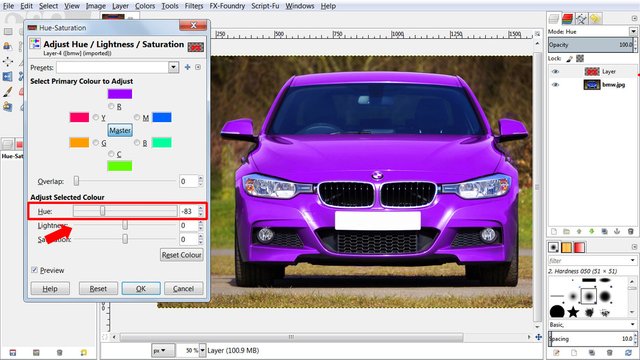
In last step find the hue-saturation tool in Color->Hue-saturation. By varying the hue, you can easily change the color. In result you may repeat this step a lot times and make more images of your car with different colors. But in this way you can't change your car color to white or black.
For save your image find the Export As button in File->Export As.

Thank you for reading this article. I hope you now can make interesting images.
Downvoting a post can decrease pending rewards and make it less visible. Common reasons:
Submit