Step 4: Add a Button to the Main Activity
Navigate to the Design tab of the activity_main.xml display.
- In the Palette menu to the left of the phone display, find Button (under the heading Widgets).
- Click and drag Button to be centered underneath your welcome message.
- Make sure your button is still selected.
- In the Properties menu (on the right side of the window), scroll down to find the field for "text."
- Change the text from "New Button" to "Next Page."
Step 5: Create a Second Activitynge the text from "New Button" to "Next Page."

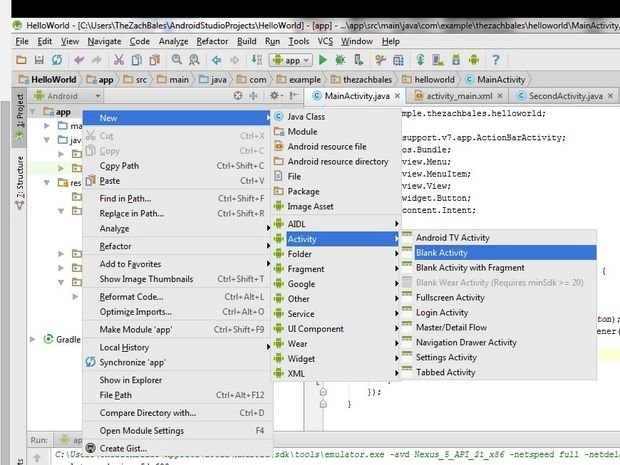
- At the top of the project's file system tree, right click on "app."
- Navigate through to New > Activity > Blank Activity.
- Change the name of this activity to "SecondActivity".
- Click "Finish."
- Make sure you are in the Design view of activity_second.xml.
- Drag the text box in the upper left of the phone display down to the center as you did on the Main Activity.
- With the text box still selected, find the "id" field in the Properties menu on the right, and set it to "text2".
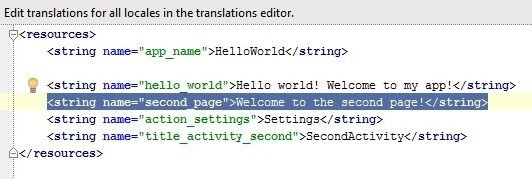
- Open strings.xml again.
- Add a new line under "Hello world! Welcome to my app!" that reads "Welcome to the second page!".
- Navigate back to activity_second.xml.
- Select the text box again.
- In the Properties pane, set the "text" field to "@string/second_page".
- Make sure that the text box now reads "Welcome to the second page!" and is in the center of the screen in the phone display.

More in the next tutorial
thanks
This post was resteemed by @resteembot!
Good Luck!
Learn more about the @resteembot project in the introduction post.
Downvoting a post can decrease pending rewards and make it less visible. Common reasons:
Submit