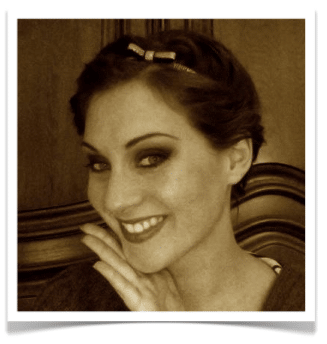
Hello everyone, here is the long awaited tutorial to know how to put a headband like Pin-up whether you have long hair, very long or even short. Enjoy: -)
Hello and welcome. Today, the tutorial "How to put a headband in a Pin-up way".
So I went shopping and found this pretty little headband, as you can see with the little bow. Without a node, I must confess that it will be a little more difficult to do Pin-up so try to find a headband with a small node.
We'll start right now. You're gonna have to put your headband on your head, drop it off. If you put it on the forehead as it is done very often at the moment or if you have a double headband on your head, we are not in the Pin-up style. One is more in the style of the last century: the 20s, the 30s or really the Antiquity side. Here, we're going to do Pin-up so it's going to be placed preferably on the side of the head with the well roulottés hair.
I put my headband well on the side and I'll just drop the headband all around my headband. From now on, pull your hair all around your head so that your headband does not rise and there is no mushroom effect. With the other hand, by the way, I hold it and pull so that my hair doesn't come up. From there, it's very easy, it's just going to be necessary to put each strand back up and put it in the headband all around the head.
My little tip: hold your headband on the other side so that it doesn't come up!
There, I really put it down on my ears and as far as I could, i. e. close to the forehead without going on the forehead. I start, I hold on one side and I take the highlights. Quite simply, I'm going to put them in. I'll take another strand and put it in it. We have to do this all the way around the hair. I change my hand and I always hold the headband because often, when we move our hair around, we tend to pull it up. I'll keep going. I try to get closer so that you can see a little bit of the gesture but it is very simple. There you go. Here you go. We're almost done here. For those with long hair, there is no problem, we continue. For those who have just like me, that's where I give you my little trick: simply tweezers. You're going to take your strands behind and grab them with the headband, so it really won't move.
Afterwards, it's up to you to adjust a little bit around the head. You can do more or less pull out your strands to make more or less volume. I think so, I mean, I hope it's okay.
There, my headband is finished! It's a little more difficult for me than in my bathroom!
Now, if you have very long hair, it's simple: you make a very loose mat. You're counting a few crossovers. You roll them on them very loosely once again and at the end, it's very simple, just pull in the last hair. It will be a lot easier for you than doing strand to strand with very long hair.
Last trick: if you love headbands but your hair is really too short to roll, just do the front and back strands (I take off what I did) and iron the hair too short over it. So I've undone my headband a little bit. I'm replacing it.
I hope you enjoyed this tutorial and that it will make you want to wear headbands. I must confess that not only do I want to wear them, but I also want to create them because I had a lot of difficulties finding small headbands with pin-up nodes. Here, tell me if you ever want to have Pin-up headbands. I think I'm going to start creating Pin-up headband!
Thank you for watching this video and I'll see you soon on PinupBio. com.