This is my homework post for Steemit Learning Challenge Season 21 Week 2 assignment of Professor @hamzayousafzai’s class, Creating an Amazon Affiliate Account & Adding Affiliate Links to Your Blog.
Note :
- I performed this task on Windows 10 PC, Google Chrome.
Task 1 - Create Your Amazon Affiliate Account
- I searched for Amazon affiliate programs on the internet via Google.
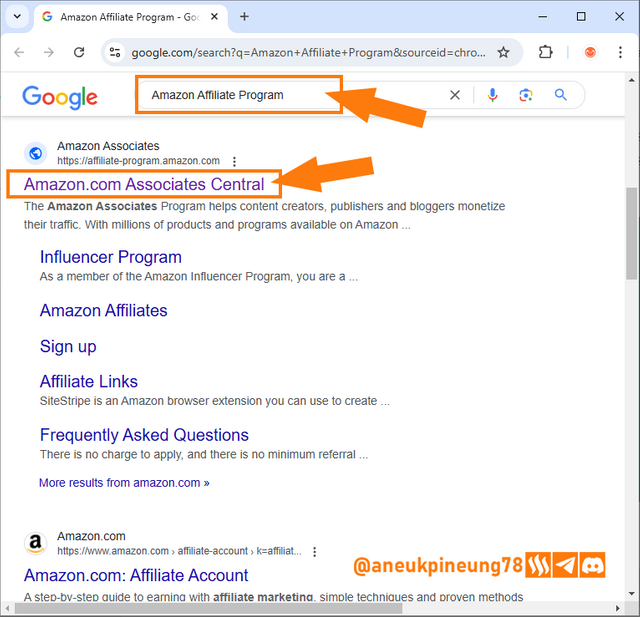
Image is clickable and might show larger resolution. - I pressed the [Sign Up] button on the Amazon affiliate program webpage.
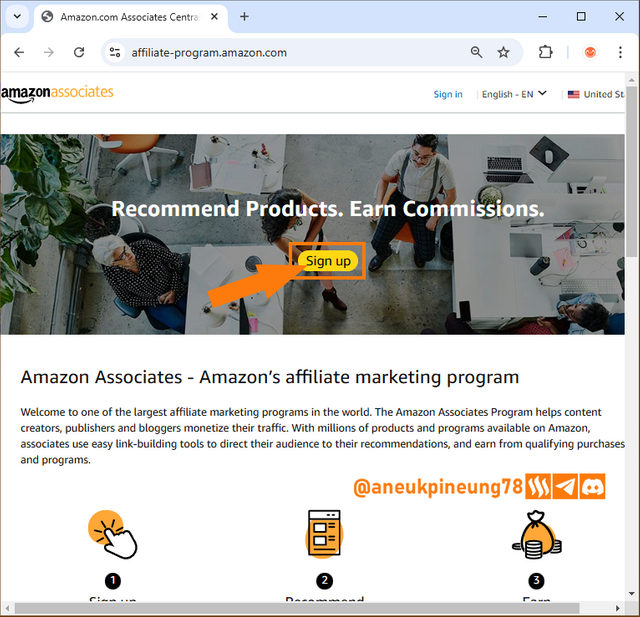
Image is clickable and might show larger resolution. - On the next page I pressed the [Create your Amazon account] button.
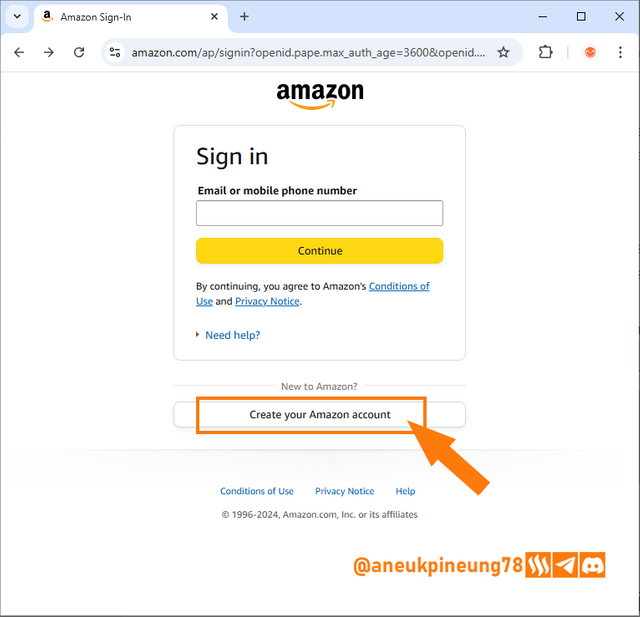
Image is clickable and might show larger resolution. - I filled in all the required credentials and once done, I pressed the [Create your Amazon account] button.
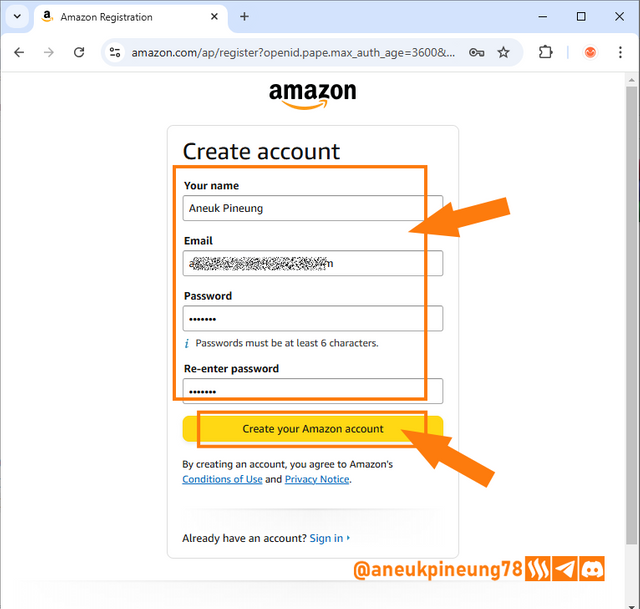
Image is clickable and might show larger resolution. - Next, I was asked to verify the email address I entered in the previous step by entering the OTP sent to the email address, then I pressed the [Create your Amazon account] button.
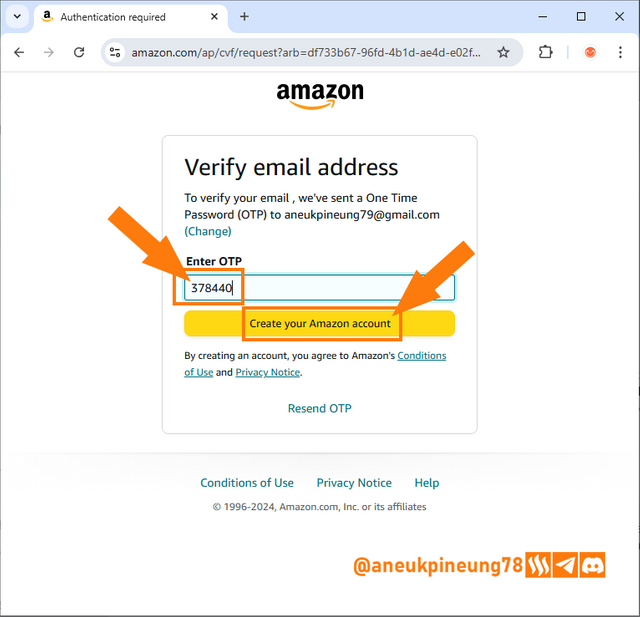
Image is clickable and might show larger resolution. - On the next page I was asked to enter more comprehensive personal data relating to my address as Payee.
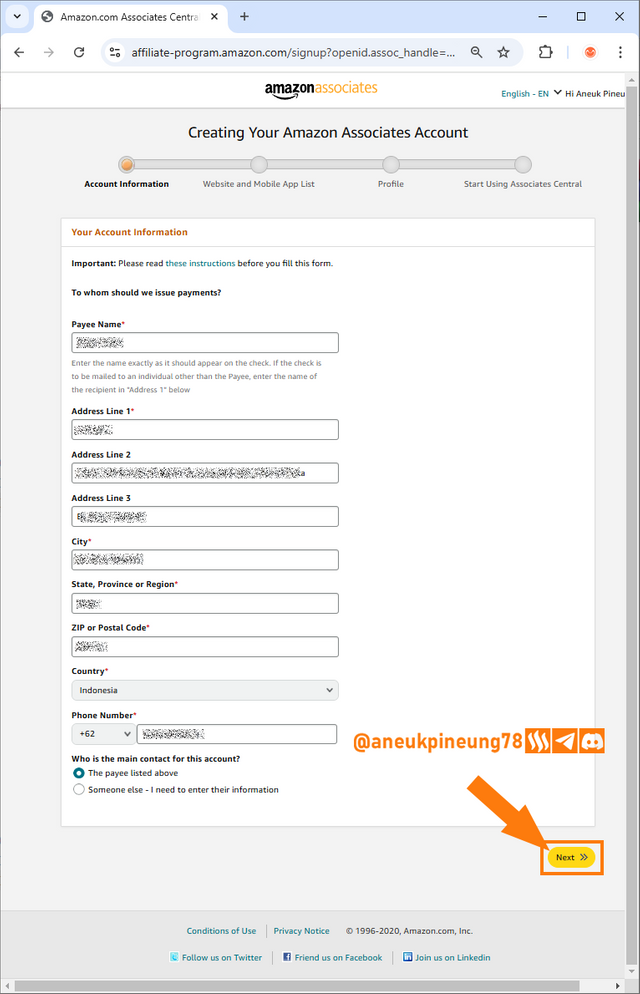
Image is clickable and might show larger resolution. - Added my website.
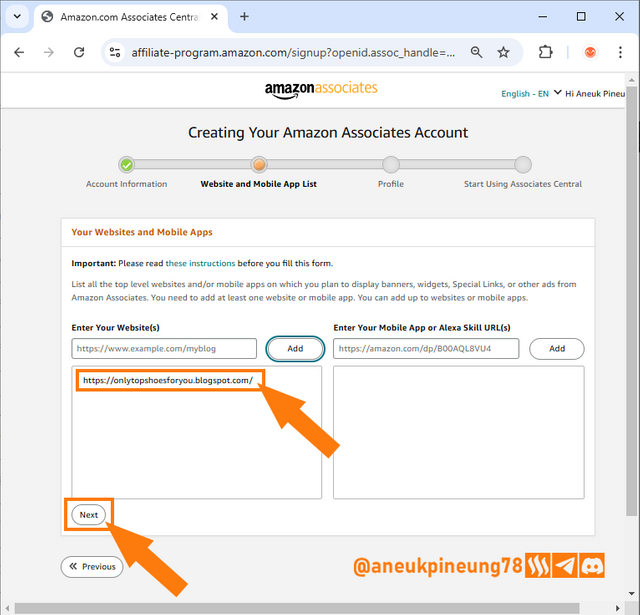
Image is clickable and might show larger resolution. - Made website content statement.
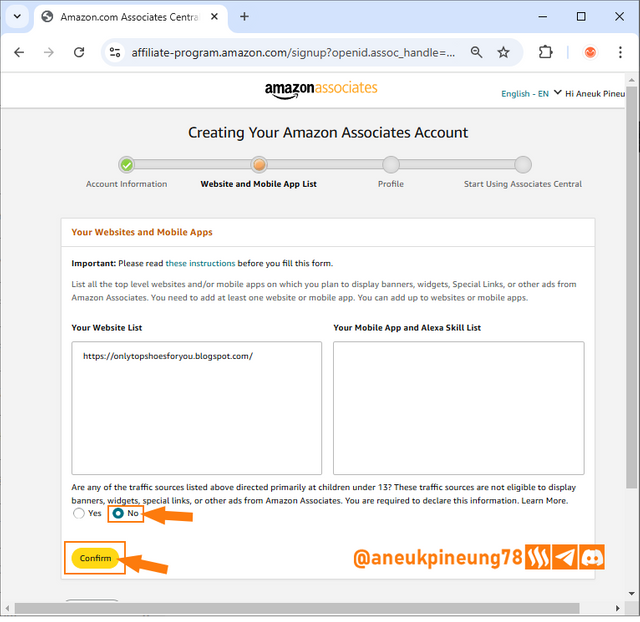
Image is clickable and might show larger resolution. - Completed associate account profile.
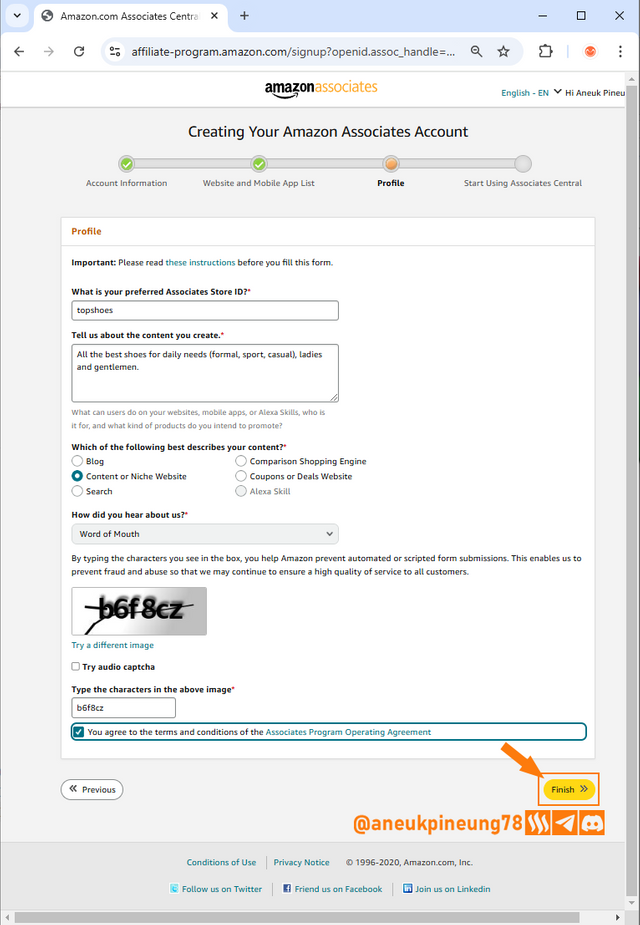
Image is clickable and might show larger resolution. - Set up was completed.
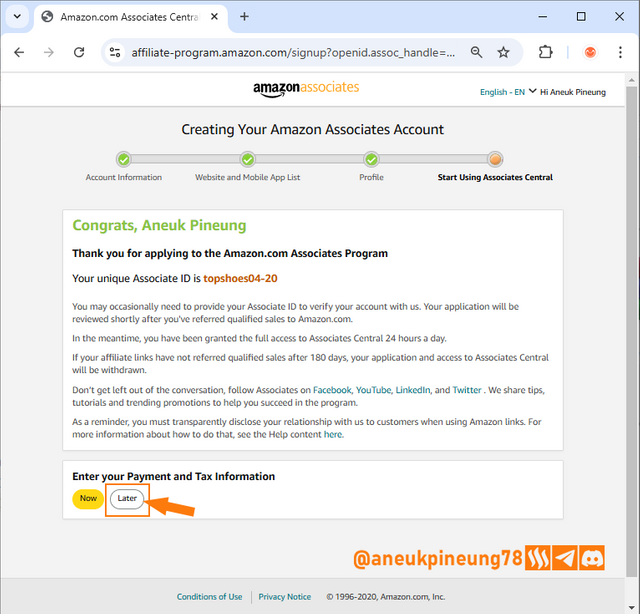
Image is clickable and might show larger resolution. - This is how the front page of my affiliate program on Amazon looks like.
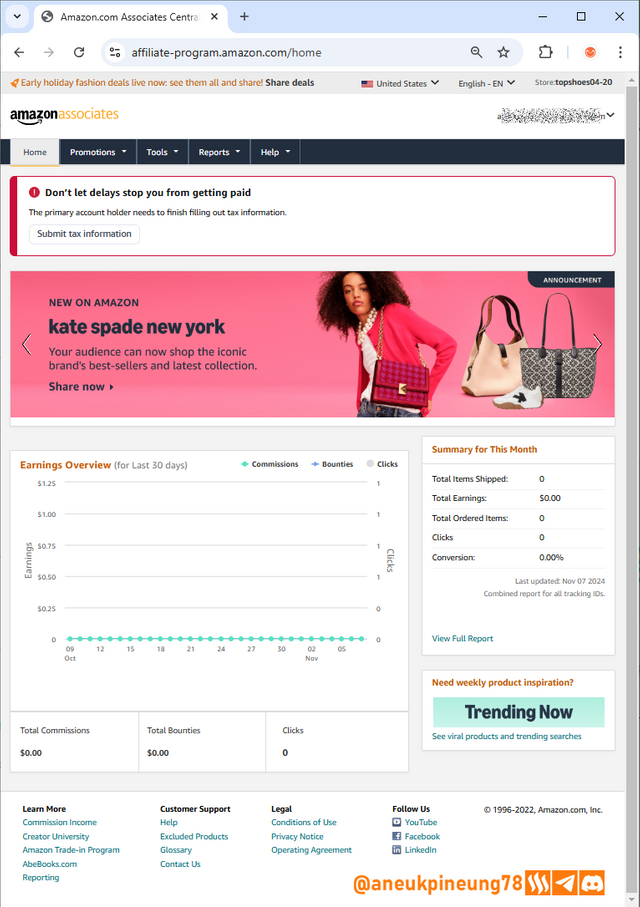
Image is clickable and might show larger resolution.

Task 2 - List Products on Your Blog
- I went to amazon.com and searched with the keyword 'shoes'.
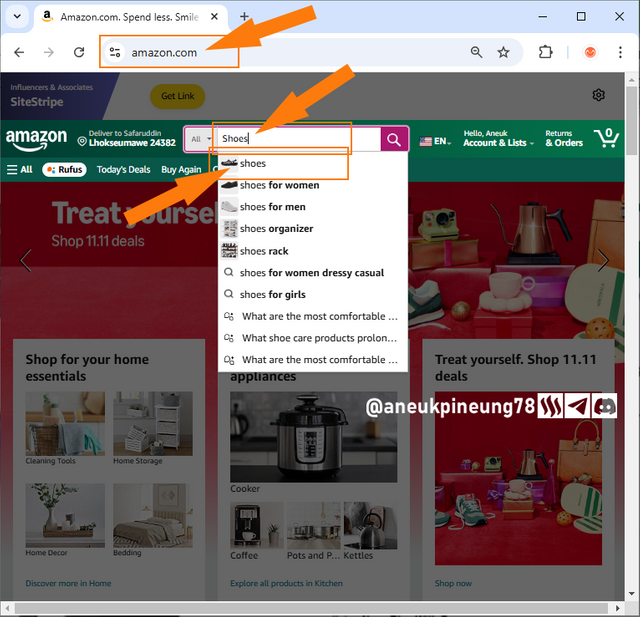
Image is clickable and might show larger resolution. - Search results page on amazon.com with the keyword “shoes”. I clicked on one of the search results.
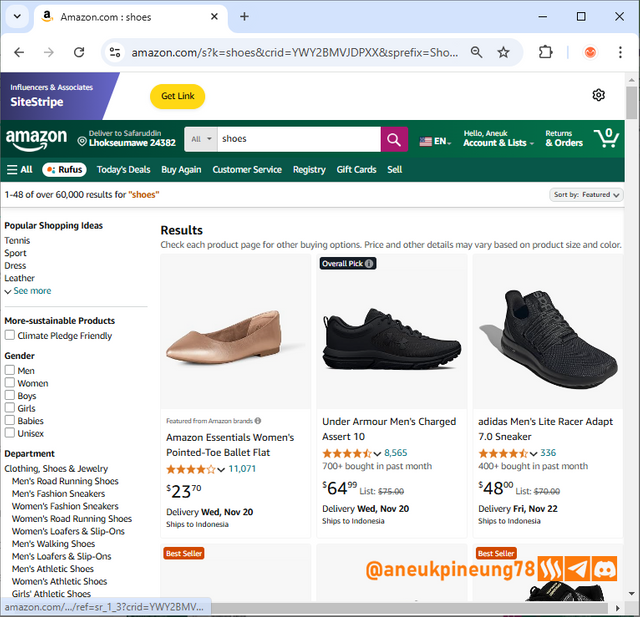
Image is clickable and might show larger resolution. - I right-clicked on the shoe image and selected “Save image as...” to save the image as an entry on my blog later.
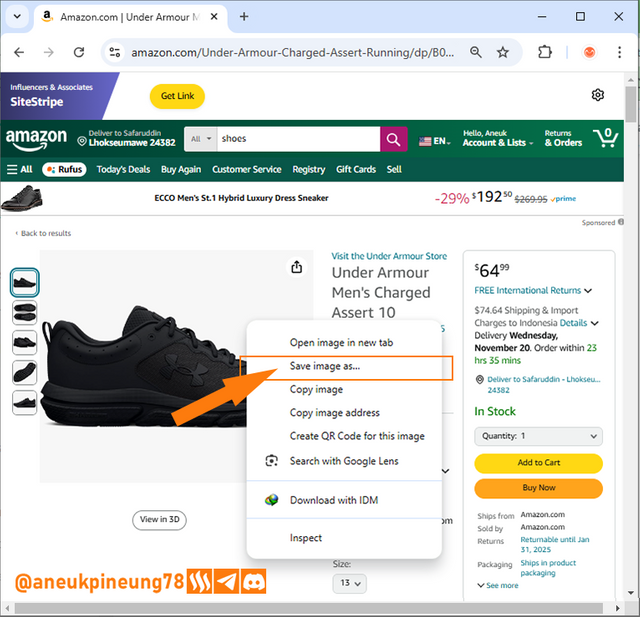
Image is clickable and might show larger resolution. - Then I take the affiliate link of the item.
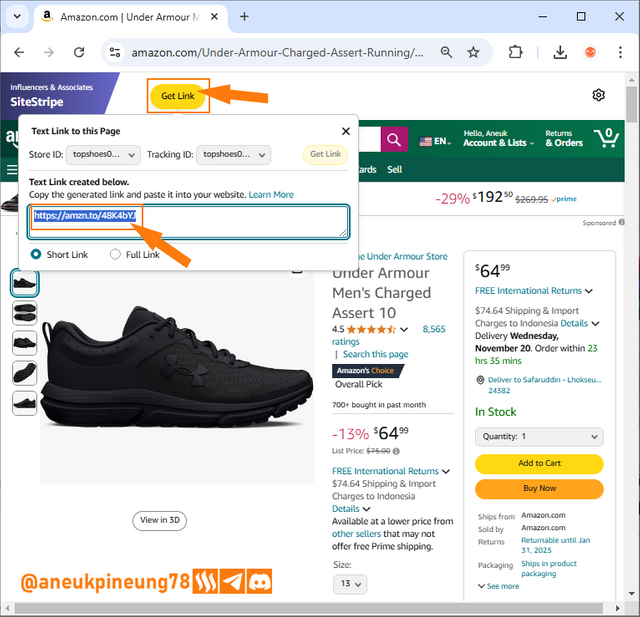
Image is clickable and might show larger resolution. - I created a new post on my blog, (I can also update an old post, if there was already a similar entry).
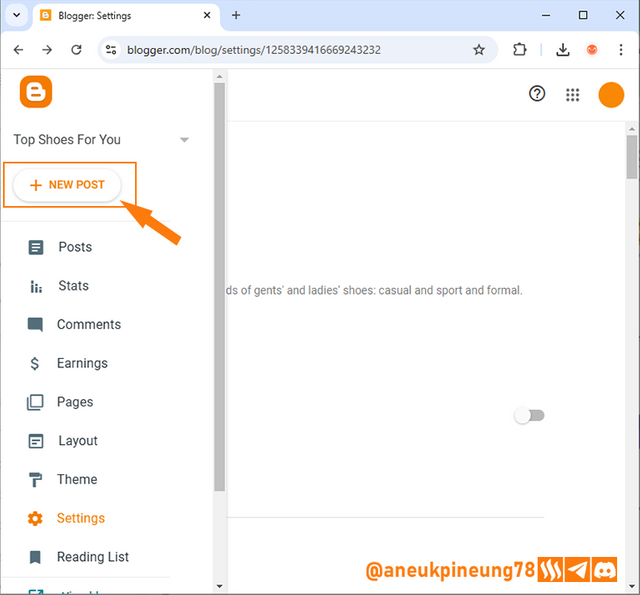
Image is clickable and might show larger resolution. - I activated the HTML view mode, because I will insert the affiliate link that I have copied before.
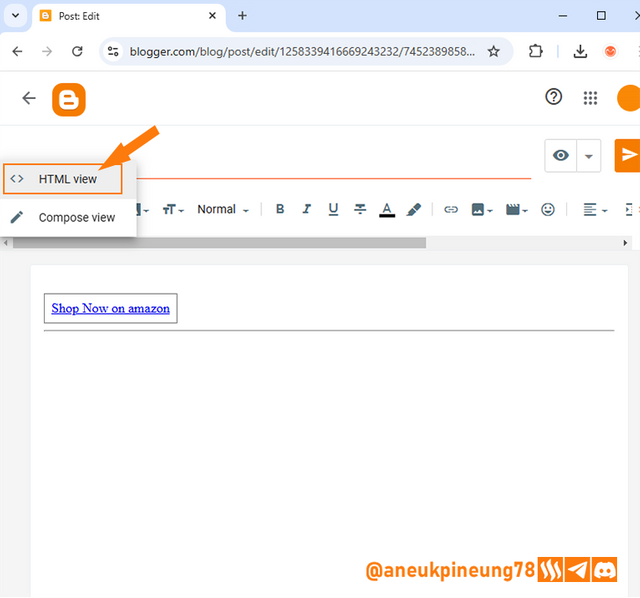
Image is clickable and might show larger resolution. - I pasted the copied link.
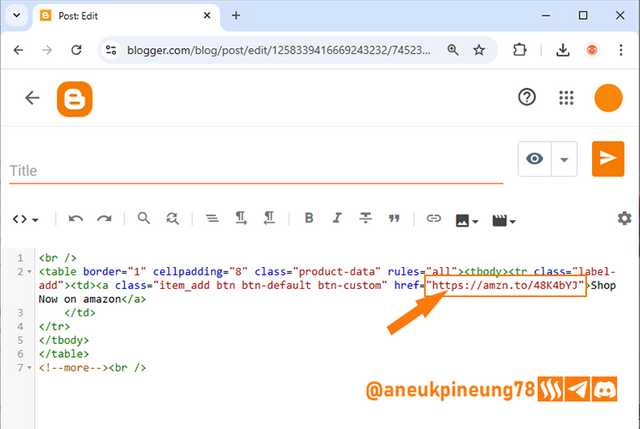
Image is clickable and might show larger resolution. - I then went back to Compose view mode to fill in the title, add an image and product description.
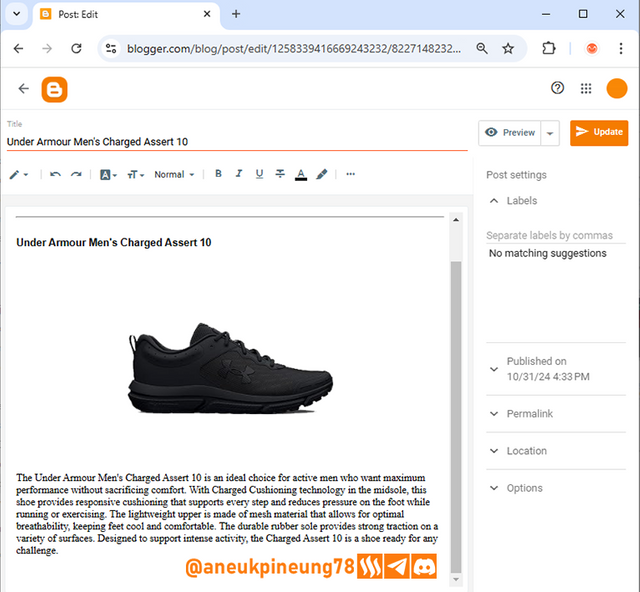
Image is clickable and might show larger resolution. - This is how my blog looked like after I filled 5 entries. The problem that arose last week, namely the link box to the product on Amazon, still looks cut in half, even though I have changed the theme with the latest theme provided by Prof. Hamzayousafzai.
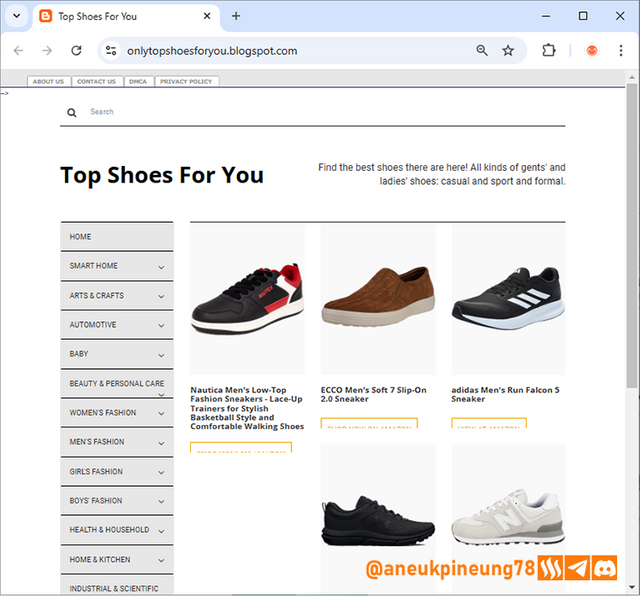
Image is clickable and might show larger resolution. - It looked even weirder when I added the sixth entry.
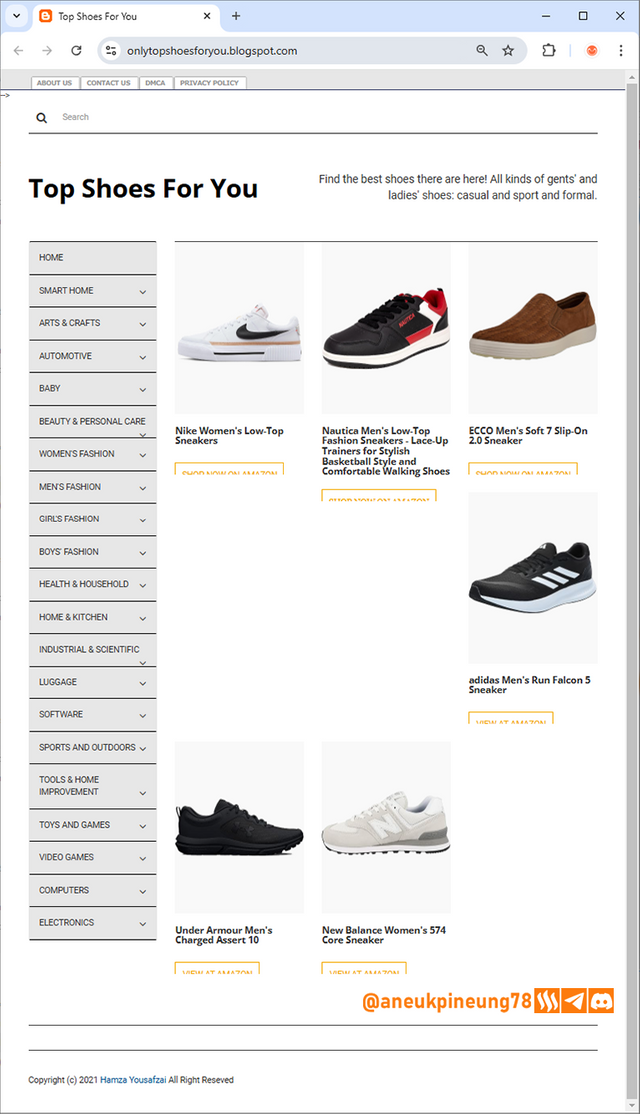
Image is clickable and might show larger resolution.

- It got a little better when I cut the long title of an entry.
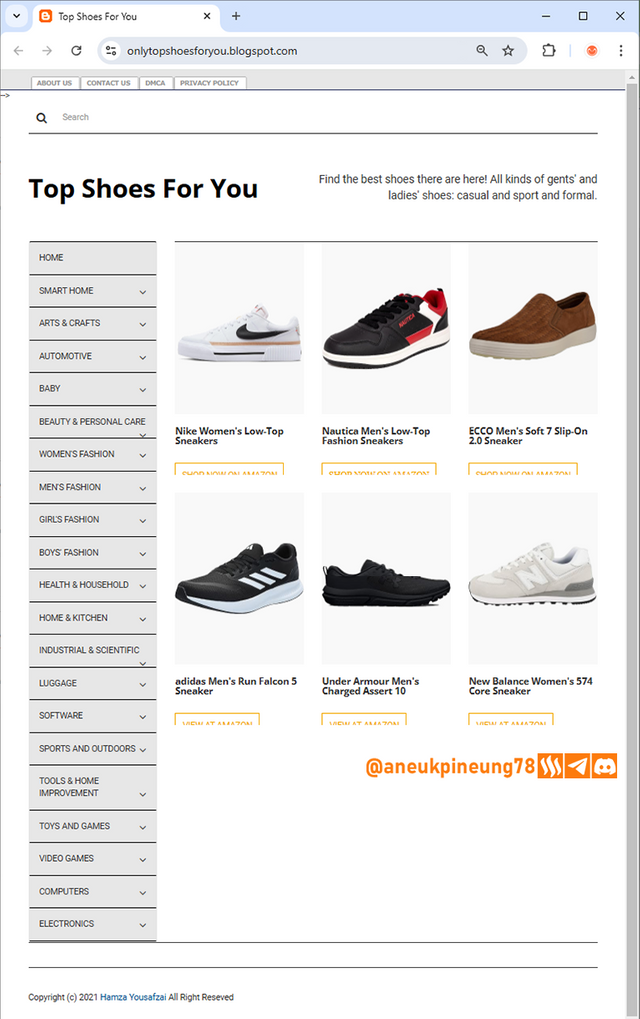
Image is clickable and might show larger resolution.
Task 3 - Define Your Niche
I chose shoes as my blog niche, because I myself basically like various types of shoes, especially sports and casual. Another reason is mainly because shoes are an essential need that affects daily appearance, comfort, and lifestyle.
With a target audience of adults, both men and women, my blog can offer a wide range of choices to suit their style and activity needs, from casual and sports shoes to formal and specialty shoes. Adults tend to look for shoes that combine comfort, style and durability, so informative and in-depth recommendations would be highly appreciated.
This blog can help audiences make informed decisions by providing full reviews, comparing different brands, and presenting tips on choosing shoes that suit personal needs, whether for daily activities, sports, or formal occasions.
In addition, this blog can discuss the latest trends, comfort technology, and shoe maintenance to make them last longer. Visitors will find it helpful that the blog simplifies the shoe search process, offers recommendations tailored to their individual needs, and saves them time in choosing the best product.
With a clear focus on quality and detail, this blog can be a trusted resource for adults who want to stay stylish and comfortable with every step.

Task 4 - Register Your Blog on Google Search Console
- I opened the blog setting and clicked on [Google Search Console]
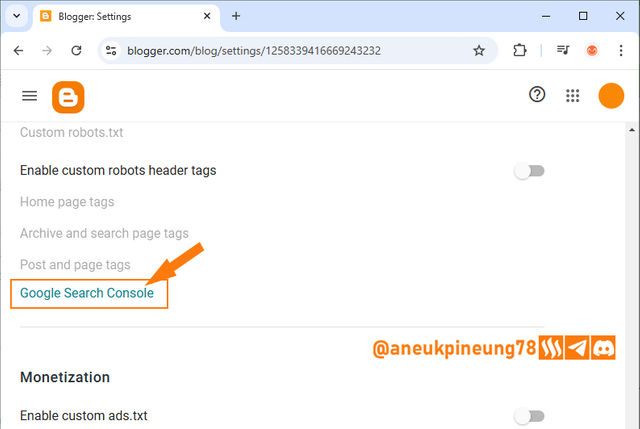
Image is clickable and might show larger resolution. - I entered my website name.
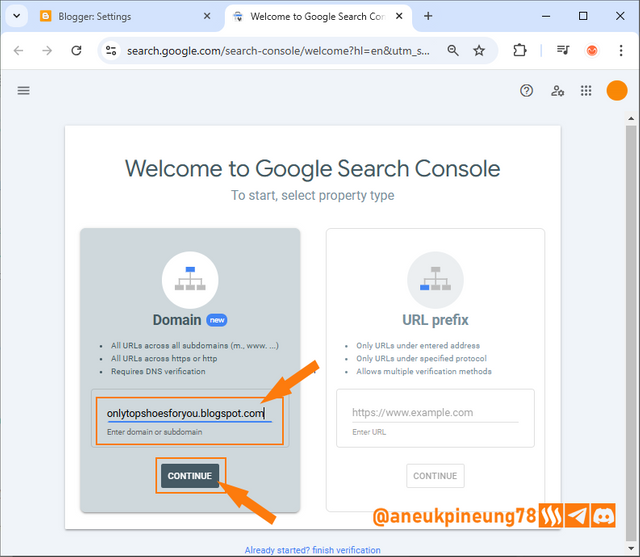
Image is clickable and might show larger resolution. - I hit [Done].
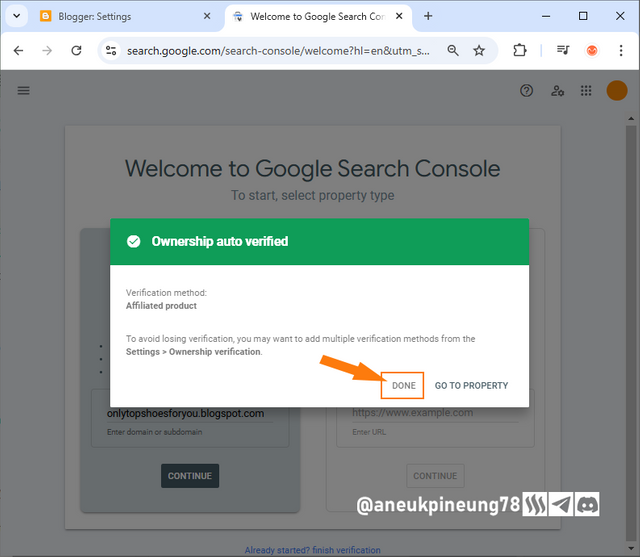
Image is clickable and might show larger resolution.

Thanks
Thanks Professor @hamzayousafzai for the lesson.
Pictures Sources
- The editorial picture was created by me.
- Unless otherwise stated, all another pictures were screenshoots and were edited with Adobe Photoshop 2021.




Thank you very much for sharing your assignment task with us! We truly appreciate the time, effort, and creativity you have put into completing this assignment. Your dedication to following the guidelines and your commitment to learning are evident, and it’s a pleasure to see your progress.
Below are the evaluation results, highlighting the strengths of your post and any areas of focus for improvement:
Teacher Recommendation and Feedback!
Great job on successfully creating your Amazon Affiliate account and thoroughly documenting each step in your post! Your screenshots make the process very clear and easy to follow.
I noticed you also added three products to your blog which is a fantastic start. You included all the steps in detail and everything looks perfect in the screenshots. However I couldn't find the actual link to your blog. Including the URL would allow readers to check it out directly.
Your chosen niche "shoes " is a smart choice with good potential. Just keep in mind that sizing can be a common challenge in this category so providing detailed sizing information or guidance could be helpful for your audience.
Lastly its great to see that you've added your blog to Google Search Console. This will help improve its visibility and performance over time.
Total | 8.7/10
Downvoting a post can decrease pending rewards and make it less visible. Common reasons:
Submit
Thanks, Professor.
Downvoting a post can decrease pending rewards and make it less visible. Common reasons:
Submit
https://x.com/aneukpineung78/status/1855263081087086883
Downvoting a post can decrease pending rewards and make it less visible. Common reasons:
Submit