Hello guys!
This time I want to enter my homework that given by one of our professors @yohan2on.
who asked us as students to discuss one of the DeFi web3 wallets. The task is to provide steps for installing the wallet application and discussing what features we can get from the wallet that we have installed. The wallet I will choose to discuss this time is MetaMask.

For those of you who don't know what MetaMask is. MetaMask is an add-on that can be installed directly on the browser which is useful as a wallet for storing ETH and ERC-20 Tokens.
Well, we will go into the installation steps.
Step 1: Install To The Browser
You can search for metamask in your browser and select it on the official MetaMask website, or you can click here to visit the website directly.
After that, you download the add-on by clicking on the "Download" button.
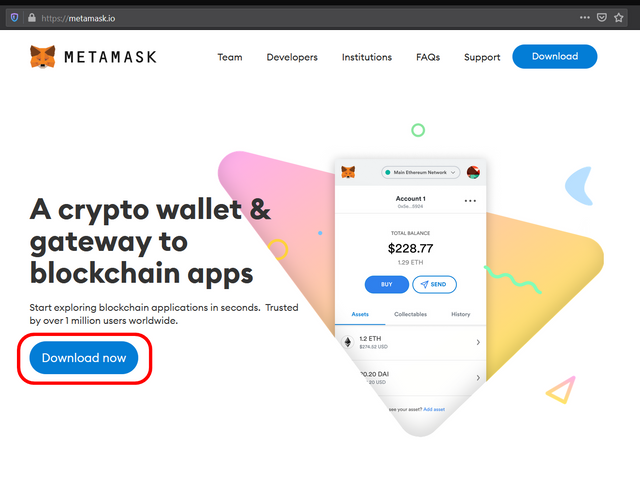
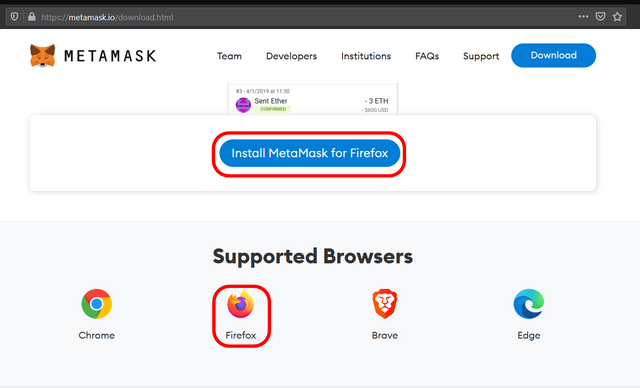
Choose the installer provided according to the browser you are using. I use Mozilla Firefox, so I will choose the Mozilla Firefox icon or by clicking on the "Install MetaMask For Firefox" button.
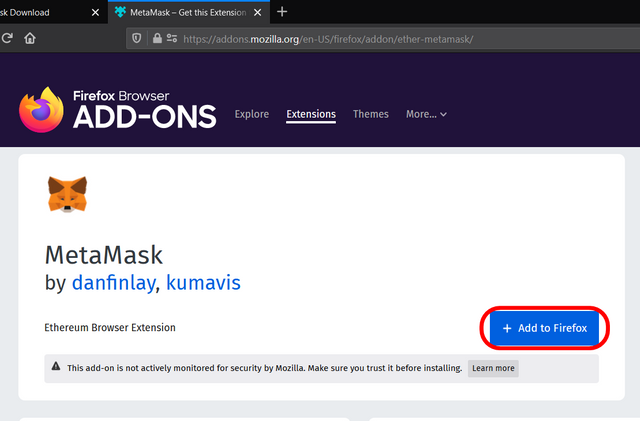
After that, click on the "Add to Firefox" button, and after you click on that button a pop-up will appear asking you permission to continue the process of downloading and installing the add-on to your browser.
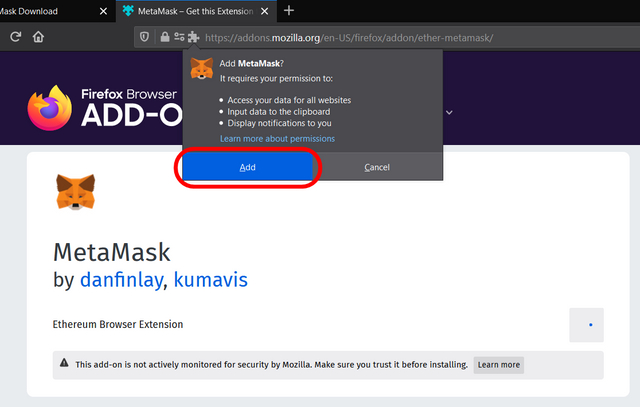
After the download process is complete, the browser will automatically install the add-on to your browser, and MetaMask has been successfully installed.
Step 2: Create a New Wallet on MetaMask
After the installation process is complete, we will proceed to the next process, which is to create a new wallet.
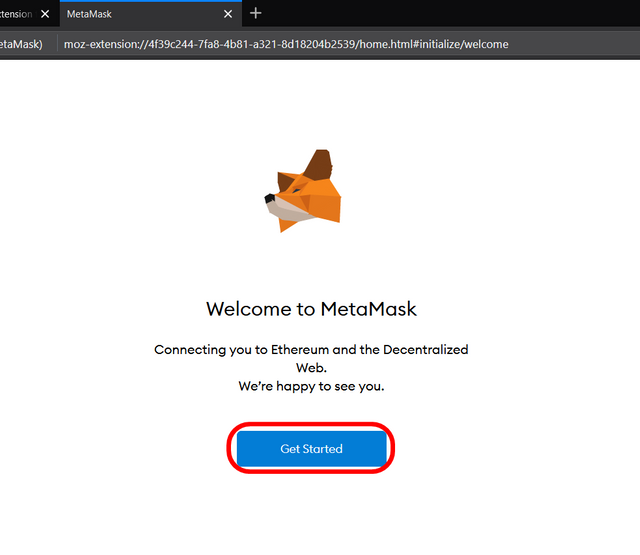
After the installation process that we discussed is complete, you will be taken to a page to create the wallet that we discussed. You just have to click the "Get Started" button.
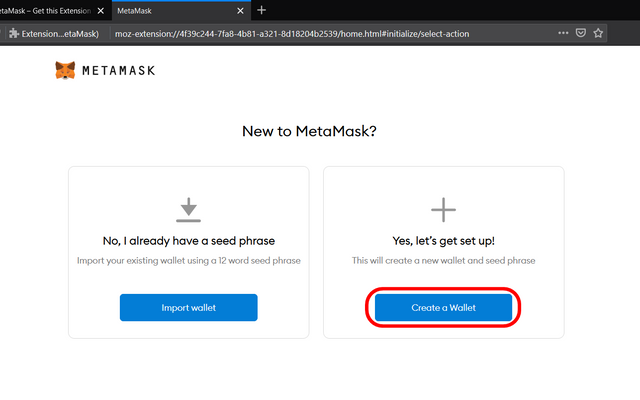
After that, choose the option to create a new wallet on the right to continue to the next step.
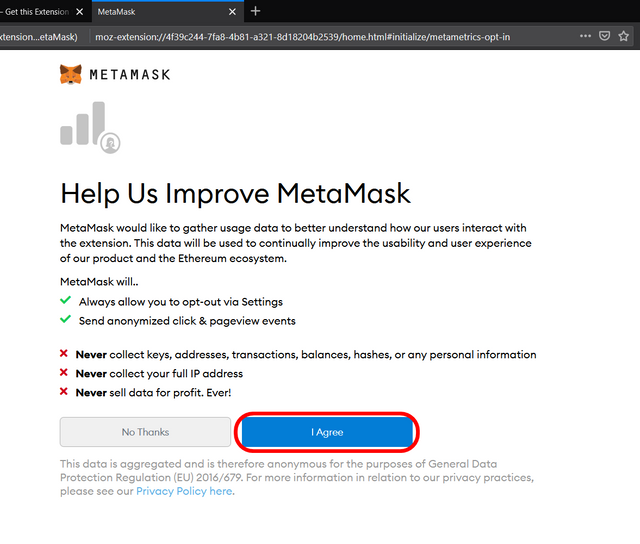
Then you will be asked to agree to some of the terms proposed by MetaMask, you just have to click the "I Agree" button to continue.
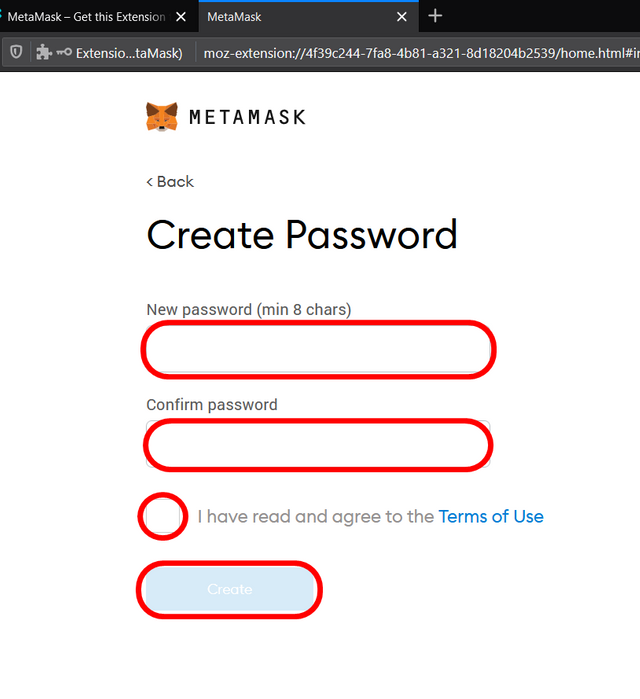
You will be prompted to create a password that will become the key to accessing your wallet. Make the password as complicated as possible to make it more secure.
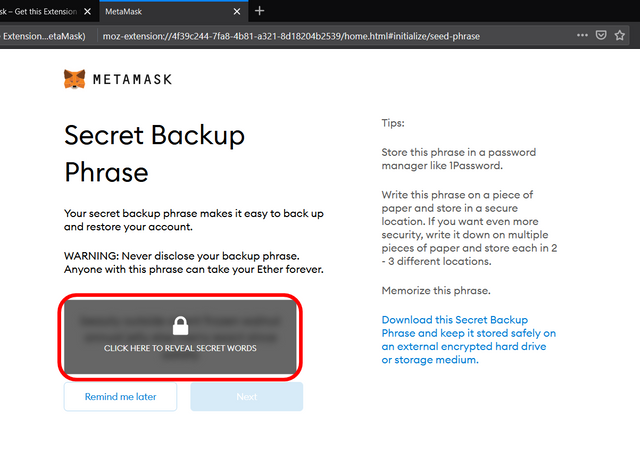
After that you will be given a sentence containing random words and that sentence will be the backup password for your account, so save the sentence correctly.
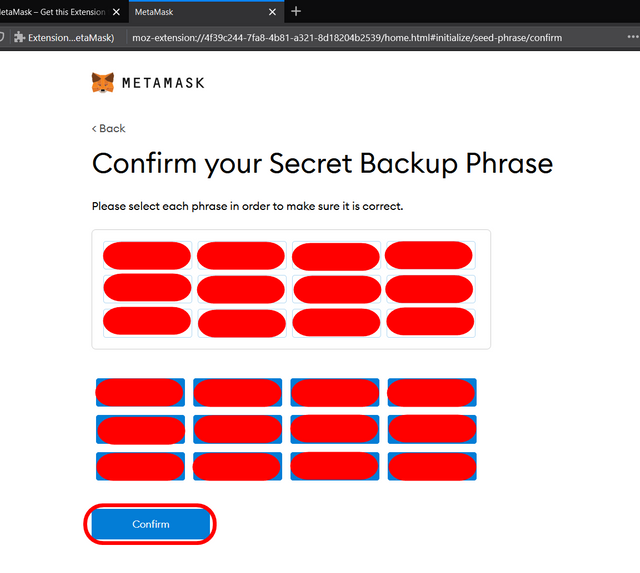
The last step is that you just need to verify the sentence earlier by ordering it regularly and after that, you just need to press the "Confirm" button.
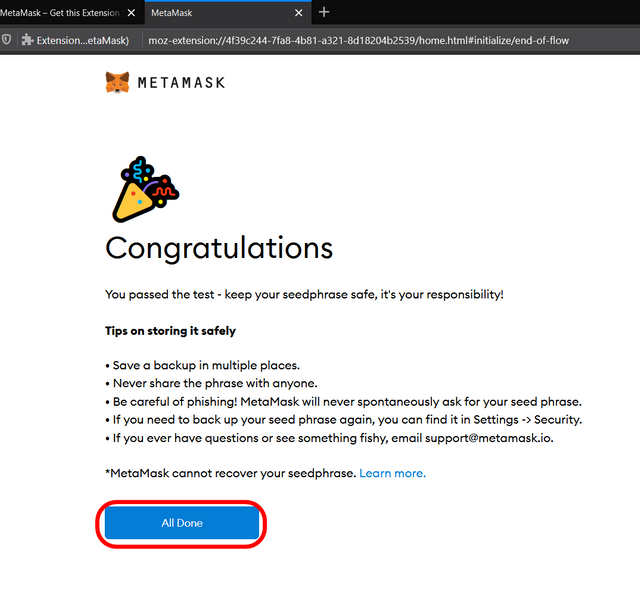
Congratulations, your wallet has been created and you can immediately use it for your DeFi needs
Step 3: Using MetaMask
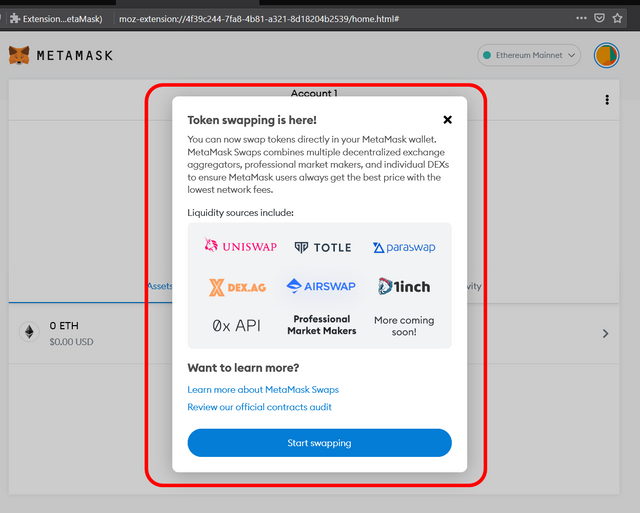
When your wallet is finished, you will be given an announcement stating that in MetaMask we can swap with fellow tokens. Yep, MetaMask already has this feature.
However, I will first explain some of the other main features so that the explanation I provide is more organized. The first thing I cover is depositing our ETH assets into MetaMask
1. Deposit/Buy
To make a deposit we only need to press the "Buy" button on our wallet.
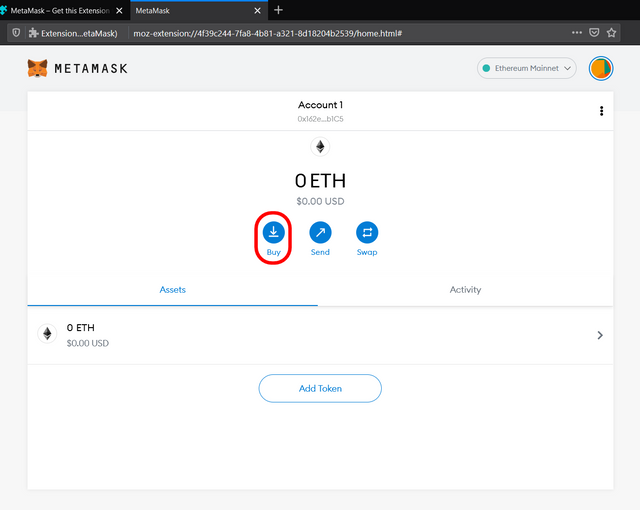
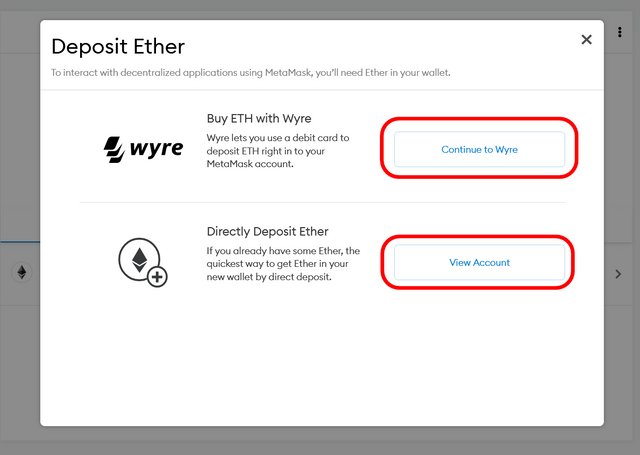
After that, you just have to choose the options below to make a deposit. However, if you don't have ETH assets, then you can buy them by using Wyre on another option, Wyre will link your wallet with a debit card so that the purchase transaction can be carried out.
2. Send
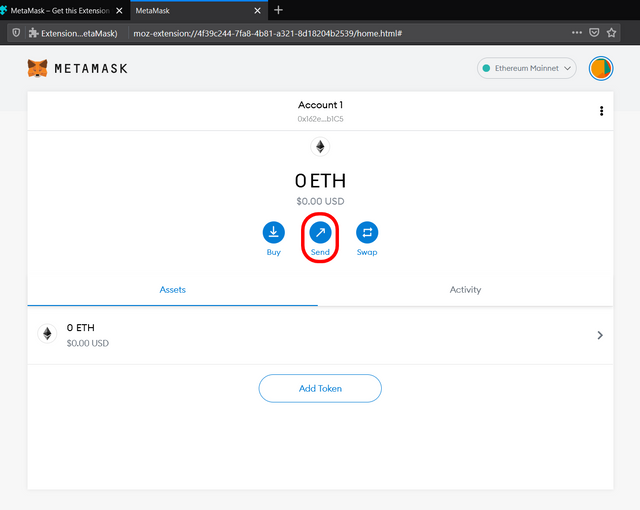
The second thing you can do on MetaMask is sending your ETH assets to the exchange for cashing.
You just have to click the "Send" button.
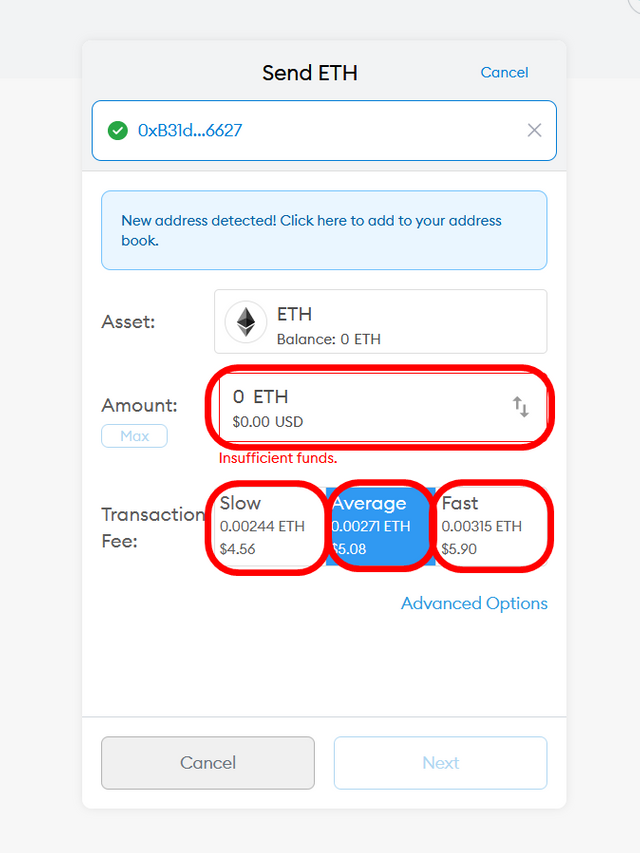
Next, you will choose how much ETH you will send and how much the transaction fee will be charged.
3. Add Token
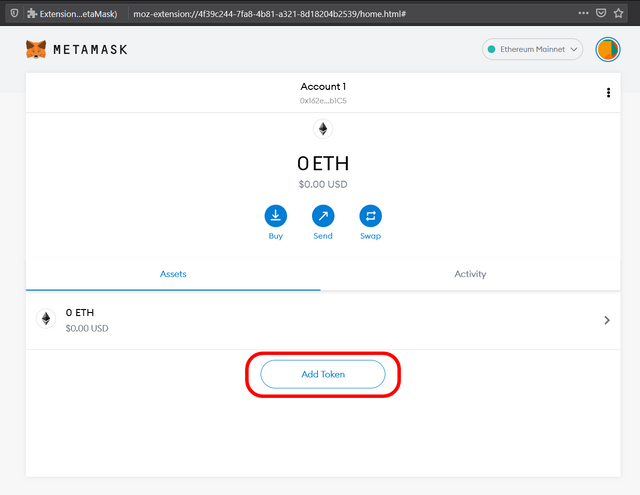
The next thing is that you can add tokens that you want to monitor or do transactions frequently on the start page of your wallet.
The first step is to select the "Add Token" button.
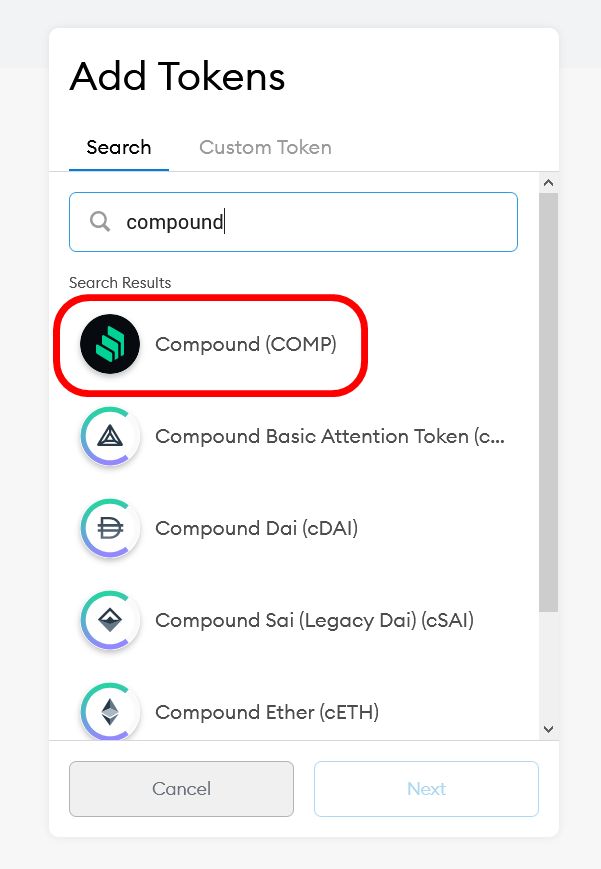
The next step is for you to search for the token that you want in the search field and after finding it you just click on the token icon.
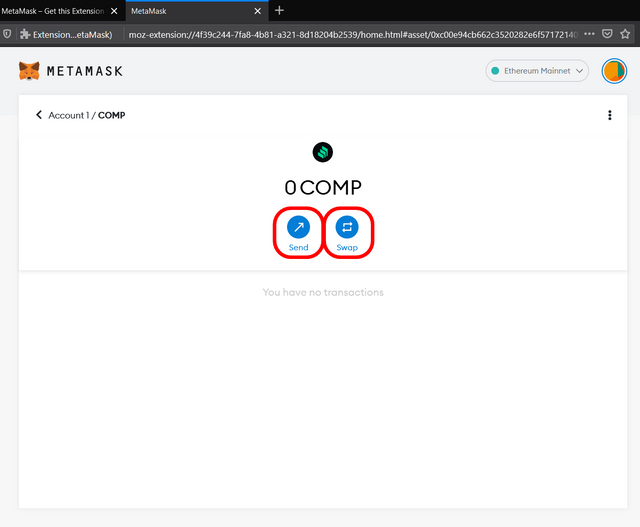
Then you will be taken to the token page where you can send the token and swap the token with other tokens.
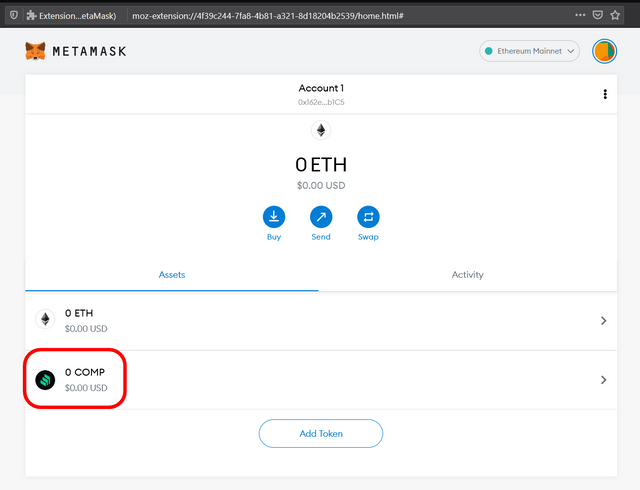
And if you return to the start page of your wallet, then you will see that the token is already embedded on the start page of your wallet, and to access the token page you only need to click on the token icon.
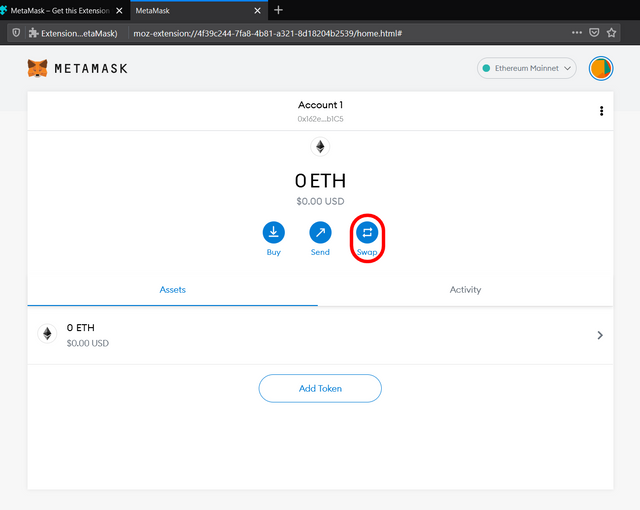
4. Swap
Next, as I explained earlier, you can swap your ETH with the token you want. You just need to click on the "Swap" button.
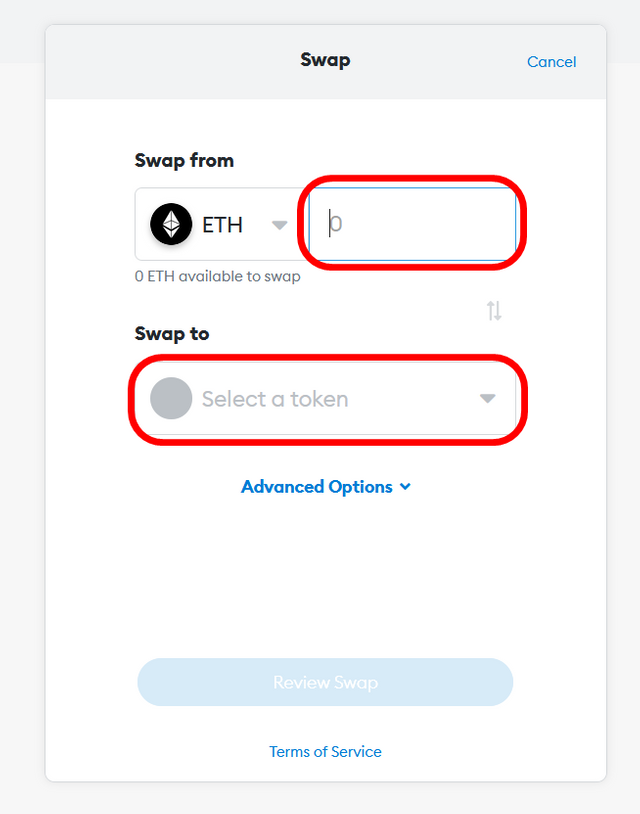
After that, you choose how much ETH you will exchange and what tokens you like.
Step 4: Connecting MetaMask with Hardware Wallet
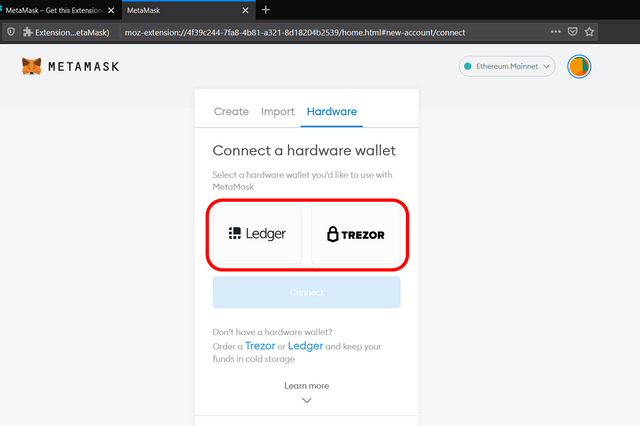
A very unique feature of MetaMask is that we can connect our Hardware Wallet with this wallet so that we can store our crypto assets safely on our Hardware Wallet. There are 2 wallets that can be linked with MetaMask: Ledger and Trezor.
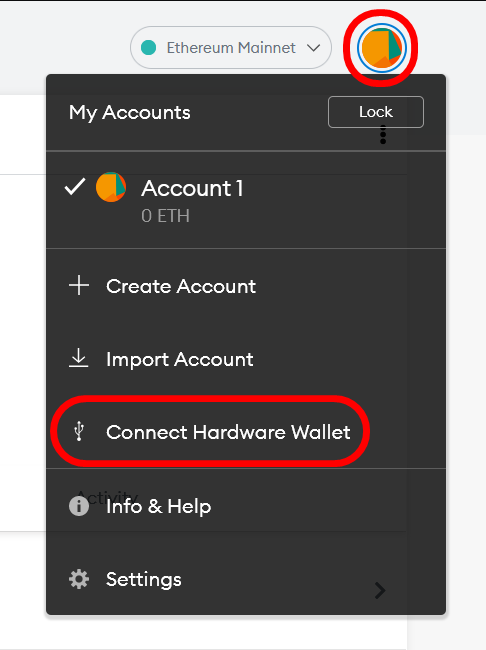
To connect it, you press your account profile icon and there will be an option to connect your MetaMask with the Hardware Wallet, namely "Connect Hardware Wallet"
Next, you first read the steps to connect your Hardware Wallet to MetaMask which can be read in the section below.
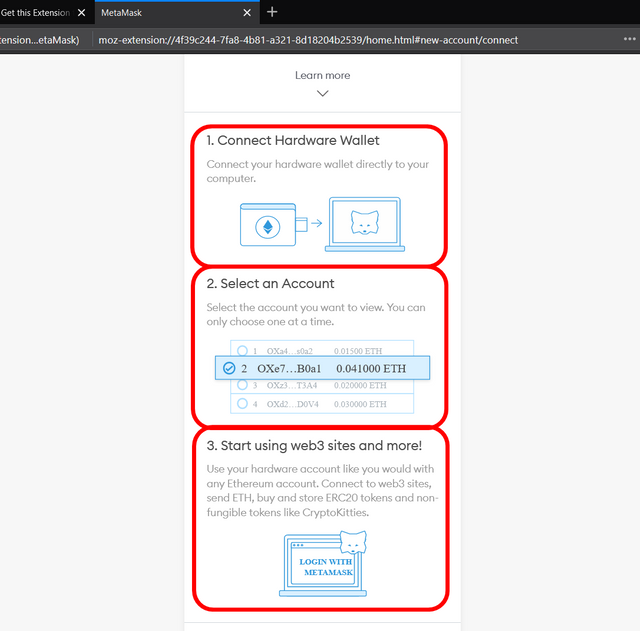
After reading all the steps, all you have to do is choose which Hardware Wallet you have, including the 2 Hardware Wallets that have been provided.
Conclusion
For those of you who really want to have a safe wallet to store your crypto assets based on ETH, I highly recommend you to create a MetaMask wallet. Because, with the various features provided that are very helpful for users, I think this wallet is worth a try. Moreover, we can connect our Hardware Wallet directly to MetaMask.
CC: @yohan2on
CC: @steemitblog
CC: @steemcurator01
CC: @steemcurator02
Hi @aumbamumang
Thanks for attending the 5th Crypto course and for your effort in doing the given homework task.
Feedback
This is excellent work. Thanks for taking the time to explore the various key features of Meta Mask; you explained everyone of them clearly, well demonstrated visually with well edited screenshots. Keep it up!
Homework task
10
Downvoting a post can decrease pending rewards and make it less visible. Common reasons:
Submit
Thank you so much professor
Downvoting a post can decrease pending rewards and make it less visible. Common reasons:
Submit
Shared on Twitter
Downvoting a post can decrease pending rewards and make it less visible. Common reasons:
Submit