
Explain the Delegated Proof of Stake, DPoS algorithm.

As we all know, Delegated-Proof-Of-Stake is a consensus algorithm which was developed as an upgrade to the Proof-Of-Stake consensus mechanism and was developed by our very own Dan Larimer, whereby users are given the opportunity to vote and as well elect delegates to validate the blocks in an efficient way. DPOS, delegates, also known as witnesses, are in charge of reaching an agreement during the generation and validation of blocks. The voting power of each user is dependent on the number of tokens they own. The voting system differs significantly from project to project. In a broad sense, when requesting votes, each representative makes an independent proposal. In most cases, delegates’ benefits are evenly shared among their respective corresponding voters. The Proof-Of-Work consensus mechanism as used by many cryptocurrencies requires a large amount of resources and also requires a lot of computational work in order to be able to secure and produce a transparent distributed ledger, which wastes a lot of resources. DPOS was designed to combat some of the flows of the POS mechanism and uses fewer resources to produce effective results within a specified period of time. When comparing performance to POW and POS, DPOS blockchains are much more scalable, with the capacity to process more transactions per second (TPS). Some of the well-known DPoS networks are: TRON, EOS, STEEMIT, COSMOS, ARK, CARDANO, TEZOS.
Advantages and Disadvantages of Delegated-Proof-Of-Stake
| ADVANTAGES | DISADVANTAGES |
|---|---|
| Because DPOS does not require a lot of power to run, it is more financially viable. | A small number of witnesses can cause the network To become centralized. |
| Because DPOS transactions are not reliant on the computing needed to run the network, it is more scalable. | DPOS are hard to maintain due to the fact that they are decentralized and much decision is in the hands of limited number of holders of the token |
| Double spending is well protected on the DPOS. | Delegators must be well aware and assign genuine witnesses in order for the network to operate make decisions effectively |
| Given the low entry threshold, DPOS allow for more decentralization because more people have the opportunity in the consensus | Users with lower stake can opt out of voting if they believe their votes are insubstantial |
DPOS OPERATION
By delegating more into the network, users in DPoS networks contribute and build their reputation in the network. A vote from a large stakeholder in a DPoS network can elevate a small stakeholder to the top tier of witnesses in that network.
The following table lists the various DPoS networks and the number of witnesses they have.
| Blockchain | Number of witnesses |
|---|---|
| Lisk | 101 |
| Steemit | 21 |
| EOS | 21 |
| Bitshare | 101 |
| Ark | 51 |

Explain what are Ricardian contracts on the EOS Blockchain?

The Ricardian Contract was birth in the year 1995 by a renown programmer named Ian Grigg, which has now become part and parcel of the blockchain network.
Ricardian contracts are a type of digital document that serves as a contractual agreement between two parties detailing all the terms and conditions of their engagement. As we all know, the basic necessities for a contract to be binded, involve there must be an offer and acceptance, consideration, capacity, and legality, Ricardian contract is not an exception, but the uniqueness of it has to do with the contract being cryptographically signed and verified over the blockchain network. The Ricardian contract can be read by the human race in text form and understand its context, as well as machine/computer readable contracts which are hashed, signed and can as well be saved over the blockchain network.
The Ricardian contracts are integrated into the EOS blockchain by Block.one. The goal was to increase the safety of the blockchain and translate the software's programming language into more of a human-readable version for everybody.
Ricardian Contracts on the EOS blockchain, in particular, assist users in doing fully open transactions in a safe and timely manner, while also looking to understand each phase of such a transaction.

Explore the official EOSREX interface (eosauthority.com). Show screenshots.

To have access to the official site of the eosrex, you first of all have to visit eosauthority.com where you will be presented with the official site interface.
In this write-up, I have presented the interface in sub divisions by numbering them in numerical order.
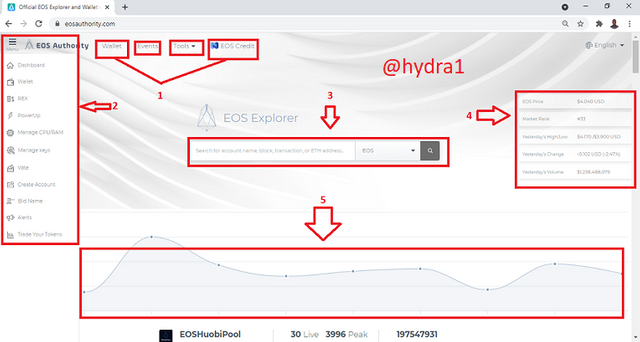
- What you see on the official site are the wallet, events, and EOS Credit, which I have named as (1).
Wallet: When one clicks on the wallet, it presents to you the wallet details where you get access to your wallet.
- EVENTS: When you click on the events, it gives you information about upcoming events and as well gives you the opportunity to add an event and as well have access to those events created.
Tools: The tools button presents to you about 29 available tools that you can interact with on the site.
EOS Credit: It is linked with Nexo.io, which presents to you the opportunity to borrow cash or stablecoins.
- Item (2) is the MENU, which entails the following:

Dashboad: It presents you with the opportunity to link all your accounts and, as well, presents tokens, price charts, account security airdrops, and many others.
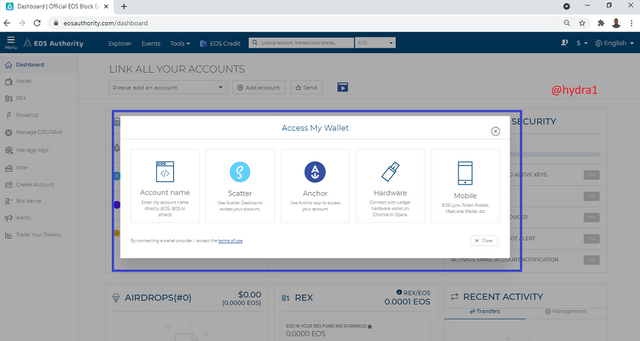
Wallet: This session presents to you the wallet details which give you access to your wallet.
.png)
REX:When you click on the REX button, it presents you with the REX token session where you can lend to REX, BorrowCPU/Net(DApps), REX calculator, and REX statistics.
.png)
PowerUp: This session presents you with the various powerup tools, which include, Get Power, PowerUp calculator, and PowerUp Statistics.
.png)
Manage CPU/RAM: This session presents to you Unstake Tokens, Stake tokens, Undelegate, Delegate, Ram Market(sell/buy).
.png)
Manage Keys: This session gives you the opportunity to regenerate both active and private keys and owner keys as well.
.png)
Vote: This session gives you the opportunity to cast your vote.
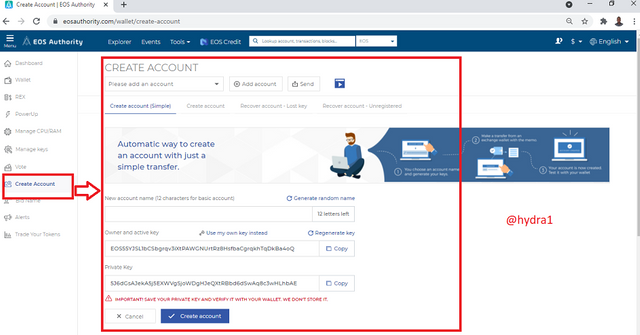
Create Account: As the name suggests, this session gives you the opportunity to create an account.
.png)
Bid Name: This session presents you with the opportunity to Bid For a Premium Name.
.png)
Alerts: This session presents you with the opportunity to link your email address to receive alerts on incoming and outgoing transfers, bid names, airdrops, and many more.
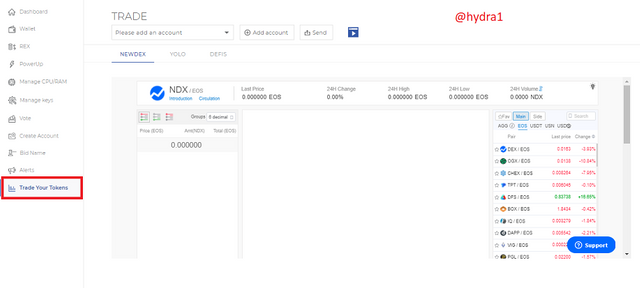
Trade Your Token: This session gives us the opportunity to trade in our tokens.

- Item (3) is the EOS Explorer located at the top center of the page, which works just like the blockchain explorer where you can search for account names, blocks, transactions, and many more.
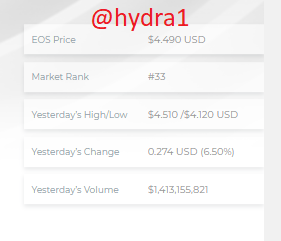
- Item (4) is the EOS token which displays the current price of the token, market rank, yesterday’s high/low, yesterday’s change and yesterday’s volume.

- Item (5) displays the current transaction chart that is happening, which is adamant to change every 5 secs.
And when we go down to the bottom of the page, I have presented another sub-session in numerical order.
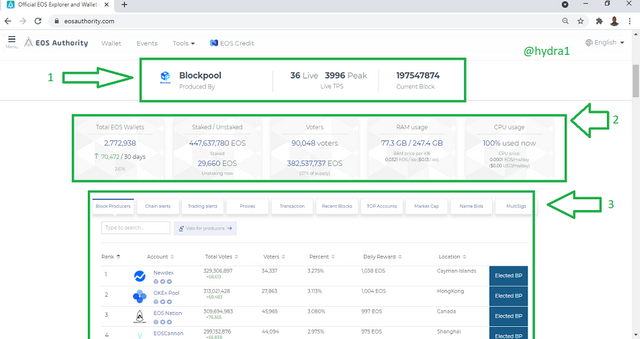
Item (1) displays the Live TPS with the Current block count.
Item (2) displays the EOS wallet, staked/unstaked, voters, RAM usage and CPU usage.
Item (3) displays the current block list ranked in an orderly manner.

- At the bottom are the supporting partners.

Download the Sqrl Wallet, Exploration And How To Obtain CPU, RAM and Network.

In order to be able to have access to the sqrl application, you first of all have to visit the official site sqrlwallet.io and download the wallet according to you computer operating system. In my case, I am going to download the windows version of it.
- Launch your browser and visit the official site link sqrlwallet
.png)
- Click on the windows version for the download to begin.
.png)
- Locate where the downloaded file is, and launch it and click on next.
.png)
.png)
Click on Install and wait for the installation process to complete
.png)
Now launch the sqrlwallet and click on connect to server
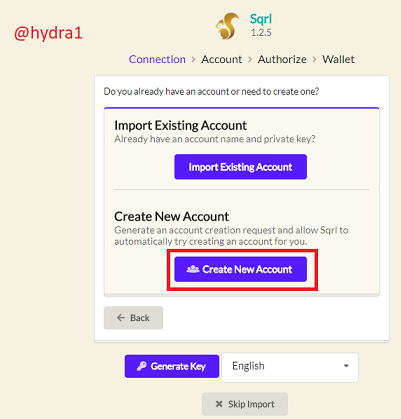
- Click on Create Account
.png)
- Fill in account Name and copy the keys given in a safe place and click on next.
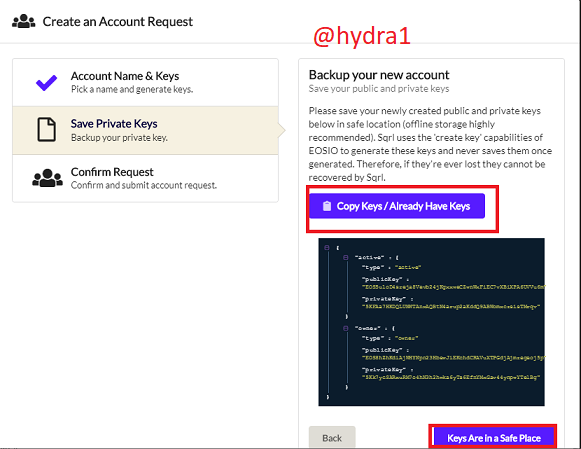
- Click on copy/already have keys and then click on keys are in a safe place.
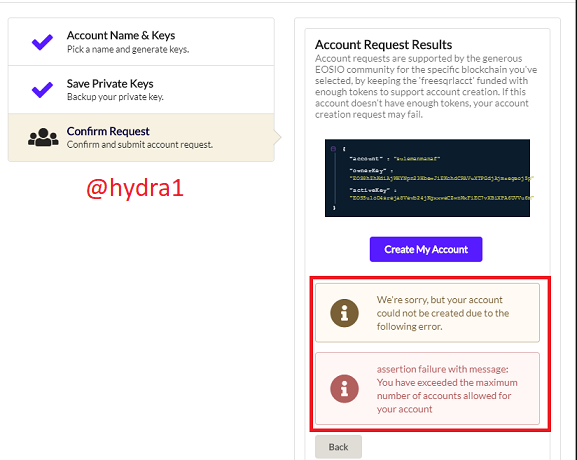
- Click on create my account. I was given a notification that account couldn't be created.
So i proceeded to telos.net and created the account
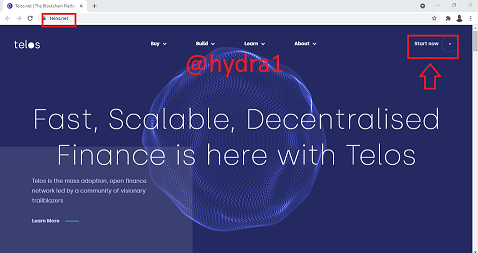
- Clicked on create new wallet.
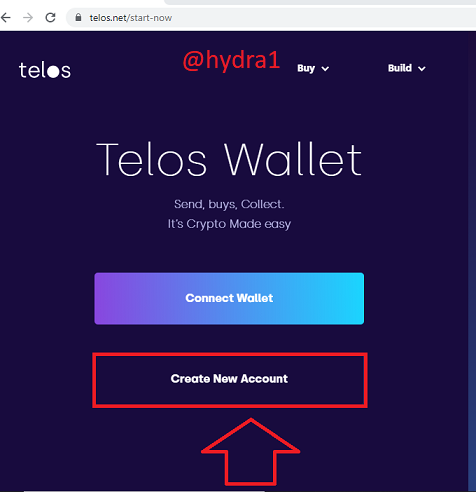
- Click on Create a new account.
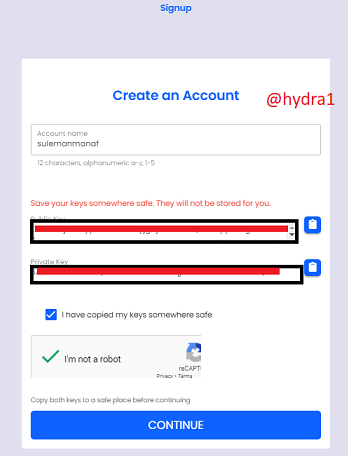
- Fill in your preferred username and copy the generated keys in a safe place and click on continue for the account to be created.
Now go back and launch the sqrlwallet on your desktop
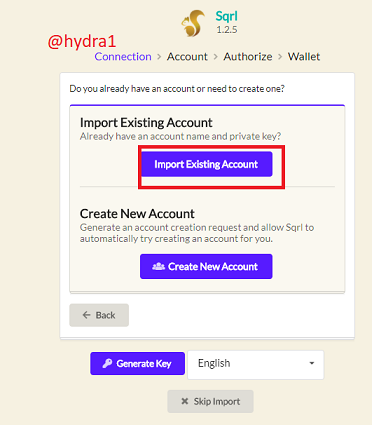
- click on import existing account.
- click on lookup for account and key in the account name and click on lookup account.
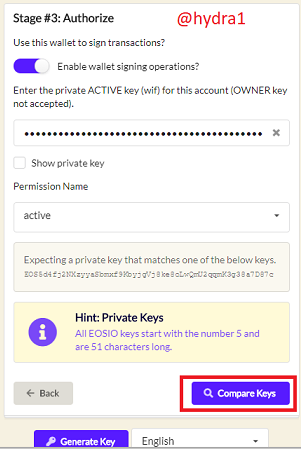
- copy and paste the Active keys you saved and click on compare keys.

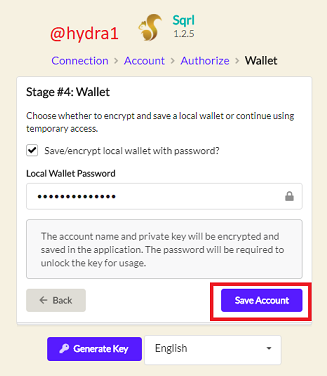
- key in a password of you choice and click on save account.
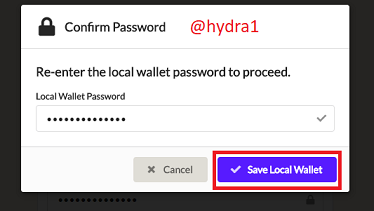
- Retype the password to confirm and click on save local wallet
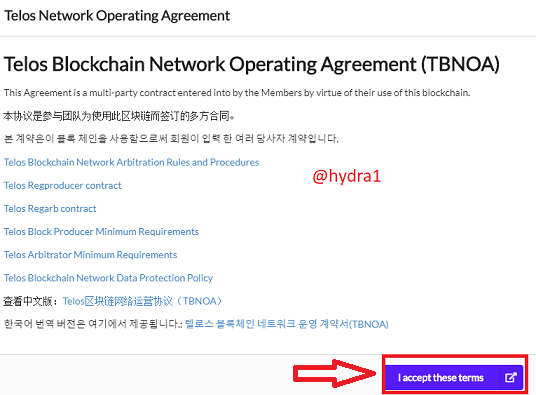
- Click on "I accept these terms"
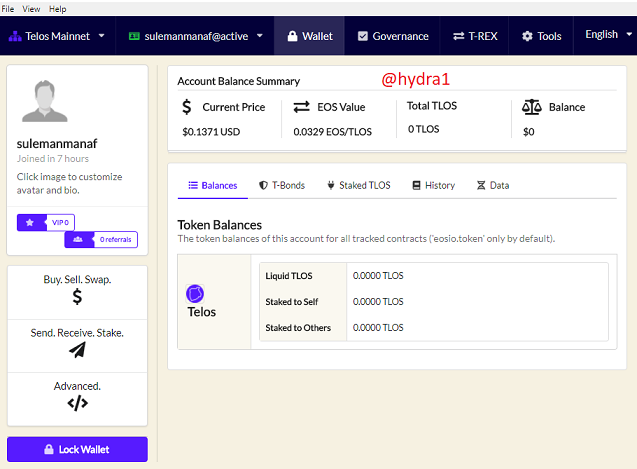
- Now the our sqrlwallet has been created now and login
Sqrlwallet Exploration
- Wallet
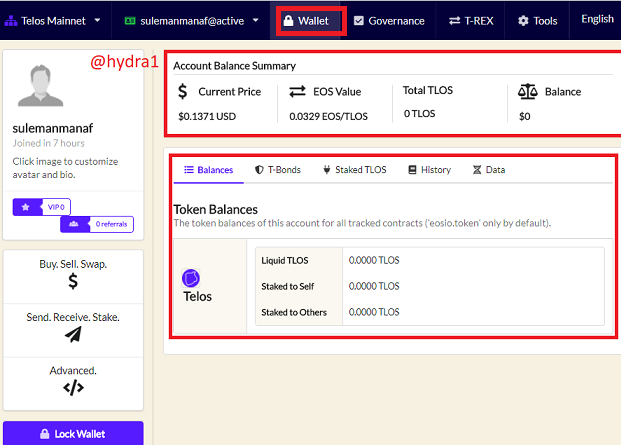
On the site, you may see a summary of your account balance, including the current TLOS price, EOS value, Total TLOS, and your balance.
- Governance
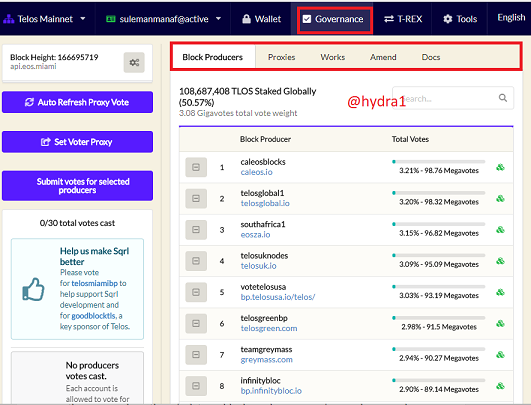
The governance feature is just next to the wallet, where you will see block producers, proxies, amend and docs
- T-REX
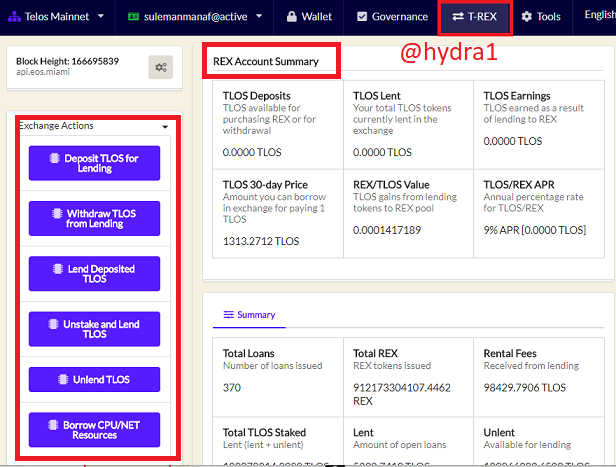
Next to the governance is the T-REX feature, which displays the REX account summary, TLOS deposits, TLOS lent and many more.
- TOOLS
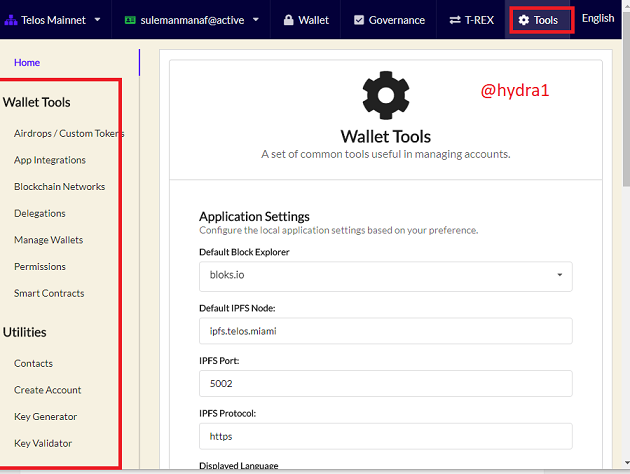
Next to the T-REX is the TOOLS feature, where you can find all kinds of tools relating to the sqrlwallet, which includes wallet tools, utility tools.
- Buy.Sell.Swap
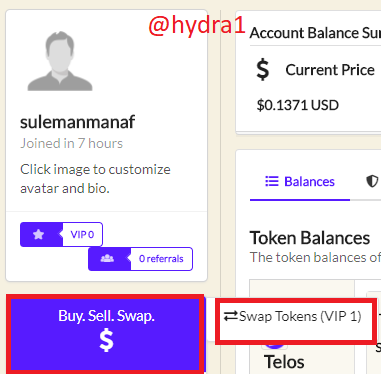
with This function we can buy, sell and swap tokens but with a restriction of (VIP1)
- Send.Receive.Stake
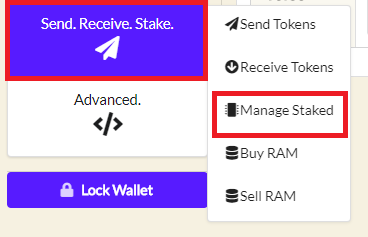
with this function we can send, receive and stake tokens and as well as buy and sell RAM.
- Advanced.

with this function we can broadcast signed transactions
- Lock Wallet
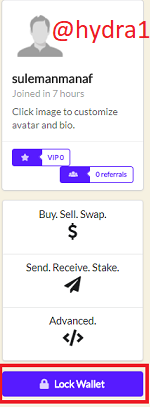
This function enables us to lock and unlock our wallet.
How to Get RAM, CPU and Network
CPU and NETWORK
- select the send.receive.stake function and click on manage stake

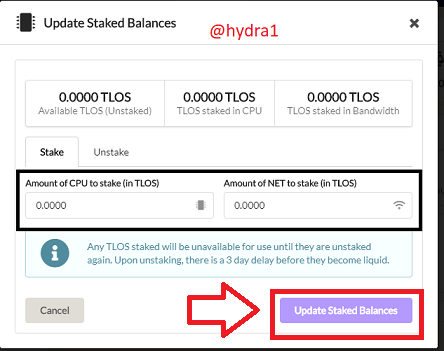
key in the amount of CPU stake at the left and can as well key in the amount NET you want to stake depending on the one you wish to do.
RAM
- select the Send.Receive.Stake and click on Buy RAM
.png)
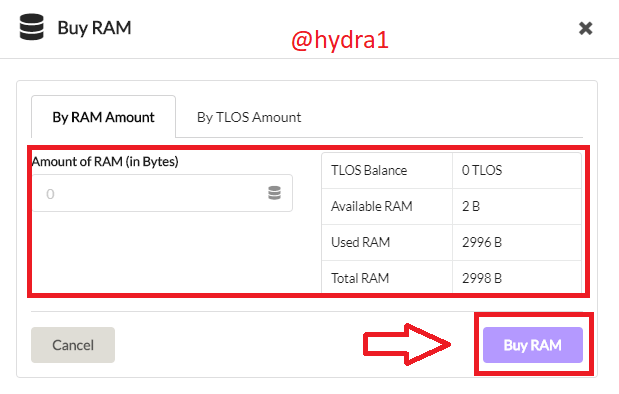
Enter RAM amount and click on buy RAM.

The Price of the REX Token and What it is Used For.
The REX token, which stands for Resource Exchange, is a currency used on the EOSREX network to reward users that provide resources to the network, such as EOS, CPU, RAM, and NET. REX is a marketplace for exchanging RAM, NET, as well as other resources on the EOSREX blockchain. Inside the REX pool, this token is not transferable and also untradable. REX tokens can indeed not be transferred among users and therefore must be sold within a duration of four days of purchase. Tokens are obtained through lending out a few of your assets.
The specification for a user to obtain REX has been that, the person votes through a proxy or has to acquire an average of 21 witness testimony. The token's role is always to be staked on the network in order to acquire the most benefits.
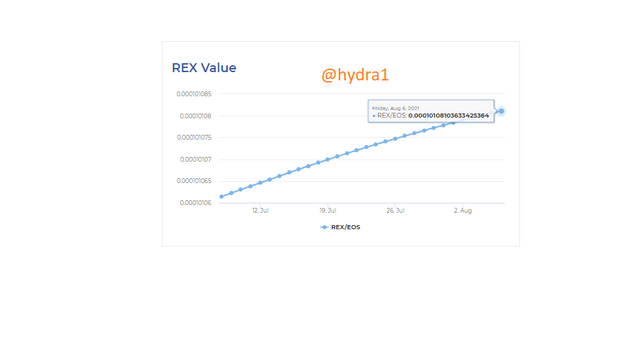
The current REX value during the time of this assignment on 6th August, 2021 as shown in the picture above was 0.00010108103633425364 REX/EOS that is approximately $0.00042
Conclusion
All thanks to professor @pelon53 for this important topic about Delegated Proof of Stake DPoS, I have explored deeper into this consensus mechanism and I have realised it is being implemented to solve the scalability and security issues of the previous Proof of work(POW) and Proof of Stake(PoS) consensus mechanisms. Users participate in the network without consuming much computing power. My explore through the EOS network as a typical example of DPoS network, has really helped me to understand how the DPoS consensus mechanism work especially during the process of installing and exploring the sqrl wallet.
Thank you
cc;
@pelon53
Gracias por participar en Steemit Crypto Academy Season 3:
Espero seguir leyendo tus publicaciones.
Recomendaciones:
Calificación: 9.2
Downvoting a post can decrease pending rewards and make it less visible. Common reasons:
Submit
Graçias
Downvoting a post can decrease pending rewards and make it less visible. Common reasons:
Submit