Hey Guys..!!
Meet again with me Wahyu Nahrul on the other Steemit Crypto Academy homework. Today I will be working on homework given by one of our professors @reddileep.
The homework given by our professor this week is about How To List Your Own Token On a Public Exchange.

Okay, just get to the discussion. Happy Reading !!

The Idea of Listing a Crypto Token In a Public Crypto Exchange
From the previous lesson, we already know how easy it is to make a Crypto Token, from the lesson made by professor @reddileep we can also know that everyone can create their own Crypto Token without having high computer programming knowledge.
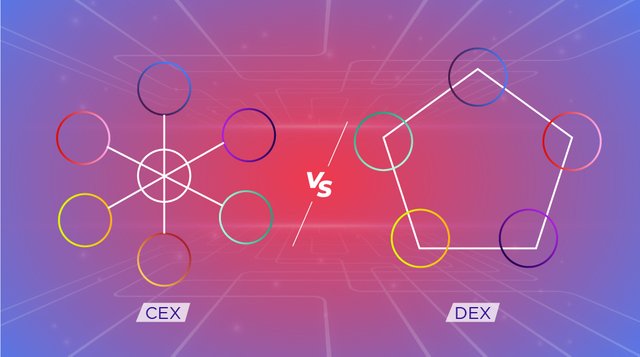
However, even though anyone can easily create a Crypto Token, it does not mean that the Crypto Token he created already has value so that the Crypto Token has value, he must be able to list the Crypto Token created into a Public Crypto Exchange and as we know that the type of crypto exchange has been divided into 2 types which are Centralized Exchange and Decentralized Exchange.

When we want to list the Crypto Tokens that we have created to a Centralized Exchange, then we will be asked to create an application that explains some details of the Crypto Tokens that we have created, data that will usually be requested by the Centralized Exchange when we want to register our Tokens with the Centralized Exchange including Project name, Whitepaper, Token Name and Symbol, Project Objectives, Project Quality, Launch Date, Circulating Supply, Maximum Supply, Etc.
From all of this, we can see how complicated it is to list a token on a Centralized Exchange where we have to prepare a lot of data about our Crypto Token. Then, after we provide the data to the Exchange, they will read and review it manually and decide whether the Crypto Token is worthy of listing on their Exchange or not.
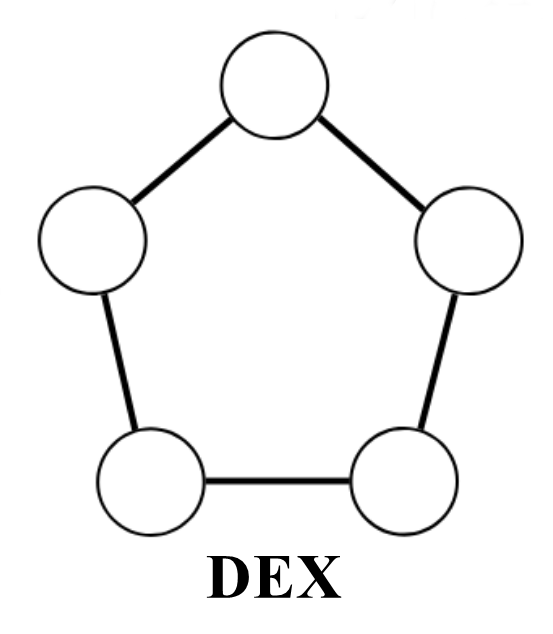
However, unlike the Centralized Exchange, we can easily list our Crypto Tokens on the Decentralized Exchange without having to prepare the data and we don't need to wait for approval from the exchange to approve the proposal for listing the Crypto Tokens that we make.
However, there are things that must be noted, even though we can easily list our Crypto tokens on a Decentralized Exchange, it does not mean that our Crypto Tokens already have value in the market, so that our Crypto Tokens have value, we must provide Liquidity in the Liquidity Pool so that they can be used. traded by everyone, but it is not an easy thing because we have to spend a lot of money to increase liquidity.
For Crypto Token developers who are serious about developing their projects, then listing Crypto Tokens is something that the project developers must do, because if the Crypto Tokens are already listed on an exchange, there are several things that distinguish their Crypto Tokens from other Crypto tokens, including:
- Crypto tokens have value in the market.
- Crypto tokens can be traded widely by everyone.
- Projects developed can be known more widely.
- Can bring in new investors.
- Can have a community that strengthens the value of the Crypto Token.
- The project can be more trusted by the holders.
Therefore, it is important for a cryptocurrency project developer to list their Crypto Tokens into an exchange, be it a Centralized Exchange or a Decentralized Exchange.

Prepare Everything Needed To List Newly Created Crypto Token In a Public Exchange and Distribution To Other Wallet
Before we will list the Crypto Tokens that we have created into an Exchange and distribute them to other Wallets, there are several things that we need to prepare so that the whole process goes well. The matters referred to include:
1. Depositing a certain amount of BNB to MetaMask wallet
The first thing we have to prepare is to deposit some BNB into the wallet containing the Crypto Token that we have created because my Crypto Token (SCAS Token) is in my MetaMask wallet, I need to deposit some BNB into my MetaMask wallet.
However, because in the previous lesson I followed professor @reddileep's directions on a previous assignment to make a BNB deposit which at that time amounted to about $15, then I no longer need to deposit another BNB into my MetaMask wallet.

We can see in the picture above, that my MetaMask wallet already contains 0.0204 BNB which is currently around $12.06 which is estimated to be sufficient to accommodate the transaction fees that will be charged for the listing process and the Crypto Token transaction that I made.

2. Choose an exchange to do token listing
The next thing to do is choose the type of exchange where we will list the Crypto Tokens that we have created. As I explained earlier that listing my Crypto Tokens to the Centralized Exchange is currently almost impossible because the process is difficult and the Crypto Tokens that I created is only an example of learning.
Therefore, I will choose the Decentralized Exchange that runs on the Binance Smart Chain because the Token I created is a BEP-20 Token, and the Decentralized Exchange I chose is PancakeSwap.

I chose this DEX because it is a Decentralized Exchange which is ranked number 2 as the Top Cryptocurrency decentralized Exchange according to CoinMarketCap. This proves that PancakeSwap is a Decentralized Exchange that has a high level of trading volume and has been trusted and used by many people.

3. Choosing and Creating a wallet
The last thing we have to do is select and create a wallet. Here my choice fell to TrustWallet.
The reason I chose TrustWallet is that it is a wallet that runs on the Binance Smart Chain network which means it is capable of storing BEP-20 type tokens so I can easily send the Crypto Tokens I created to this wallet.

In addition, the reason I chose this wallet is that it has a good user interface and is easy for beginners to understand, I myself have been using this wallet for a long time as a place to store my cryptocurrencies because the network fees charged for each transaction are very cheap compared to other wallets. using different network types.
Now I will show you how to create an account on TrustWallet, the method is very easy because we just need to download it on a smartphone using Google Play or App Store. Please follow these steps:

Step 1
After we have finished downloading the TrustWallet application on our smartphone, then we open the application and we will be shown the initial display as in the image on the right. After that, we click on the "CREATE A NEW WALLET" button.


Step 2
After that, we will be told that we will be given 12 words which will become our Recover Phrase wallet and we will be asked to backup them. Check the approval box and click "CONTINUE".


Step 3
We will be given 12 unique words and we must backup them in a safe place, here I suggest you write it down on a piece of paper in the order of words shown in the TrusWallet application and you must store it in a safe place.
After we finish writing it down on the paper, we click the "CONTINUE" button.


Step 4
After that, we will verify the recovery phrase that we noted earlier. Choose the 12 words one by one according to the order that we noted on the paper earlier.


Step 5
After we finish selecting it, then we click "DONE".


Step 6
A notification will appear telling us that our wallet has been successfully created, just click the "DONE" button to go directly to our wallet account.


Step 7
And Done!!
Our TrustWallet account has been successfully created and its initial display will look like the image on the right.

Listing Crypto Token in a Public Crypto Exchange
Now, I will show you how to list the Crypto Tokens that we created in the previous task into an exchange, the exchange I chose in this example is a Decentralized Exchange that runs on the Binance Smart Chain called PancakeSwap.
Step 1
The first thing we have to do for listing the Crypto Token on the exchange is that we must first know the contract address of the Crypto Token that we have created.
To find the address of the contract, we just need to enter the MetaMask wallet and in the "Activity" section we click on the Contract Deployment that we did when we created the Crypto Token earlier.


Step 2
After that, a pop-up will appear containing the details of the transaction, then we just click the arrow icon which will take us to the BscScan page.

Step 3
After we are taken to the BscScan page, we will be shown all the details of the transaction, then we click the copy icon next to the contract address we want to be able to copy the contract address correctly.


Step 4
Then, we enter the official page of PancakeSwap which will look like in the image below.


Step 5
In the menu options at the top of the page, we select the "Trade" menu and then two other options will appear, we just need to select the "Exchange" option.


Step 6
We will immediately be taken to the measurement page in PancakeSwap. But we must first connect our MetaMask wallet with the PancakeSwap website. To do this we click on the "Connect Wallet" button in the upper right corner of the exchange page.


Step 7
We will be given the option of choosing a wallet that we want to connect with PancakeSwap because I have a MetaMask wallet so I will choose the "MetaMask" wallet option.


Step 8
A pop-up will appear from MetaMask which will connect our wallet with the PancakeSwap website, we click on the "Next" button.


Step 9
Then MetaMask will ask for confirmation permission to connect our wallet with PancakeSwap, we click on the "Connect" button to continue.

Step 10
After the wallet connection process is complete, we can see our MetaMask wallet address written on the page, this proves that our wallet is well connected.


Step 11
After that, we will continue the process of listing our Crypto Token on PancakeSwap. To do this we select one of the token icons in the exchange menu shown by PancakeSwap, here I will choose the BNB icon.


Step 12
Then, we paste the address of the contract that we copied earlier from BscScan in the search menu.

Step 13
Our Crypto token will automatically appear on the page, then we click on the "Import" button to enter our Crypto Token into PancakeSwap.


Step 14
A warning pop-up will appear telling us about the dangers of buying tokens that are not clear, we don't need to read them because the tokens that we will enter are Crypto Tokens that we created ourselves. We check the box provided and then click on the "Import" button.


Step 15
And done!!
Our Crypto Token has been added to PancakeSwap. The token icon symbol that was previously BNB has changed to the crypto token that we created.

Bringing Half of Created Crypto Token Into a Public Exchange
After we have successfully listed the Crypto Tokens that we created on PancakeSwap, the next thing we will do is bring some of the Crypto Tokens that we created to PancakeSwap so that they can be traded.
Step 1
We open our MetaMask wallet and then on the first page of the wallet we select the Crypto Token that we have created.


Step 2
After that, we click on the "Send" button so that we can send some of the Crypto Tokens that we created.


Step 3
Paste the contract address of the Crypto Token in the first column, then enter the number of Tokens we want to send at the contract address, here I will send 50% of the total supply of SCAS tokens which means I will send 500,000 SCAS to the contract address. After that, we just click on the "Next" button.


Step 4
Next, we will confirm the Crypto Token sender transaction, the pop-up that appears will show transaction details such as the number of tokens that will be sent and the gas fee that will be charged to us. After confirming all these things we click on the "Confirm" button to continue the process of sending our Crypto tokens.

Step 5
A notification will appear from the browser informing us that the transaction we made on our MetaMask wallet has been successful.


Step 6
Then in the Activity section, we can see that I managed to send 500,000 SCAS tokens. To view the details of the transaction, click on the notification.


Step 7
A pop-up will appear containing the details of the transaction, then we just click the arrow icon which will take us to the BscScan page.

Step 8
We can see in the transaction details shown by BscScan below, the transaction process that I did was successful and the SCAS token has been entered into the contract address.


Step 9
We go back to PancakeSwap and we can see that the SCAS token that I sent from can be traded by anyone.

Withdraw Some Crypto Tokens Into Trust Wallet
After successfully listing the Crypto Tokens and sending a number of these tokens into the contract address for trading, the next thing I will do is bring some of the Crypto Tokens that I created from the MetaMask wallet to the TrustWallet that I created earlier.

Step 1
First of all, we first open the TrustWallet application, and on the start page of our wallet click the button in the upper right corner.


Step 2
After that, we paste the contract address of the Crypto Token that we have created, here I enter the contract address of the SCAS token. Then, select the "Add Custom Token" option in the middle of the page.


Step 3
Next, we will be taken to a page to set the token which we will insert into our TrustWallet. But before that, I have to make sure that the network we use is the Binance Smart Chain network, to change the network, we click on the network option that is already at the top.


Step 4
After that, various networks from various blockchains will appear, here we will choose the Binance Smart Chain as shown in the image on the right.


Step 5
After we have successfully changed the network, we paste the contract address of our Crypto Token by clicking the "PASTE" button in the first column, and all other columns will be automatically filled in by themselves. Finally, we click on the "DONE" button in the upper right corner of the page.


Step 6
After we have successfully listed our Crypto Token to TrustWallet, the next thing we will do is take the wallet address of the token that is in TrustWallet, the way is by clicking on the "Receive" button on the Token page.


Step 7
To copy the address correctly, we just need to click the "Copy" button in the lower-left corner.

Step 8
We return to the MetaMask wallet page and click on the Crypto Token that we created.


Step 9
Click the "Send" button which appears on the next page.


Step 10
Paste the wallet address that we copied from TrustWallet in the first column, then enter the number of tokens we want to send, here I will send 100,000 SCAS. After that click on the "Next" button.


Step 11
Next, we will confirm the Crypto Token sender transaction, the pop-up that appears will show transaction details such as the number of tokens that will be sent and the gas fee that will be charged to us. After confirming all these things we click on the "Confirm" button to continue the process of sending our Crypto tokens.

Step 12
In the Activity section it is shown that our Crypto Token has been successfully sent from our MetaMask.


Step 13
Then I checked again on my TrustWallet and I saw that the SCAS Token I sent from MetaMask was successfully entered into my TrustWallet.

Step 14
To check transaction details on BscScan, we first click on the transaction information in the Activities section.


Step 15
A pop-up will appear containing the details of the transaction, then we just click the arrow icon which will take us to the BscScan page.

Step 16
After that, we can see from the transaction details shown by BscScan that the transaction process for sending SCAS tokens as much as 100,000 SCAS that I did was successful.

And in the image below, you can see the transaction details of the sender and recipient addresses of SCAS Tokens that match my MetaMask and TrustWallet addresses.


Last Word (Conclusion)
This task proves that we can easily list and trade the Crypto Tokens that we have created in the previous lesson easily, even though the exchange we can use is a Decentralized Exchange, whereas if we want to list the Crypto Tokens we created on a Centralized Exchange such as Binance, Coinbase, Upbit, etc. We have to register our Crypto Token first and the exchange will analyze our Crypto Token project in detail and make a decision whether the Token and the Project are eligible to be listed on their exchange.
Those are some of my explanations regarding How to list your own Token on a Public Exchange, I apologize if there are still many mistakes that you can get when reading my explanation earlier, I would be very grateful if you told me in the comments column below.
Thank you for reading my blog, hope it will be useful for all of you. 😁


