Hello Steemian!!
We are back to homework which was held by one of the professors from Steemit CryptoAcademy @yohan2on.
This time we will discuss the wallets that DeFi users must have. There are several wallet options provided, but I will focus on discussing one of the wallets, MetaMask.
MetaMask
MetaMask is a wallet used to store Ether as well as ERC-20 tokens. Unlike other wallets, MetaMask is a wallet in the form of an add-on that is installed directly into the browser used by its users.
This is done so that Ether and ERC-20 token owners will be helped by making it easier to monitor the value of their crypto assets without having to open other wallet sites.
Steps to Install MetaMask
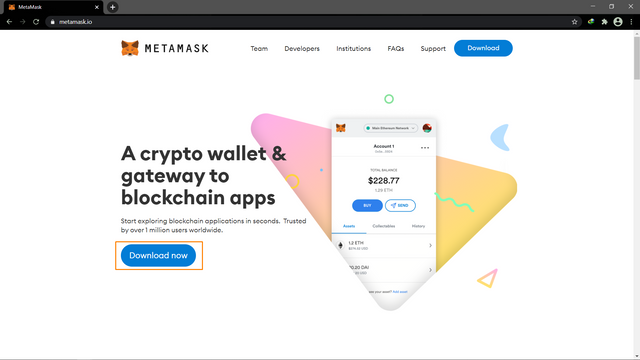
The first step we do is visit the official site of MetaMask which you can visit here. After that, all you have to do is click the "Download" button which is already on the start page on the MetaMask site.
After clicking the button you will be taken to another page where you will be given several options to download MetaMask which is tailored to the type of browser you are using. In MetaMask there are 4 types of browsers that are compatible with MetaMask, namely: Google Chrome, Google Edge, Brave, and Mozilla Firefox. In this example, I will download using Google Chrome.

After that, you will get a page to download the MetaMask extension which will be installed on your browser.

After you press the "Add To Chrome" button, the browser will automatically download and install the MetaMask extension on your Chrome.
Steps to Create MetaMask Wallet
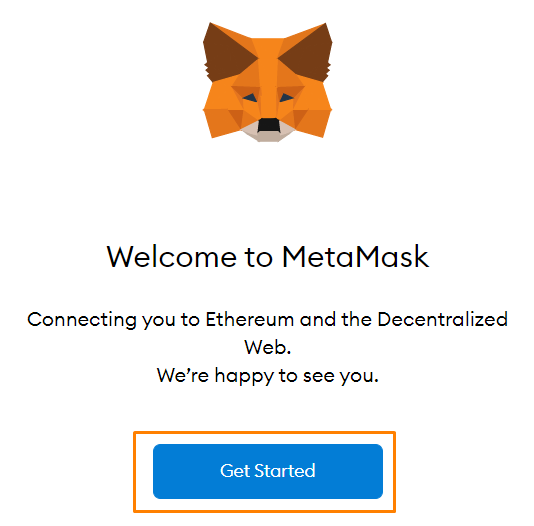
After the installation process is complete, the next step we will do is create a new wallet. The first step is that you click the "Get Started" button on the page that MetaMask has opened automatically after the installation process.
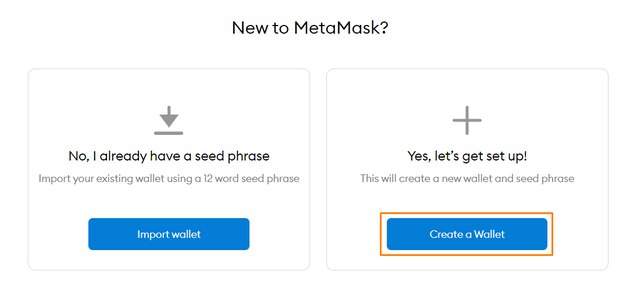
Then you select the option to create a new wallet on the right
After that, you will be given a permission request to use several permissions to ensure MetaMask runs properly. You can see all the details in the photo below.
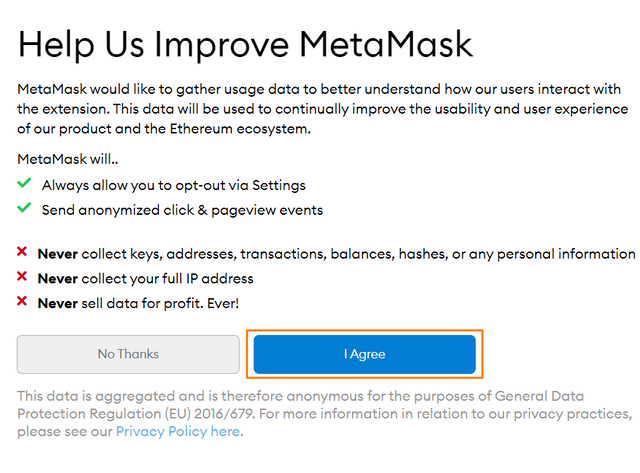
The next step is that you will create a password that will be the security key of your wallet account. My advice is to make a password that has a high level of difficulty for hackers to break into so that your wallet remains safe.

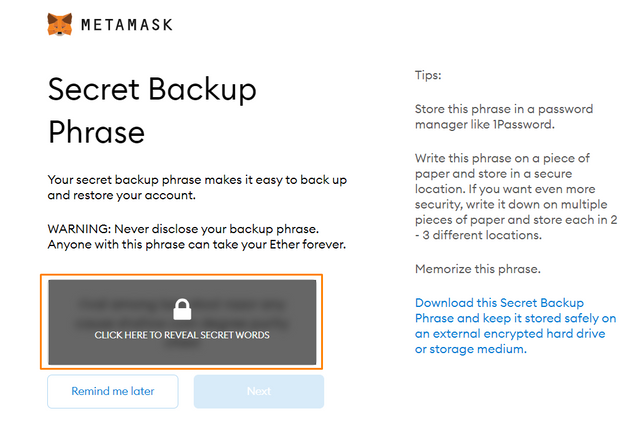
MetaMask will give you a few words which will be the key to back up your data if needed.
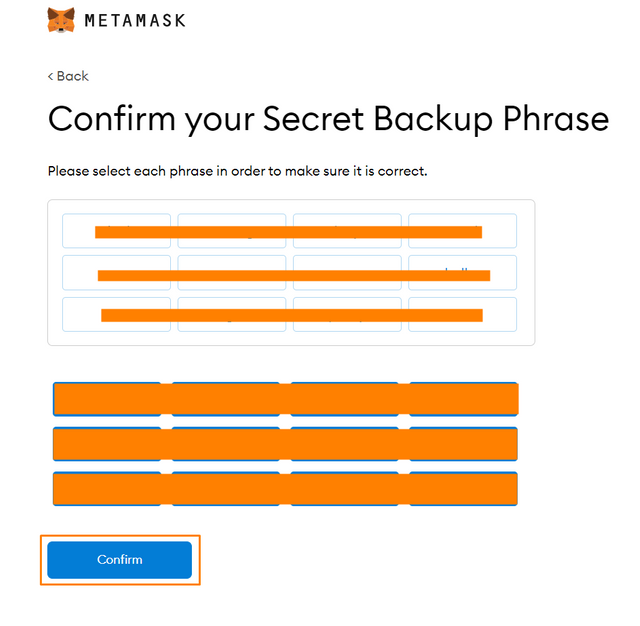
All you have to do is click on the box with a lock symbol and you will be given some of these words which you have to keep in a safe place. After that, you continue to the next page and on this page, you will re-sort the words earlier by clicking on the word choice below in sequence, after that you just have to confirm.
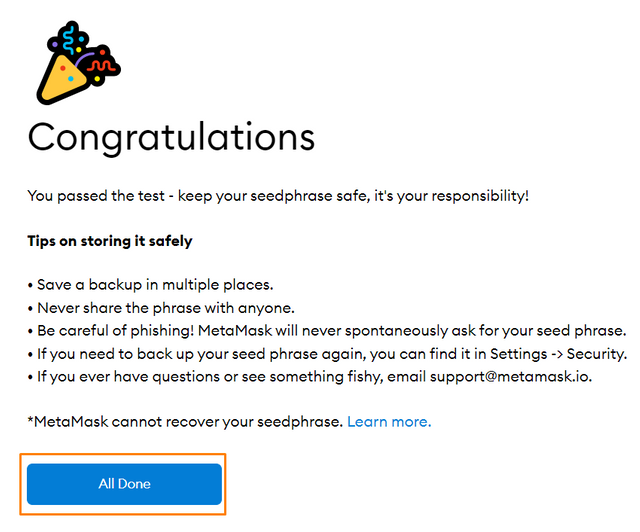
Congratulations, finally your wallet is ready to be made and you can use it right away.
Use of MetaMask
There are several things we can do with the MetaMask wallet, besides we can store crypto assets, we can also exchange Ether assets with other ERC-20 tokens. However, I will teach you first how to send our Ether assets to MetaMask so that they can be stored safely.
1. Receive/Buy
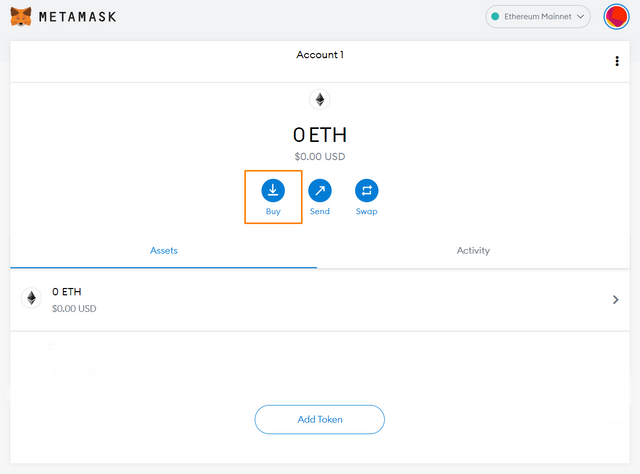
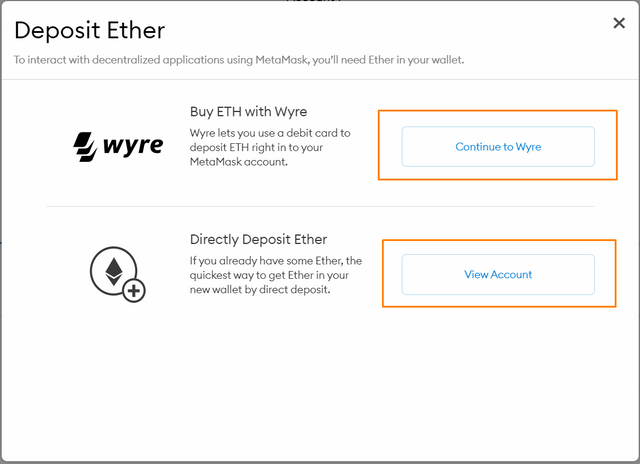
To fill our wallet with Ether, we are given 2 options by MetaMask. The first option is that we can buy Ether assets with Wyre which will later be linked to our debit card. Or if you already have Ether assets and you only want to save them to MetaMask, you just have to choose the second option which means you will send your Ether assets to MetaMask.
2. Send
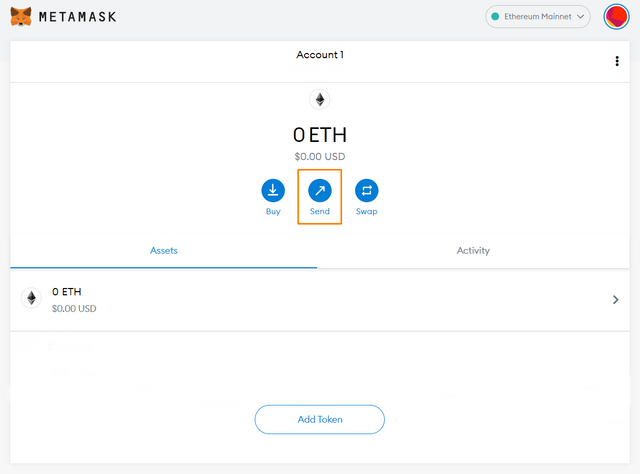
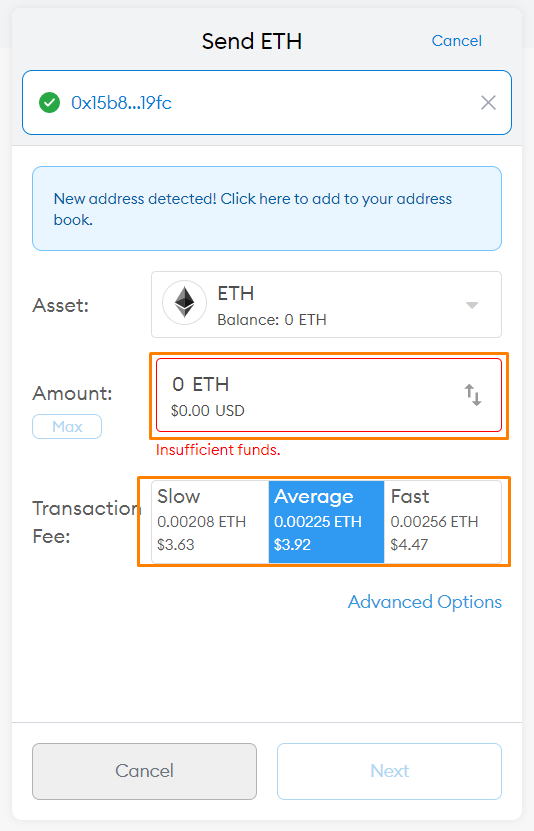
If we can put Ether in to MetaMask. Of course, we can also transfer Ether to the exchange to make a withdrawal. All you do is click the "Send" button.
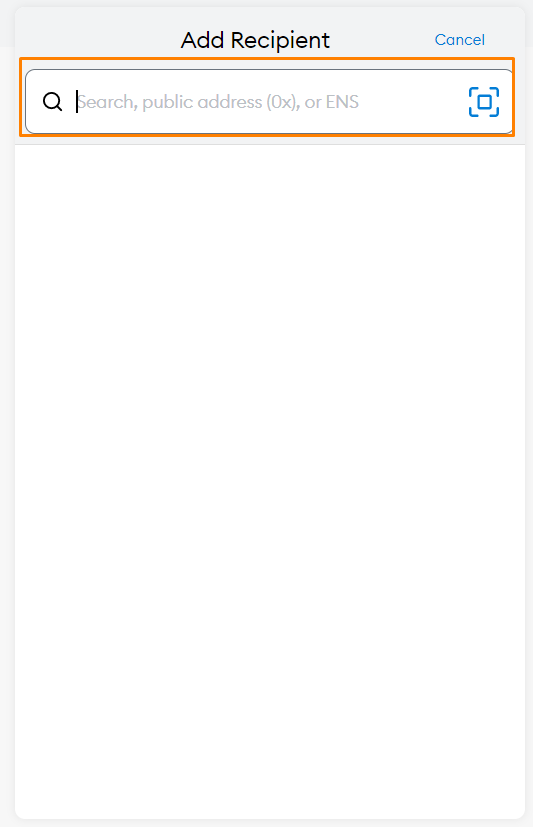
Then you just have to enter the address you want to go to.
After that, you just need to enter the amount of Ether you want to transfer and choose how fast the transfer process of Ether you want to be processed.
3. Swap
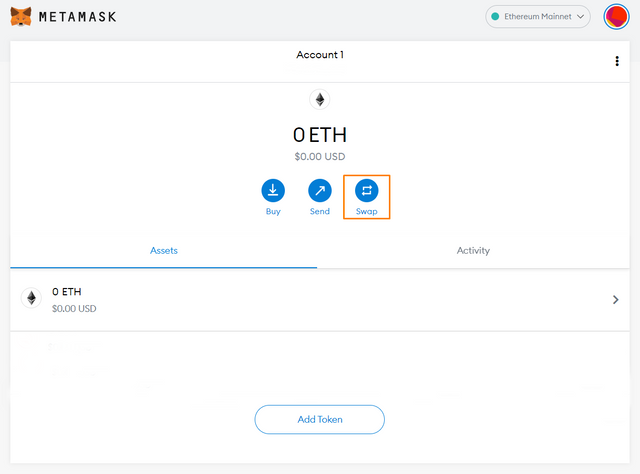
We can also use the swap feature in MetaMask to exchange our Ether for ERC-20 tokens. The rarity is we click the "Swap" button.
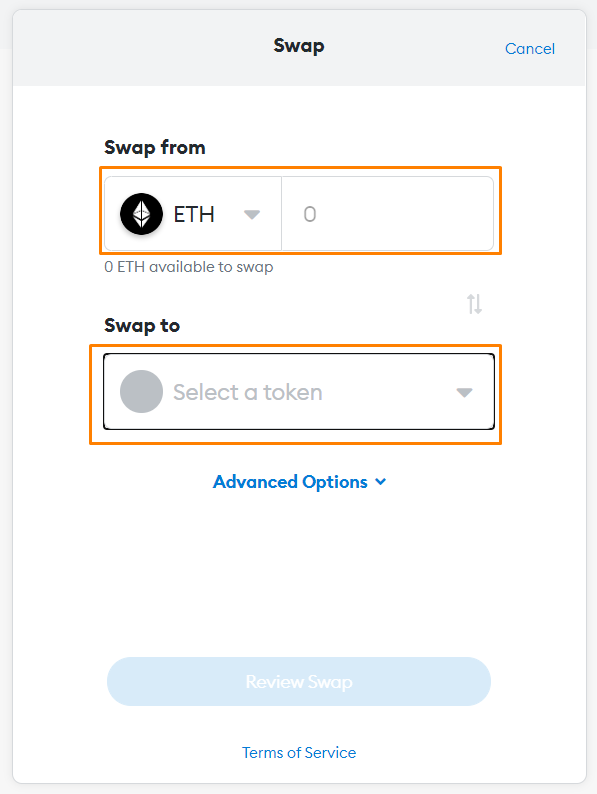
Then we just have to choose how much Ether we want to exchange and with what token we will exchange it.
4. Organize Tokens
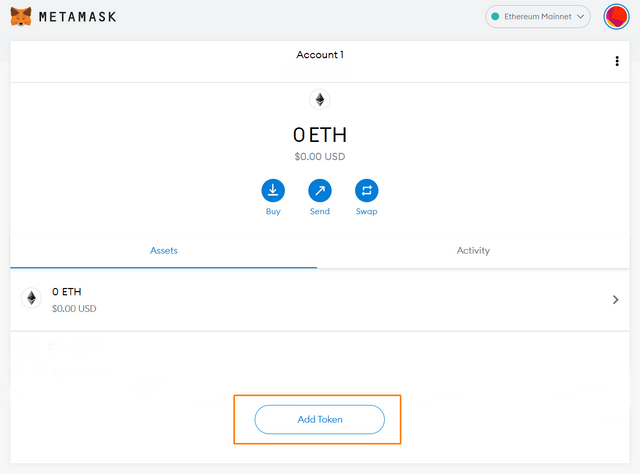
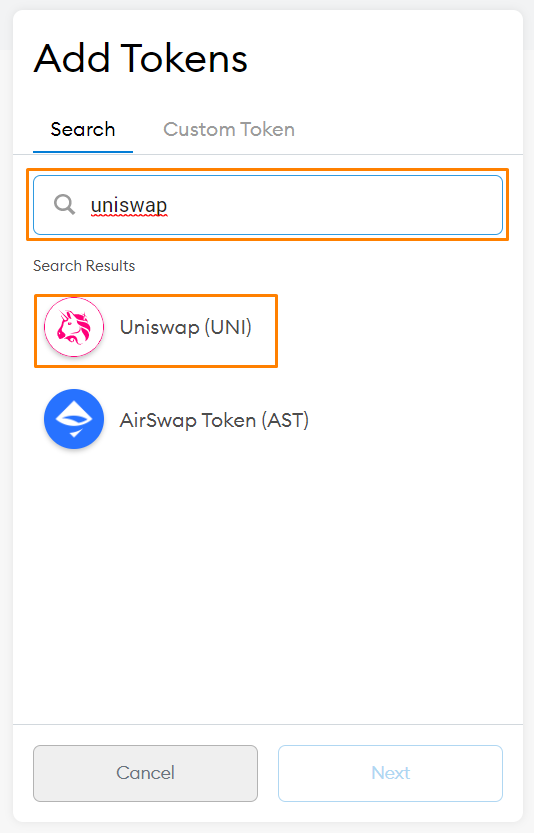
For our help on MetaMask, we just need to click "Add Token".
Then we just need to type the token we want in the search field and click on the token.
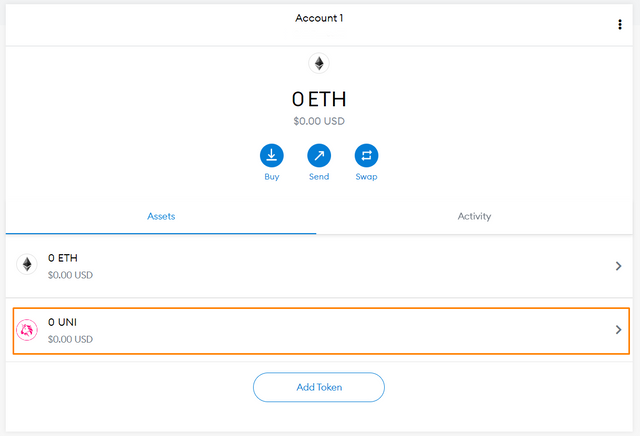
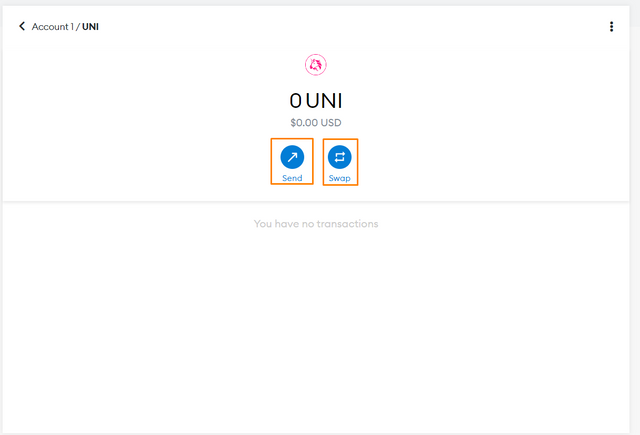
Then when we return to the start page, the token is already in front. If we click on the token, then we will be given 2 choices, the first we can send the token to another place, and the second we can exchange the token with another ERC-20 token.
5. Connect Hardware Wallet With MetaMask
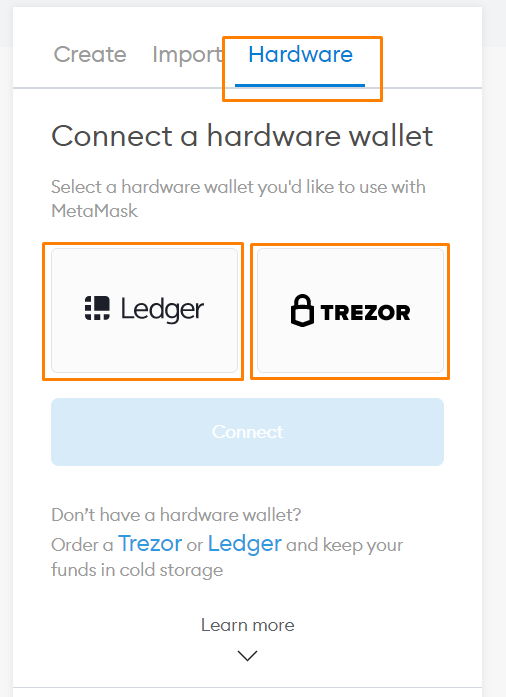
The most interesting thing about MetaMask is that we can connect our Hardware Wallet with the MetaMask add-on. You just have to click on your account icon on the top right and select the "Connect Hardware Wallet" option.
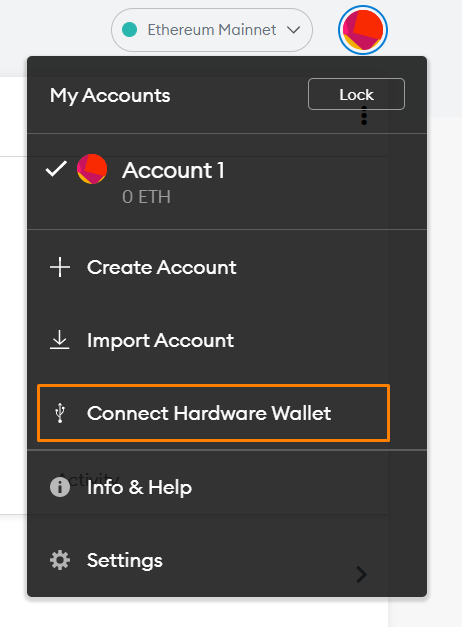
After that, you select the Hardware option in the options above and you just have to choose what Hardware Wallet you use. In MetaMask there are 2 Hardware Wallets that can be connected: Ledger and Trezor.
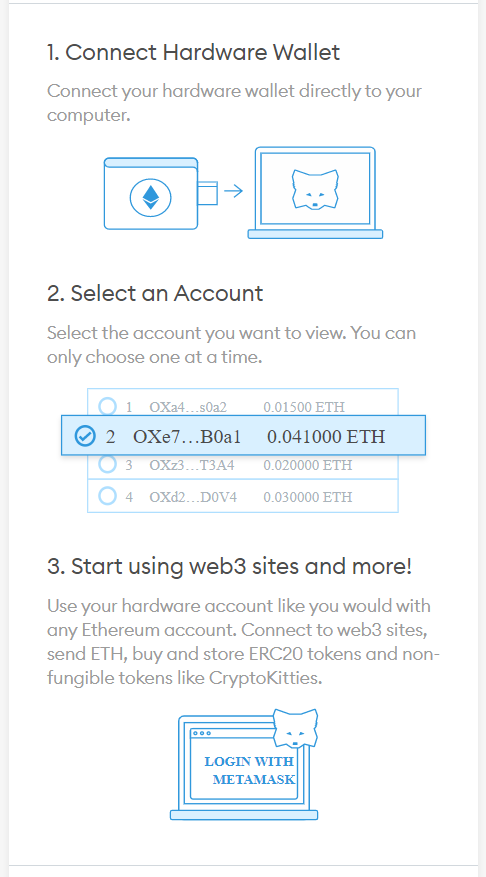
If you are confused when connecting, you can scroll down and there will be a tutorial on how to connect your Hardware Wallet with MetaMask.
Conclusion
I think MetaMask is a multifunctional wallet and will really help owners of Ether and ERC-20 Tokens to easily manage their assets.
That's all from me, apologize if there is something wrong with my explanation, if you find these deficiencies or errors you can comment in the comments column below.
See you guys in the next post!!
Hi @werahau
Thanks for attending the 5th Crypto course and for your effort in doing the given homework task.
Feedback
This is excellent work. You have done well to explore quite a number of vital features in Meta Mask wallet. Very well explained with well edited screenshots guiding and demonstrating what you were doing.
Homework task
10
Downvoting a post can decrease pending rewards and make it less visible. Common reasons:
Submit
Thank you so much professor..!! @yohan2on
Downvoting a post can decrease pending rewards and make it less visible. Common reasons:
Submit
Shared on twitter
Downvoting a post can decrease pending rewards and make it less visible. Common reasons:
Submit
Downvoting a post can decrease pending rewards and make it less visible. Common reasons:
Submit