Construct 3 is one of the easiest, fastest and friendliest platforms to create 2D games. It has a simple interface and easy to get familiar with.
It is programs like these that make our lives easier, it is no longer necessary to know how to program to make a video game or a program. We have tools like this to do whatever our imaginations lead us to.
This will be a guide for those who want to learn or have just always been curious about how games are created.
A look at what we are going to do....

We will create a new project, we will place a sprite, we will make the character move in both directions and we will know the solid objects.
To open Construct 3 you can do it from the following link editor.construct.net or download the application for PC and create offline games.
Creating a New Project
Clicking on new project will open a dialog box to configure the name, the size of the file, and other details.

Set the size to 1280x720


This will be our work table where we will insert objects, create and design our games.
We have a canvas or artboard in the center. Here we will place the background image, the characters, objects, elements and all the pieces that will make up our game.
On the right side we have the project tab where all the folders of our project are grouped without files, images, etc.
At the top we will find the Layout tabs (where the design of our project is shown) and Event Sheet (where we will give actions and conditions to the objects)
On the left side we are shown the properties of the project from the size, effects, behaviors and others.
Inserting Objects
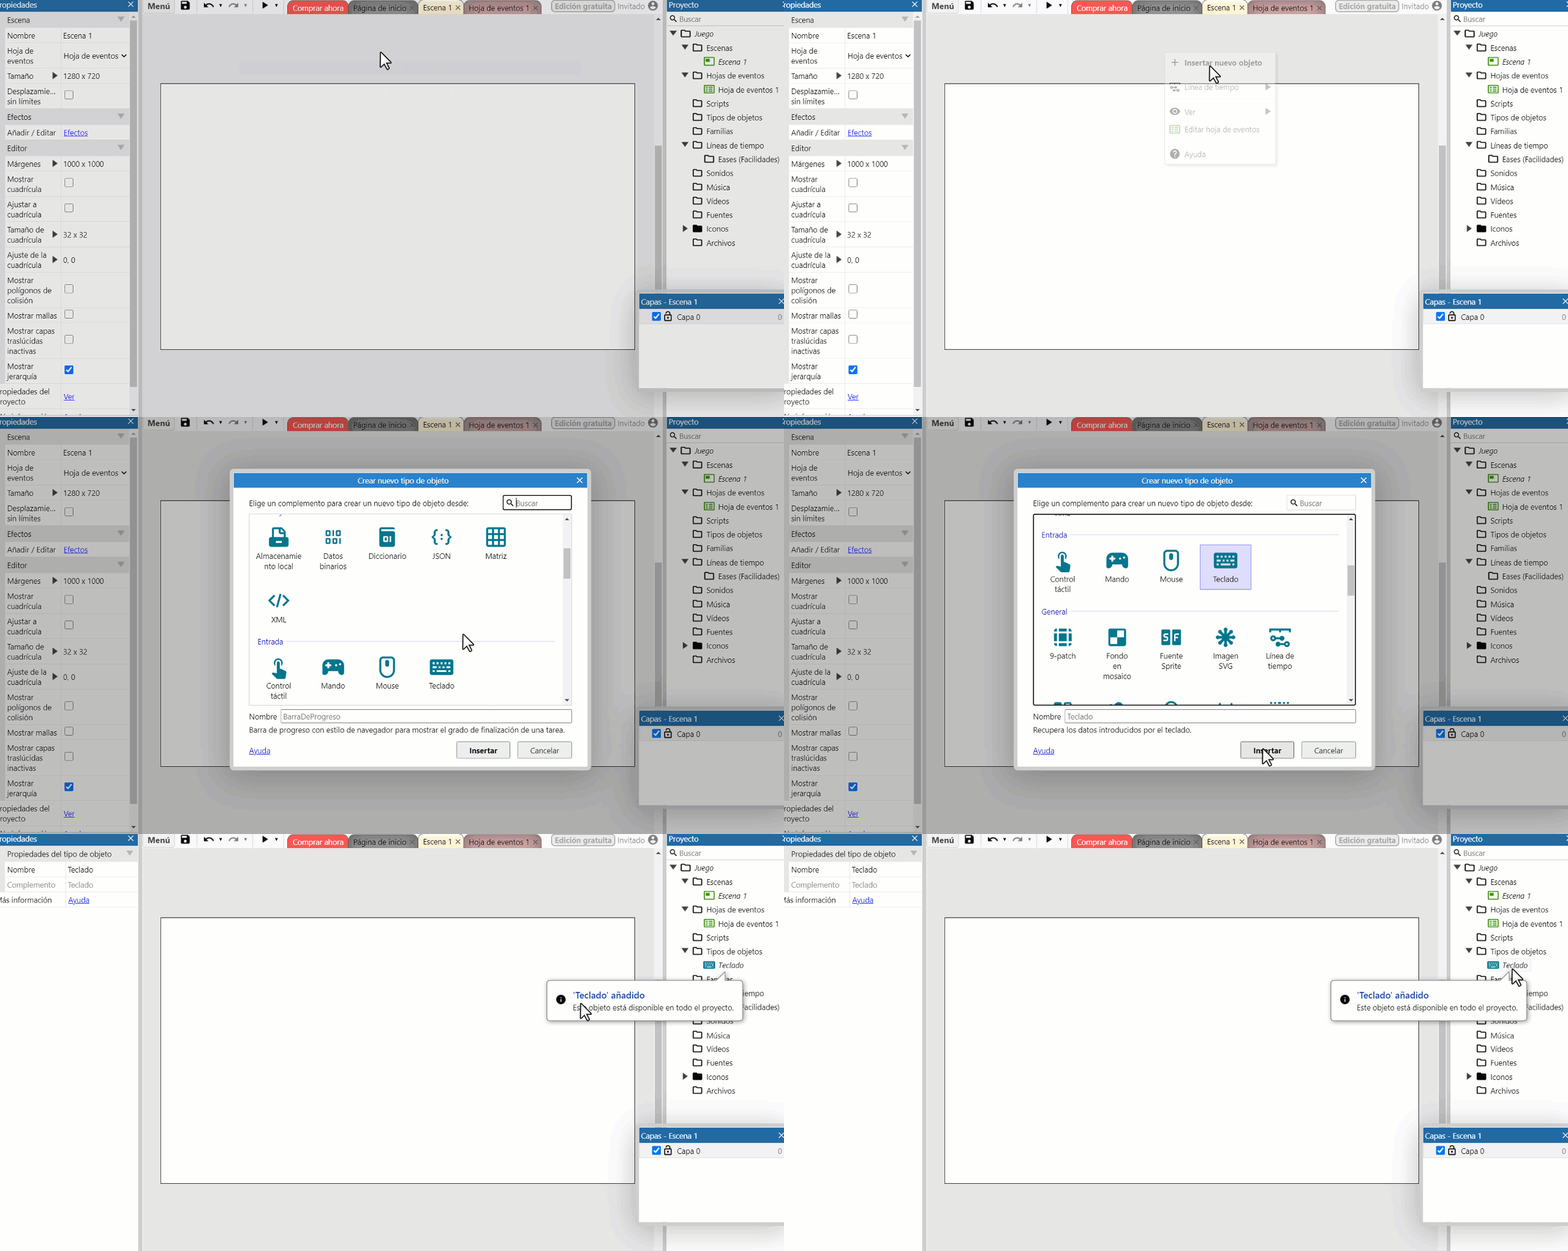
We insert the keyboard object to control our character with the keyboard arrows. Right click on the scene and insert object, we go down and select keyboard.
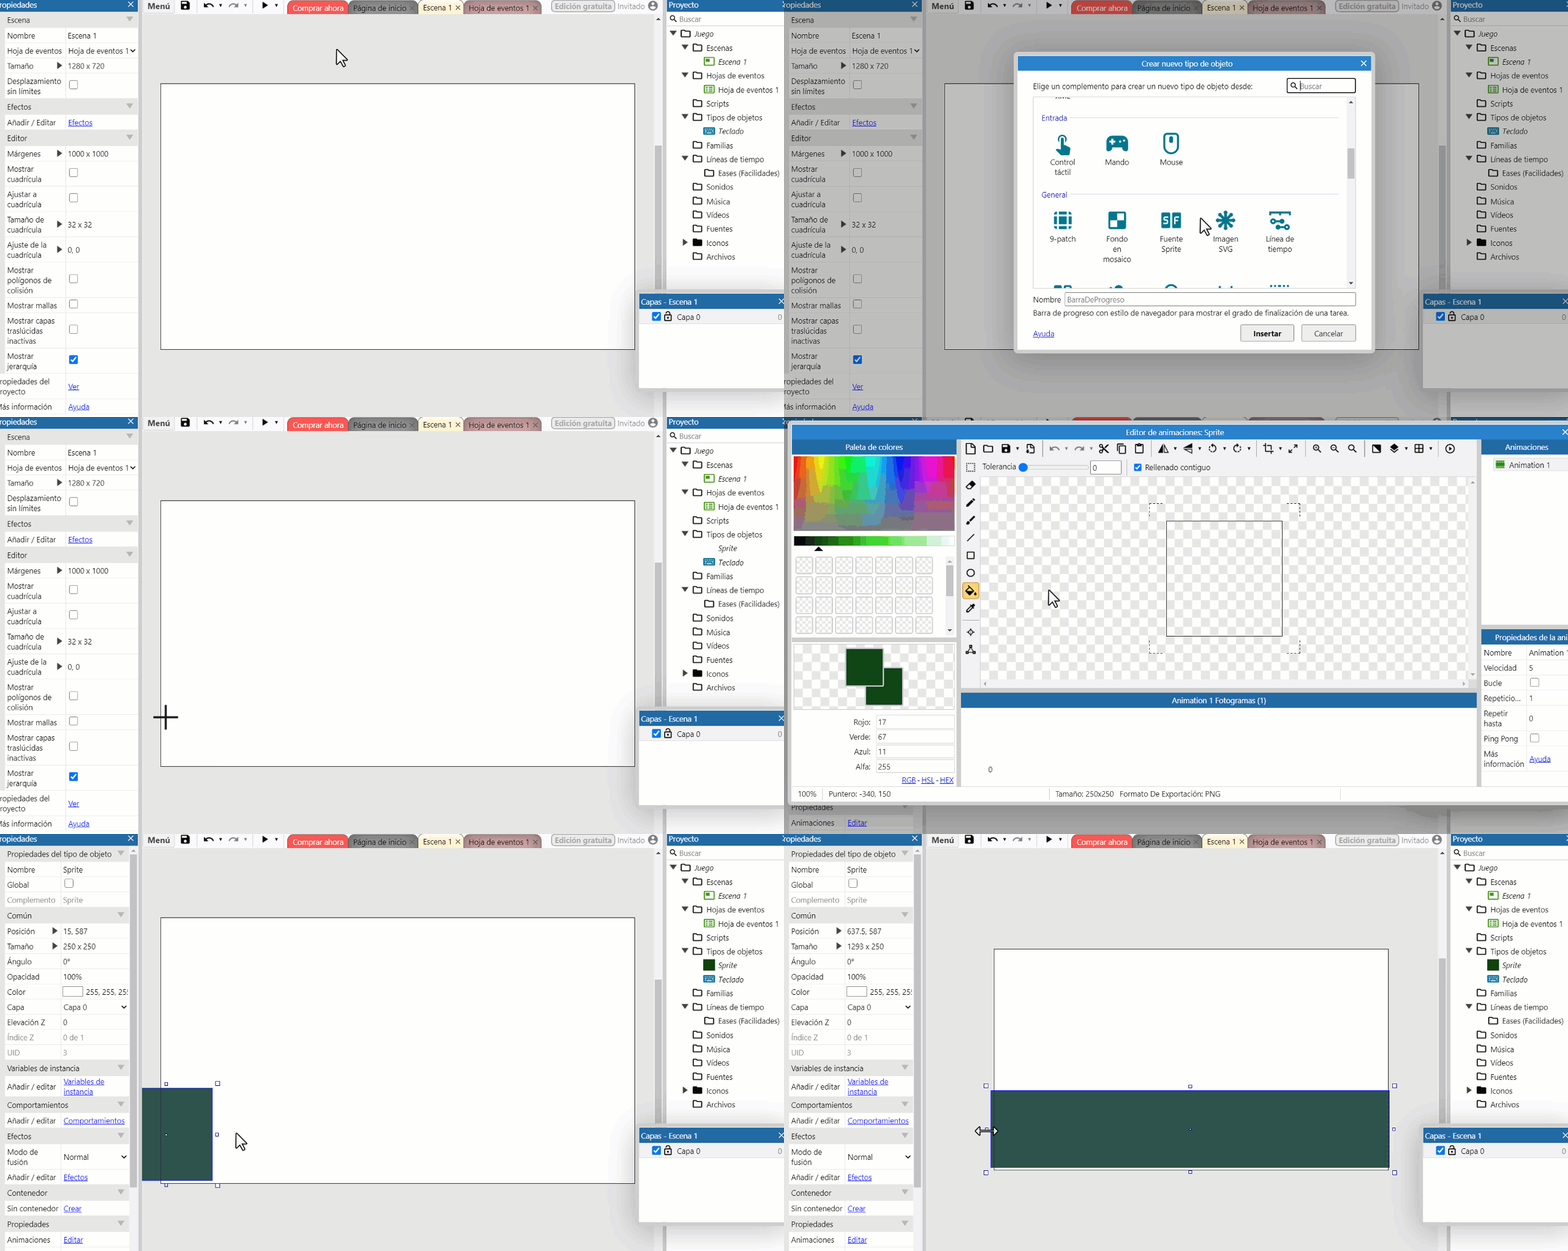
We insert another object that will be the ground. Right click - Insert new object - SPRITE. We make a square and lengthen it on stage. As the picture indicates.
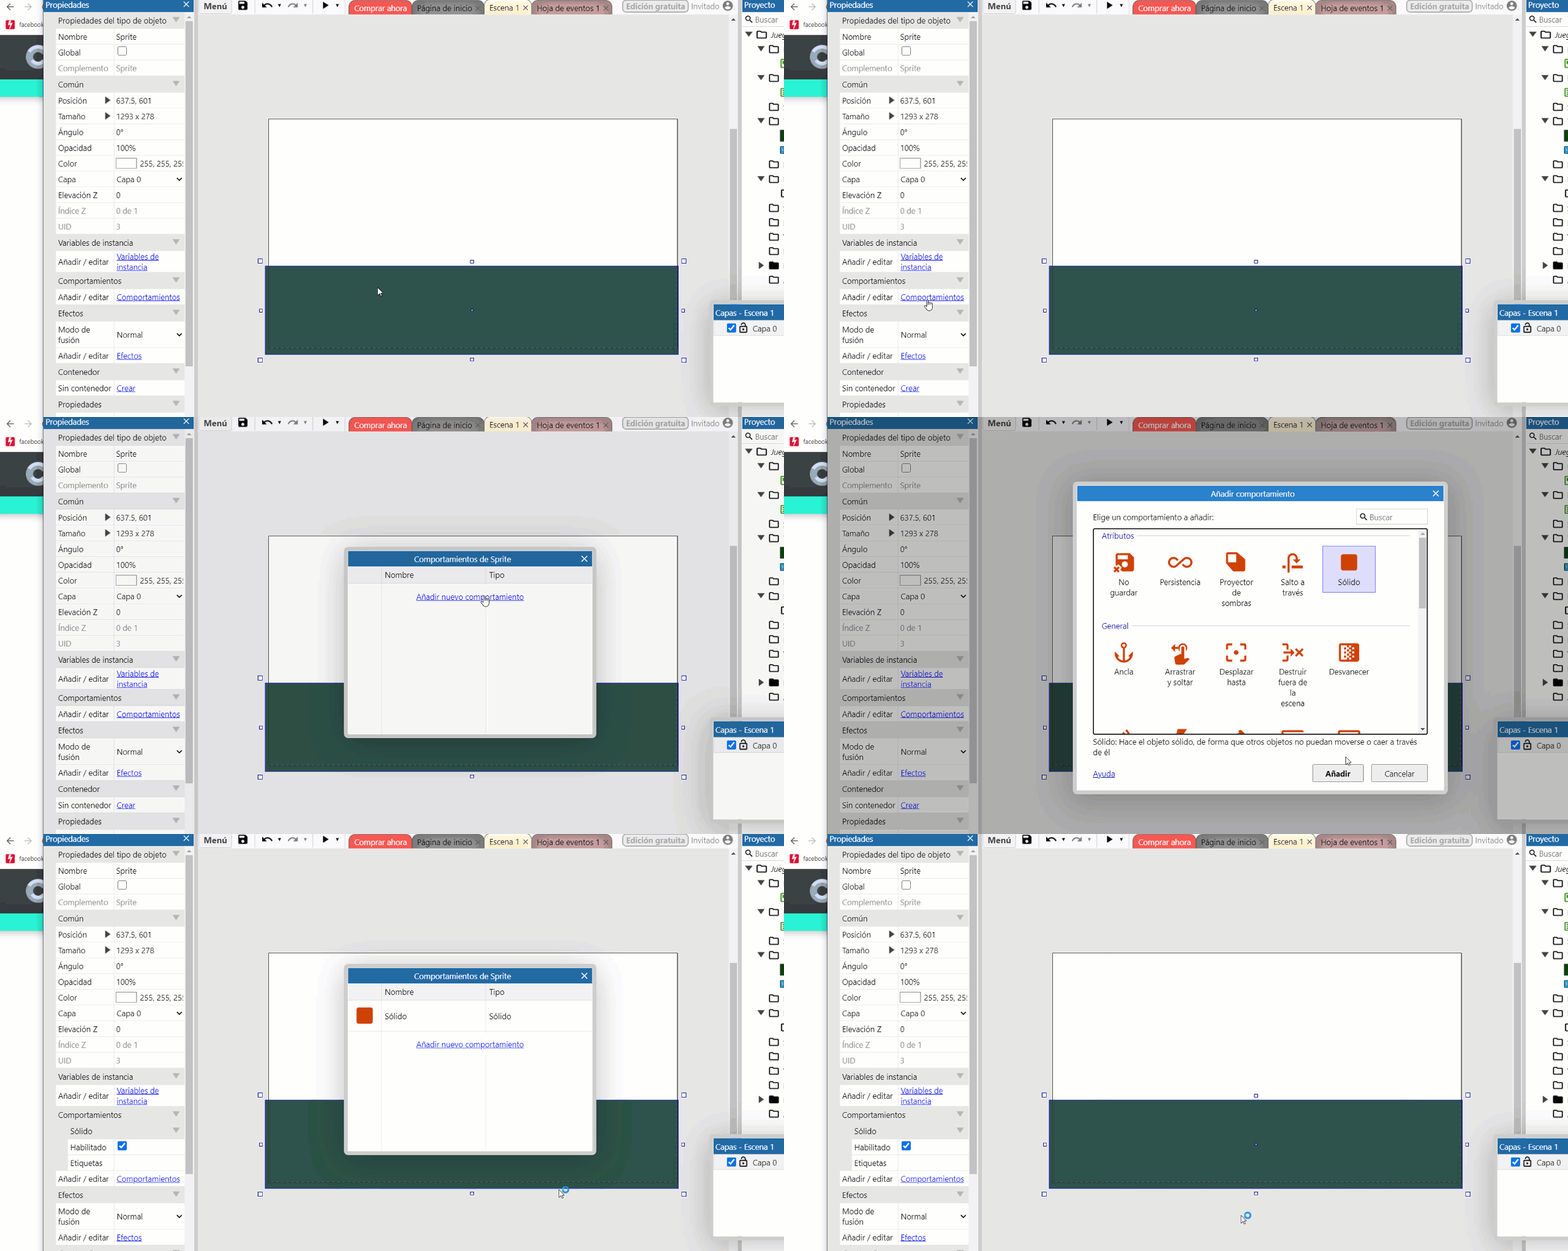
We add a behavior to the object, Click on the object- Behavior - Solid
Insert player
We insert the Object that will be our character or player. Right click - New object - Sprite. The animation editor will open. We import the frames from a file, we select them all and voila, we will have all the frames in our editor, we only have to delete the "0" layer because it remains blank.
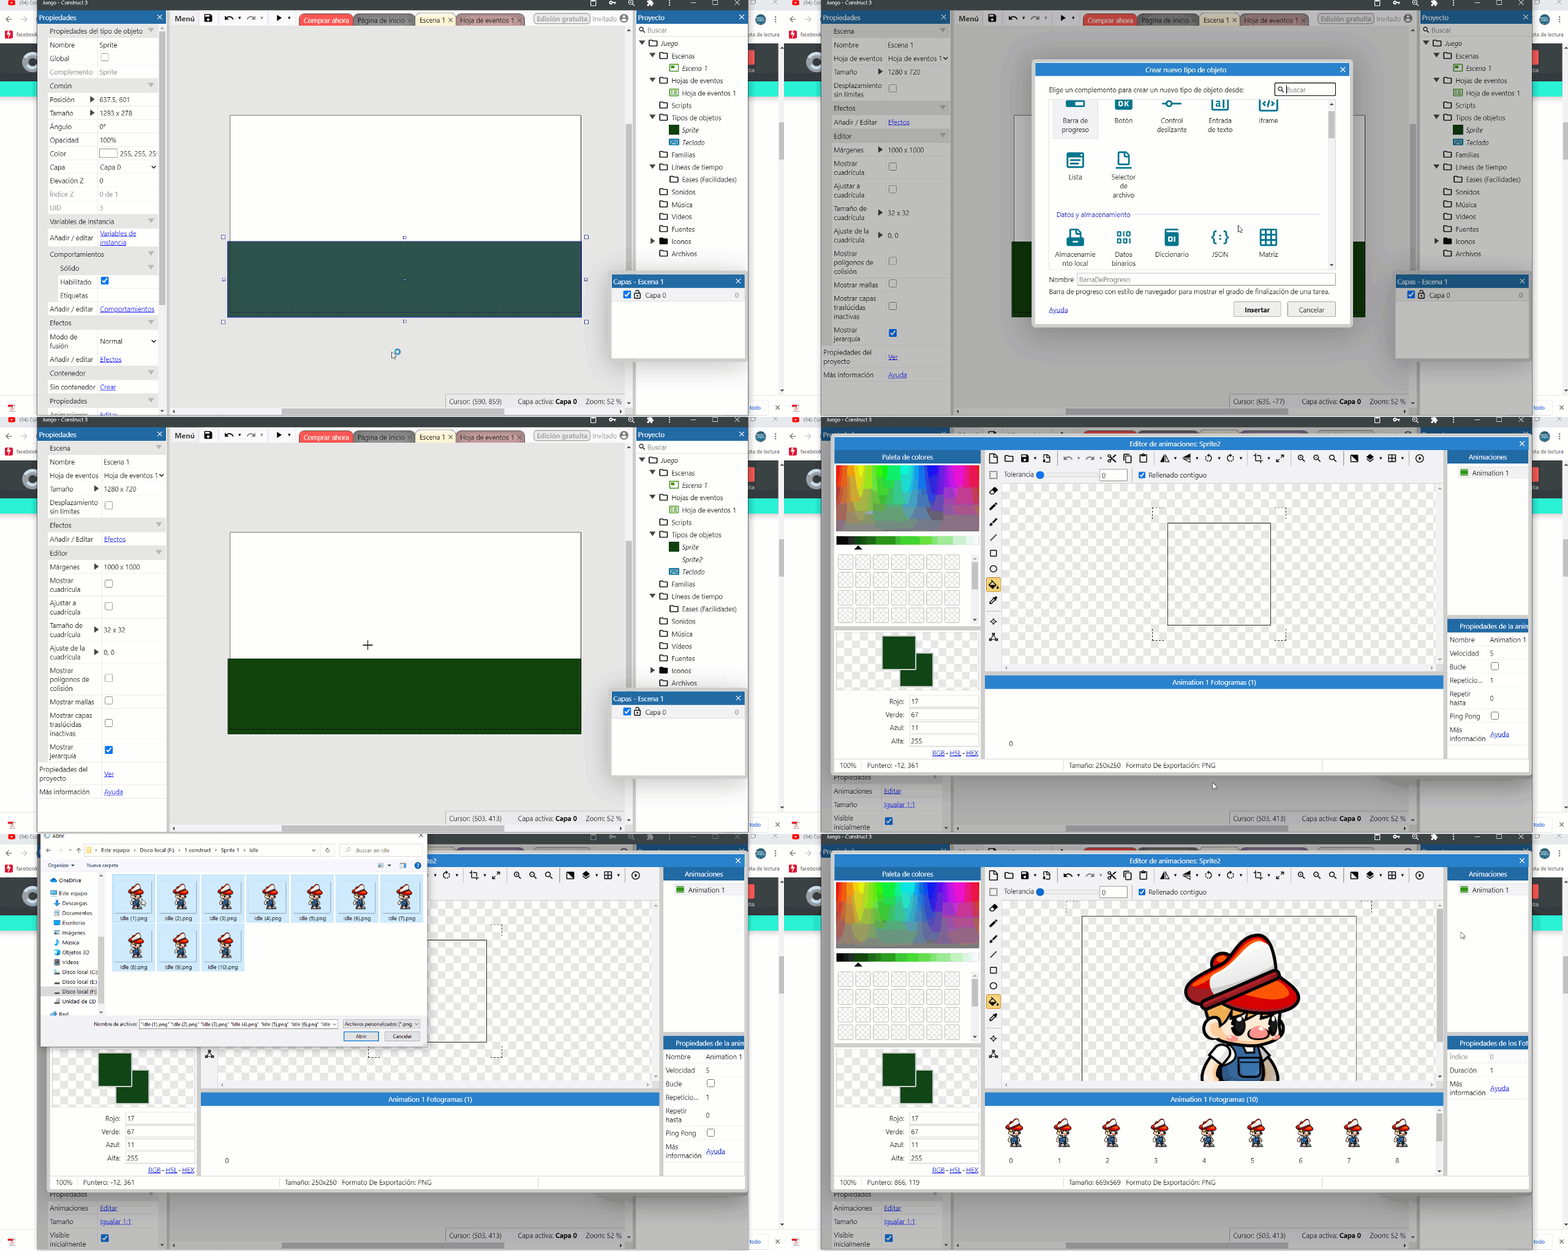
We change a couple of things in the "animation properties", the name of the animation (in my case I put "Inactive"), we mark the "loop" box, and we adjust the speed at which you want it to play, you can play with the animation properties and adapt it to your liking.
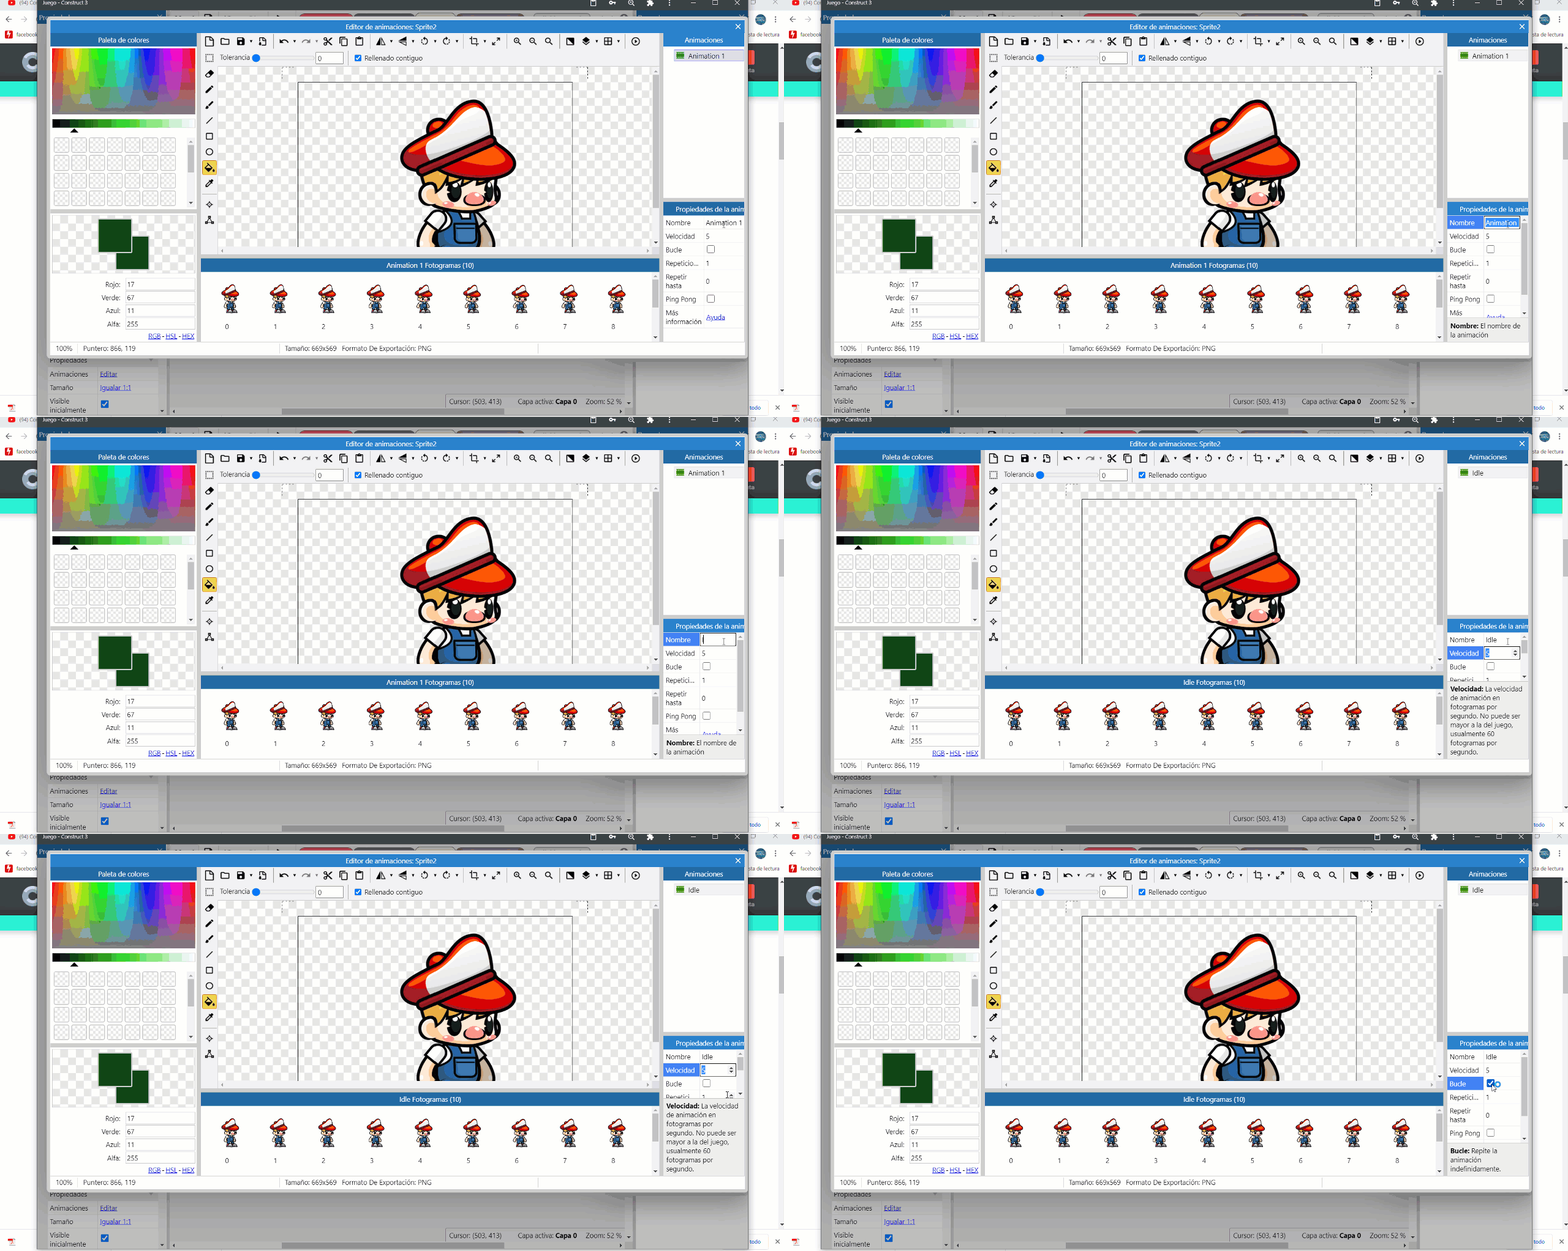
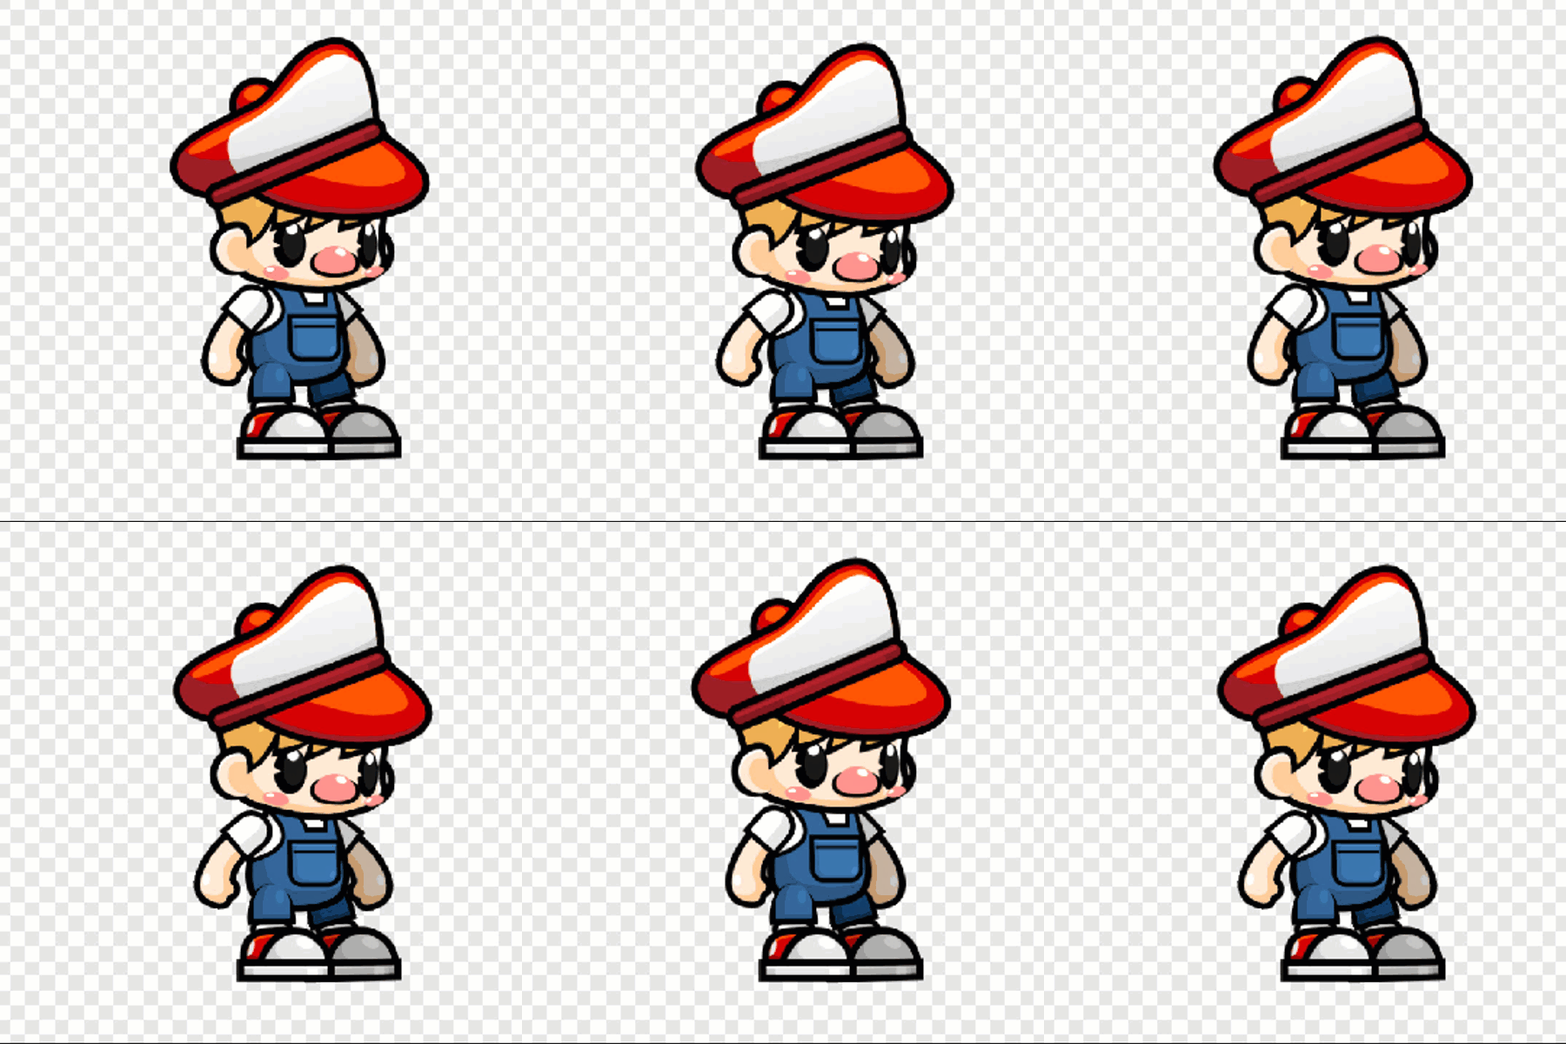
Animation Preview "Idle"
We create another animation and this one will be called "Run"
´
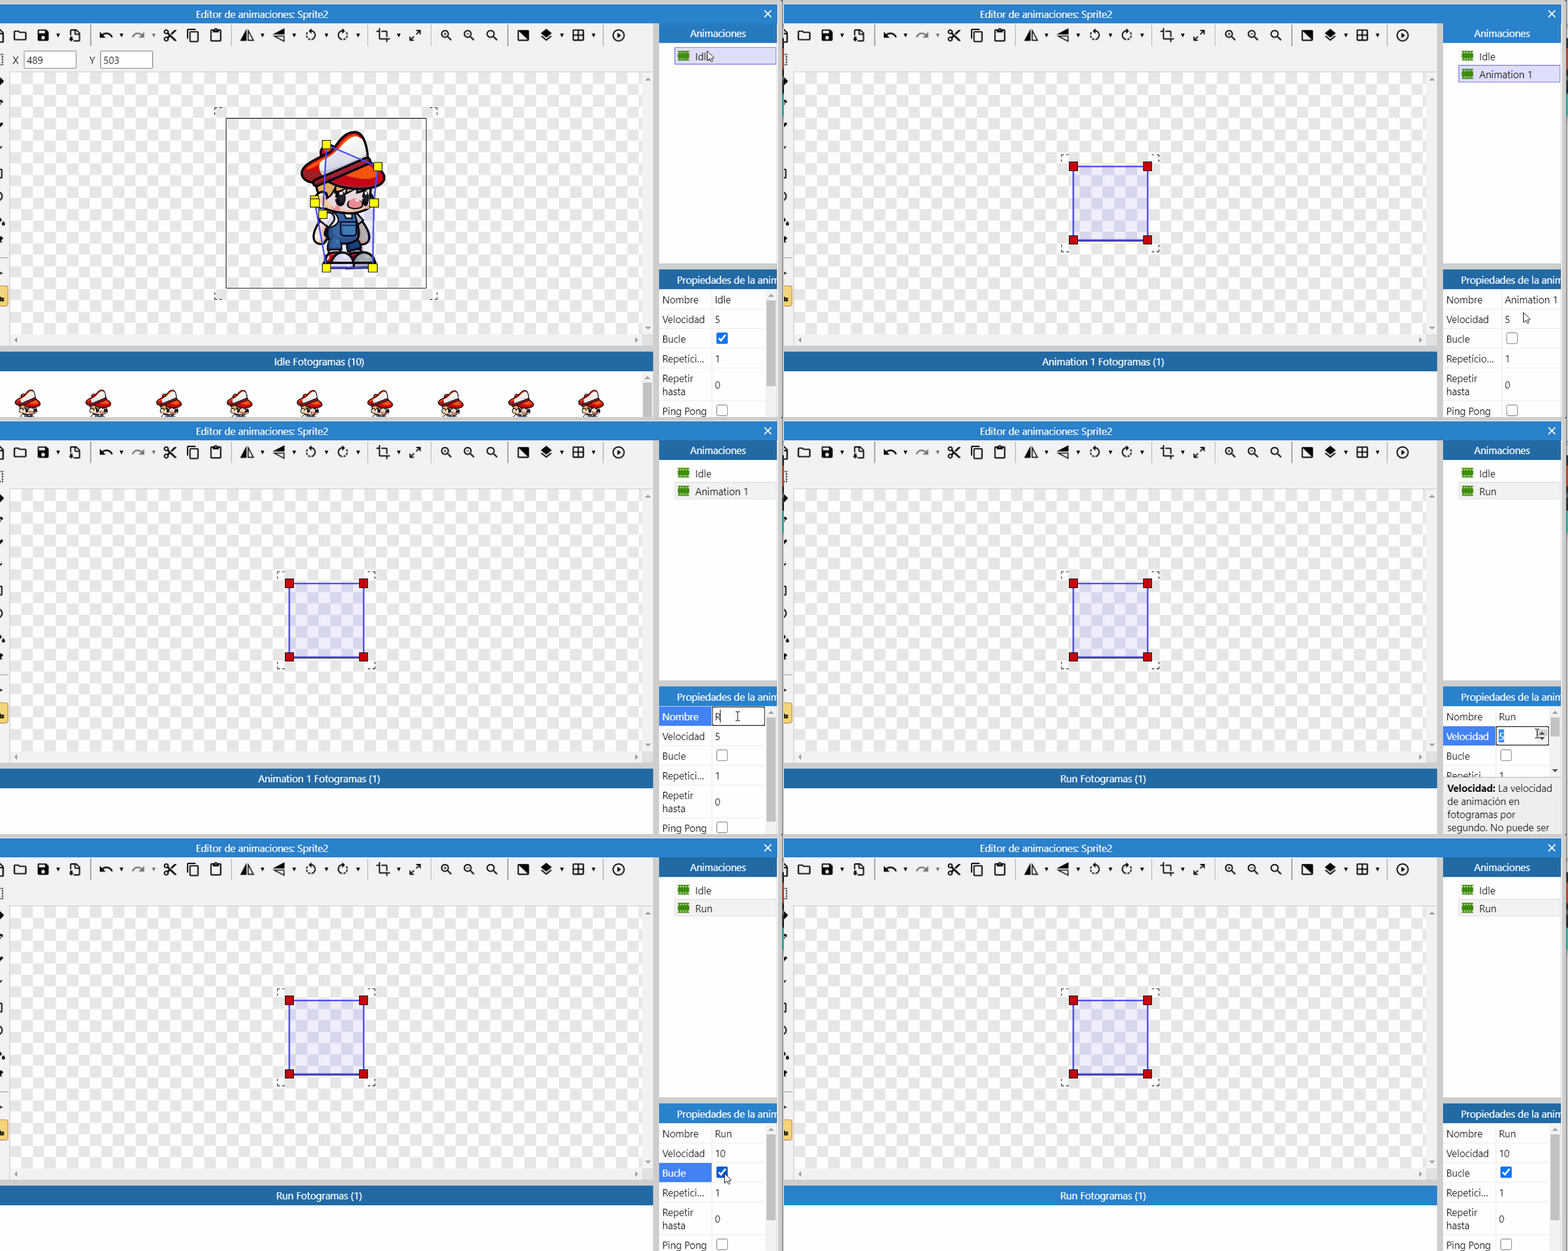

Preview of the animation "Run"

We close the animation editor and return to the design page. We select the character and click on the behaviors found in the options on the left side.
We are going to place two behaviors; platform: so that our character can move around the scene. And the "bound to layout" behavior makes the character unable to leave the scene.
![]()
Add events
Events consist of conditions that test whether certain criteria are met, for example, "Is the space bar down?". If all these conditions are met, all event actions are executed, for example "Create a bullet object".
We click on the "Event Sheet" tab and then click on "add event"
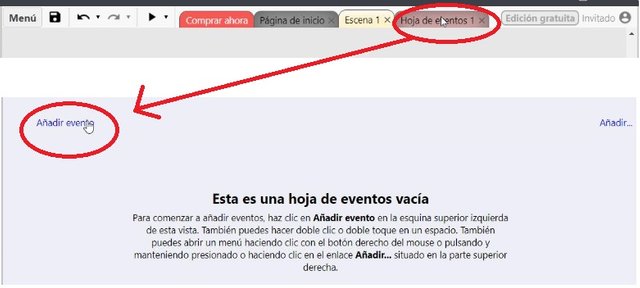
A window will open where you will find all the objects that you have added to the project.
Different objects have different conditions and actions depending on what they can do.
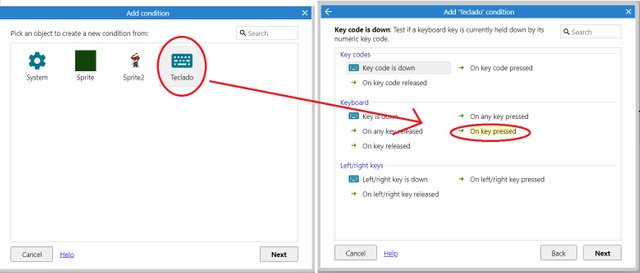
We will select the "Keyboard - On Key Pressed" and we will press the Right Arrow of the keyboard. With this we are saying that when the "Right Arrow" is pressed, a certain action will be performed.
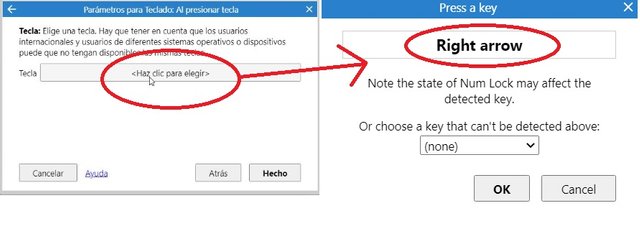
In this case, when the right arrow is pressed, the "Inactive" animation will be activated. Let's see how to do it!
We will select the "Keyboard - On Key Pressed" and we will press the Left Arrow of the keyboard.
We do the same procedure with the "left arrow".

Now we will give actions to each of the keys. We will tell you that when you press the right / left arrow, the "RUN" animation will be executed.
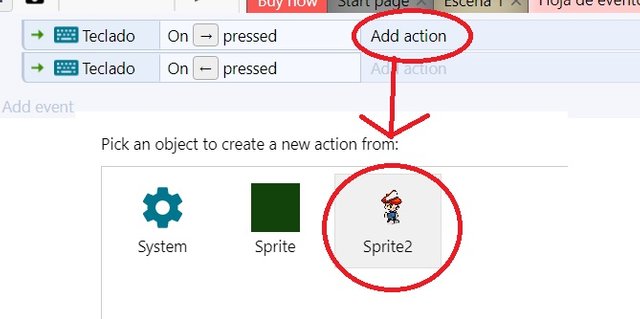

We write the name of our animation. In this case it would be "RUN" which is the name we gave to the animation.
We do the same procedure with the left arrow. And we would have something like that.


We will give another action to our character, so that he can turn to both sides.
Add action - Player - Set mirroed - Not Mirroed


The same for the left arrow but we will place "Mirroed"

With these actions we are telling the character that when any of the arrows is pressed, he will turn around.
We will add another event to the "Player". That when it is on the ground and does not move, it plays the "Idle" animation. This so it doesn't follow the "Run" animation when stopped.


We right click on the condition that we just added "Platforma is moving" and we click on "Invert". So that when the Player is on the ground and does not move, the action is executed.

We add the action "Animation Idle"


We press "Preview"

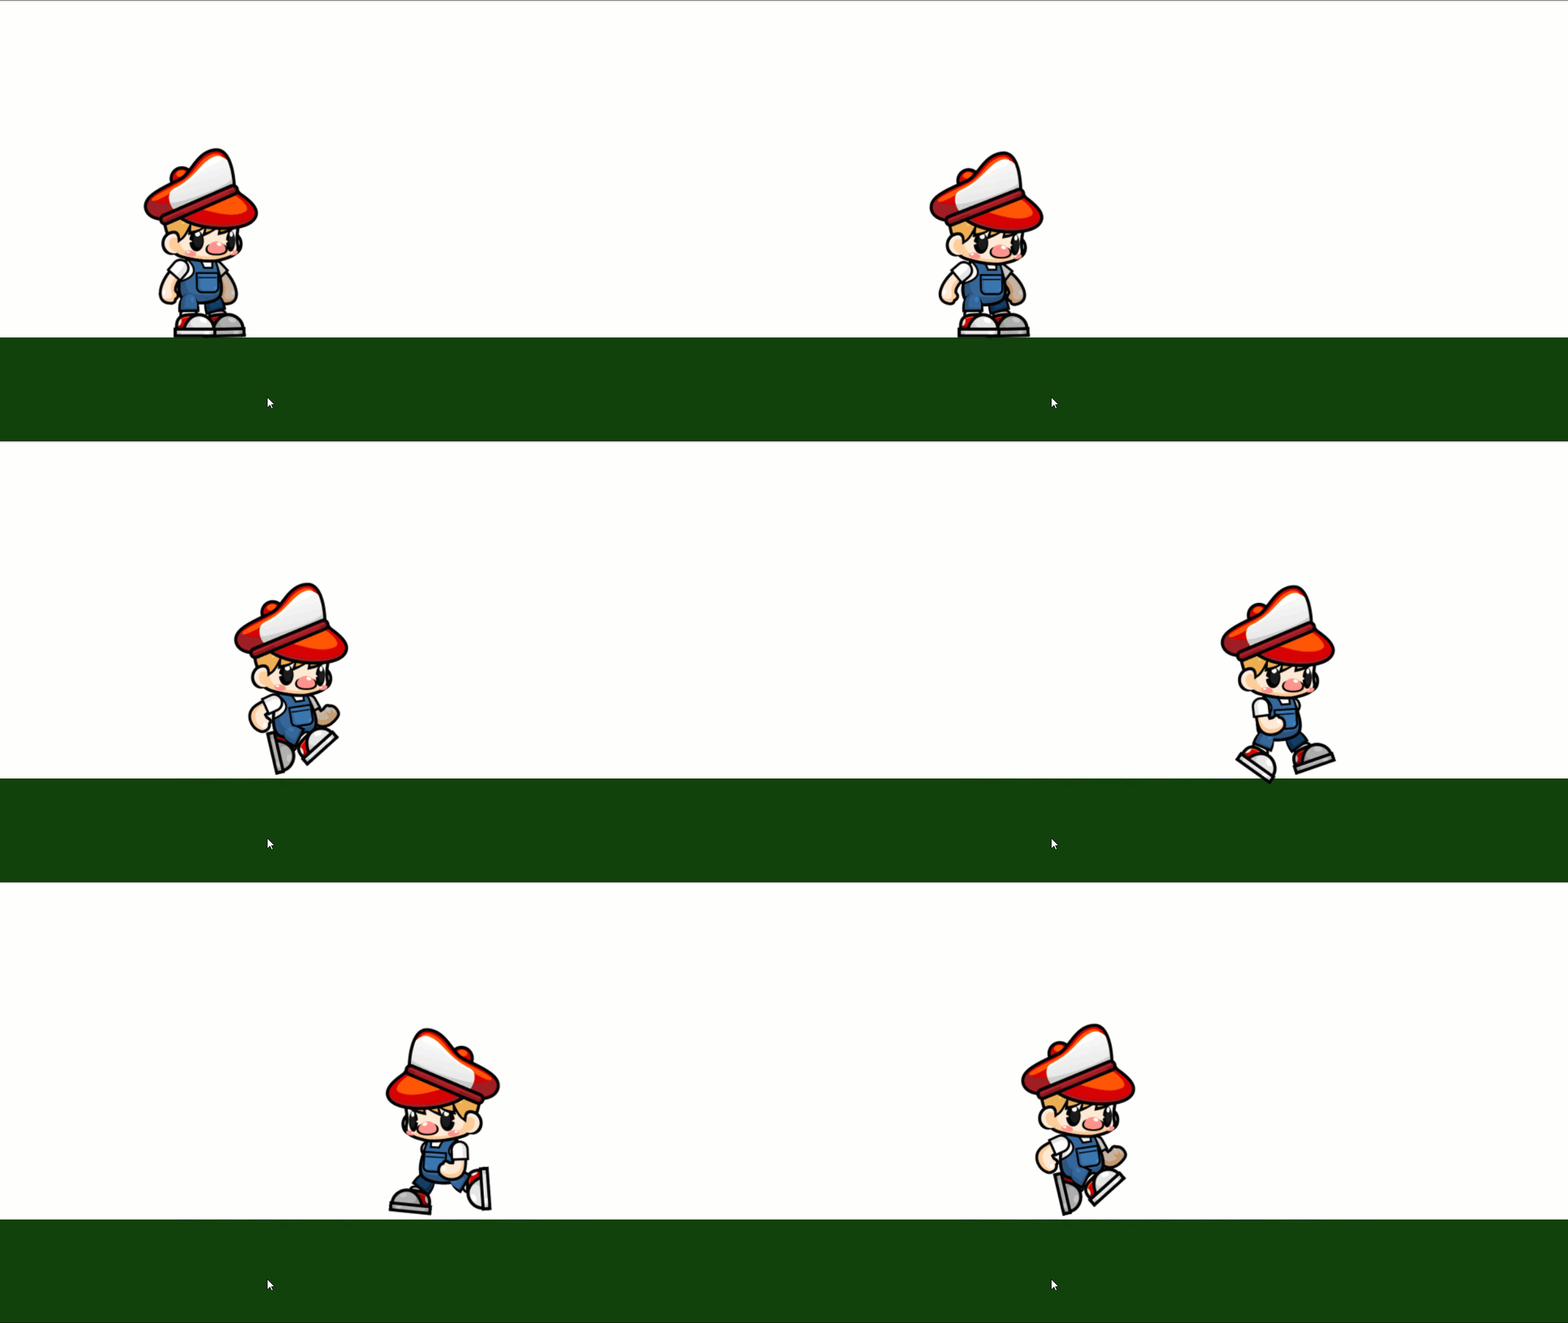
What we just saw:
- How to create a new project
- Add objects
- Add and edit animations
- Add Events
- Create conditions and actions
This guide will serve as the basis for creating any game. In the next post we will see how our character can jump, crouch and pick up objects.
I will leave a folder in Drive with all the resources used. Try to make the other animations that I leave in the folder and share it in the comments. Any questions they have, you can also write it with pleasure I will answer them.😉
Excellent digital artwork @osmerj, very interesting how games are created. We need more of these works in our community !!
Downvoting a post can decrease pending rewards and make it less visible. Common reasons:
Submit
Thank you @osmerj for giving the community this opportunity to learn how to create games, it is interesting to create the characters, greetings.
Downvoting a post can decrease pending rewards and make it less visible. Common reasons:
Submit
Wow.. Great tutorial to learn animating characters, very well detailed steps.
Downvoting a post can decrease pending rewards and make it less visible. Common reasons:
Submit
Thanks brother
Downvoting a post can decrease pending rewards and make it less visible. Common reasons:
Submit
Excellent animation, something beyond the paper. Digital creativity.
Downvoting a post can decrease pending rewards and make it less visible. Common reasons:
Submit
Thanks Cindy👍
Downvoting a post can decrease pending rewards and make it less visible. Common reasons:
Submit
Hello @osmer, welcome to Create you, with your tutorial, very good idea. Thanks for sharing it with us.
Downvoting a post can decrease pending rewards and make it less visible. Common reasons:
Submit
¡Parecía más difícil de realizar! Gracias por el tutorial, Osmer...
Downvoting a post can decrease pending rewards and make it less visible. Common reasons:
Submit
Gracias! Si solía pensar lo mismo. Gracias a estas plataformas que nos hacen el trabajo mas fácil. Podemos realizar todo sin saber de códigos, solo utilizando la lógica.
Downvoting a post can decrease pending rewards and make it less visible. Common reasons:
Submit
You can do so much, just by imagining. Your work is great.
Downvoting a post can decrease pending rewards and make it less visible. Common reasons:
Submit