Hello steemian friends, in the previous week we have learned how to create a blogger account for Amazon affiliate marketing, now it is time for us to continue how to create an Amazon affiliate account as given in this course guide.
But before we complete all the tasks given in this week's course, the best step is that we have to update the blog display theme because considering the theme last week has some problems.
✍️ Create Your Amazon Affiliate Account |
|---|
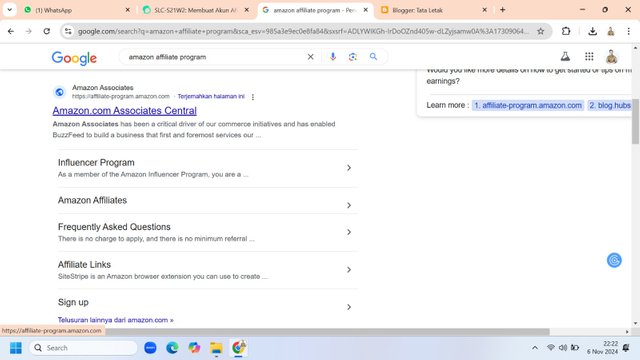
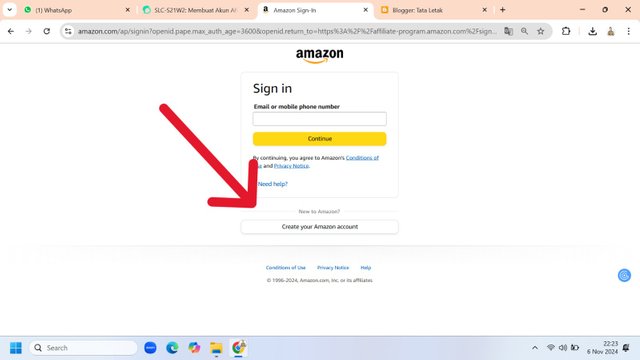
Next I immediately created an Amazon affiliate account, the first step I opened the browser on Google and immediately did a search for "Amazon Affiliate Program," after successfully entering the Amazon dashboard page I then chose the Sign Up menu, then it will appear like the following page then I chose "Create Your Amazon Account," here I filled in some of the required information such as email and then verified the email to get an OTP code.
 |  |
|---|---|
| 👆 | 👆 |
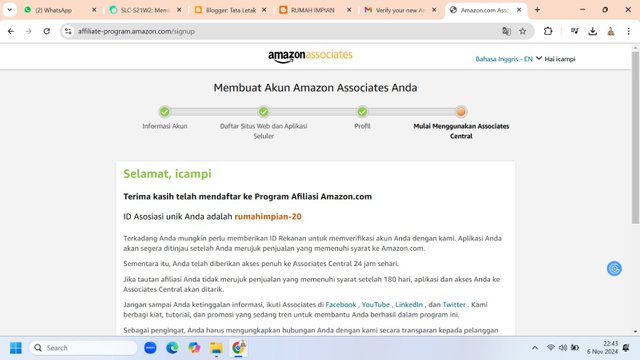
After successfully verifying the email I can then directly log in to the Amazon Affiliate page, then I need to fill in several stages of the required information, such as account information, register a website, and fill in the website profile. After completing all these steps, the information will appear "Thank you for registering with the amazon.com affiliate program," if you are at this stage then the entire Amazon affiliate registration has been ✅ successful.
| Fill in account information 👉 | 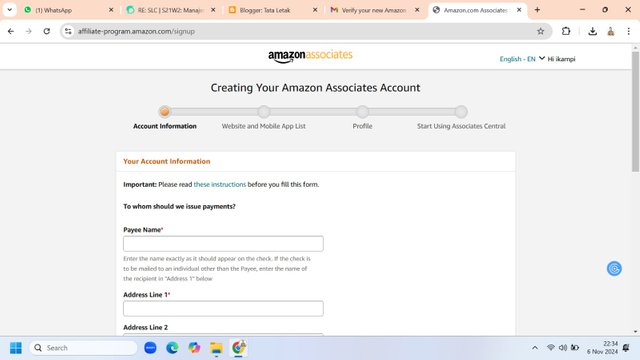 |
|---|---|
| Registering a website 👉 | 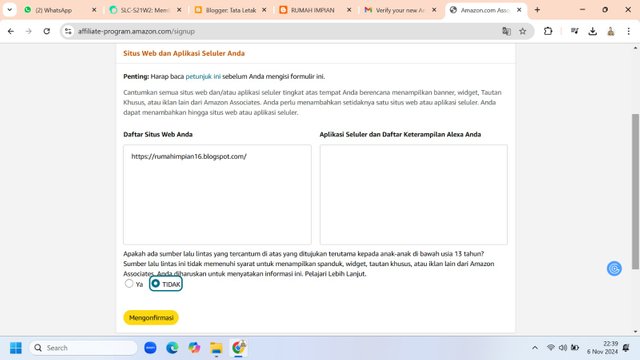 |
| Filling in the web description 👉 | 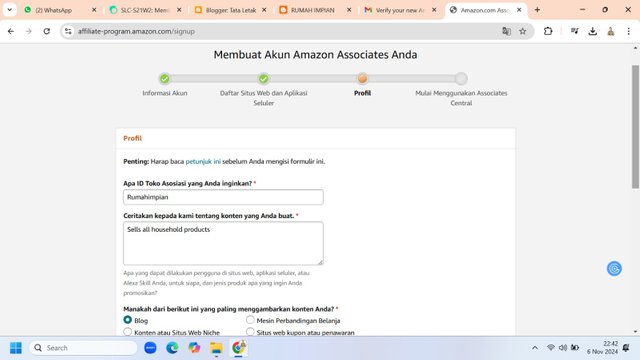 |
 |
|---|
| 👆 Account created successfully |
⛳ Register Products on Your Blog |
|---|
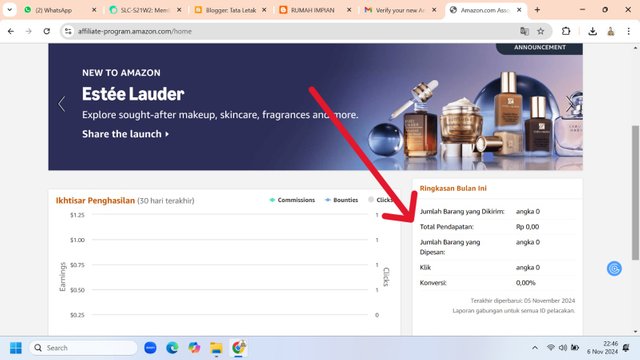
Main page, on this page we can see a summary of income
The next step is to log in to the amazon account that has been successfully created, then a menu will appear on the first page where on this menu several summaries of the income we have this month are displayed, of course I don't have any income yet because I have just finished the account creation process. We can see it on the right side of this page.
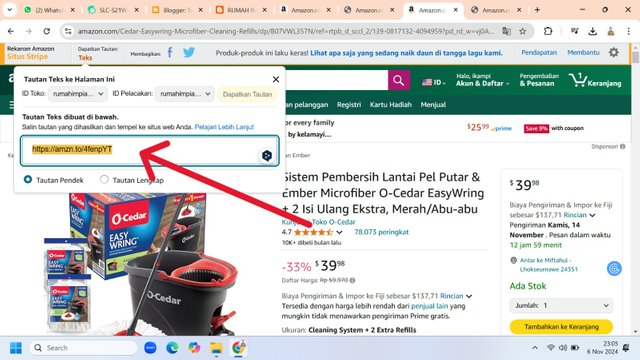
Get affiliate links
The next step that I do and is to open the Amazon.com page then choose the product that I want to market on the blog that I have, here I already have a number of items that will be marketed, namely floor mopping tools, CCTV cameras, and simple sports equipment.
After selecting several products, I then took the affiliate link to the product and added it to my blog. The method is very easy, on the blog post menu here I choose “HTML view,” after the view opens then we need to find and edit several parts, especially in the “View at Amazon” section replaced with “Buy Now", then in the "Javascript" section removed and then replaced by pasting the affiliate product link obtained on the Amazon.com Affiliate website.
My Blog Links
| First steps 👉 | 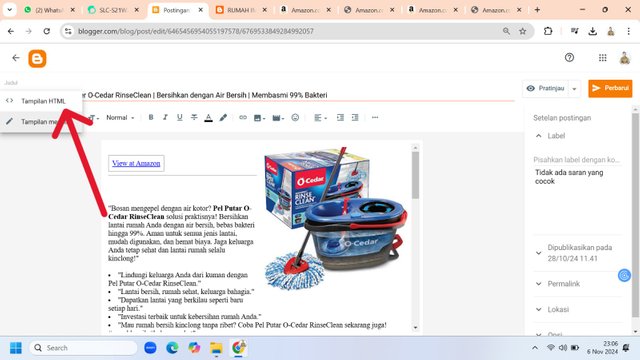 |
|---|---|
| Step two 👉 | 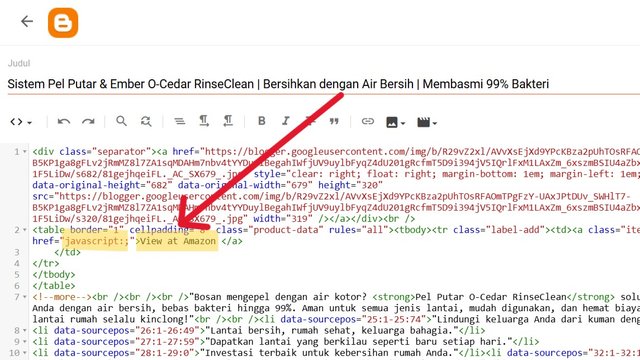 |
| Step three 👉 | 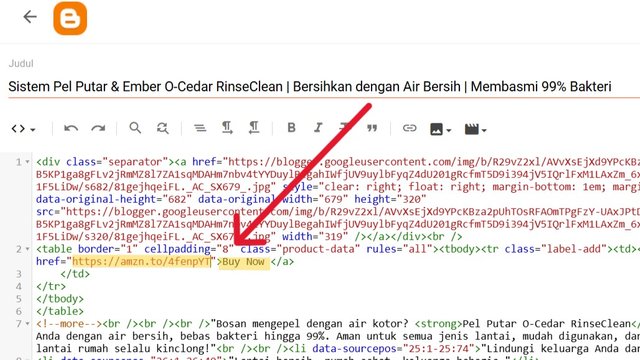 |
🙋♂️ Determine your Niche |
|---|
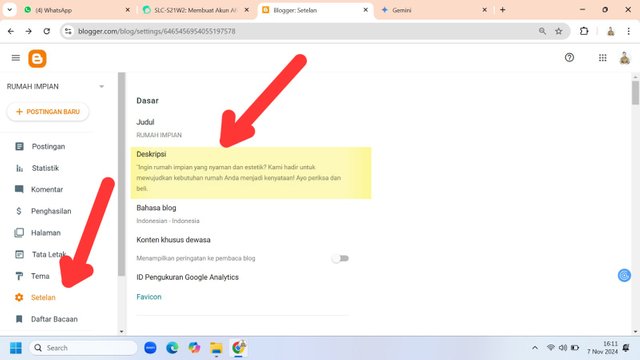
Niche can be written in the blog description column
From the beginning of creating a blog I have determined the title of the blog by giving the name “Rumah Idaman” meaning that this will be a special blog containing household supplies. I have specifically added a niche about my blog in the settings menu of this blog, so that everyone can read this blog description. I think household supplies are items that are always in demand by many people, especially women. I'm sure if you focus on household products, it will be successful and have many buyers.
In addition, the products I recommend will certainly be very useful because I will always conduct surveys and rigorous examination of each buyer's review, if I am very confident that this product is useful and of good quality then I will add it to my blog so that those who buy will never feel disappointed.
🔎 Register Your Blog on Google Search Console |
|---|
 |
|---|
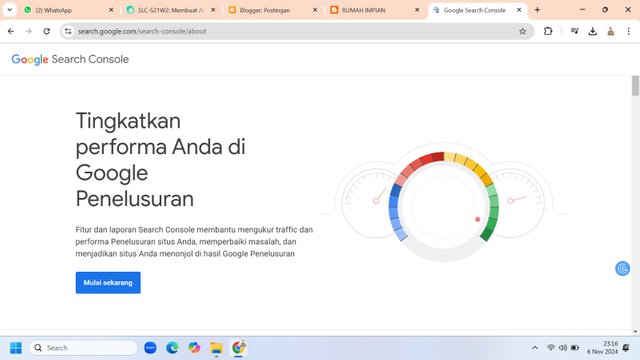
| 👆 Google search engine homepage view |
I have been on the Google Search Console (GSC) page, the main purpose of registering my blog here so that the blog that has been created can be found or indexed by the Google search engine, remember that this is very important.
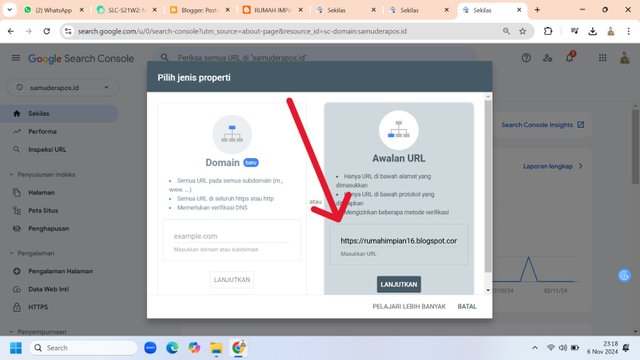
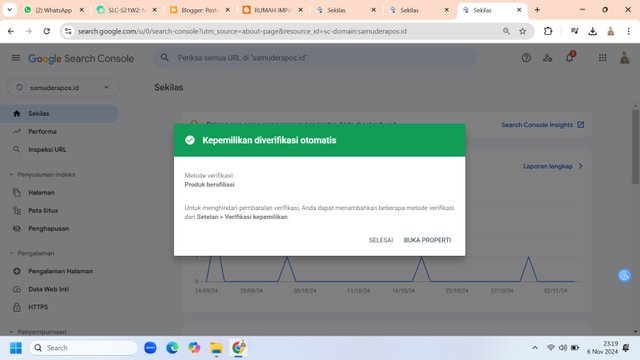
The next step “Choose start now” and log in with the email you used to create the blog, then select “Add property” then paste the blog link, then select “Continue.” Next wait for the process for a few seconds then a notification will appear “Ownership is automatically verified ✅” then click finish.
 |  |
|---|---|
| Process 👉 | Successful ✅ |
If you are at this stage, it means that you have successfully registered your blog with the Google search engine. This process may take several days or weeks for the blog to be found by the Google search engine.

Thus this article, I hope it is useful and inspires all who read it.I also invite you to participate in this contest. @fantvwiki @fadia @fajrularifst
Thank you for reading this post, don't forget to comment.
Thank you very much for sharing your assignment task with us! We truly appreciate the time, effort, and creativity you have put into completing this assignment. Your dedication to following the guidelines and your commitment to learning are evident, and it’s a pleasure to see your progress.
Below are the evaluation results, highlighting the strengths of your post and any areas of focus for improvement:
Teacher Recommendation and Feedback!
Great step-by-step guidance on setting up an Amazon affiliate account and Google Search Console. The clear instructions make it easy for readers to follow and create their own accounts.
Your focus on household supplies as a niche is smart. These items have broad appeal, especially for women. Sharing quality products after thorough research will build trust with your readers.
The use of images is helpful, but some descriptions could be more detailed. Adding concise captions will make the tutorial even more user-friendly.
Total | 8.8/10
Downvoting a post can decrease pending rewards and make it less visible. Common reasons:
Submit
Thank you very much for your feedback and rating.
Downvoting a post can decrease pending rewards and make it less visible. Common reasons:
Submit
https://x.com/mrzsuha/status/1854490747904622860
Downvoting a post can decrease pending rewards and make it less visible. Common reasons:
Submit