Hello 👋 Friends and fellow Steemkids lovers all over the world.
I trust we’re all doing great and staying safe too.
I’d really like to appreciate all the Admin and selfless team of the @steemkids Community for your efforts so far. May God bless you and replenish you all.
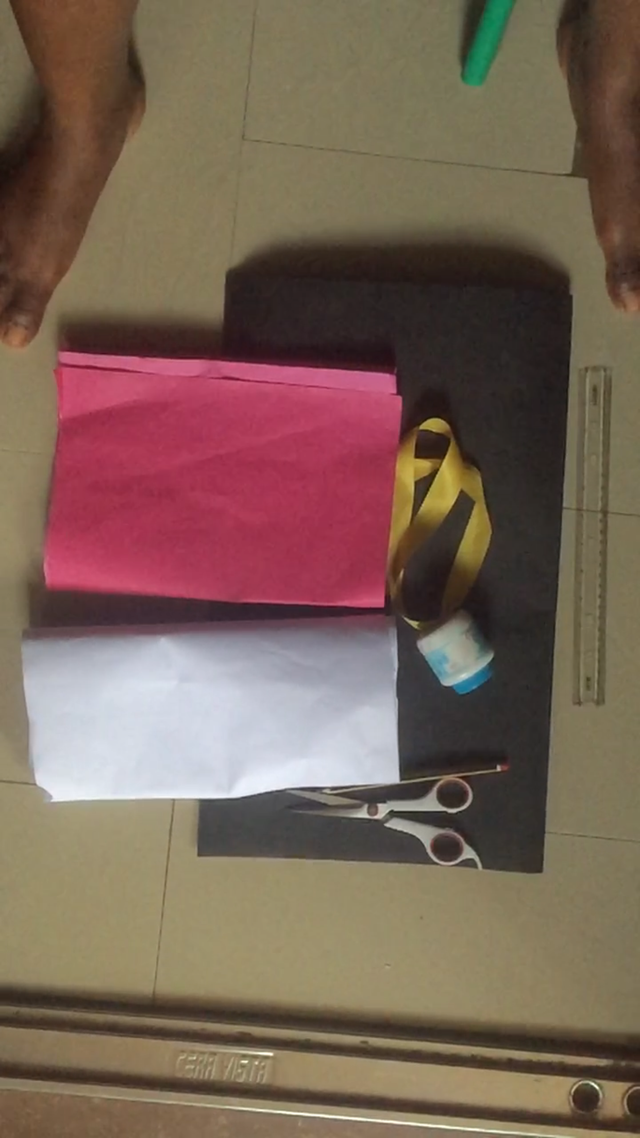
Still in the spirit of Summer Holiday which is gradually coming to an end, I wish to share a simple do it yourself (d i y) crafts that our children can do at home and find it quite useful for their pencils, erasers, books and some other personal stuffs.
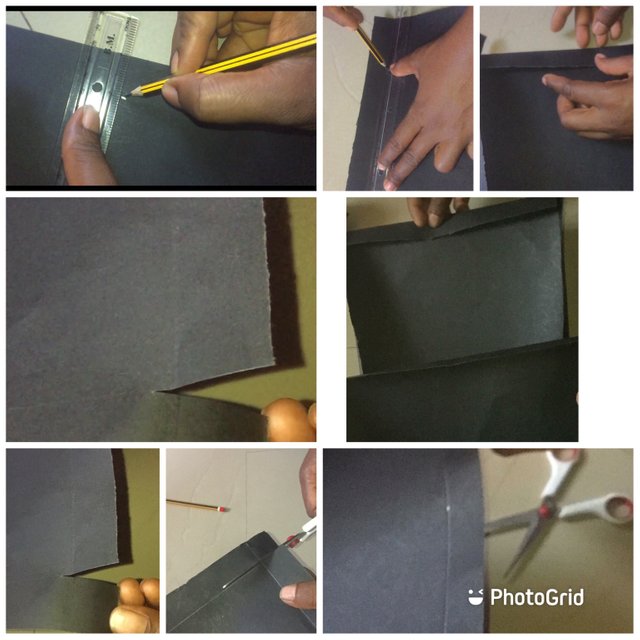
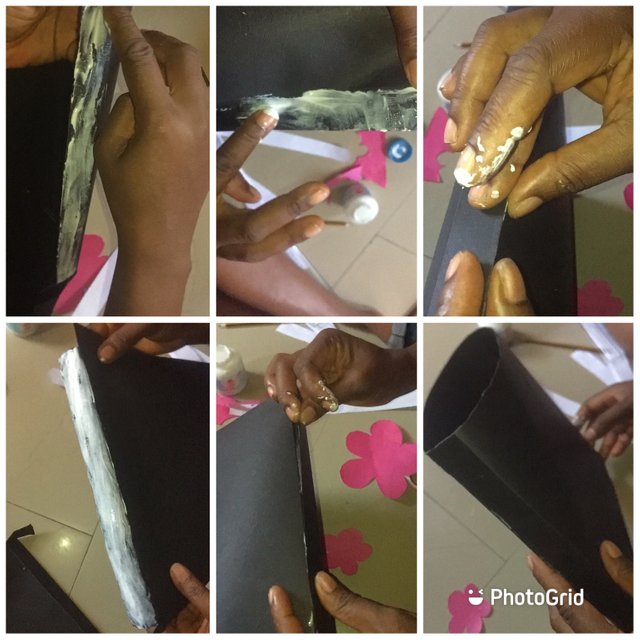
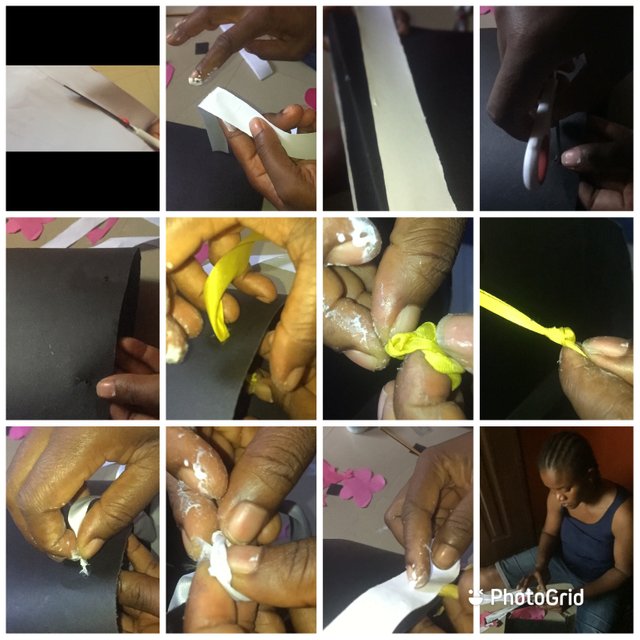
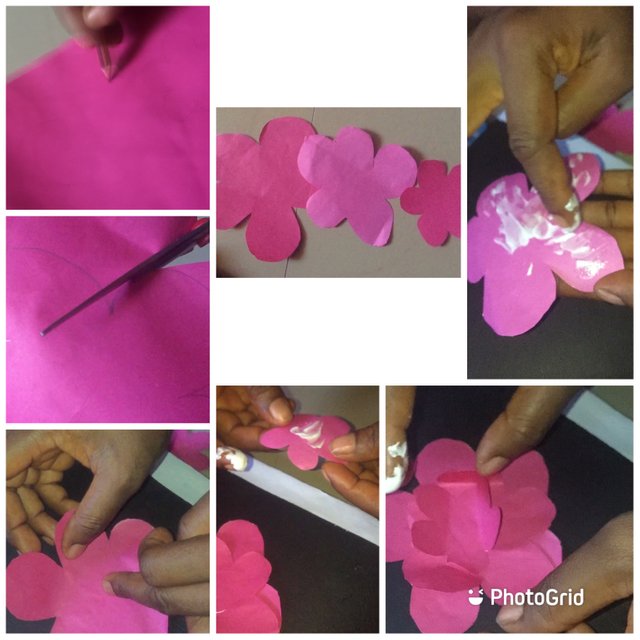
Now, with your ruler measure 1.5 inches from the two opposite sides and draw with your pencil to make some marks and fold neatly making sure the lines are straight. Next, cut off the points where the two straight lines joined on one of the papers to make space for lapping of the two papers. Use the tip of your scissors ✂️ to bore enough holes that your ribbon could pass through. Pass the ribbons from the outside through the holes and knot them inside your folder. Remember you cut two strips of white paper. Now, apply glue on them and glue one to the base of your bag and the other on the top covering the holes and the ribbons so as to make only the hand (ribbons) visible and your bag beautiful. You can stop at this point and start rocking your elegant bag but I love mine with little more beautiful touches and am making it for a very special person. So, I draw some flowers 🌸 with my pencil on my pink sugar paper, cut them out and neatly glue them to my bag. @steemkids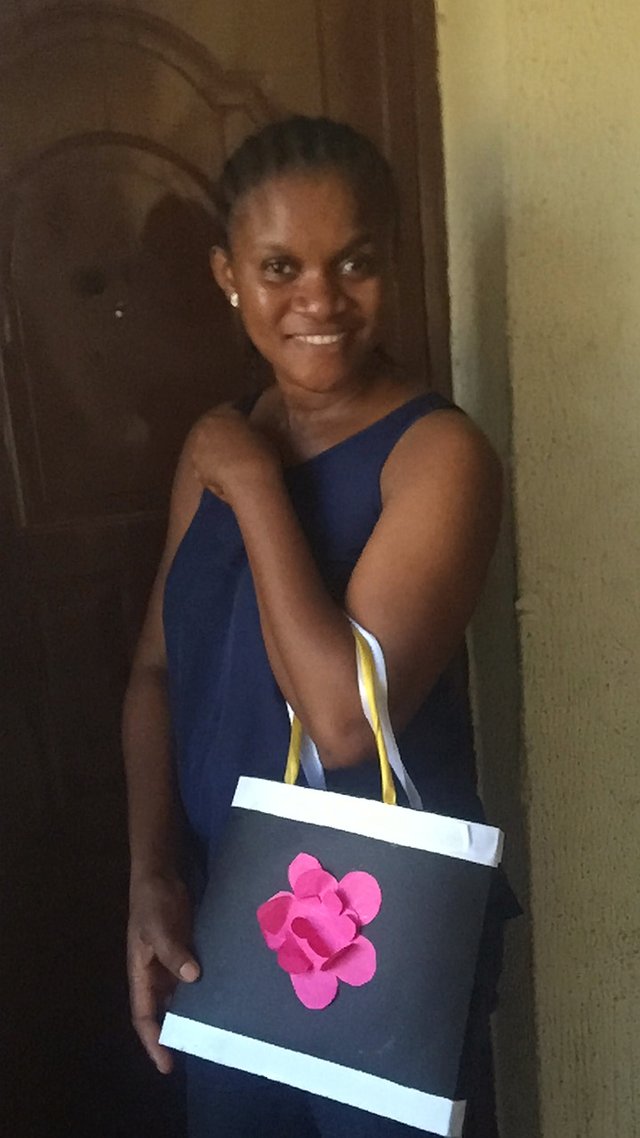
You can make any designs you want but I love flowers 💐. WOW! 😲. This is way too much. So beautiful 😍.
@ngoenyi Ma’am, this is for you. I hope you like it. Please, save all our @steemkids little stuffs inside it. 😁😁.

@ngoenyi
@focusnow
@bright-obias
@eliany
@meymeyshops
I love the bag, its so nice. Good work done
Downvoting a post can decrease pending rewards and make it less visible. Common reasons:
Submit
Thank you so much @daakye. I appreciate your kind words.
Downvoting a post can decrease pending rewards and make it less visible. Common reasons:
Submit
This is a beautiful and creative one, keep up the goodwork.
Downvoting a post can decrease pending rewards and make it less visible. Common reasons:
Submit
Thank you so much @steemkids for always giving me the opportunity to be a better me.
Downvoting a post can decrease pending rewards and make it less visible. Common reasons:
Submit
Congratulations @nneoma08 , your post has been selected for quality post of the day.
Downvoting a post can decrease pending rewards and make it less visible. Common reasons:
Submit
Oh Wow! This is wonderful!
Thank you so much @steemkids for your support. I am so so grateful.
Downvoting a post can decrease pending rewards and make it less visible. Common reasons:
Submit