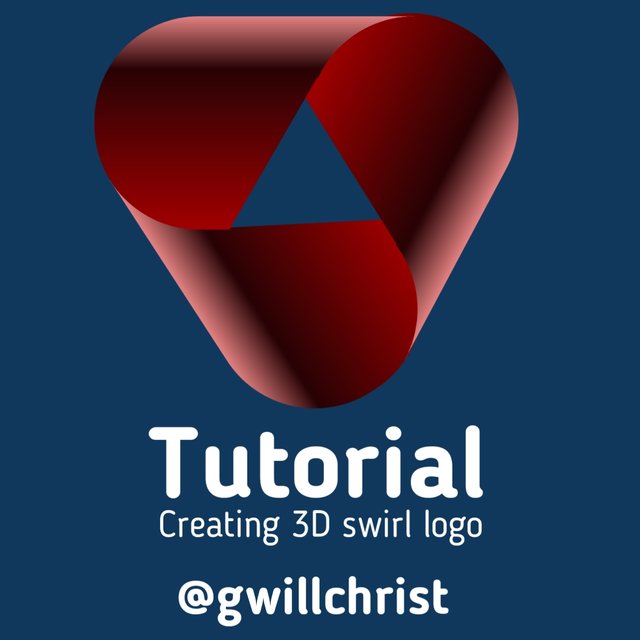
Greetings:
Good day my fellow steemians in this amazing community: @steem4nigeria
I believe we all are having a good day.
I thank @ngoenyi for creating this contest: My Lifestyle Content Choices WK23.
I salute @reminiscence01 and @cryptogecko for their kind support on my previous tutorial content.
I also want to sincerely thank @patjewell for her nice comments and good advice on my previous contest post.
I appreciate #krsuccess for kind advice in Creating good contents.
Tools:
∆ An Android phone (with at least 2gb ram)
∆ Pixellab App (It is available in google play store for download)
Step one (1):
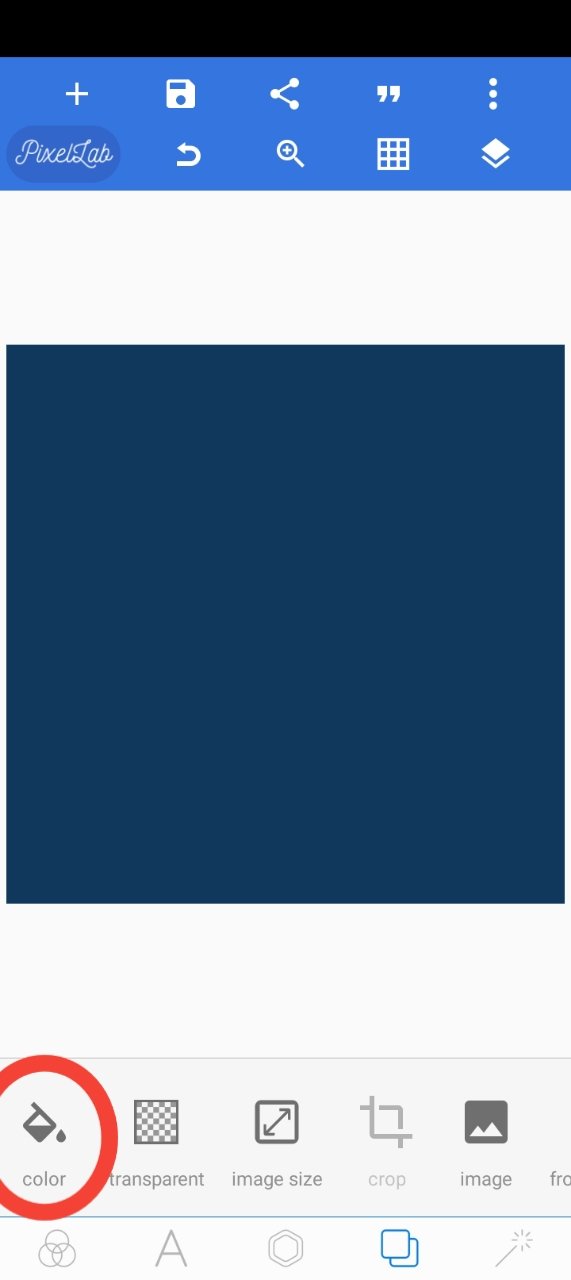
✓ Opened the pixellab app
✓ change its background colour to deep blue by clicking in the colour icon as seen above.
Step two (2):
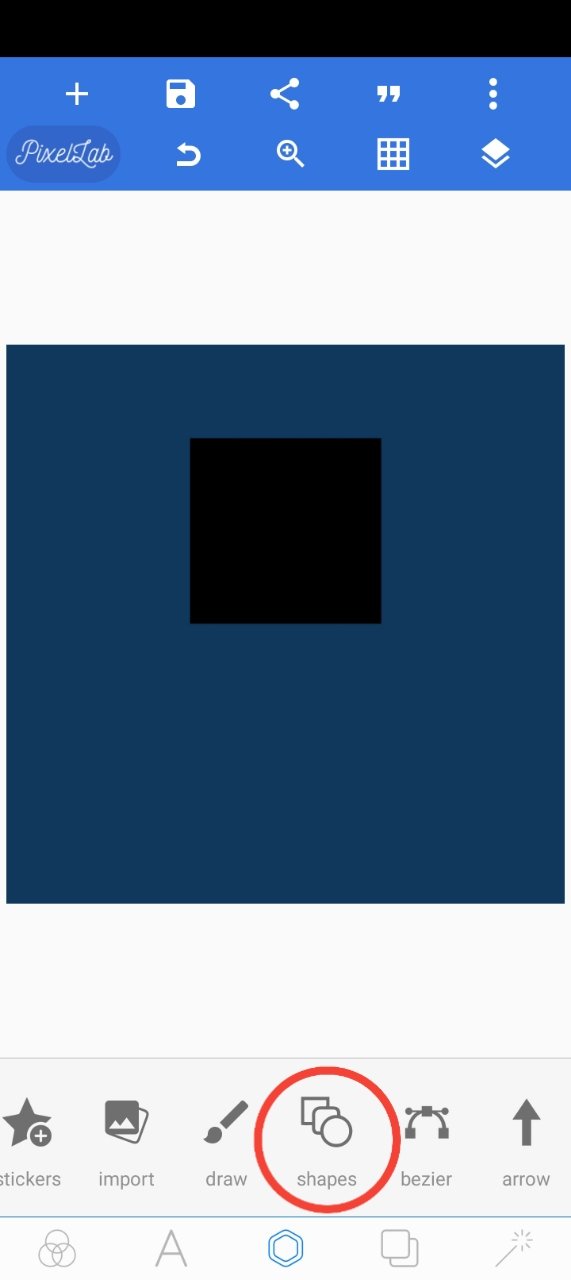
✓ I clicked on the shapes button as seen to
draw the black rectangle inside the page.
Step three (3):
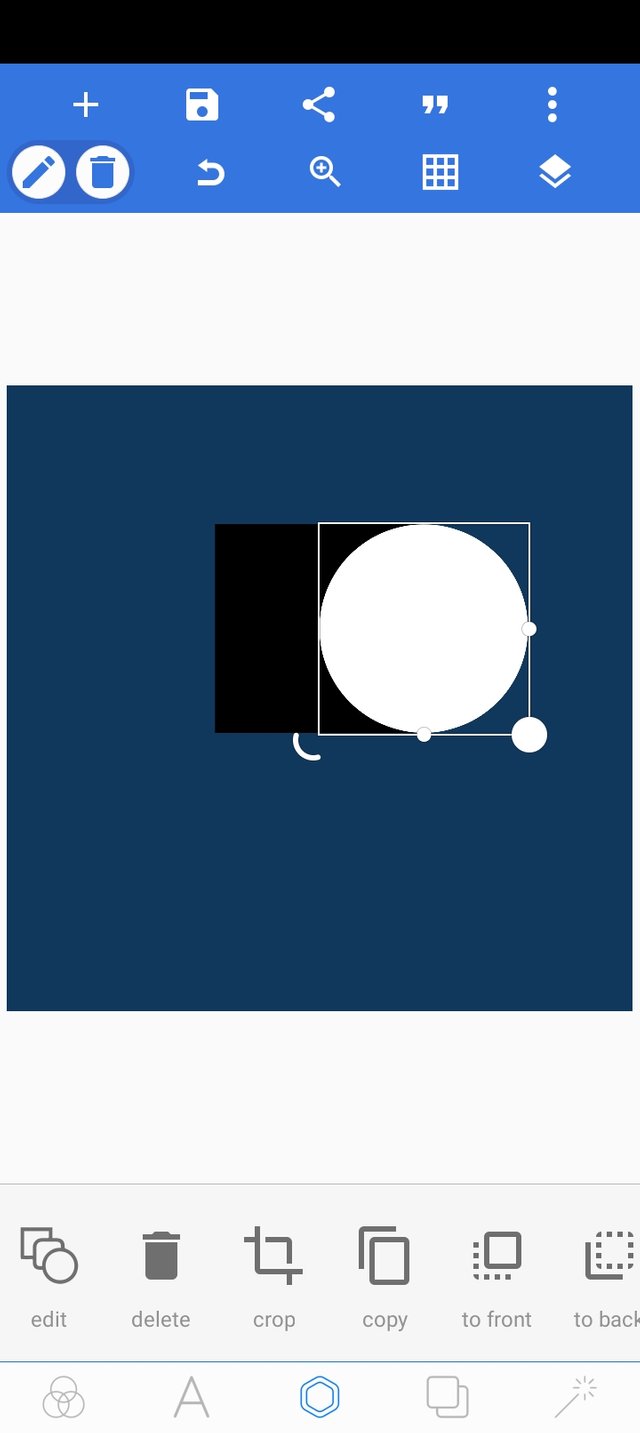
✓ I now draw a circle with white colour as seen - still using the shape button.
Step four (4):
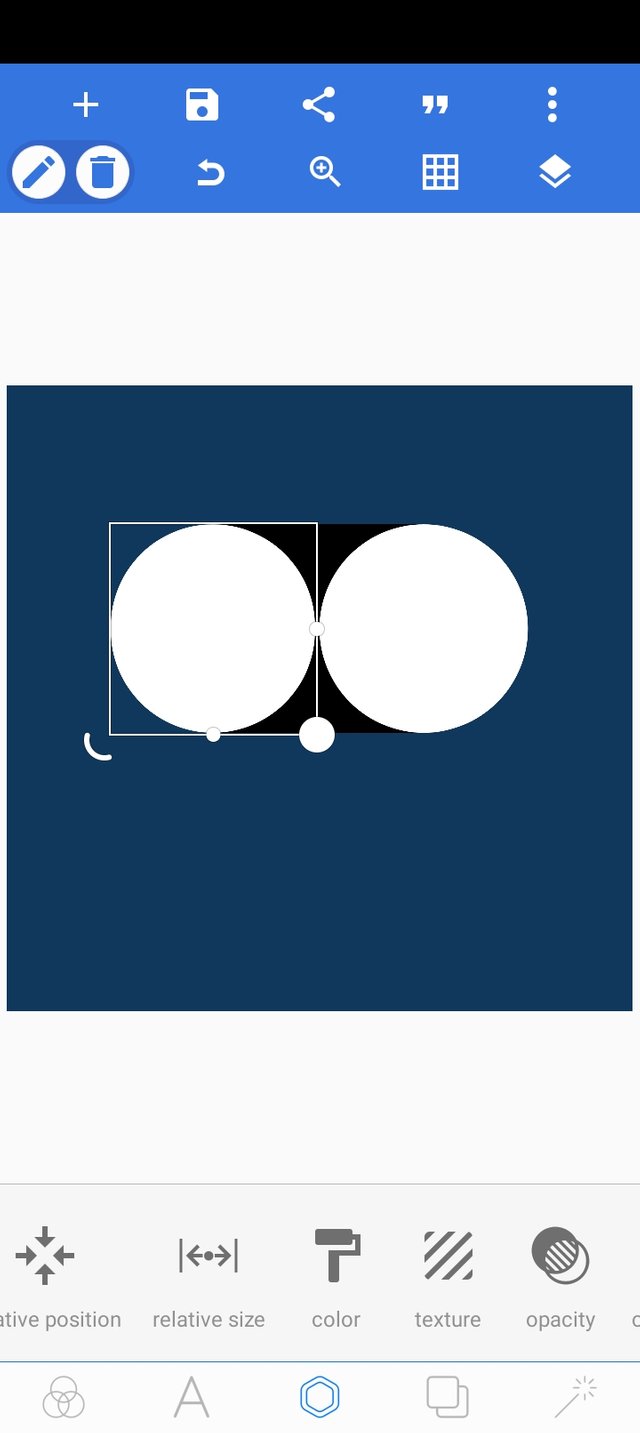
✓ I duplicate the with circle and place it on the left.
We now have two white circles.
Step five (5):
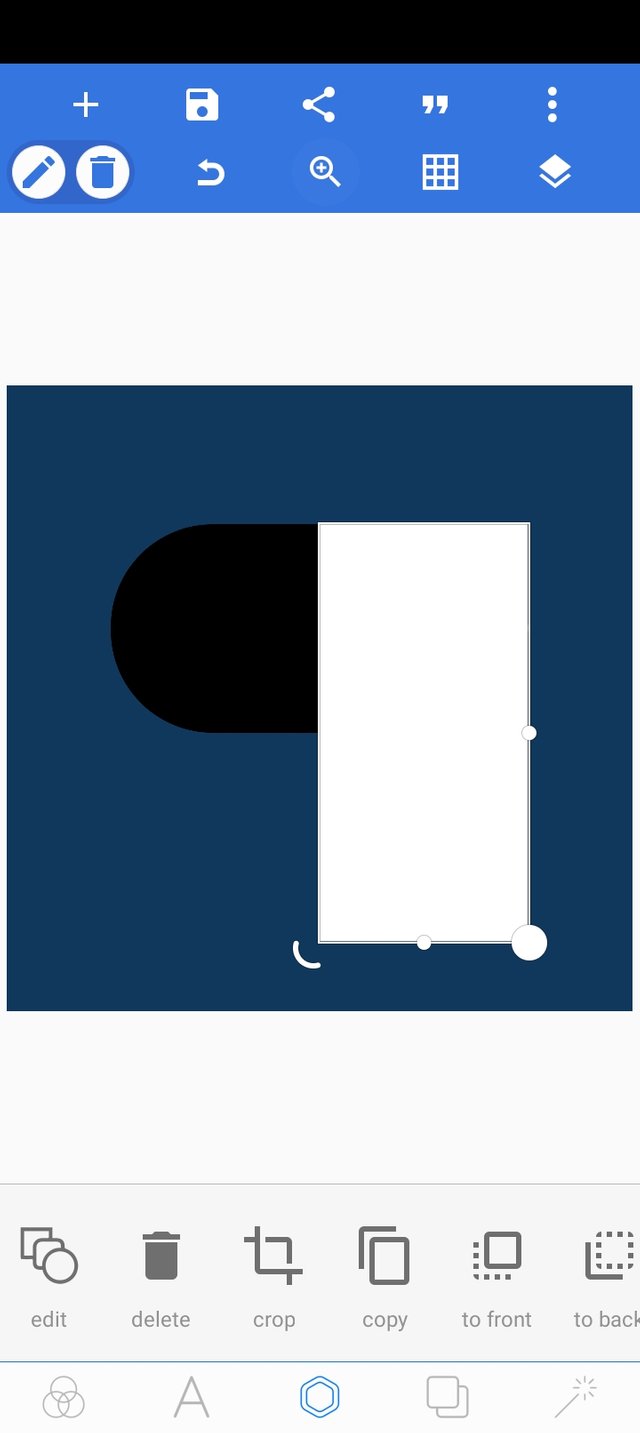
✓ I now draw a white rectangle down covering the white circle at the right.
Step six (6):
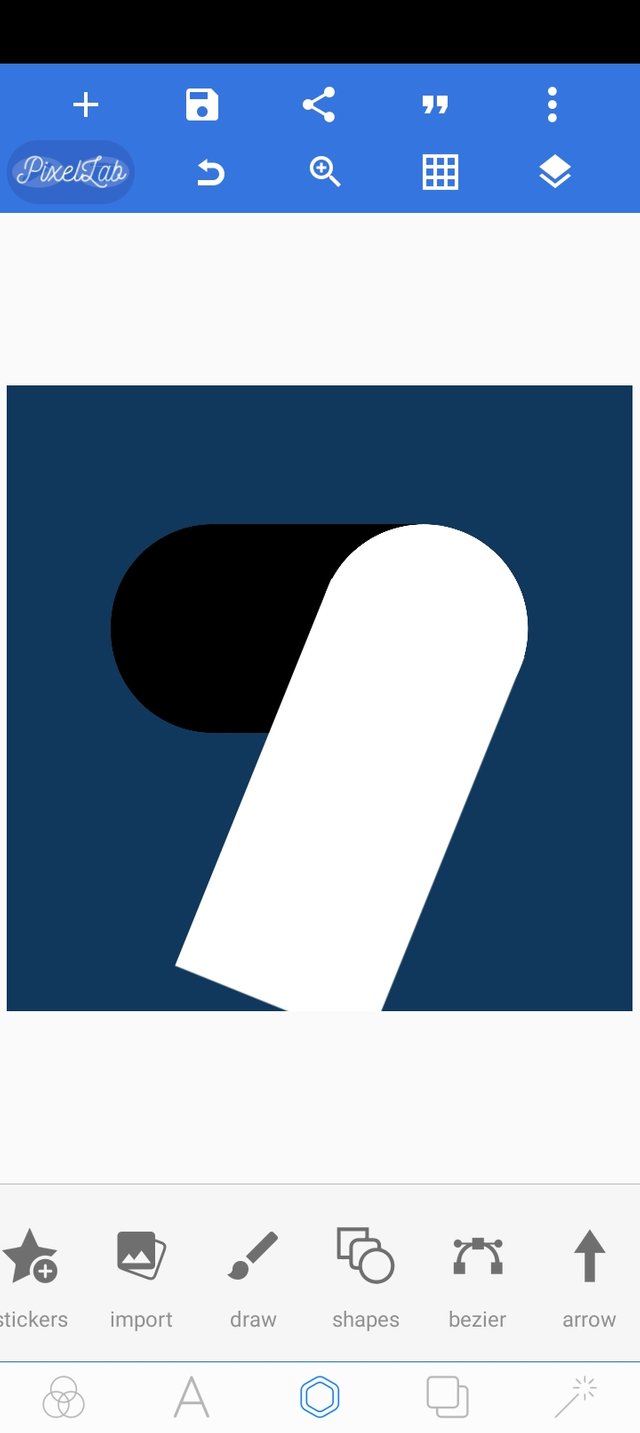
✓ I rotate the rectangle to fit in well in the circle.
Step seven (7):
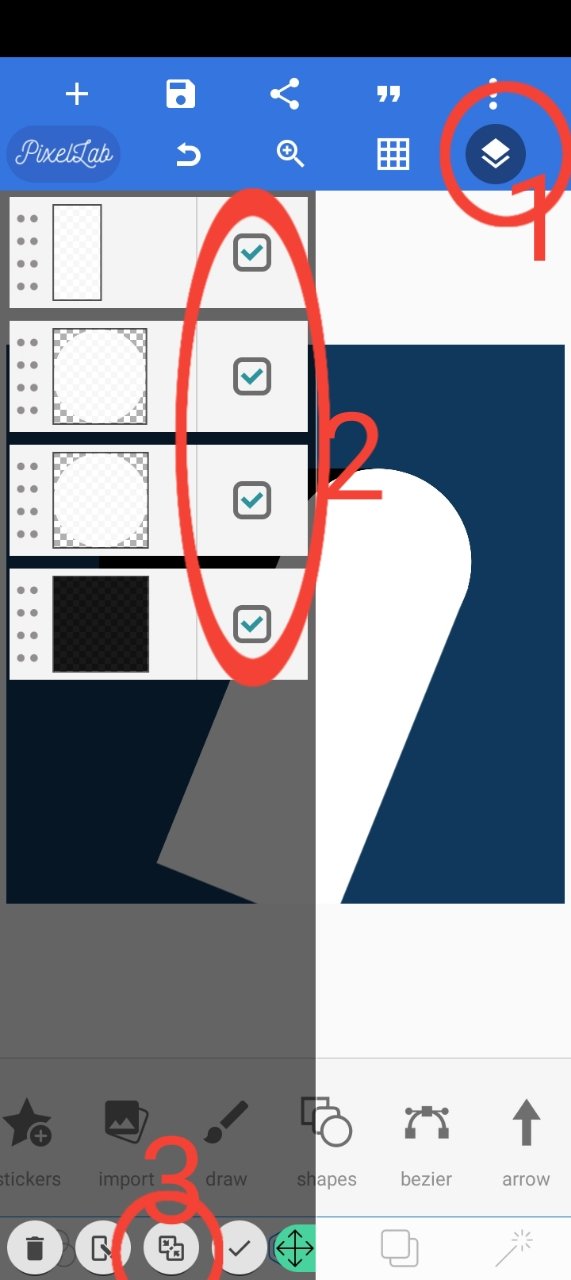
✓ I make the following selections (1, 2, 3) to merge all the object together as seen above.
Step eight (8):
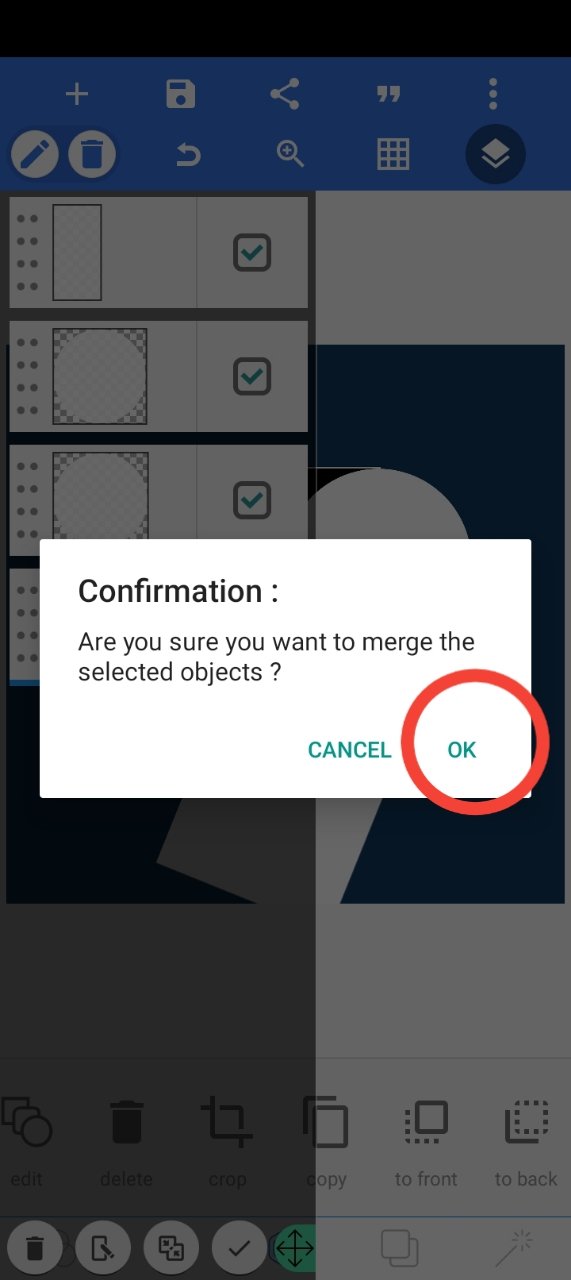
✓ A message box will pop up after clicking the merge button ( Wich is no. 3 in step 7) and the I'll click ok.
Step nine (9):
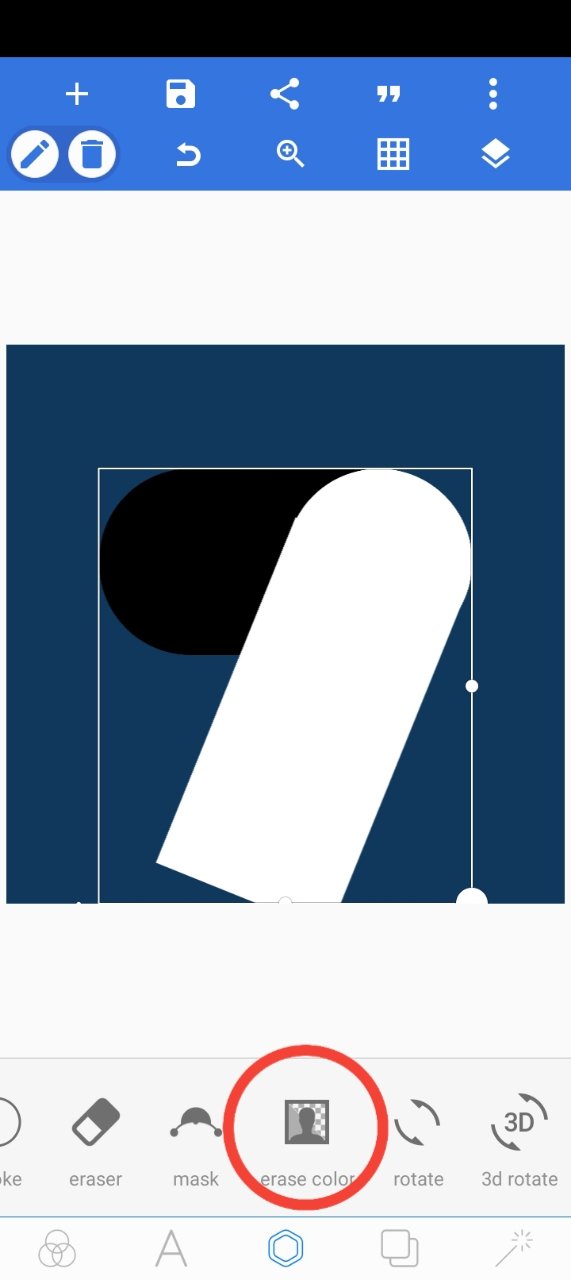
✓ at this point I'll click on the "erase background" button as seen above.
**Step ten (10):
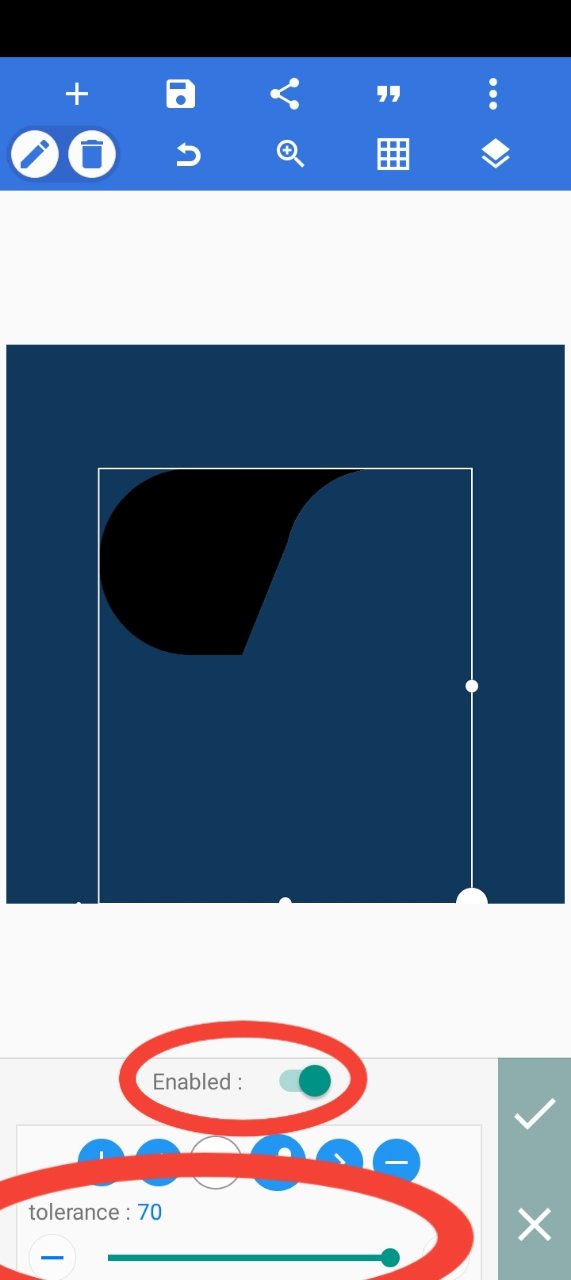
✓ After clicking in the erase background button,its properties will pop up
✓ I will click on enable
✓ increase and set the tolerance property to 70.
Step eleven (11):
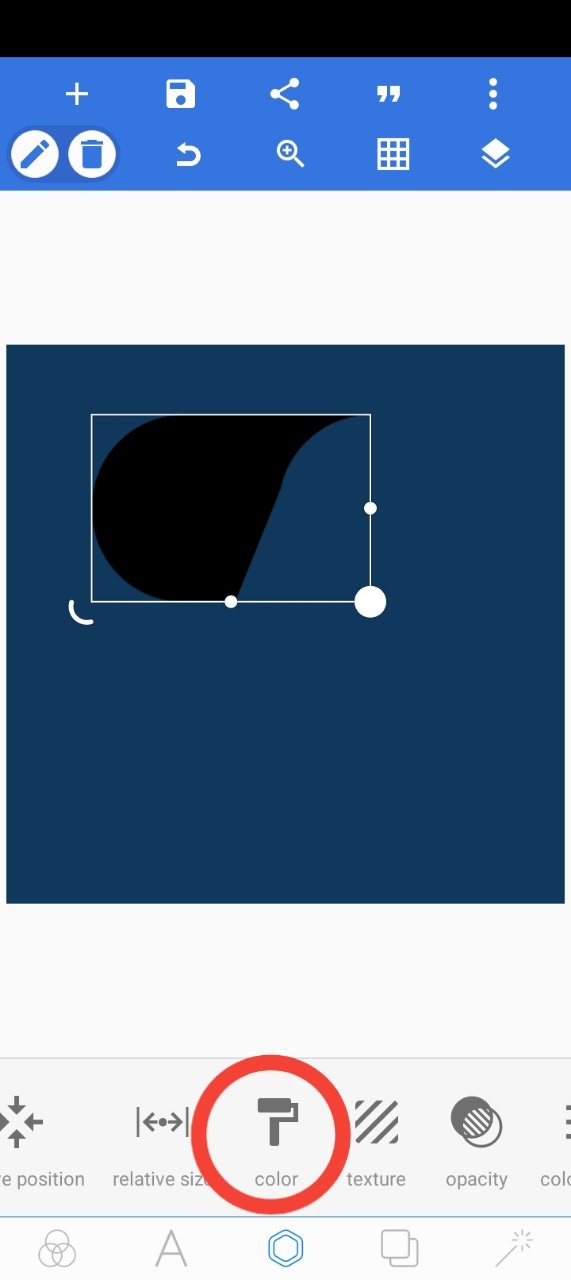
✓ I click on the colour button to change it to a gradient type.
Step twelve (12):
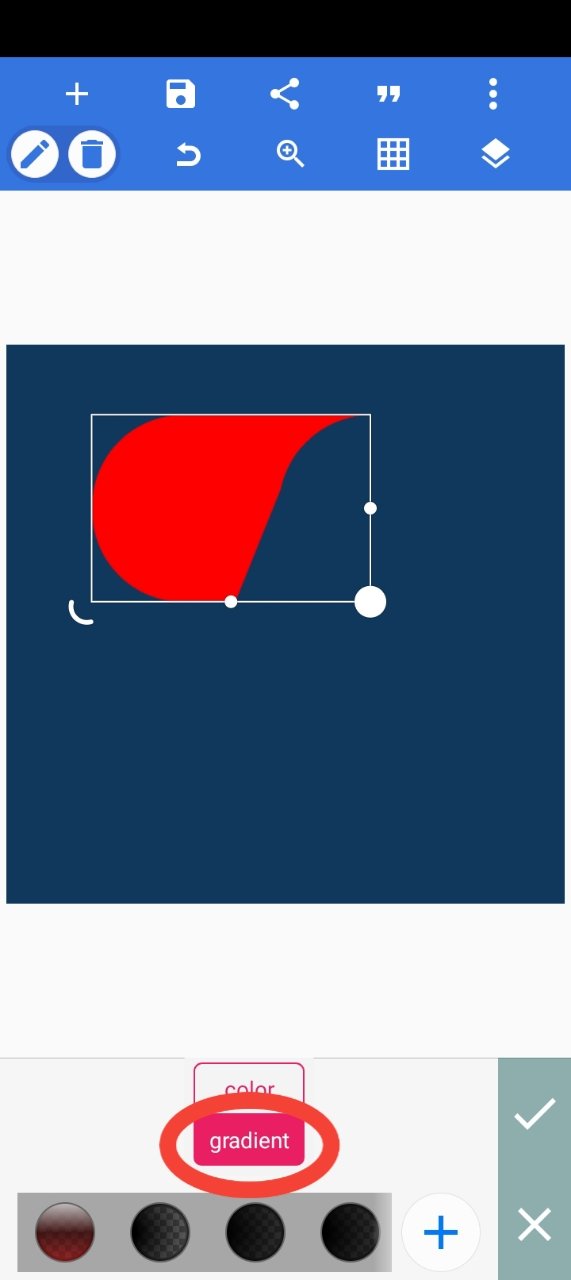
✓ I click on the gradient option.
Step thirteen (13):
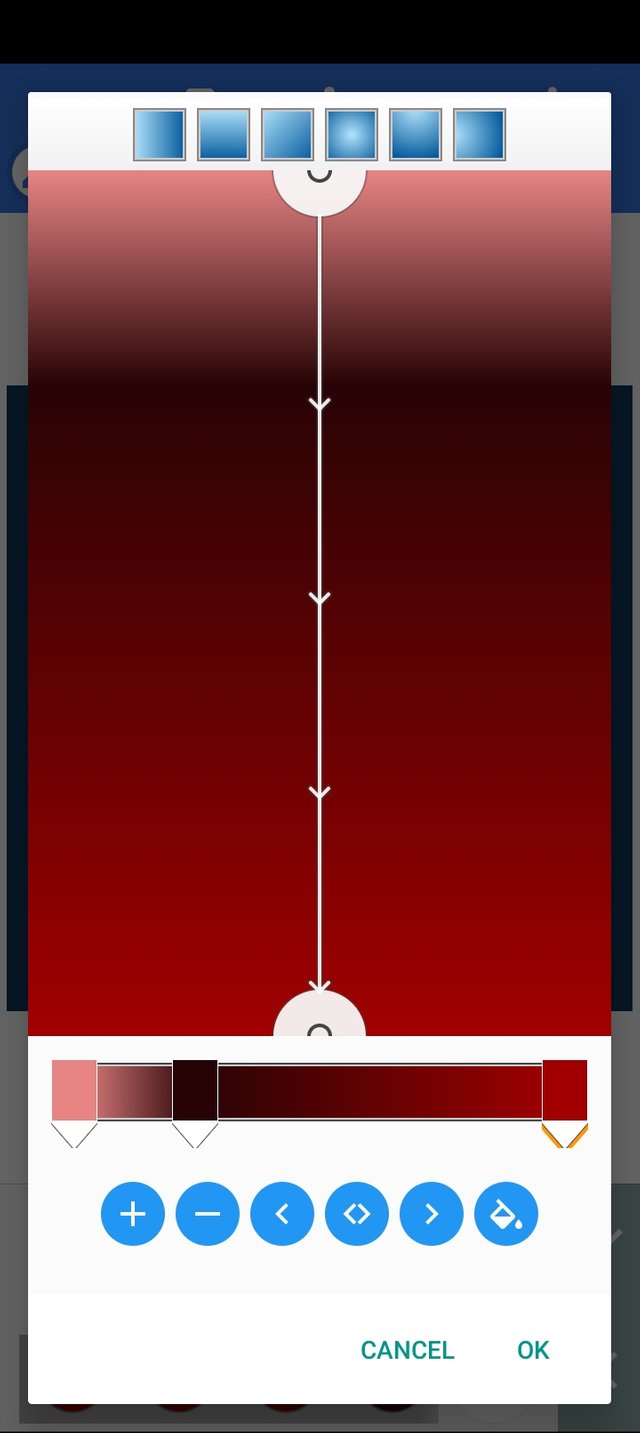
✓ I now set the gradient colour and click ok.
Step fourteen (14):
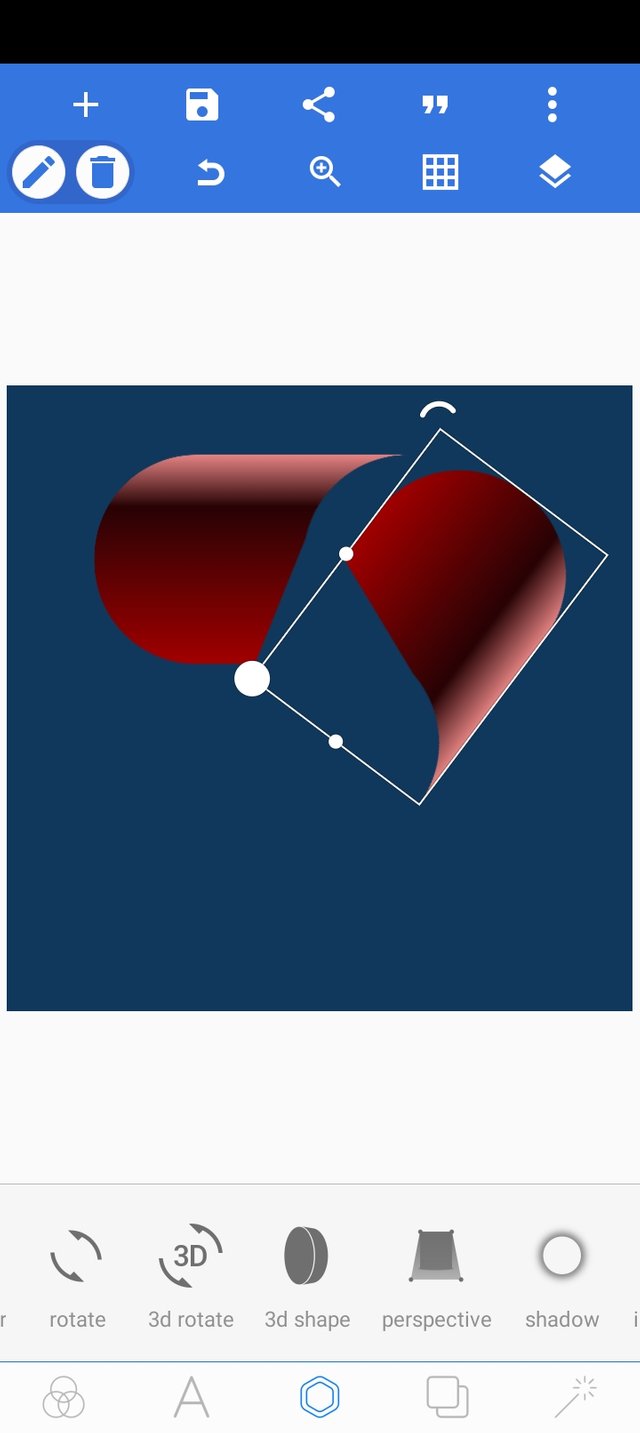
✓ after clicking ok, I'll now copy the preset shape and try rotating and positioning it to the first one
Step fifteen (15):
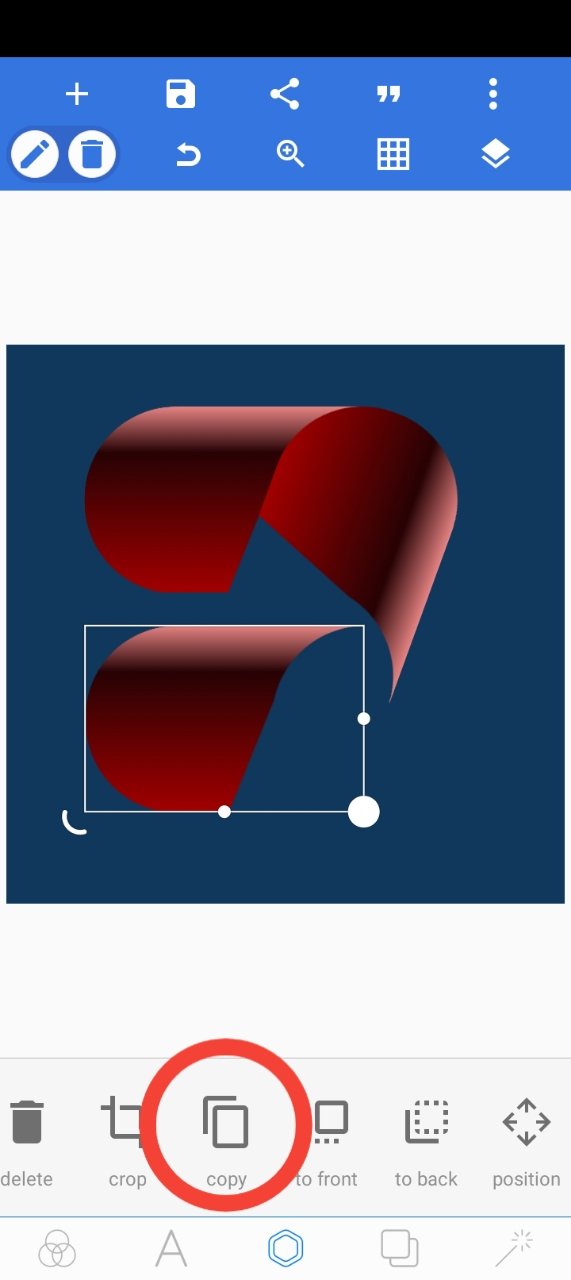
✓ after fitting it well to the first one, I click in the copy button as seen and it will be duplicated in page.
✓ I will rotate and position it well the two to take shape.
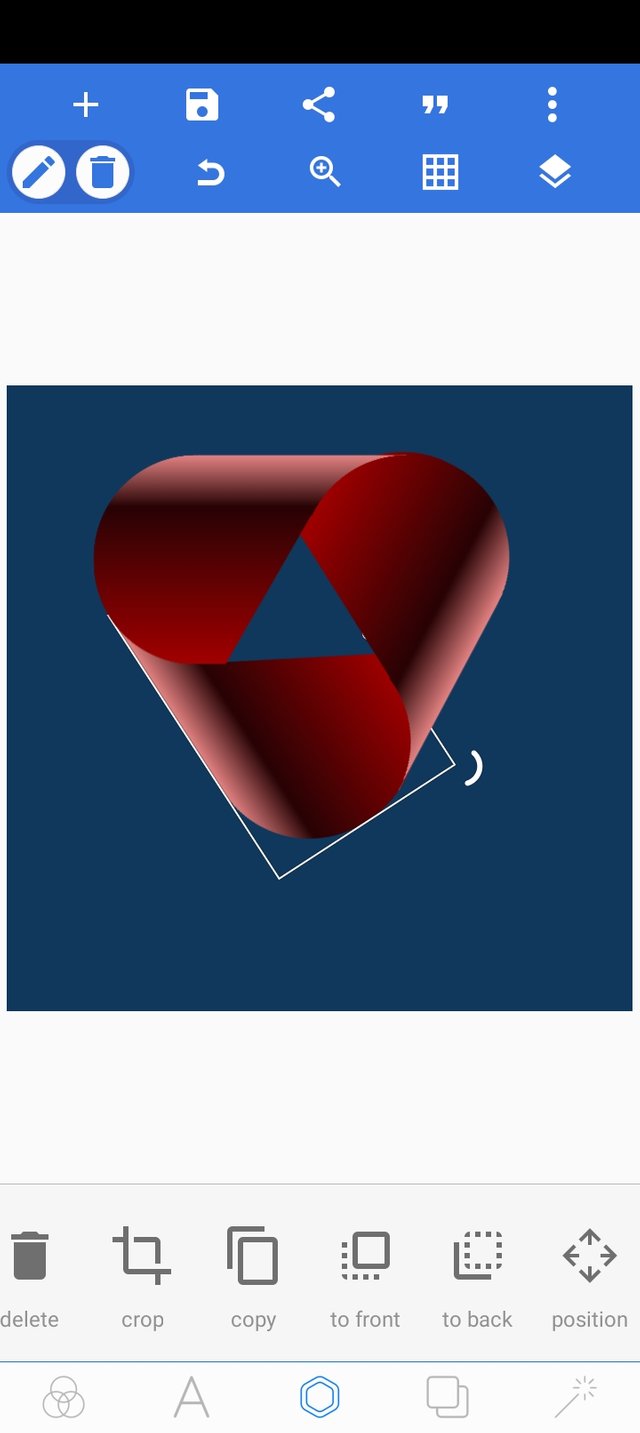
✓ this is his it is after fitting it in.
Step sixteen (16):
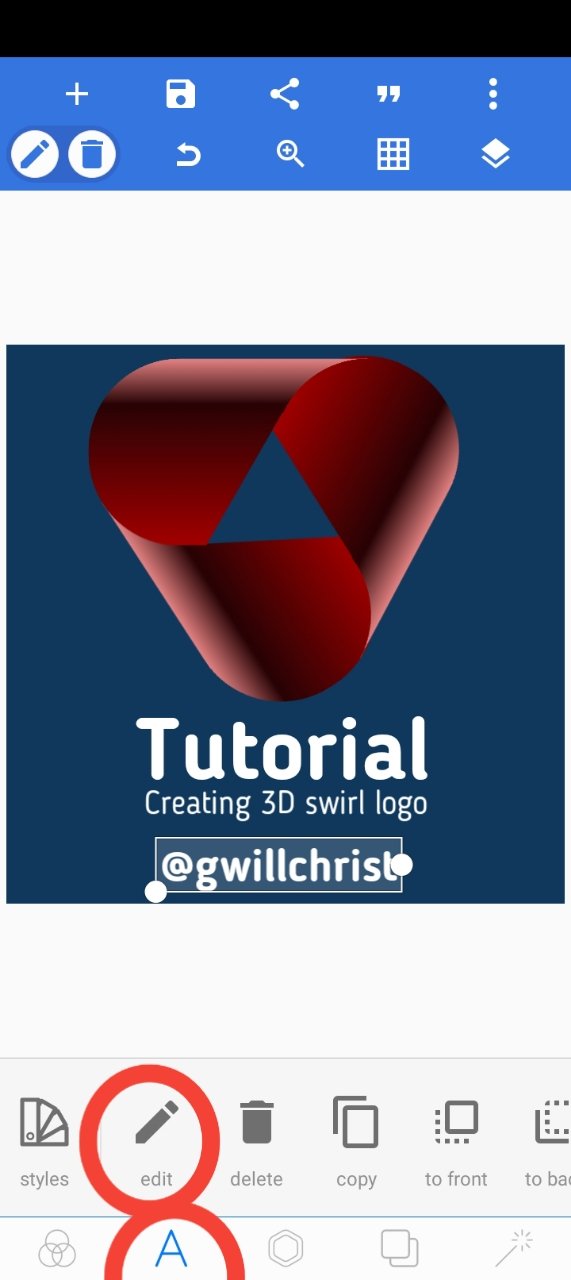
✓ finalizing everything, I now click on the text and edit button to write the text seen on my drawing Canva followed by my steemit username.
Downvoting a post can decrease pending rewards and make it less visible. Common reasons:
Submit
Curated By - @ripon0630
Curation Team - Team Newcomer
Downvoting a post can decrease pending rewards and make it less visible. Common reasons:
Submit
Nice teaching my friend. best wishes
Downvoting a post can decrease pending rewards and make it less visible. Common reasons:
Submit