[Tutorial] Diy: “Purse key ring with useful material." // "Llavero-monedero con material de provecho. "

in hive-148441 •  4 years ago 

Purse key ring with useful material.

Llavero-monedero con material de provecho.


Hello friends readers, today I will share with you a key ring with the figure of Peppa pig very pretty and it has no complication very easy to make.

Hola amigos lectores hoy les compartiré un llavero monedero con la figura de Peppa pig lindísimo y no tiene complicación alguna muy fácil de elaborar.


This key ring is especially for the little ones of the house since many of us know that they love the Peppa episodes and for that reason today I will share with you how you can make a detail with such a precious motive at home without having to go to the store.

Este llavero monedero es especialmente para las pequeñas de la casa ya que muchos sabemos que les encantan los episodios de Peppa y por esa razón hoy les compartiré como se puede hacer un detalle con un motivo tan preciado en casa sin necesidad de ir a la tienda.


Materials:

  • 1 Lock
  • Half sheet of pink eva rubber
  • Eva rubber scraps
  • 1 Scissors
  • Liquid silicon
  • 2 cold paint caps
  • Watercolor
  • Brushes
  • A little chain to hang it up

Materiales:
*1 Cierre
*Medio pliego de goma eva rosado
*Retazos de goma eva
*1 Tijera
*Silicón líquido
*2 tapas de pintura al frío
*Acuarela
*Pinceles
*Una cadenita para colgarlo


Here I leave you with the steps to obtain the beautiful purse key ring.
Aquí los dejo con los pasos para obtener el hermoso llavero monedero.


Step 1: The first thing I did was to take the zipper and put silicone on the fabric part as you can see in the picture.
Paso 1: Lo primero que hice fue agarrar el cierre y colocarle silicón en la parte de tela como se aprecia en la imagen.


Step 2: After having the silicone seal, I grabbed the two lids and stuck them on the edges, being covered on the sides by the seal.
Paso 2: Después de tener el cierre con silicón agarre las dos tapas y las fui pegando por los bordes, quedando cubierta a los lados por el cierre.


Step 3: I then proceeded to open the keychain purse to verify that it opened smoothly.
Paso 3: Luego procedí abrir el llavero monedero para verificar que abriera sin complicación.


Step 4: In this step I preceded taking the half sheet of pink eva rubber and started drawing the two faces of peppa that I will use for the key ring purse.
Paso 4: En este paso precedí agarrar la media hoja de goma eva rosada y comencé a dibujar las dos caras de peppa que utilizaré para el llavero monedero.


Step 5: The drawing we want is ready, in this case Peppa we cut out.
Paso 5: Ya listo el dibujo que deseamos en este caso Peppa recortamos.


Step 6: Then I take the piece of deep pink eva gum and pull out Peppa's nose and cheeks as you can see in the picture.
Paso 6: Luego agarro el retazo de goma eva rosado intenso y saco la nariz y las mejillas de Peppa como apreciarán en la imagen.


Step 7: With the white color of eva rubber take out the eyes of Peppa.
Paso 7: Con el color blanco de goma eva saque los ojos de Peppa.


Step 8: After having all the pieces chopped up I started blurring Peppa's face to give him a better view.
Paso 8: Luego de tener todas las piezas picadas comencé a difuminar la cara de Peppa para darle una mayor vista.


Step 9: Once all our pieces are ready, we warm them up with the iron to shape our character and start gluing everything in place.
Paso 9: Ya lista todas nuestras piezas le damos calor con la plancha para darle forma a nuestro personaje y comenzamos a pegar todo en su lugar.


Step 10: after having glued all the parts on Peppa's face we proceed to place a black dot on her white eyes.
Paso 10: luego de tener pegado todas las partes en la cara de Peppa procedemos a colocarle en los ojos blancos un punto negro.


Step 11: We continue and paint the mouth red giving a more charming touch to the character.
Paso 11: Continuamos y pintamos la boca de rojo dándole un toque más encantador al personaje.


Step 12: We will put silicone on both sides of the lid and then glue it to Peppa to cover it, thus repeating the step on the other side.
Paso 12: A las dos caras de la tapas le colocaremos silicón y luego pegaremos a Peppa para tapar y así repetimos el paso del otro lado.


Step 13: the key ring was ready, something seemed a little strange on Peppa's face and that's when I noticed that she was missing two black dots on her nose and I put them on her, making her face look very pretty.
Paso 13: ya listo el llavero monedero algo me parecía un poco raro en la cara de Peppa y es cuando me fijo que le faltan dos puntos negros en su nariz y se los coloque quedando muy linda su cara.


Step 14: Finally, I opened the coin purse key ring and placed a circle at the end of it on the lid, serving as a base for this beautiful recycled coin purse key ring.
Paso 14: por último abrí el llavero monedero y por dentro le coloque a la tapa un círculo al final sirviendo como base a este hermoso llavero monedero reciclado.


This is how our precious craft will look.
Así quedara nuestra preciosa Manualidad.


I loved the result was great to see that with a little ingenuity you can make beautiful things so I can not deny that I was pleased and very happy for this craft I hope you also enjoy it as much as I do, I want you @shirahoshi.

Me encanto el resultado fue genial ver que con un poco de ingenio se pueden realizar cosas hermosas así que no lo puedo negar quede complacida y muy feliz por esta manualidad espero que ustedes también la disfruten tanto como yo, los quiere @shirahoshi.


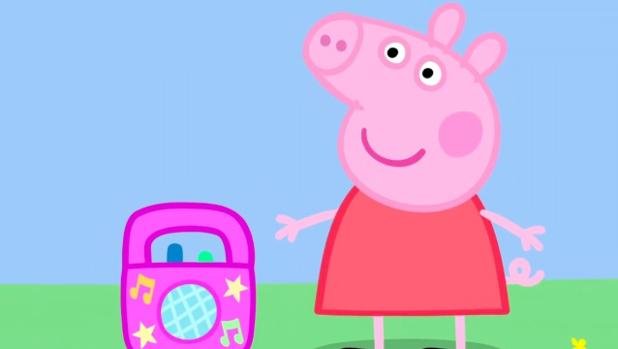
To make the Peppa Pig face, the following image was used as a reference:

Para realizar la cara de Peppa Pig se usó como referencia la siguiente imagen:


The photographs are my own and were taken by me with a sony cybershot DSC-S2000 and were edited in powerpoint.>Las fotografías son de mi autoría y fueron tomadas por mí con una camara sony cybershot DSC-S2000 y se editaron en powerpoint.


The Step by Step Gif was made by me in AdobePhotoshop CC2014.

El Gif de Paso a Paso fue realizado por mi en AdobePhotoshop CC2014.

My social networks-Mis redes sociales

Authors get paid when people like you upvote their post.
If you enjoyed what you read here, create your account today and start earning FREE STEEM!