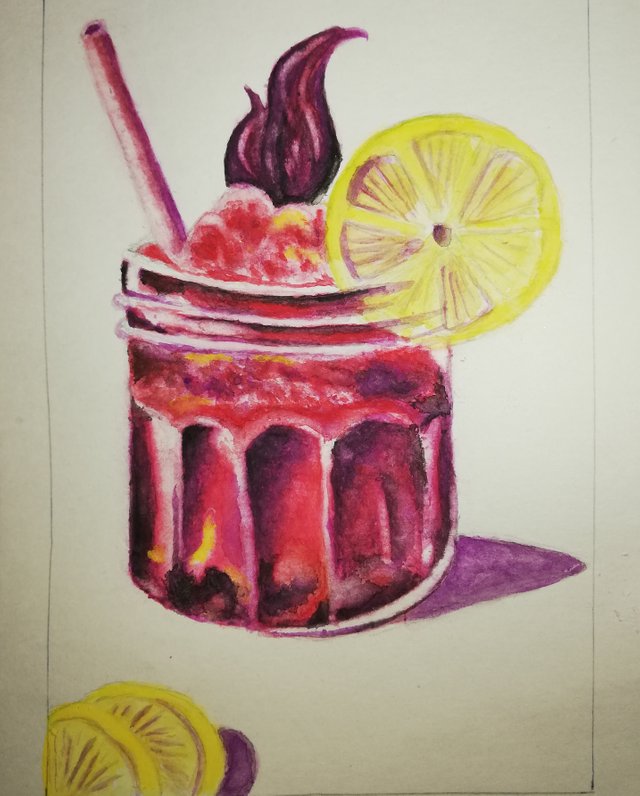
Hello everyone! Today I am going to share how I painted the mason jar drink painting above. It looked simple but the painting process was a little more complicated than I expected it to be. Before I jump into the process, I would like to share that Lindsey (thefrugalcrafter)'s video is the one that inspired me to try this painting. Click here to check her video out.
Tools and Materials
- A good quality artblock that can absorb water
- Buncho water colours
- A small round brush
- 2 containers of water (one to mix paint and one to clean brush)
- A palette to mix paint
- A HB pencil to draw
- Tissue to absorb excess paint/water
Method

This is my basic drawing. I used a HB pencil to draw it as it is a hard pencil and hence that reduces the smudging of the pencil to a large extent when I paint.

This is the first layer of paint. I mixed the red and purple to create some shadows. I kept the values low so that I can add more later when I add details. I thought that this part of the jar is the easiest to paint which is why I started with this area.

I painted light layers on the other parts as well. I kept the colours diluted as it is the first layer.

I painted another layer on the artwork including some shadows to increase some of the values.

Here's a sneak peek of my little work space from the top.

I added more shadowy tones this time, as in darker shades. As I work with a small number of colours, I mixed most of them to get the colours I wanted. I even added pink here and there although it doesn't stand out.

This picture may look close to the previous picture but if you look carefully, you can see that I have added some highlights using the lifting technique. In case you are not sure how to do it, just let your previous layer dry completely first. Then, pick some water up using a clean brush and paint over the parts you want to 'lift' or remove to create highlights. Then, quickly use a tissue and place it on the parts to absorb the paint before it dries off. Repeat the steps if necessary. It is best to use this method instead of using white colour as white may make it look misty and dull.

I made the shadows even darker to increase the contrast of the artwork. This time I used black as well. Please me mindful if you choose to use black too as black is a colour that can either make or break a painting. It is easier to add as you go than trying to remove it after adding it too much.

I added more highlights using the same lifting technique. I also added some yellow to create some reflections of the lime on the surface of the mason jar. Finally, darkened the shadows further with tints of black.

This is the picture of the same painting but taken using a different phone for better quality. I also captured it the next day of completion under natural light.

Thank you for dropping by and I hope that you have a great day/evening ahead!
Support of Visual Artworks and Photogrpahy on Steem by @stef1 and @art-venture , rewarded by the Steem Community Curation Project ( @steemcurator08 ).
Downvoting a post can decrease pending rewards and make it less visible. Common reasons:
Submit
Thank you so much!
Downvoting a post can decrease pending rewards and make it less visible. Common reasons:
Submit
I really enjoyed your processes. You did a nice job here.
Well done dear.
Downvoting a post can decrease pending rewards and make it less visible. Common reasons:
Submit