Hello Steemians.
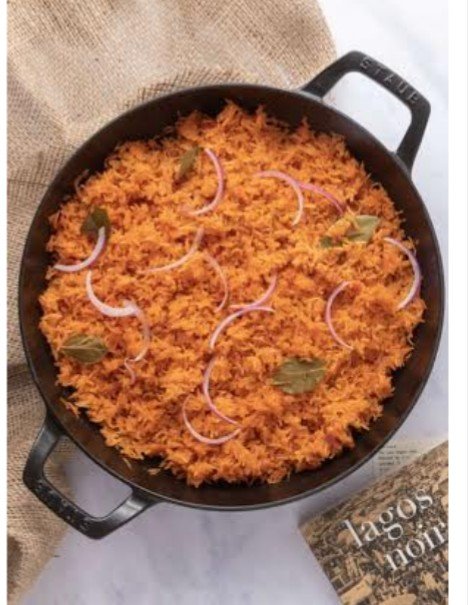
As a foodie that I am it won't make any sense if I don't post anything about food on the platform. So today I am pleased to share with you a little bit of what I know about the Naija jellof (Nigerian jellof). How it is been prepared, ingredients also difference between it and the Ghana jellof.
Difference between Naija jellof and Ghana jellof.
There is a lot of difference but the major difference in the preparation is the type of rice used. Naija use long grain rice which absorbs flavour while Ghanaians use aromatic basmati rice which carries it own natural flavour.
Ingredients.
3¾ cups long grain parboiled rice
- 2/3 cups Tomato Stew
- pepper and salt (to taste).
- 2 medium sized onions.
- Maggi cubes.
- 2 teaspoons thyme.
- 2 teaspoons curry powder (Nigerian curry powder).
How to prepare Naija jellof.
Prepare the tomato stew. It is advisable to prepare tomato stew before hand and keep in the freezer. This is so that whenever you want to cook any jollof rice related dish, it is just a matter of adding it to your cooking.
If you will use whole chicken then wash and cut it into pieces. Cook with the thyme, Knorr cubes and 2 bulbs of onions. The cooking time depends on the type of chicken. The rooster or cockerel cooks much faster than the hen but the hen is definitely tastier. When done, grill it in an oven. You may also fry it. This is to give it a golden look which is more presentable especially if you have guests for dinner.
Parboil the rice using the method detailed in parboiling rice for cooking jollof rice. Rinse the parboiled rice and put in a sieve to drain.
step 2.
- Pour the chicken stock and the tomato stew into a sizeable pot and leave to boil.
- Add the drained parboiled rice, curry powder, salt and pepper to taste. The water level should be the same level of the rice. This is to ensure that all the water dries up by the time the rice is cooked.
- cover the pot and leave to cook on low to medium heat. This way the rice does not burn before the water dries up.
Thanks for your time.
Regards to everyone especially:
@booming01

Nice post. It would be better if you add more photos step by step.
Downvoting a post can decrease pending rewards and make it less visible. Common reasons:
Submit
I appreciate.
Will add more pictures next time.
Downvoting a post can decrease pending rewards and make it less visible. Common reasons:
Submit
Hello :
In the SteemFoods Community, you can only produce content with your own photos, it is forbidden to post with copyrighted and online photos. This is the first warning, thank you very much for your understanding.
You can review the post below to get detailed information about the SteemFoods Community.
Downvoting a post can decrease pending rewards and make it less visible. Common reasons:
Submit
Thank you for participating in the Steemit Nursery Community contest - Love4steem and steemit!
You have been voted by @bright-obias, as a member of the Steem Greeters team STEEM POD Project and we are voting with the Steemit Community Curator account @steemcurator03 to support newcomers who enter steemit.
Follow @steemitblog for the latest Steem Community update!
Have a nice day!
Downvoting a post can decrease pending rewards and make it less visible. Common reasons:
Submit