hi, in this guide i teach you how to make a custom video feed for any software that accepts a v4l2 input along with some tips on what to do when something doesn't work.
- first step is to have the v4l2loopback installed. i use debian and for debian i can use :
sudo apt install v4l2loopback-dkms
you may also need the ffmpeg command line tool installed for this example which on debian can be installed by
sudo apt install ffmpeg - then you need to use the modprobe command to create a virtual v4l2 device :
sudo modprobe v4l2loopback devices=1 video_nr=10card_label="LoopbackCam" exclusive_caps=1
this command wil create a virtual v4l2 device namedvideo10with the address of/dev/video10with the nameLoopbackCamwhich will be recognized by your software. - create a output to
video10by the v4l2 format with one of the following commands :
the below command will use the video feed (for example from webcam) available at /dev/video0 and resize it to 320x240 with the frame rate of 10 fps. this is useful if you want to save bandwidth but your software has no options to reduce quality. the input size of the v4l2 is the default size but you can set your own in case you know what your camera supports.
ffmpeg -f v4l2 -i /dev/video0 -s:v 320x240 -r 10 -vcodec rawvideo -pix_fmt yuv420p -f v4l2 /dev/video10
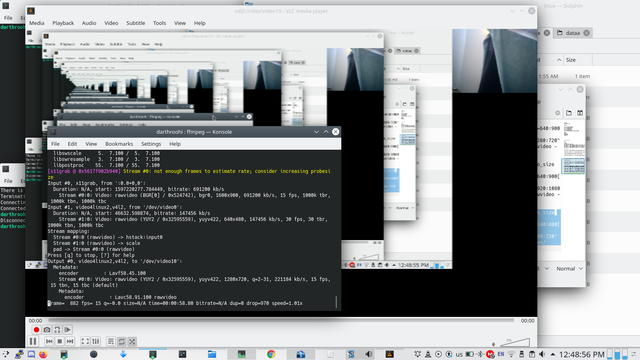
the command below will attach your camera right next to your monitor as shown in the image below:
ffmpeg -f x11grab -r 15 -s 1600x900 -i :0.0+0,0 -f v4l2 -i /dev/video0 -filter_complex "[1:v]scale=320x240:force_original_aspect_ratio=decrease,pad=320:900[a];[0:v][a]hstack[q];[q]scale=1280:720:force_original_aspect_ratio=decrease,pad=1280:720" -threads 0 -f v4l2 -r 15 -vcodec rawvideo -pix_fmt yuv420p /dev/video10

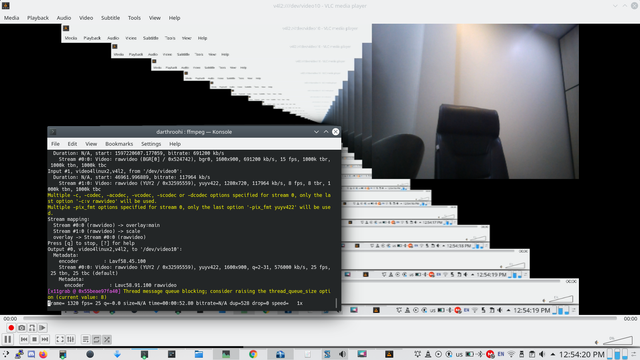
the next command will attach your camera ON the top right of your screen as shown in the image :
ffmpeg -f x11grab -r 15 -s 1600x900 -i :0.0+0,0 -f v4l2 -video_size 1280x720 -i /dev/video0 -filter_complex "[1:v]scale=640:480[a];[0:v][a]overlay=x=(main_w-overlay_w):y=(main_h-overlay_h)/(main_h-overlay_h)" -threads 0 -r 15 -f v4l2 -vcodec rawvideo -pix_fmt yuv420p /dev/video10

the reason why you may want to use this feature is if the software your using has not implemented screen share for linux, or not implemented screenshare at all. the screenshare may not be configurable for your preferred overlay dimensions for streaming purposes and many other reasons.
problems : it could be process intensive. so make sure your system can keep up with the frame rate. also proper use of filters and initial capture settings can be effective
tips :
#1. some softwares only take standard inputs like 320x240, 640x480 and 1280x720 as input. so if you set a non standard output size you may experience problems
#2. in these examples yuv420p is used as the output pixel format, but you can use other formats such as yuyv422look to see what your camera supports and try to avoid any unnecessary conversion if your streaming software supports that format.
#3. refer to more guides on v4l2 devices if you have issues on capturing from your camera, don't worry, what you want will get done if you put enough effort. it's not impossible you just need to learn the right settings.