Writing, as we all know is a great way of expressing one’s self, and to express yourself well you know not only check your choice of words but also how you present it in the writing form. It would not be encouraging to write nice work but your reader(s) don’t see what you writing. Then your reader(s) starts asking questions such as:
Is this a comma or a full stop?
Is this supposed to be a subscript or an alphabet I don’t know of?
Are the words closely written or I can see properly?
Is this supposed to be an underline or a crossword?
Questions are bound to be raised once your work isn’t presented well. This post aims to guide users on how to use markdown to present their work or posts.
Headings are always the best way to introduce a topic or subtopic. One needs to choose the size correctly, there are 5 heading styles, ranging from Heading 1 to Heading 5.
That is, H1, H2, H3, H4, H5.
Below is how they are written:
<H1> </H1>
<H2> </H2>
<H3> </H3>
<H4> </H4>
<H5> </H5>
NOTE: They start with a “<” and end with a “>”.
To use any of the heading styles, all you need to do is write the tag and put what you want inside it.
Example:
Let’s say I want to use heading style one, this is what I do;
I write: <H1>I’m Heading 1</H1>
The output will be;
I’m Heading 1
The same applies for the others too, this will be how they will be displayed if used;
I’m Heading 2
I’m Heading 3
I’m Heading 4
I’m Heading 5
If you’ve used Microsoft word before then you’ve probably seen this In the Home ribbon:

There are four (4) types of text alignment, and these are:
- Align Left
- Center
- Align Right
- Justify
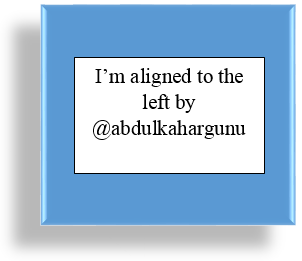
Align Left: Aligns your content to the left.
Center: Centers your content.
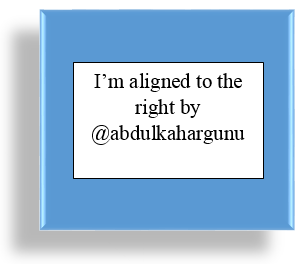
Right: Aligns your content to the right.
Justify Distributes your content evenly.
How to use the said text alignment styles? this is how to:
<div class = "pull-left"> </div>
<div class = "pull-right"> </div>
<center> </center>
<div class = "text-justify"> <div>
Above are the various markdowns for the text alignments respectively, if used, this with be the respective outputs:
To make a subscript or a superscript, these are the markdowns to use:
<sup> </sup>
<sub> </sub>
NOTE: “sup” means superscript and “sub” means subscript.
This is an example of its use:
Today’s date is 10<sup>th</sup> September 2021.
I think oxygen is written as H<sub>2</sub>O.
The respective outputs will be:
Today’s date is 10th September 2021.
I think oxygen is written as H2O.
To make a table we use this markdown:
<TABLE>
    <TR>
        <TH></TH>
        <TH></TH>
</TR>
<TR>
    <TD></TD>
    <TD></TD>
</TR>
<TR>
    <TD></TD>
    <TD></TD>
</TR>
</TABLE>
Explanation: TR means Table Row, TD means Table Header, TD means Table Data. Basically, you make a Row and put the individual data (TH or TD) of that row inside it.
If used well this will be the output:
| SN | User Name |
|---|---|
| 1 | @zology69 |
| 2 | @tymes2 |
| 3 | @habdallah |
| 4 | @desiigner |
Explanation: You realize that there are five (5) rows, meaning 5 HR’s, in the first HR, I put 2 TH’s since those will be my table headings, inside the first TH, I put “SN” and “User Name” in the second TH.
I then make another TH and put 2 TD’s since I want to put data there, in the first TD, I put “1” and “@zology69” in the second TD. I then make the other TR’s and put their respective data inside.
NOTE:The first TD in a TR represents the first column, the second TD represents the second column, in that order. Basically, a TR can have many TD’s.
To make quotations, one must use “ ” or > symbol
If one chooses “ ” the output will be:
“This is a quoted sentence”.
If one chooses > the output will be:
This is a quoted sentence.
Let's say I download a picture from pizabay.com and wish to reference it, this is how it's done:
I use this markdown;
[Source](Link Here)
Let's practicalize it below:

Adding images to your posts will always prove to be useful in one way or the other, these are ways you can align images in your posts:
<div class = "pull-left">Paste Image link here</div>
The above markdown aligns the image to the left
Output:

<div class = "pull-right">Paste Image link here</div>
The above markdown aligns the image to the right.
Output:

<center>Paste Image link here</center>
The above markdown centers the image.
Output:

To make a text bold, this is the markdown to use:
<strong> </strong>
If used, the output will be:
I can make a single word bold or a whole sentence like, Lorem ipsum dolor sit amet, consectetur adipiscing elit. Nunc eget purus a tortor egestas placerat sit amet vitae sem. Nullam sit amet finibus justo. Donec volutpat ipsum leo. Pellentesque habitant morbi tristique senectus et netus et malesuada fames ac turpis egestas. Suspendisse sit amet dignissim ante.
To make a text italic we use the markdown;
<em> </em>
If used, the output will be:
I can make a single word italic or a whole sentence like, Lorem ipsum dolor sit amet, consectetur adipiscing elit. Nunc eget purus a tortor egestas placerat sit amet vitae sem. Nullam sit amet finibus justo. Donec volutpat ipsum leo. Pellentesque habitant morbi tristique senectus et netus et malesuada fames ac turpis egestas. Suspendisse sit amet dignissim ante.
To strike through text, one cn use the following markdown:
<strike> </strike>
If used, the output would be;
This text will be striked through
To make a list, you use this markdown:
For ordered lists
<ol>
 <li> </li>
 <li> </li>
 <li> </li>
</ol>
If used the output will be:
- I’m first
- I’m second
- I’m third
For unordered lists
<ul>
<li> </li>
<li> </li>
<li> </li>
</ul>
If used, the output will be:
- I’m first
- I’m second
- I’m third
Using HTML as markdown is simple, just that people fear that they might have to type lenghty lines of markdowns, with enough practice, you'll find out that using HTML is just like speaking english.

Thank you for participating
Downvoting a post can decrease pending rewards and make it less visible. Common reasons:
Submit
Sir, I hope you can make me a verified member of the community.
https://steemit.com/hive-172186/@abdulkahargunu/achievement-1-post-by-abdulkahargunu-my-introduction-post
Downvoting a post can decrease pending rewards and make it less visible. Common reasons:
Submit
Wow nice post and nice presentation bro. Keep it up bro and I wish you all the best bro
Downvoting a post can decrease pending rewards and make it less visible. Common reasons:
Submit
Nice work there bro
Downvoting a post can decrease pending rewards and make it less visible. Common reasons:
Submit