
After last week participating in learning about SEC | S20W4 | Google Sheets features and functionality (Creating Forms & Sheets), This week I will try to go back to the advanced learning from the previous knowledge. I think this is related and must be continued so that we get perfect learning results.
Before starting to prepare/add the summary sheet which is the into of this week's learning, according to the instructions from the tutor for Homework, students are expected to be able to add a tag column to the steemian detail sheet.
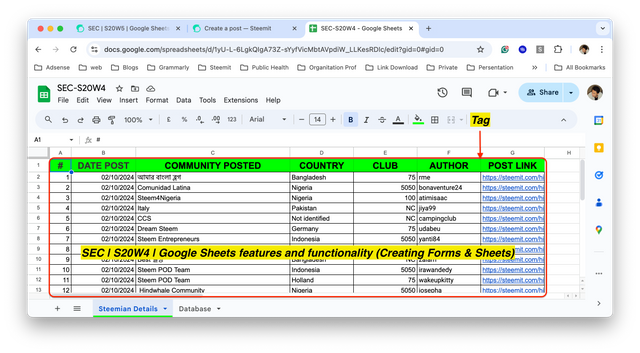
Using Google Sheet S20W4, I will give an example of how to add a tag column to the previous assignment. I will add a Tag column between column F and G as in Pict. 1 above.
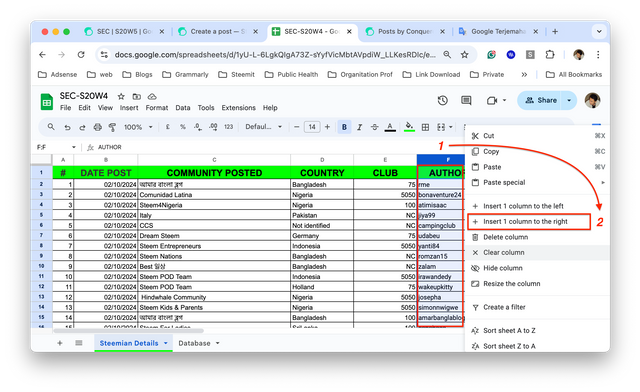
Here explains about the guide to adding a tag column between columns F and G, the first step to do is right-click on column F, then select `insert 1 column to the right. The placement of the new column can be adjusted according to your needs, you can add it to the left or right of the existing column.
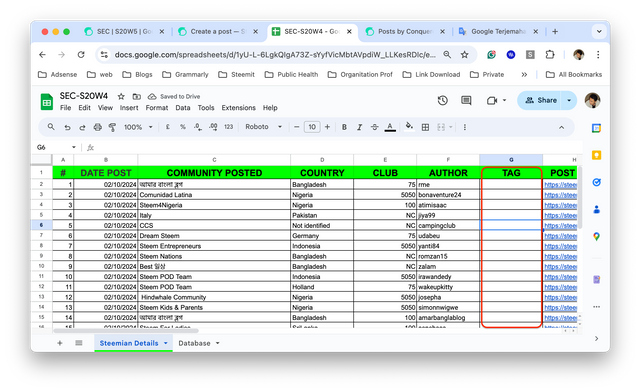
A new column called Tag has been created and the next step is to add tags according to the post link that was previously inputted in the previous lesson (S20W4).
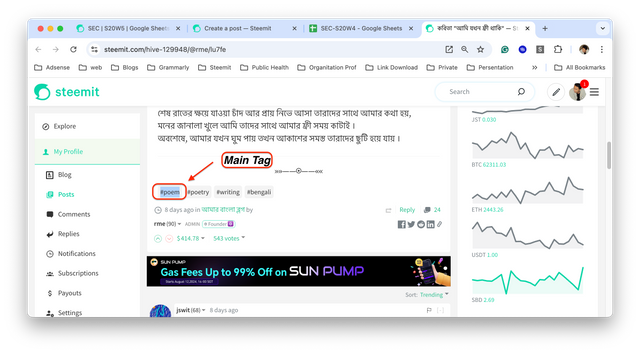
I give an example of one of the post links in order 1 that I have inputted before, the way is to press the link in the Post Link column, and then the author's post will appear on a new tab on the web you are using. Here the first tag used is #poem and I will fill it in the tag column.
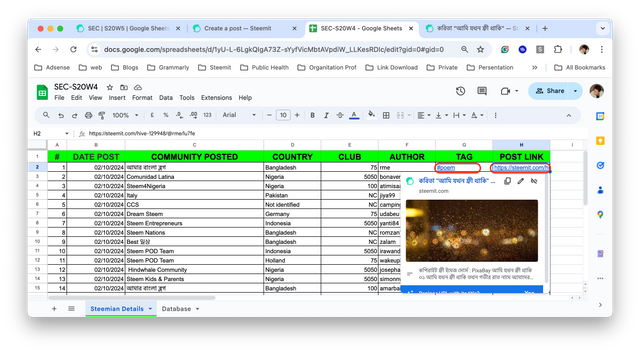
The main tag used for the first post link on the Google Sheet has been filled in, I will continue with all the existing links until finished with a total of 30 posts (30 tags).
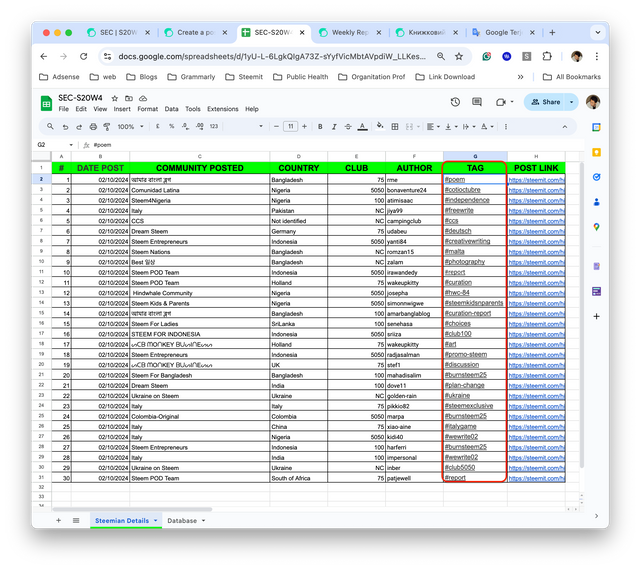
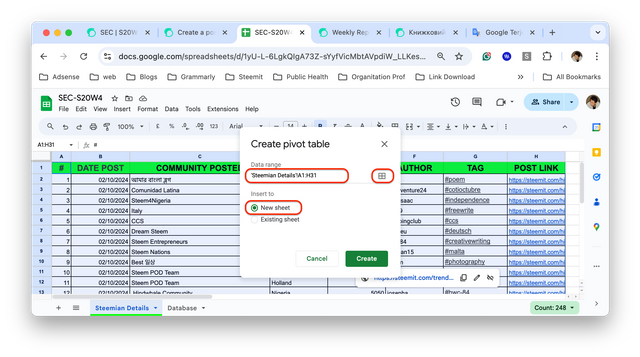
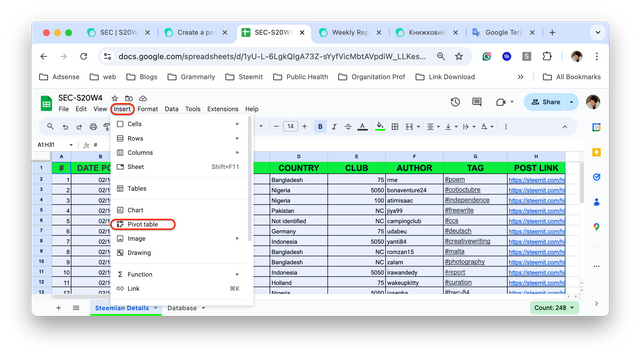
The two images above show the steps in creating a summary, because the summary uses a private table, I will start explaining the stages.
There are 2 alternatives that can be used to create a pivot table, the first is to select/block the worksheet that has been filled in/ can press ctrl+A for Windows devices or command+A for IOs (MacBook) devices.
The second alternative is to use select range, after selecting insert private table you will find select data range to block the data that will be used as a resume/summary.
Because the tutor recommends participants to create a new sheet called Summary, select new sheet. This new sheet will be replaced by the sheet name according to the guide taught by the tutor.
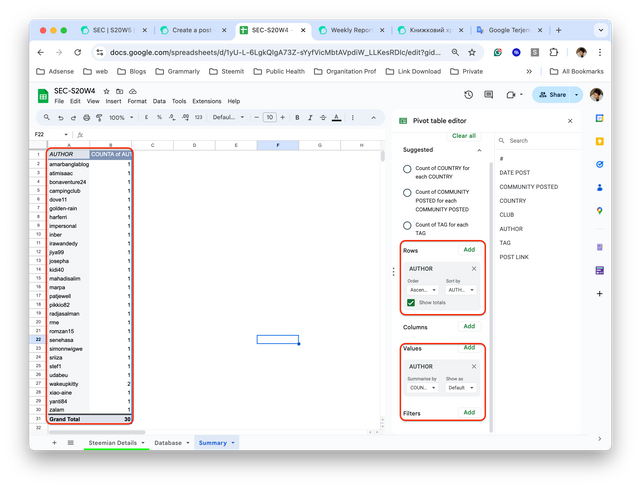
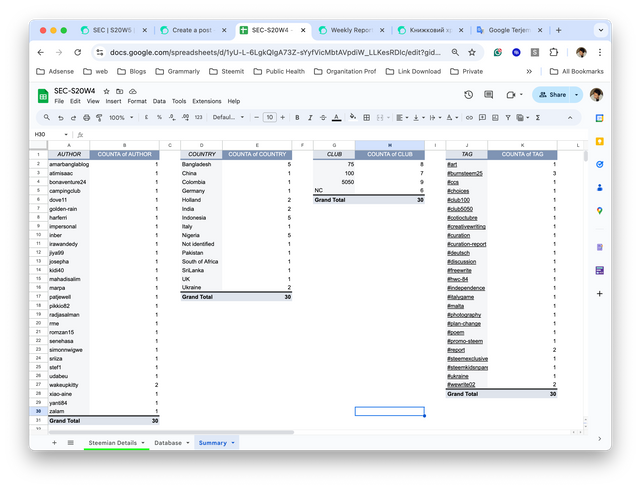
Pict. 9 shows the next step from Pict. 7 and 8, select the type of data rows you want to filter for summary, then select values for the accumulative value of the data rows that have been needed.
To obtain other results/data such as Country, Club and, Tags. There are 2 alternatives that can be done.
- Block the first summary data, for example,
authorthen paste it into another column on the same sheet. delete rows and values, then add other rows and values according to your needs.
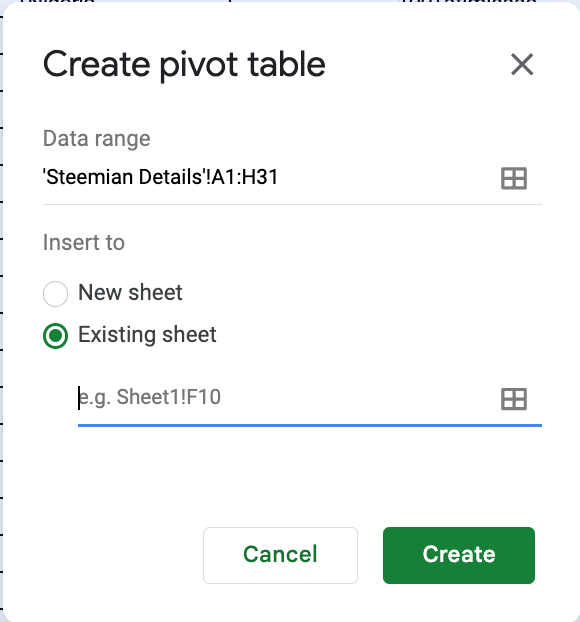
- You can start from scratch, insert a pivot table, and select the existing sheet. Determine the range of data needed, and block the section. I suggest that the Steemian detail sheet is blocked, then select the location (summary) in the next cell (next to the author data). then select rows and values (eg country).
A summary of post links containing the required data has been completed. Pivot tables will be effectively used to filter data as needed.
| Google form |
|---|
I will not describe the steps to design a Google form, because this stage has been described in detail in previous lessons. In week 5, I will show a resume of my journey on Steem during 2016.
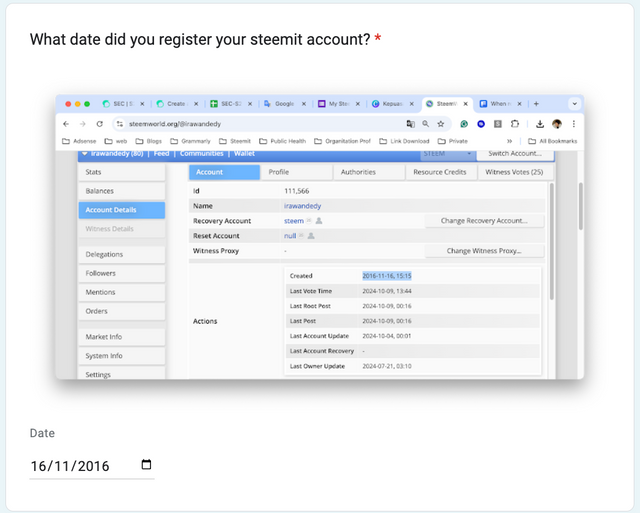

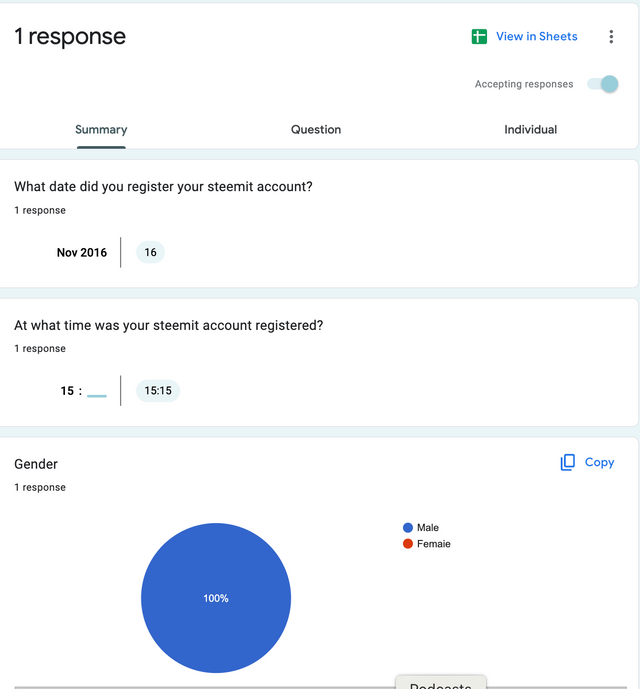
This image explains the account registration information that I did, I have been registered on Steem since November 16, 2016.
In the second question which contains the time the account was registered, I was registered on that date at 15.15 West Indonesia Time

Using a drop-down format, I designed a third question about gender.

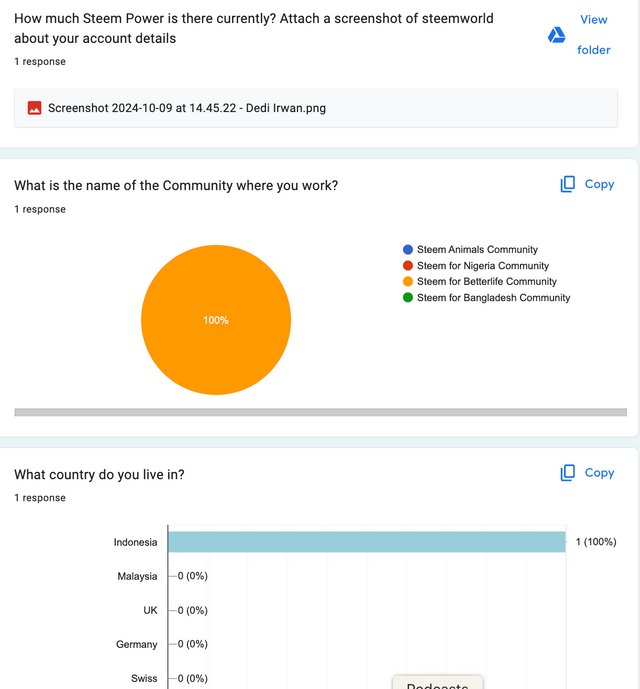
I use the document upload format for the amount of Steem Power owned, here every user who wants to fill out the Google form is expected to be able to upload proof of the SP owned from a screenshot of steemworld.org
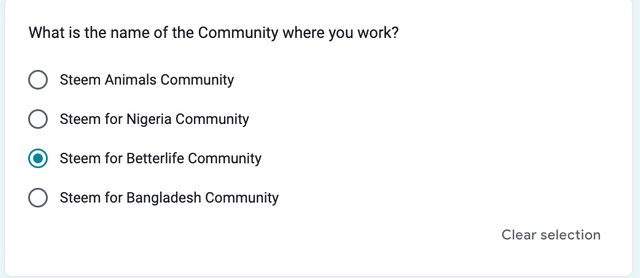
Using a multiple-choice format, I describe the community I work with.
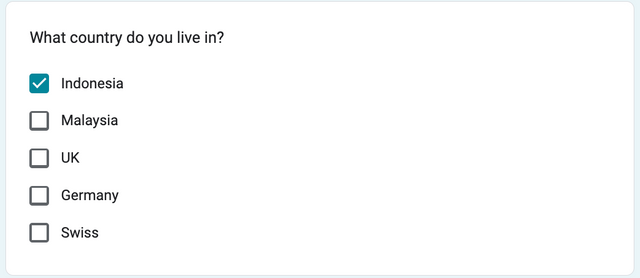
Then for my nationality/country, I chose the check box format.
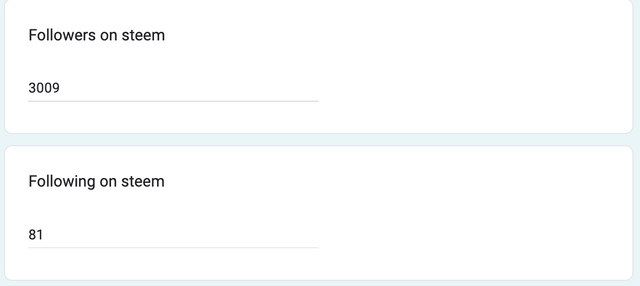
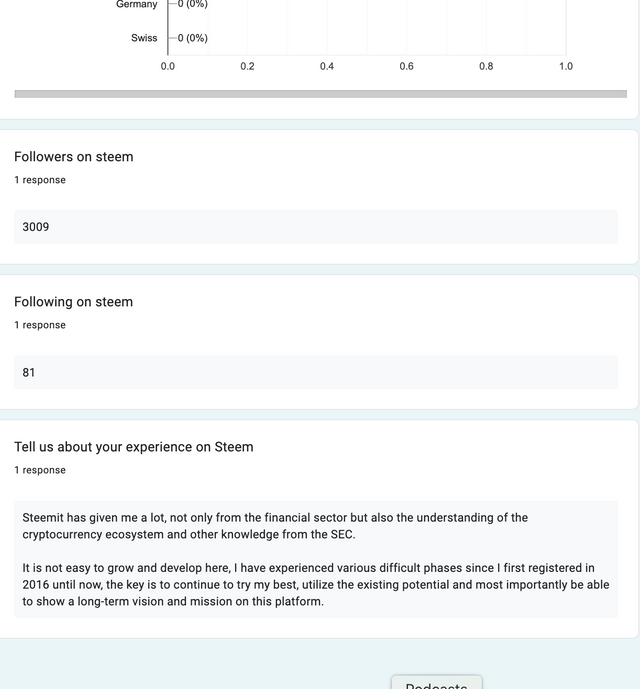
This question is a short answer type question, here what is filled in is the number of followers and following.
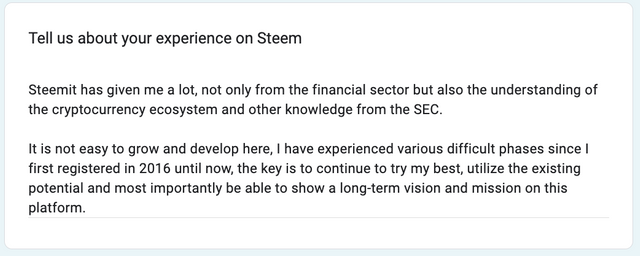
I explain my long journey on the platform, the challenges, and the benefits gained while getting to know this platform. I use paragraph format for this type of question.
Resume results from Google form can be seen by accessing the link, I made it in the form of a google sheet. or you can see the resume via Google Form, this link can only be fully accessed by tutors as the teaching team for this topic. Google Form
 |  |  |
|---|
 |  |
|---|
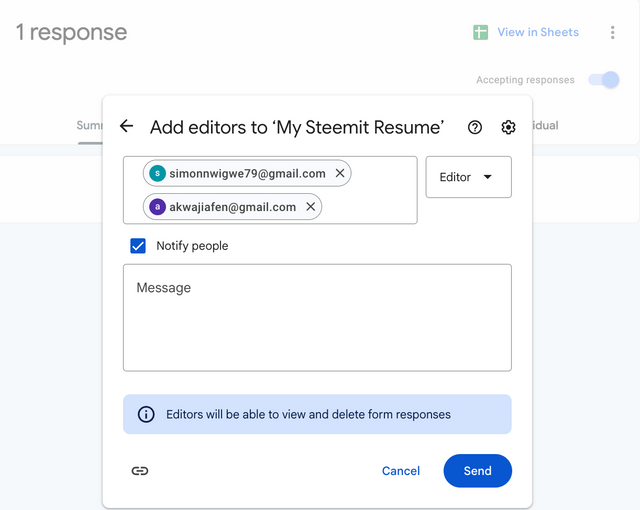
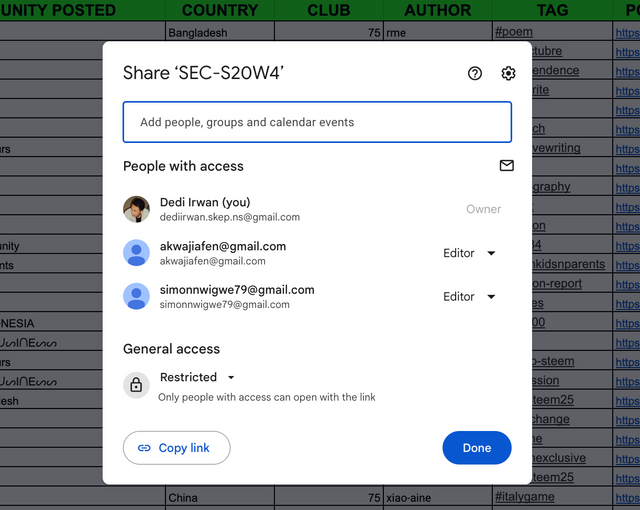
I also give the tutor full access to the Google Sheet.
I say that this is important learning and I would like to express my thanks to the tutor who has provided this important material to increase my knowledge about Google Sheets and Google Forms.
I invite @afrizalbinalka @harferri and @wakeupkitty to participate in this topic. Come on guys....
Indonesia, October 9, 2024
@irawandedy
cc: @simonnwigwe, @josepha
Downvoting a post can decrease pending rewards and make it less visible. Common reasons:
Submit
Bang @irawandedy, itu membuat screenshot pake aplikasi apa.
Downvoting a post can decrease pending rewards and make it less visible. Common reasons:
Submit
Ga pakek apa-apa bang, cuma screenshot biasa di laptop (command + shift + 3).
Kalo di windows mungkin tekan Fn + PrtSc
Downvoting a post can decrease pending rewards and make it less visible. Common reasons:
Submit
Itu kan bukan sekedar skrinsyut tapi juga dimanipulasi lagi dengan menambahkan misalnya panah dan kotak, itu apakah aplikasi bawaan laptop yang terintegrasi dengan fitur skrinsyut?? Kalo di windows metode PrtScr itu setahu saya tidak memiliki fitur manipulasi, manipulasi harus dilakukan dengan melibatkan aplikasi lain pengolah image.
Terimakasih.
Downvoting a post can decrease pending rewards and make it less visible. Common reasons:
Submit
Itu bawaan dari sistem iOS bang... Setelah screenshot, pilih menu edit dan dimodifikasi sesuai dengan keinginan
Downvoting a post can decrease pending rewards and make it less visible. Common reasons:
Submit
Keren. Windows tidak memiliki itu.
Downvoting a post can decrease pending rewards and make it less visible. Common reasons:
Submit