As I mentioned to you in the previous post about adding liquidity in a crypto pool, today I will socialize with all of you how to participate in liquidity mining in the WoxDefi application by selecting the percentage return that best suits your investment criteria.
I wanted to address this topic, since liquidity mining is one of the most promising investment strategies within the DeFi platforms, since it has been showing extraordinary and attractive economic incentives for investors.
The liquidity mining percentage returns offered by the WoxDeFi platform are quite attractive to users as they have formidably high rates of return, and the best thing is that to participate the investor simply has to Hodl, or rather deposit and block the capital of his participation for the period that best suits his investment strategy.
In the following I will compete with you a step by step on how to participate by selecting the percentage in liquidity mining in the WoxDeFi application:
Step 1 - 2. After having added liquidity in the TRX/WOX pair ( please see previous publication ) we must check to be connected to the application with which the investment was executed, which in my case was the JustMoney platform.
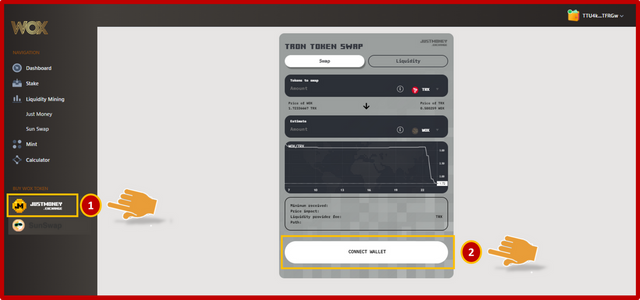
Step 3. The next step is to locate in the left segment the application with which the investment is being executed to confirm that the data is correct.
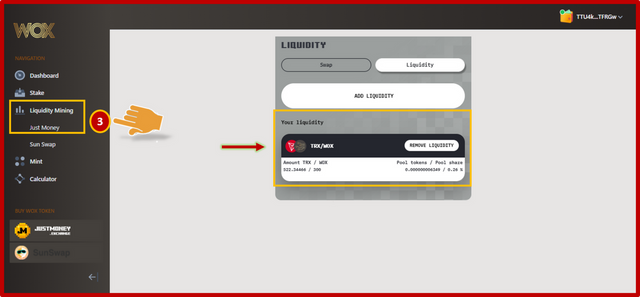
Step 4. Afterwards, we must verify that our transaction appears correctly loaded in the WoxDeFi application system.
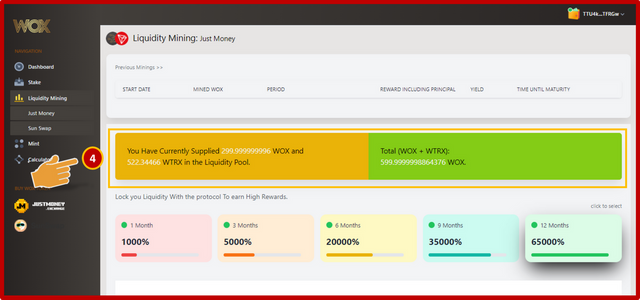
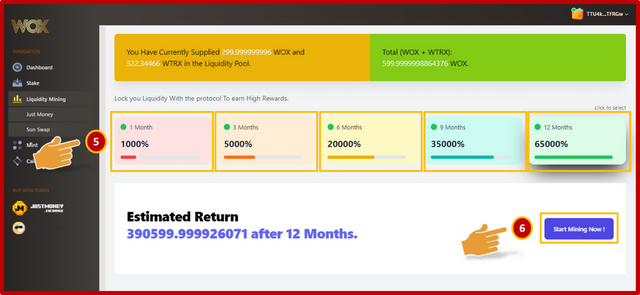
Step 5 - 6. Then click on the option in which we want to participate either; 1 month = 1000%; 3 months = 5000%; 6 months = 20000%; 9 months = 35000%; or 12 months = 65000%, after selecting the period that best suits our investment strategy the following will be to click on the option "Start mining Now".
Step 7. After you have selected the time frame of your investment, the next step is to click on the "Sing" option to accept the terms of the smart contract and confirm the action with your TronLink-wallet.

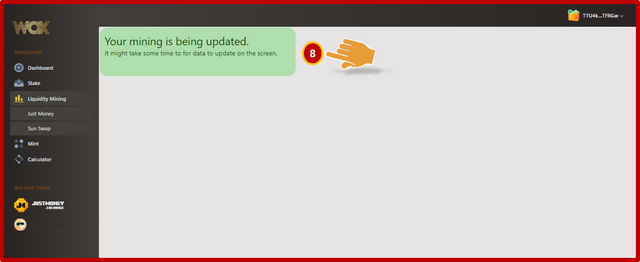
Step 8. After a few seconds of waiting, the following message will appear: "Your mining is being updated. It may take some time for the data to be updated on the screen".
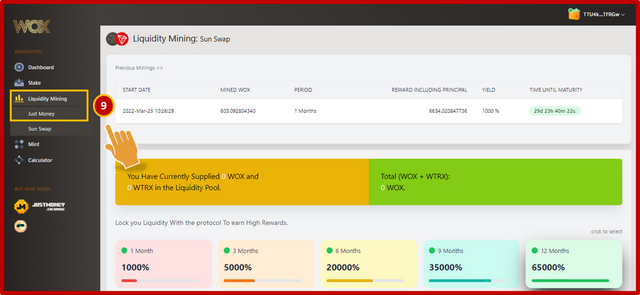
Step 9. Finally, by clicking on the Liquidity Mining menu in the application with which we execute the deposit and blocking of the investment, we can see the data of our participation.

OBSERVATION:
The cover image was designed by the author: @lupafilotaxia, incorporating screenshot of the portal: WoxDefi


Good job! You just got yourself a 100% upvote from ACOM. Enjoy!
Downvoting a post can decrease pending rewards and make it less visible. Common reasons:
Submit
For those that might done this with Sunswap before the process here is still same, it is just that we are using just money. Thanks once more for the guide.
Downvoting a post can decrease pending rewards and make it less visible. Common reasons:
Submit
Hi @tfame3865
That's right the process is similar to Sunswap, thanks for leaving your comment.
Best regards, be well.
Downvoting a post can decrease pending rewards and make it less visible. Common reasons:
Submit
Hello @lupafilotaxia, Thank you for this second part of your post.
I now have enough information with this to review and apply liquidity in WOX defi.
Downvoting a post can decrease pending rewards and make it less visible. Common reasons:
Submit
Hello @tocho2
Glad to hear that this material can serve as a guide to help users who wish to participate in WoxDeFi.
Best regards, be well.
Downvoting a post can decrease pending rewards and make it less visible. Common reasons:
Submit
@tipu curate 5
Downvoting a post can decrease pending rewards and make it less visible. Common reasons:
Submit
Upvoted 👌 (Mana: 0/5) Get profit votes with @tipU :)
Downvoting a post can decrease pending rewards and make it less visible. Common reasons:
Submit
Your post is manually rewarded by the
World of Xpilar Community Curation Trail
STEEM AUTO OPERATED AND MAINTAINED BY XPILAR TEAM
https://steemit.com/~witnesses vote xpilar.witness
Downvoting a post can decrease pending rewards and make it less visible. Common reasons:
Submit