
| Materials for drawing picture |
|---|
• Ruler.
• Pencil.
• Eras.
• Cut the pencil.
• A4 size art paper.

| Let's Start |
|---|
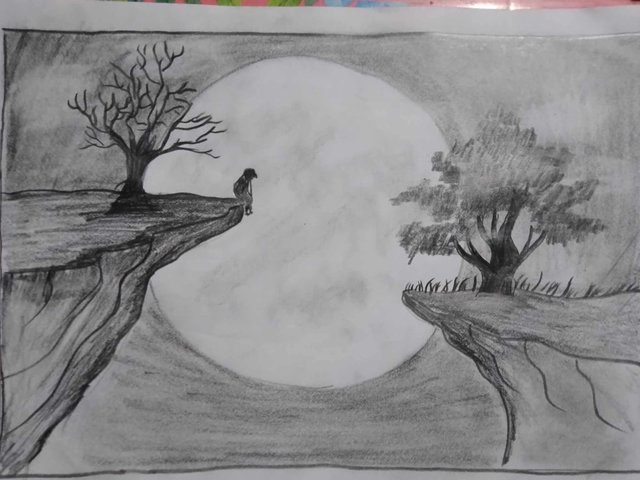
First, take a white colored paper. Then draw a circle on the white paper using a pencil compass. Then cut the head of the pencil with a pencil cutter. Then on the right side we draw a mountain by itself with a curve leaving some space in between. Similarly, on the left side, we leave some space in the middle for the guard and start matching. In the same way we give both sides by making crooked bends from the bottom. Thus we complete step 1.
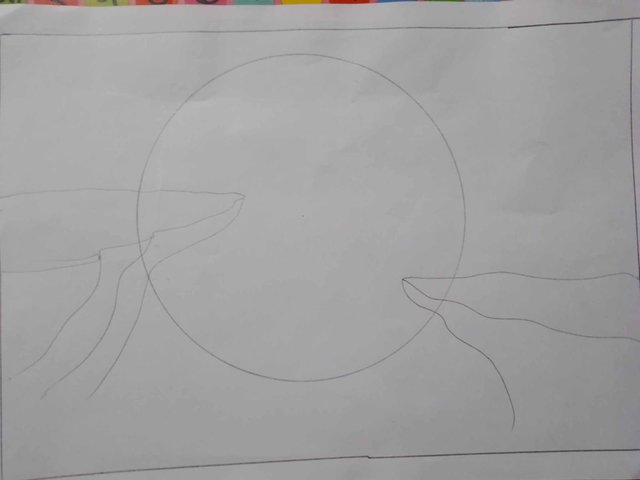

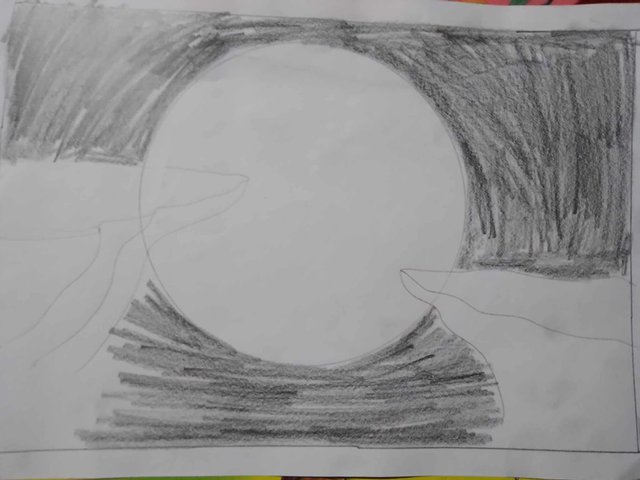
After completing step one we move to step 2. Step 2 We went to the circle and placed the two hills on both sides, and the rest of the places we left blank, it would be good to rub the pencil in a crooked direction. So that there is no empty space. First we declared the upper part of the circle, then the lower part, but we left the parts below the hill that are on both sides blank in this step, maybe later we will rub there too. Thus we conclude step two.

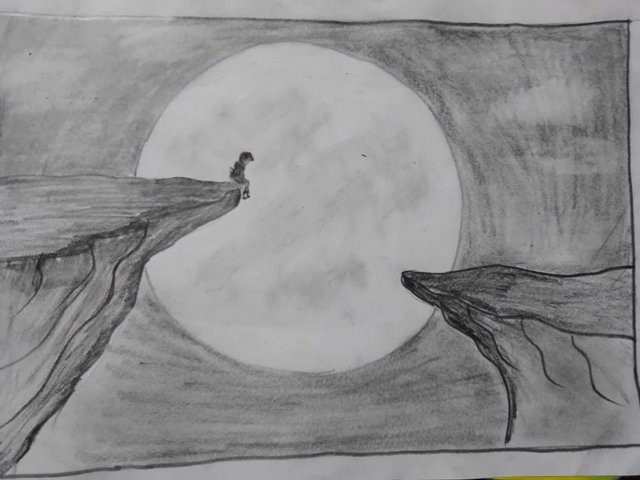
After completing step 2 we move to step 3. Here we will make it beautiful by rubbing the entire space with a pencil. Which place to focus on that day and then with the tissue we understand all the places well so that the pencil marks blend well there. Now the two legs that we left will also be well reached with a pencil and we will darken the spots with a garo pencil. On the head of the party on the right we went a little thicker, on the left we left it a little lighter and then when the rubbing is done we'll draw a man on top of the top of the hill on the left as if the man is sitting there. Thus we complete step three and move on to the next step.

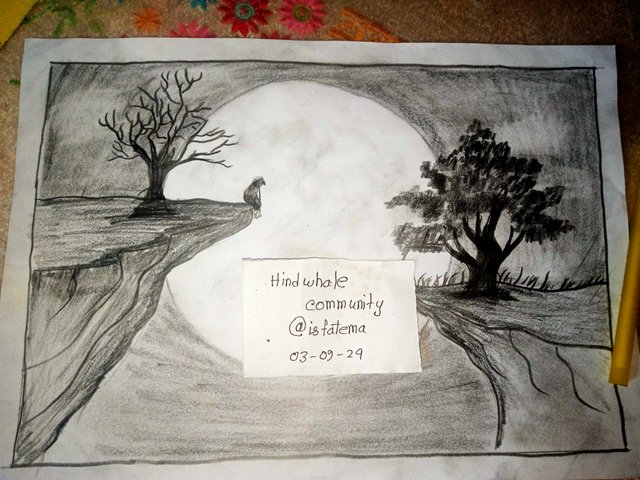
After completing step 3 we move to step 4. We have narrowed down the picture we are painting today to four steps and this is the last step. We will draw a tree behind where this man is sitting and we will cut the branches of the tree and rub the tree and dance and we will draw a dry tree with no leavesOn the right side we have enlarged it and the tree has been nicely numbered and we have taken the branches from the tree and we will rub the pencil well on the branches where each branch has leaves. And to draw some grass under the tree we went up with the pencil mark where we mean where there is some grass. When everything is finished in the sky, we will rub it well with a tissue so that the pencil marks settle and thus we have finished our drawing today.

| A | B |
|---|---|
| Photography | @isfatema |
| Device | Oppo A-12 |

very beautiful drawing.. simple and attractive... keep it up friend
Downvoting a post can decrease pending rewards and make it less visible. Common reasons:
Submit
Thank you, friend!


I'm @steem.history, who is steem witness.
Thank you for witnessvoting for me.
please click it!
(Go to https://steemit.com/~witnesses and type fbslo at the bottom of the page)
The weight is reduced because of the lack of Voting Power. If you vote for me as a witness, you can get my little vote.
Downvoting a post can decrease pending rewards and make it less visible. Common reasons:
Submit
https://x.com/IsfatE99/status/1830888425458680102?t=6tFuD7vbZa-CDyKkCEf6nw&s=19
Downvoting a post can decrease pending rewards and make it less visible. Common reasons:
Submit
This post has been upvoted/supported by Team 7 via @httr4life. Our team supports content that adds to the community.
Downvoting a post can decrease pending rewards and make it less visible. Common reasons:
Submit
Thank you for your support
Downvoting a post can decrease pending rewards and make it less visible. Common reasons:
Submit
"🌳 Step 4: Finishing Touches! 🌿️
Wow, we've come a long way since step 1! Now it's time to add the final touches to our masterpiece. Let's draw a beautiful tree behind our man, cutting off its branches and giving them a nice, textured look. And remember to rub those pencil marks with a tissue so they settle nicely.
🌸 I love how we've added some grass under the tree - it gives our scene such a peaceful feel!
👏 Great job making it this far! What's your favorite part of our drawing so far? Let me know in the comments below! 💬
📸 If you want to see more amazing photography content, be sure to follow @isfatema and check out their Oppo A-12 device 📸
Remember, a picture is worth a thousand words... but your engagement and votes are what make this community shine! 😊 Please vote for the witness 'xpilar.witness' by going to https://steemitwallet.com/~witnesses - every vote counts towards creating an even better Steem ecosystem! 💖"
Downvoting a post can decrease pending rewards and make it less visible. Common reasons:
Submit