Assalamualaikum everyone have a good night and my best regards to @siz-official, @suboohi and @cryptokraze. Meet me again, this time I will discuss about how to stup a 2 region website using a load balancer on a cloud vps. So that you can understand it easily I will explain in my own way. Read on for the following review.
Understanding Load Balancing
Load balancing is a technique for dividing the load on one server to another. For example when we have an X server and then we want to share the load on that server to server Y. In this case to do this we need two servers and one device that we will use for load balancing for example another server or a PC. Before we get into the tutorial. It would be nice if we first understand Haproxy.

Understanding Haproxy
Haproxy is a free and open source software that provides load balancer and proxy server technology for TCP and HTTP-based applications that provide suggestions or propagate requests to several other servers. Haproxy has a very good reputation due to its technology which is very fast and efficient in using the processor and memory.
We can say Haproxy is one of the fastest software and is widely used by various well-known websites. Haproxy is currently one of the most popular and well-known load balancers today.

Haproxy System and Load Balancer
HAProxy can work in two modes at once, namely TCP layer 4 and HTTP layer 7. At TCP layer 4, HAProxy forwards TCP RAW packets from the client to the application server. In HTTP layer 7, HAProxy parses the HTTP Header before forwarding it to the application server.

How to Setup a 2 Region Website Using a Load Balancer
At this time we will try to make or implement the use of Haproxy to setup the web on two different servers so it is hoped that when one server experiences problems the other server can cover so that the web can continue to be online.
In this setup we will use 3 VMs (virtual machines) including:
- Wordpress website (for example)
- Haproxy Website Servers
- Server VM for MariaDB
Alright, here we are, just login to console.idcloudhost.com and create 2 VMs in different locations.
Stage of Creating a WordPress Server
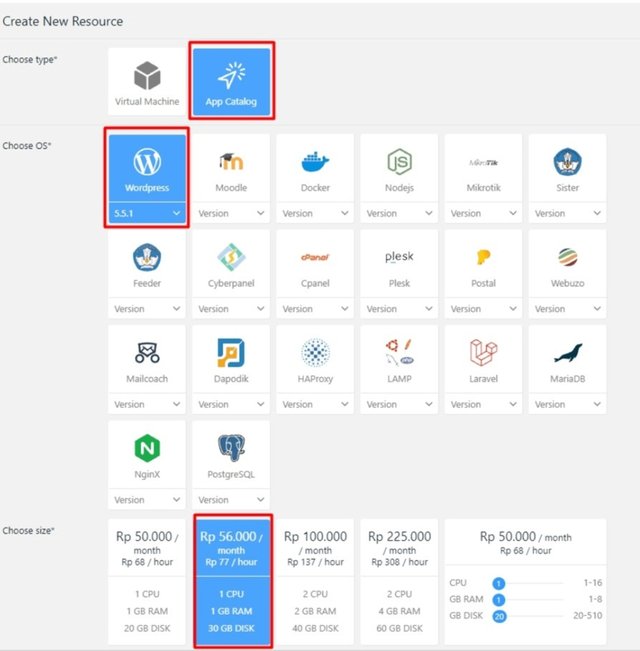
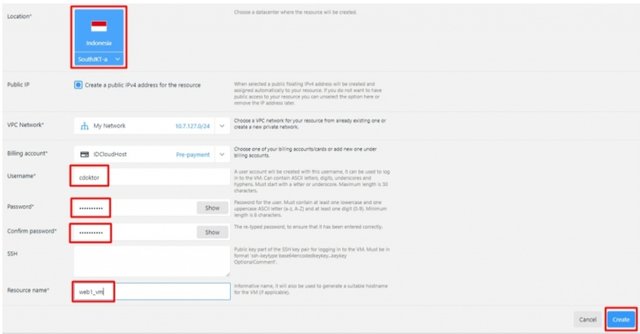
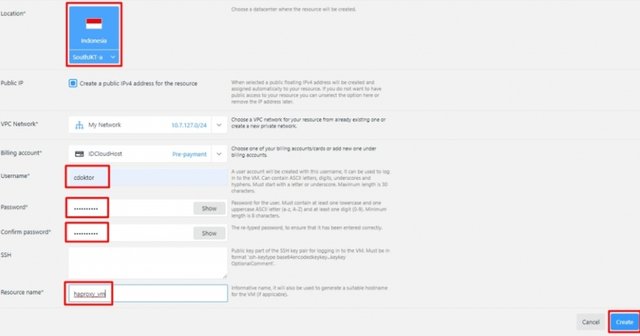
At this stage we do the settings on the server location and also our username, password and billing account.
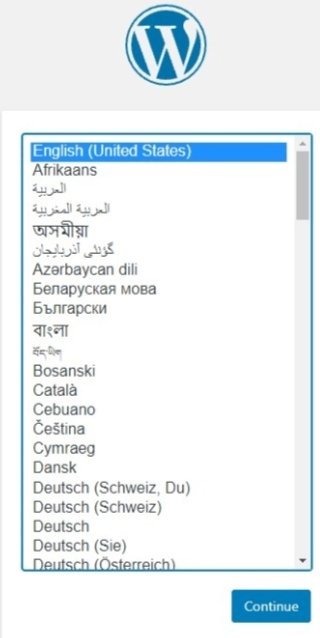
After the creation of the VM is successful, then we create it and then we can open the public IP that we get and install it like in my image.
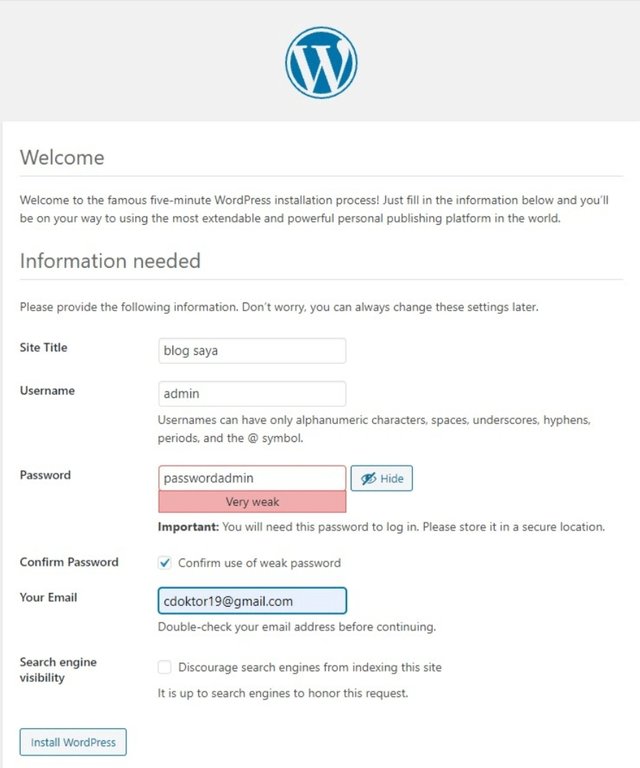
Next, do the settings on the VM you created.
After the installation process is successful, our website will appear like the example below.


Haproxy Installation Stages
At this stage we will start the process of creating the Haproxy server.
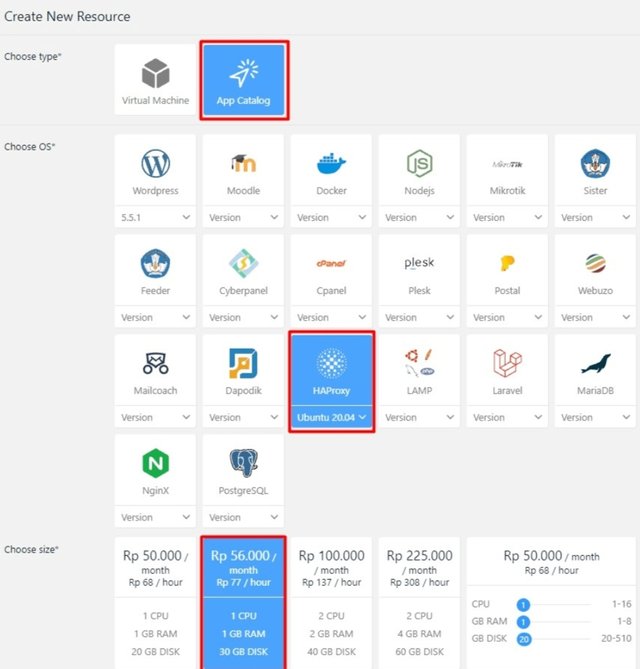
As before, make settings on the data server and also the location of the server.
After the VM is successfully built, we can login via SSH and make settings on our Haproxy like the following example.
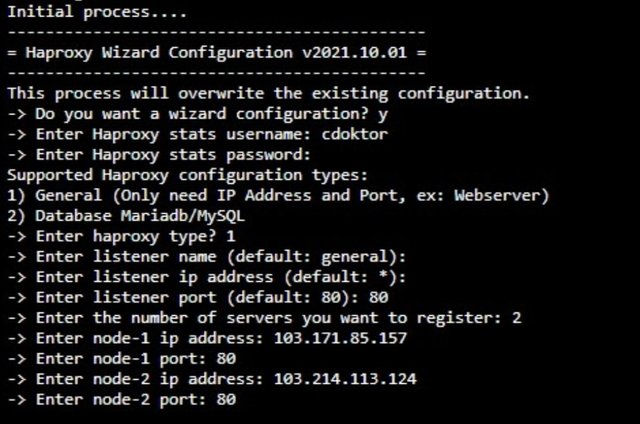
After we input the parameters on Haproxy, we can apply our website, he can access it via the IP of Haproxy so that when one of the VM Websites has a problem, the website will still be accessible, which is why it is recommended to use the data domain to access your website.

You have to access the status from Haproxy via URL access:
http://ip_haproxy:1991/stats this link can be active or inactive, depending on the specifications of the user.
By entering the username and password that we created earlier.


Stage of Creating New VM Maria DB
Here to perform the need for database centralization, we can also separate the database server that we will use by the two website VMs that we created earlier. Next we will enter the process of creating a new VM through the App Catalog, namely MariaDB.
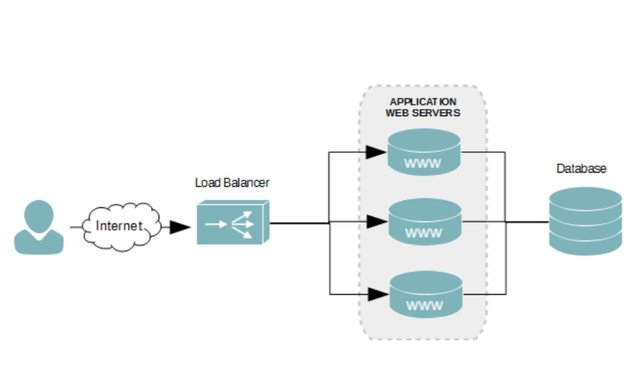
First we go to the stage of creating a new VM in the IDCloudhost VPS cloud, which first creates a VM and selects the MariaDB Catalog App.
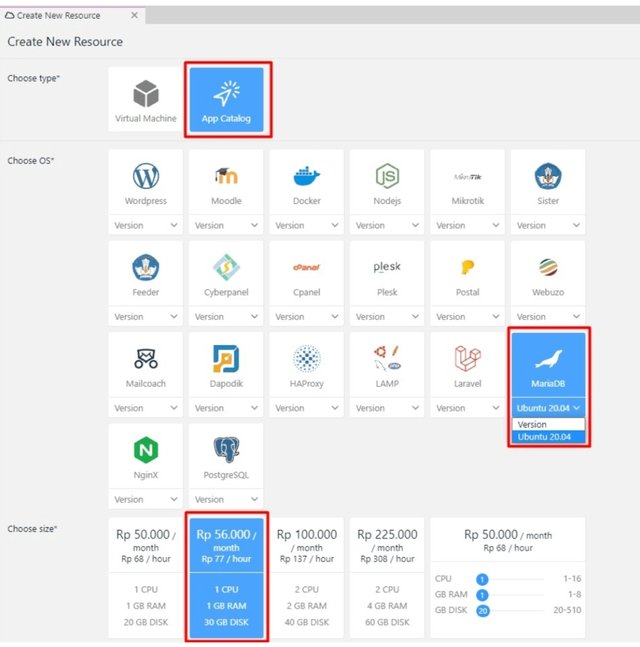
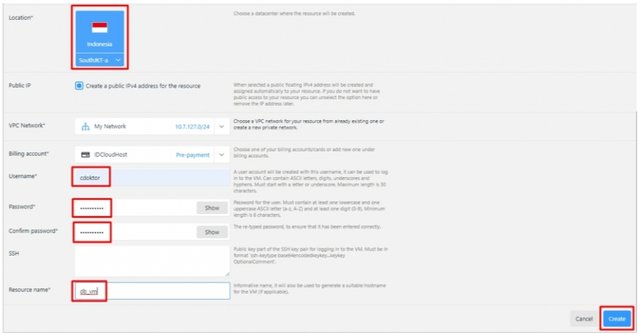
Then set the settings as before.
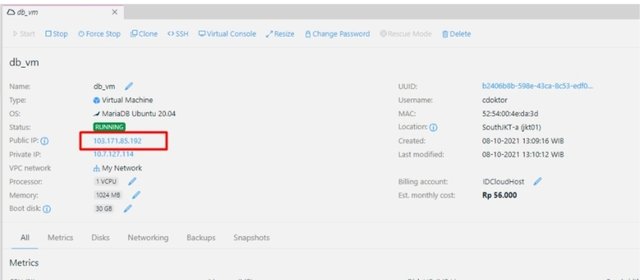
Then the VM will create and after that get a public IP like the following image.
Next we can login to our SSH VM through the panel or use the ssh Client with the password and username that we set earlier.

After successful login, we need to create a database that we will use for our website, in this example I use wordpress, then we can enter our mysql with the following command:
Next we can type the following command to create a database and user.
CREATE USER 'userwp'@'%' IDENTIFIED BY 'mypassword';
GRANT ALL ON wp_myblog.* TO 'userwp'@'%';
FLUSH PRIVILEGES;
EXIT;
Securing our database server by typing the following command.
For those whose default password is our root database user, which is empty, then we do enter and then we set our database root password to make it more secure.
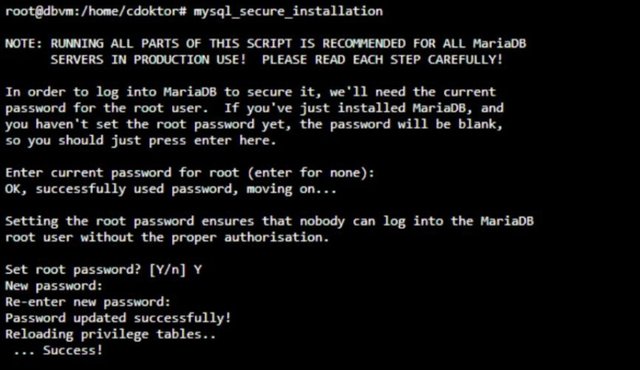
Next I advise you to select agree by typing Y on your keyboard and enter as follows.
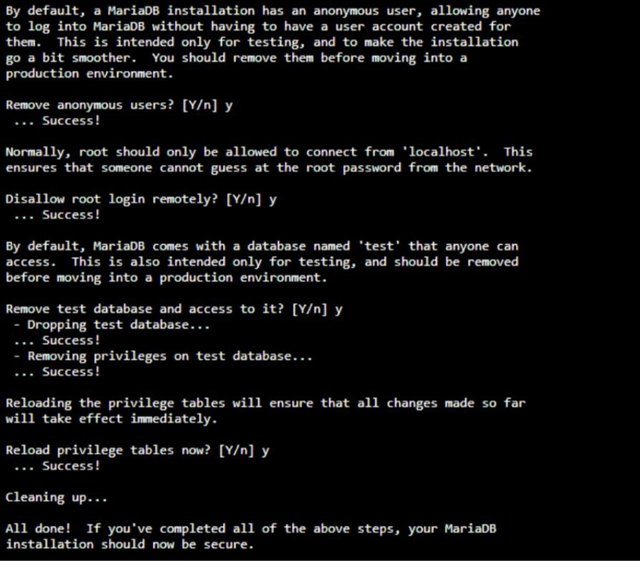
After we secure access to the database server we need to open our database access so that we can access it from a network other than the local network, then in the terminal we can open the file
Then we look for the following line.
bind-address = 127.0.0.1 then we change it to bind-address = 0.0.0.0
Then we save the file and restart our database service with the command code:
At this stage we can access the database server from outside so we can login to our 2 VM websites via ssh and make changes to the /var/www/html/wp-config.php file with the following command code:
Then adjust the database connection configuration to be like the following example:
define( 'DB_USER', 'userwp' );
define( 'DB_PASSWORD', 'my password' );
define( 'DB_HOST', 'fill_with_ip_server_database' );
Do this on both web servers, then we can open the IP address of our Haproxy server and reinstall Wordpress.

Benefits
Using Haproxy on a Cloud VPS can make it easier for us to take a few steps compared to setup on other servers. Load balancing is a method of dividing traffic to several different servers in order to prevent overloading of slow servers.
Other benefits that we can get from Load Balancing such as maximum performance and saving server resources. Of course this technology helps us. If you get a lot of visitor traffic spikes. So to avoid overloading you can use this method.
Well, how do you make it easy. So this is all I can post on this occasion, hopefully it will be useful and thank you.


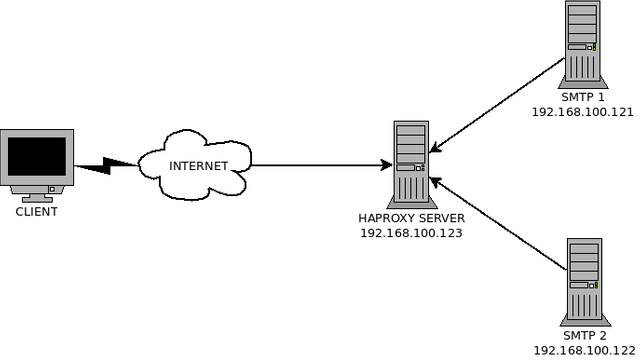.png)
Downvoting a post can decrease pending rewards and make it less visible. Common reasons:
Submit
Your post has been selected in best picks.
Downvoting a post can decrease pending rewards and make it less visible. Common reasons:
Submit
Thanks for partition.
Downvoting a post can decrease pending rewards and make it less visible. Common reasons:
Submit
Good one Post dear friend you make a very good post thanks for sharing a good information with us my best wishes for you.
Regards, Faran Nabeel
You can delegate your SP to @siz-official and take benefit of our Delegation Offer getting up to 200 % Curation rewards
501002003004005001000200030004000500010000
Downvoting a post can decrease pending rewards and make it less visible. Common reasons:
Submit
Nice post brother😁
Downvoting a post can decrease pending rewards and make it less visible. Common reasons:
Submit
For more,you can visit this community
JOIN WITH US ON DISCORD SERVER:
Downvoting a post can decrease pending rewards and make it less visible. Common reasons:
Submit