Asslam o Alikum!
Hope you all are fine. I am here again for you guys with my 2nd Lecture, of Visual Basic Application (VBA) .

Lecture#2
- Input Box and Message Box
- IF THEN ELSE
- Select Case
- Workbooks

(i) Input Box and Message Box:
Message Box
Message box is used to display the information as a pop-up.
For example we want to show the Hello in the message.

When we will run this macro it will show the Hello message.
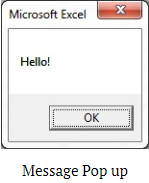
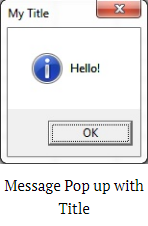
We also can show the button and title in the message like below-

When we will run this macro it will show the Hello message along with the information sign and title.
User Confirmation Message Box
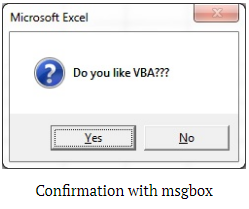
We can take the confirmation from the use in Yes and No by using the message box.

When we will run this code it will ask questions as given in the below image-
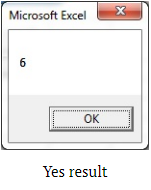
If we click on the Yes button then it will show-
If we click on the No button then it will show-
The Buttons parameter can take any of the following values:
- 0 vbOKOnly – Displays OK button only.
- 1 vbOKCancel – Displays OK and Cancel buttons.
- 2 vbAbortRetryIgnore – Displays Abort, Retry, and Ignore buttons.
- 3 vbYesNoCancel – Displays Yes, No, and Cancel buttons.
- 4 vbYesNo – Displays Yes and No buttons.
- 5 vbRetryCancel – Displays Retry and Cancel buttons.
- 16 vbCritical – Displays Critical Message icon.
- 32 vbQuestion – Displays Warning Query icon.
- 48 vbExclamation – Displays Warning Message icon.
- 64 vbInformation – Displays Information Message icon.
The MsgBox function can return one of the following values which can be used to identify the button, user has clicked in the message box.
- 1 – vbOK – OK was clicked
- 2 – vbCancel – Cancel was clicked
- 3 – vbAbort – Abort was clicked
- 4 – vbRetry – Retry was clicked
- 5 – vbIgnore – Ignore was clicked
- 6 – vbYes – Yes was clicked
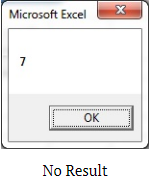
- 7 – vbNo – No was clicked
Input Box
Input box is used to take the information from user. You can enter your input as a number, any text, or date.
In the below example we will take the Name as input and will show it as output by using message box.

Below given pop will be displayed when you will run this code
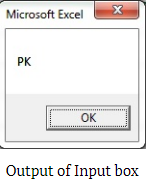
Enter you name and click on OK. Since we have used “msgbox s” so it will display the name which you enter in the message.

(ii) IF THEN ELSE:
IF then the statement is used to run the certain code when a given condition is true and if the condition is false then some other code will execute. We have to close the IF statement with End IF.
In the below example we are asking a question by using a Message box. If the user clicks on Yes then we know it will return 6 and if the user clicks on No then it will return 7. So we have taken the condition to show the message box for the click of yes and no.
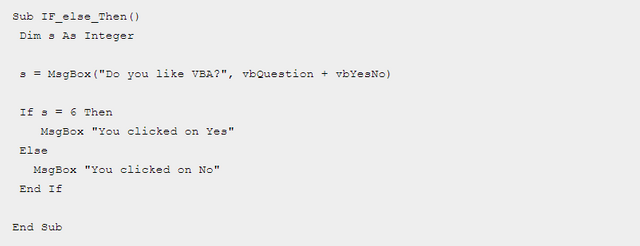
When we will run this code it will show below given message.

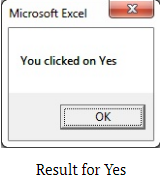
If you click on Yes button then it will return-
If you click on No button then it will return-

ELSEIF
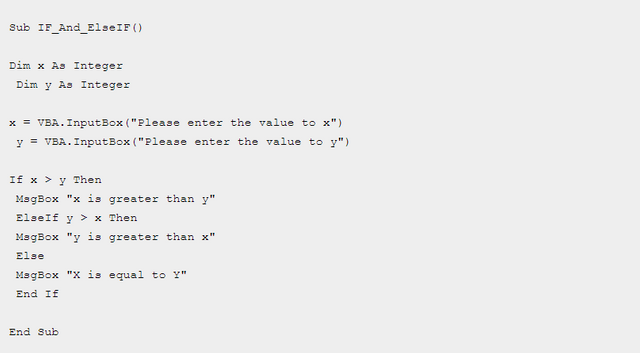
Elseif is used to use more than one condition. See the below given example.
When we will run this code, We have to input x and y values as number.
I have given the value of x as 5

I have given value of y as 10

Now it will show the result


(iii) SELECT CASE:
In the previous chapter you have learnt IF THEN ELSE. In this chapter you will learn about Select Case.
Select Case is also known as Switch Cases. VBA Select Case can be used in placed of complex Nested If statements. This makes the VBA code faster to execute and easier to understand.
To start select case we use “Select Case” and to end it we use “End Select”. In between we give the condition for different cases.
Below is the example to select the color. If R, G or B is not selected then Case Else will execute.
We also can give the value in range. We need to use To or to give the multiple values give it comma-separated.
Please see the below example wherein we use the first case as “Case 1 to 5” and for a second case we are taking as “Case 6, 7, 8”.


(iv) Workbooks:
How to Open a workbook?
To open a workbook we need to use the Open property of the Workbooks object . Below is given code to be used in the module to open a workbook. Change the path and name of your workbook accordingly.

If you want to open the workbook as read-only then put Readonly:=True .

How to Save As a workbook?
If you want to save as workbook then SaveAs property to be used. Below is the example of workbook save as.

How to Save a workbook?
To save a workbook Save property is used. Below given code to be used in the module.
How to Close a workbook?
If you want to close a workbook then Close property of workbooks is used. Below is the example.

Shavechanges are used to save the workbook before close. If you put shavechanges=false then workbook will be closed without saving.
How to create a new workbook?
If you want to create a workbook (like Ctrl+N in excel) then Add property of workbooks is used.

A new workbook will be created with names of Book1, Book2 or any other Book.
How to Protect/Unprotect a workbook?
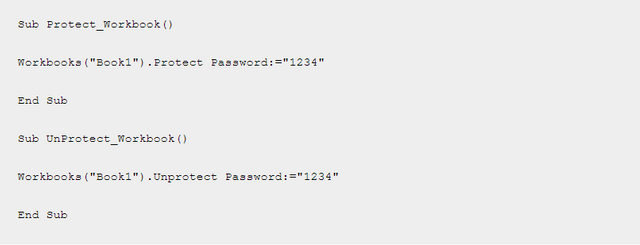
A workbook can be protected by using the below given code. After protecting a workbook, worksheets of that workbook cannot be renamed, deleted, hidden, etc.
Below is the code to protect and unprotect an open workbook.
Difference between Thisworkbook and Activeworkbook:
Workbook events are actions or occurrences associated with the workbook, to trigger a VBA code or macro. We can put our code to run to a workbooks event like workbooks open, before close, Activate, Deactivate etc.
- To fire a workbook event open the Visual Basic Window by pressing alt+F11
- Double click on Thisworkbook
- Select the Workbook in left drop down box in place of General
- Now you can select the workbook event from right drop-down box as given in below image.
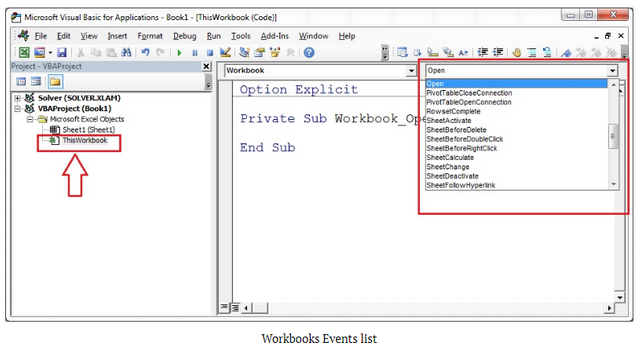
For example, we want to put welcome message while opening a workbook and good bye message on closing the workbook


That's all for today. Stay safe and blessed we will meet at the next lecture. If anyone has a question about this course or query kindly comment first. Best of Luck.
Thank you!
Regards: @ghazi.vani



Thank you for sharing this short key. 😀
Downvoting a post can decrease pending rewards and make it less visible. Common reasons:
Submit
Your welcome @faran-nabeel.
Downvoting a post can decrease pending rewards and make it less visible. Common reasons:
Submit
I like how you’ve presented your work.
I’d advise you make your source code editable so others would have a chance following with you at a fast pace
You can use “Apostrophe” 3 times at the beginning of the code and end it with “Apostrophe” 3 times again to achieve this
Downvoting a post can decrease pending rewards and make it less visible. Common reasons:
Submit
@abdulkahargunu Thank you for guidance next time I will follow your instruction and do my best.
Downvoting a post can decrease pending rewards and make it less visible. Common reasons:
Submit
This lecture is very useful for us because it can be useful for us in the life to come. You and I can all learn from it special Thanks to ghazi.vani
Downvoting a post can decrease pending rewards and make it less visible. Common reasons:
Submit