Assalam-o-Alaikum
Greeting to all Steemians. Hope you all are fine.
First of all we have to install TAB NAVIGATION command that is available on google REACT NATIVE TAB NAVIGATION.
After this installation we are going towards the step first.
Step 1:
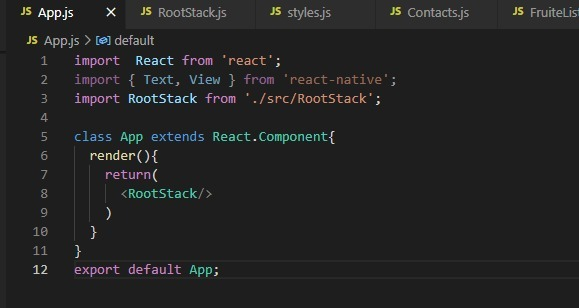
First of all we will apply code in App.js. Firstly we import the View and text component in the app.js .And then we will import Root Stack which is more important for tab navigation because we can import multiple screens easily in Root Stack.

Step 2:
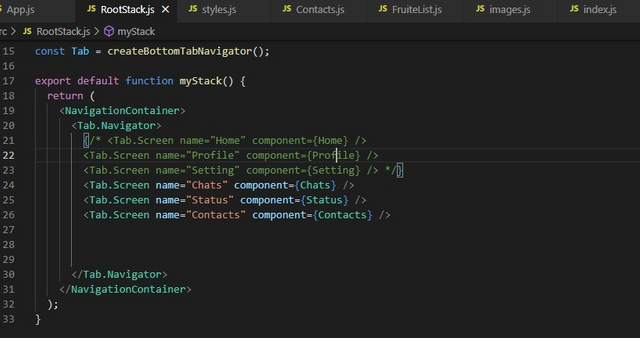
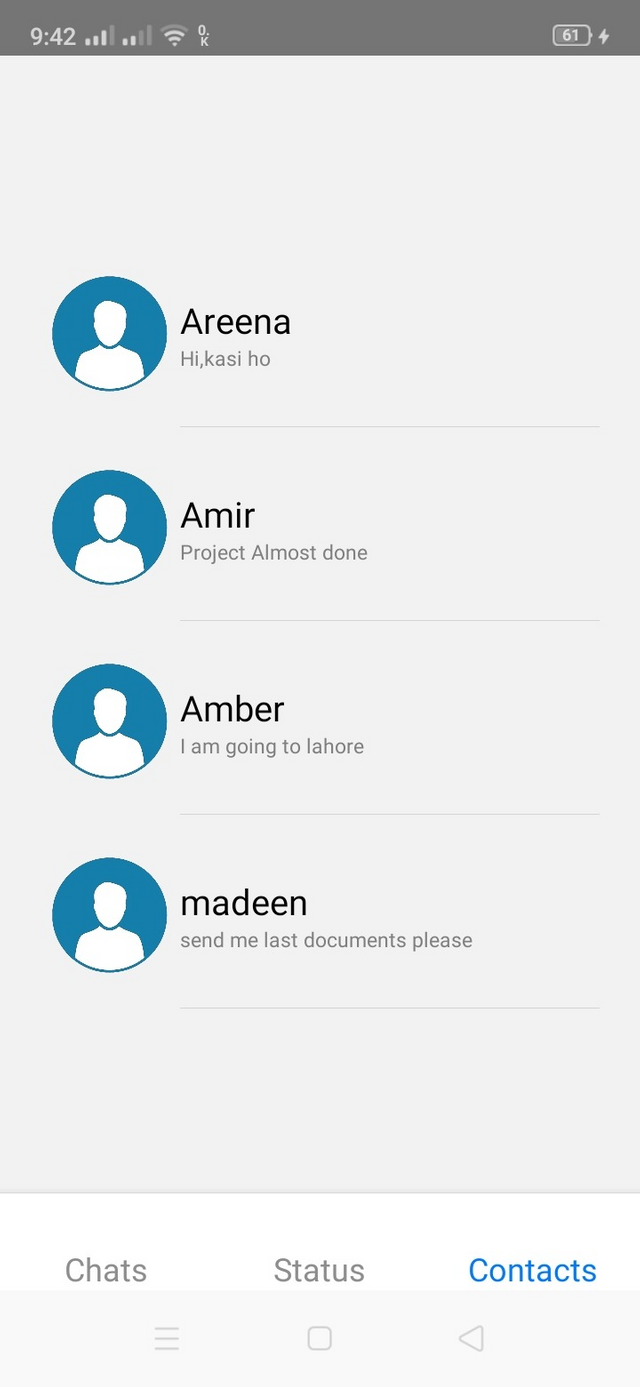
In this step we will import multiple screen in Root Stack. And also we have to use Tab Navigator and Navigation Container.
After this we will import screens like:
- Chats Screen
- Status Screen
- Contacts Screens
Step 3:
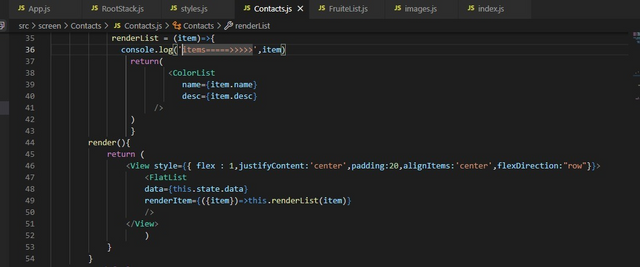
Step 4:

Step 5:

Step 6:
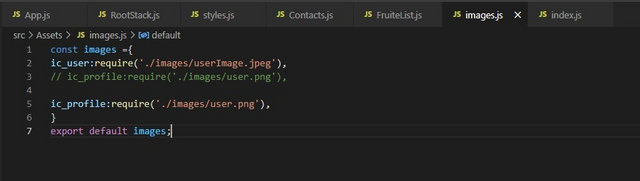
In this we will use Image.js folder that is also created in component folder. In this we will create image that we will use in our list and app that we created.
Step 7:
In this step we simply run our complete code by connected our phone or emulator by using 2 command that are:
- Adb devices
- React-native run-android
If it will be run successfully then we will move on next step
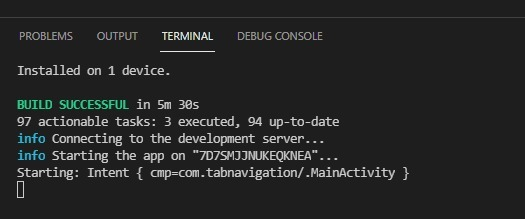
Step 8:
After completion of all previous steps we have to check our emulator or phone that our code executed or not. And here our project is running .


Now my tutorial is completed. Today’s tutorial is little bit difficult But I try to make it easier that will easily understandable for everything.. And I hope that you will like it and appreciate as usual.
Special Thanks to:
@cryptokraze
@vvarishayy
@suboohi
JOIN STEEM INFINITY ZONE:

Regards: @ramzanbaow
Wow nice JavaScript
My next target 😋
Do you know python language?
Downvoting a post can decrease pending rewards and make it less visible. Common reasons:
Submit
After completion back end of react native . My next task is python language or graphic designer
Downvoting a post can decrease pending rewards and make it less visible. Common reasons:
Submit
Its really a very informative post.
You work very hard.
I like your hard working
Downvoting a post can decrease pending rewards and make it less visible. Common reasons:
Submit
Thanks bro.
Downvoting a post can decrease pending rewards and make it less visible. Common reasons:
Submit
This is very informative post keep it up
Downvoting a post can decrease pending rewards and make it less visible. Common reasons:
Submit
wow very good post and very informative post
Downvoting a post can decrease pending rewards and make it less visible. Common reasons:
Submit
Nice post
You define it very well
I also want to learn this
Downvoting a post can decrease pending rewards and make it less visible. Common reasons:
Submit
Thank you for posting in SIZ Community.
your post has been chosen for the top 5 posts of the community. We are giving you a 100% vote from @siz-official which is the community curation account. Keep sharing the quality content. Your reward of 2 steem will be with you within 24 hours.
You can delegate your SP to @siz-official and take benefit of our Delegation Rewards Offer of getting up to 200% Curation Rewards
You can also use these quick delegation links. Just click on your desired amount of SP you want to delegate and it will be done in process of 1 minute.
50 100 200 300 400 500 1000
2000 3000 4000 5000 10000
Downvoting a post can decrease pending rewards and make it less visible. Common reasons:
Submit
You make a very informative post. I hope everyone learn
Downvoting a post can decrease pending rewards and make it less visible. Common reasons:
Submit