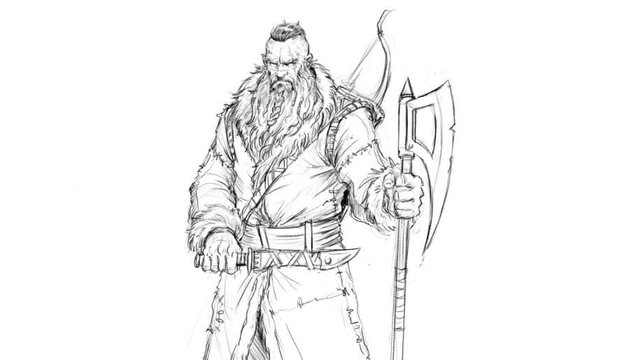
In this article, we will be showing you how to draw a perfect image of a stereotypical barbarian. We are talking about a northerner warrior and hunter and we will teach you how to draw him in 8 easy steps. The drawing would capture all his might. How amazing is that?!.
STEP 1-DRAWING THE TORSO
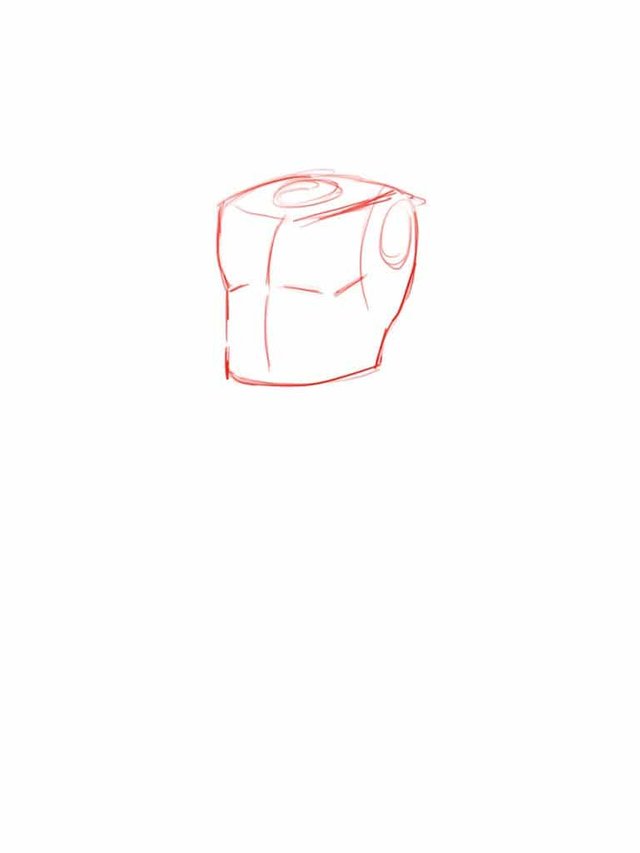
Using the above picture as a guide, the Barbarian´s rib cage should be drawn using a slight 3/4 perspective. This just means that the left side which faces the viewers would be drawn bigger in size than the left side.
Going on, the rib cage should be started off by drawing two curved horizontal lines. The lower line should have a deeper arc than the top line. Then you should draw two curved out vertical lines that connect the earlier drawn horizontal lines at their extremes. Having done that, divide the rib with a vertical line using the 3/4 perspective. When that is done, as seen in the picture, draw another curved vertical line at the left side of the rib cage. This would serve to highlight the underarm area Having drawn it, go on to highlight where the head will be by drawing a small circle at the top of the rib cage. Flowing from that, draw another circle at the top right side of the rib cage. This would be where the right arm would emerge from.
STEP 2-DRAWING THE HIPS
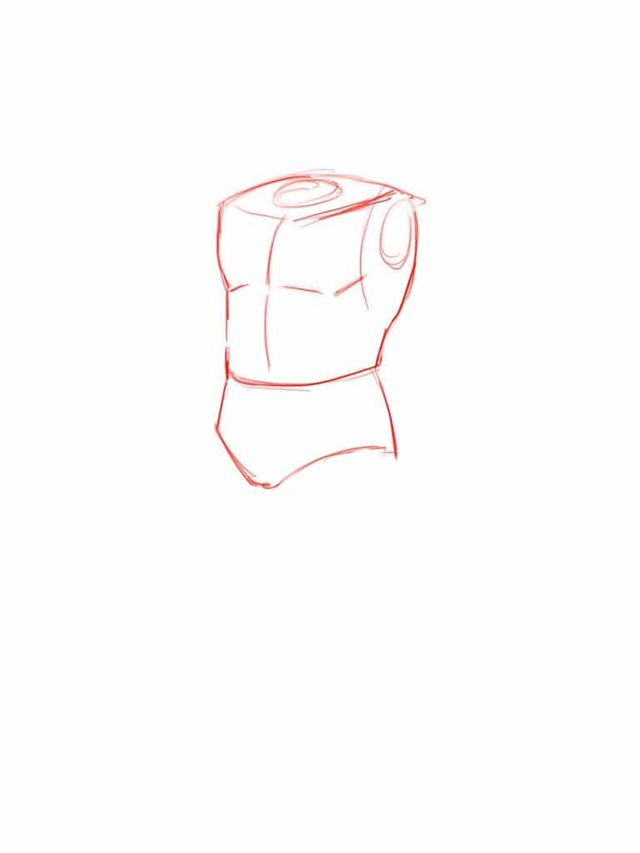
For the hips, you should draw them to take the form of a man’s underpants as depicted in the image. This is where the legs of our character would emerge from.
STEP 3- DRAWING THE LEGS
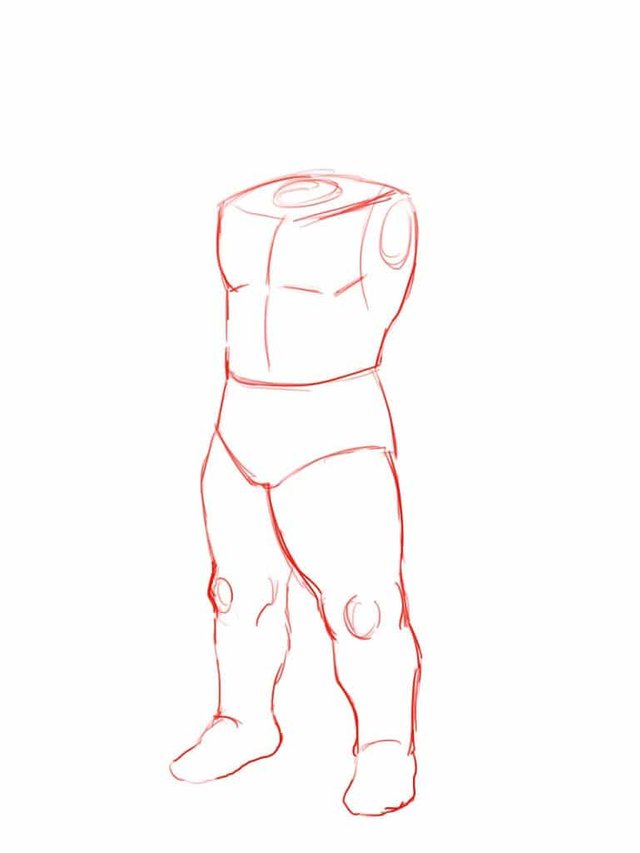
Our Barbariancharacter would be drawn standing with his legs separated and one foot stepping forward. Each leg should be started off as a big tube and then you should gradually reduce them as you get to the knees. To highlight the knees, draw two circles in between them as seen in the above picture. When you’ve done that, the continuation of the leg should then extend out a little and will fall stretch towards the ankle.
Mediavine
The difference between one leg and the other, is the leg on the right is looking forward toward the viewer, meanwhile, the other leg should be drawn in a 3/4 perspective. The right thigh will be drawn in an almost frontal perspective.
STEP 4-DRAWING THE ARMS
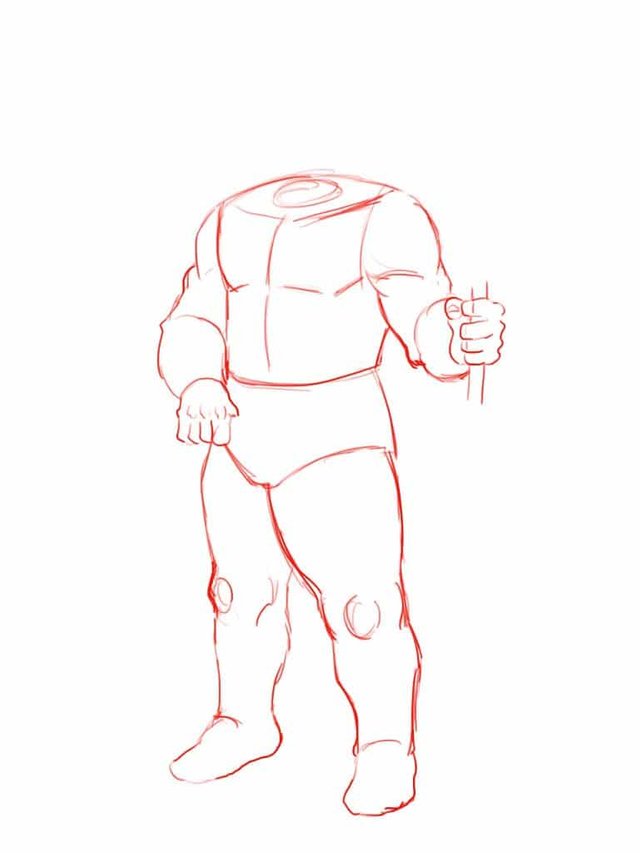
The arms of our character should be sketched slightly extended from the body and they should be drawn using a 3/4 perspective. This entails the right arm is more visible than the left arm because the right side faces the viewers.
Having laid that out, the upper arms should be started off in the form of big tubes and should reduce in size as they get to the elbows. Then they should extend out at the point of drawing the lower part of the arms and should further reduce as you get to the wrist. The main difference between the left and the right arm is the perspective. Meanwhile, the right forearm will be drawn almost frontally and elevated compared to the opposite arm, the left forearm will be drawn pointing downwards from the elbow. Having drawn that, draw the hands as seen in the picture.
When drawing the left hand, draw the fingers of the left hand slightly clenched grabbing something, with the upper part of the hand fully visible meanwhile, the opposite hand will be drawn fully frontal, with the fingers around some tube, grabbing it too.
STEP 5- DRAWING THE HEAD
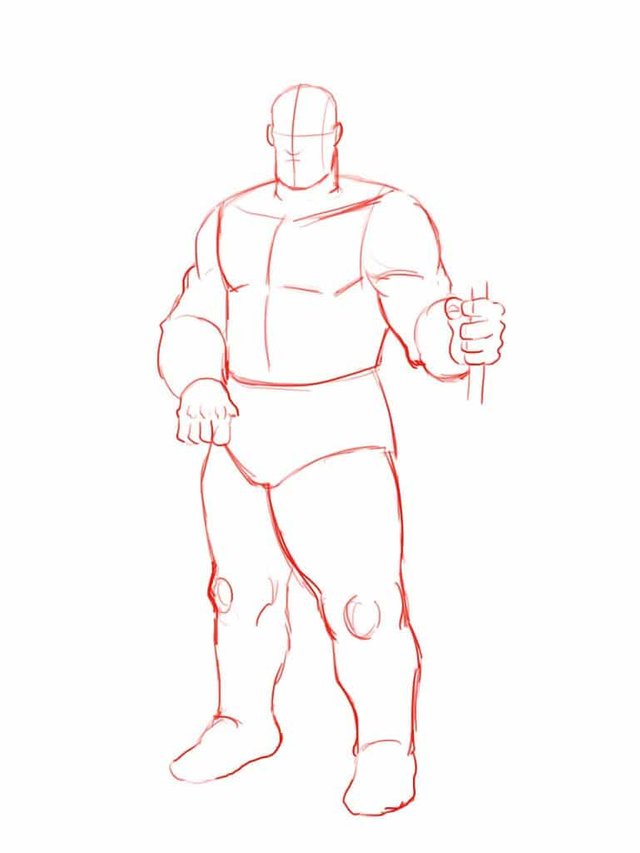
From the base created for the head, two short vertical lines should be drawn. This should serve as the barbarian´s neck. Having drawn that, our character’s head will be drawn in the form of a medium-sized oval that sits on the neck and would be drawn using the 3/4 drawing scale. The head should then be divided by a vertical line and a horizontal line that intersects in the middle( forming a cross). These lines would be used for filling in the facial details later.
STEP 6- DRAWING THE CLOTHING AND HAIR
.jpeg)
Once we have the whole body structure established, it´s time to dress our dummy up. Our character will wear a thick furry coat with fur around the sleeves, the neck, and the bottom of the coat.
The part of the coat that really breaks the whole body shape of the character is the bottom part of the coat that opens from the hips down and hides the legs.
Regarding the character´s hair, we will draw 3 different types of hair on the character´s head:
The crest or mohawk type haircut on top of the head.
The eyebrows on top of the horizontal line across the face.
The long beard covering the jaw and reaching the center of the chest. We will draw also a braid in the center of the beard coming down from the under-lip area. Also, we will draw a long mustache covering
STEP 7- DRAWING THE WEAPONS
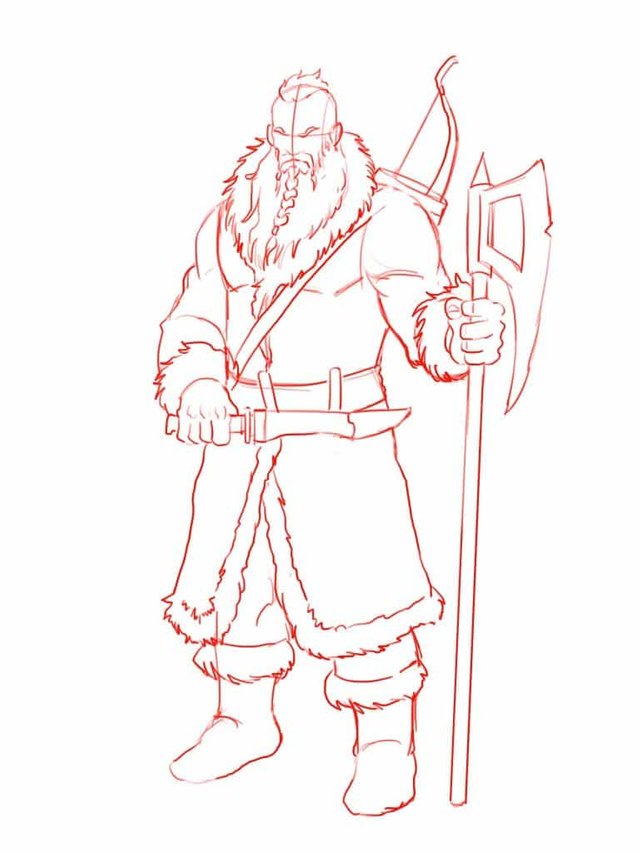
Now it´s time to draw the barberian´s weapons:
A big battle axe on the right hand
A knife inside its sheath hanging from the blame around the waist.
A bow with arrows inside a big quiver strap around the chest.
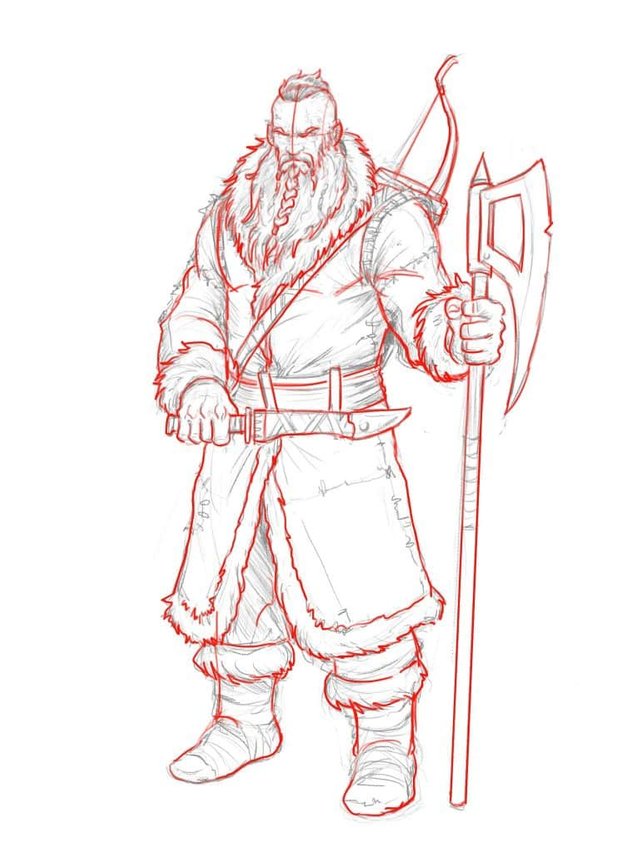
STEP 8- DRAWING THE FINAL LINE ART
@moukim excelente
Downvoting a post can decrease pending rewards and make it less visible. Common reasons:
Submit
thanks
Downvoting a post can decrease pending rewards and make it less visible. Common reasons:
Submit
Fantastic drawing bro, congratulations!
Downvoting a post can decrease pending rewards and make it less visible. Common reasons:
Submit
thank you
Downvoting a post can decrease pending rewards and make it less visible. Common reasons:
Submit