.png)
Background Image Source- Canva.com/Location

Assalam-o-Alaikum Steemians !
I'm @moneyster, a professional level Cryptocurrency investor and an analyser. As per the guidance of @sagor1233 who is working as a Moderator in this Tron Fan Club community, I decided to write another Homework Task by using my Cryptocurrency related knowledge. Let me go through all the questions given by @sagor1233.
.gif)
 |
|---|
- INTRODUCTION OF OPENSEA MARKETPLACE
OpenSea is basically a Marketplace that we can use for buying or selling NFTs (Non-Fungible Tokens) in a decentralized manner. With the help of this platform, we have the ability to give value to our own NFTs at a certain level by listing them on this OpenSea Marketplace.
In fact, this is the first and top Marketplace that has been created as an NFT Marketplace in the world. Because this Opensea Marketplace consists of a larger Trading volume as compared to other NFT marketplaces.
The most interesting thing about this NFT marketplace is that this is a two network-based Marketplace named Ethereum and Polygon. Therefore, we have the ability to do all the Transactions by using both Ethereum and Polygon networks for paying gas fees. However, the Ethereum network gas fee is relatively very high as compared to the Polygon network.
Additionally, they have also introduced Solana Network as a beta version to accomplish some Transactions on this Platform. Here we can mainly use the Phantom and Glow wallets to keep the connection with this Marketplace. However, it is still a beta version and soon it will be attached as a permanent option for accomplishing all the Transactions.
The interface of this Opensea Marketplace is very simple and attractive. When we look at the 1st window of this Marketplace, we have the ability to explore a lot of NFT Collections according to some categories. I will further discuss those additional details in the next point.

- REVIEWING THE OPENSEA MARKETPLACE STEP BY STEP
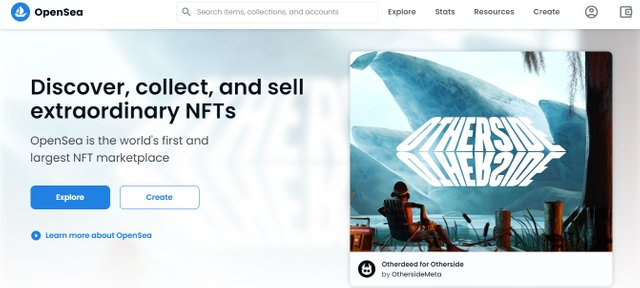
First of all, I will go through the https://opensea.io/ URL to open this large NFT Marketplace in my web browser. Then we can see the main interface of this NFT marketplace. Below I have attached a screenshot of the main interface of this Opensea NFT marketplace.
 |
|---|
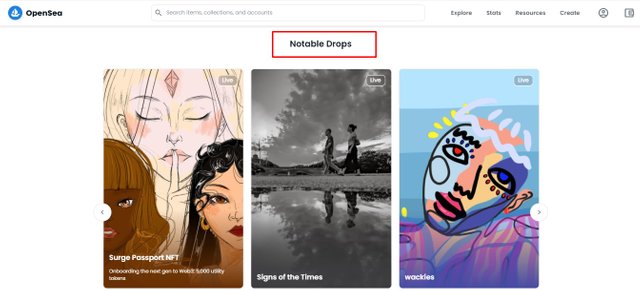
When we go a bit down of the window, we can see a list of Notable Drops as live thumbnails. This is a collection of featured NFTs that have been listed on this Opensea Marketplace.
 |
|---|
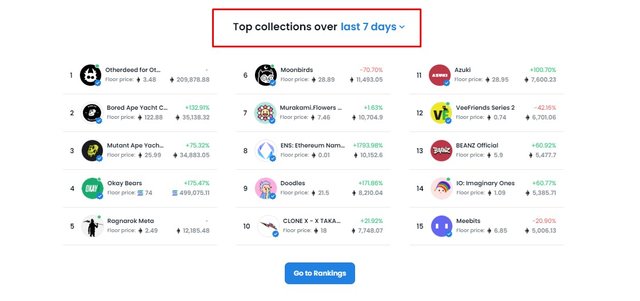
After that, we can see the Top NFT collections over the last 24hrs, the last 7 days and last 30 days. As the default option, we can see the list of the last 7 days' NFTs according to their ratings. Below I have included a screenshot to demonstrate it.
 |
|---|
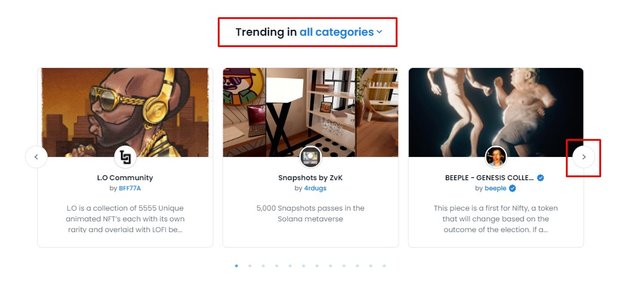
In the next page, we can see a list of Trending NFTs according to all the categories including animation type NFTs. In the right side of that window, we can also see a small arrow icon to see more Trending NFTs.
 |
|---|
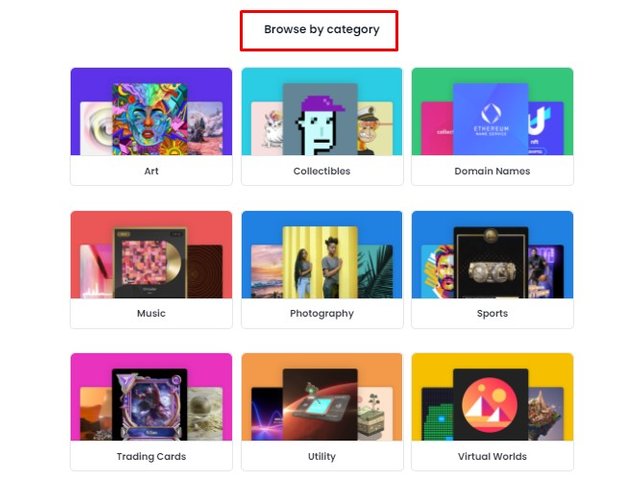
Finally, at the bottom of the window, we can see a lit of categories according to different subjects. Here we have the ability to browse a lot of NFTs according to relevant categories.
 |
|---|
.gif)
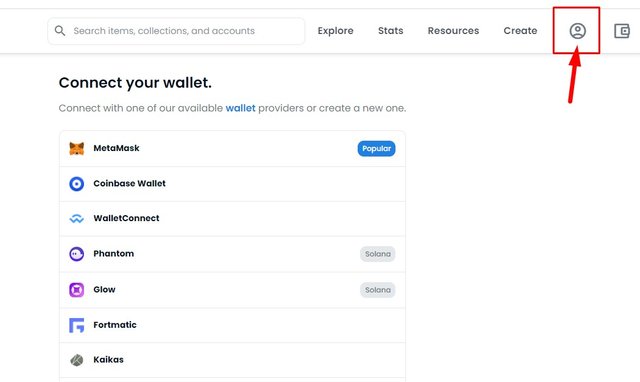
Creating an account in this Marketplace is a very easy task. First of all, we need to have an online wallet to connect with this Marketplace. If we already have a wallet, we can easily connect it by clicking on this profile icon. Here I have attached a screenshot to demonstrate it.
 |
|---|
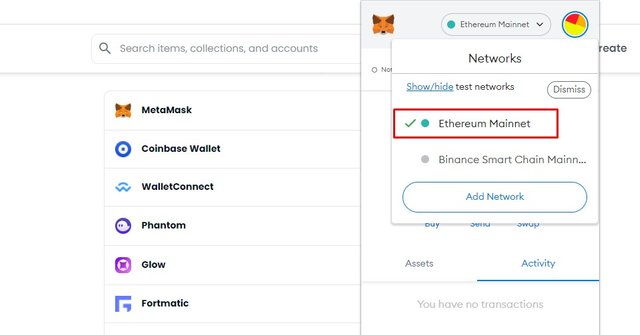
As the second step, we can easily connect our desired wallet. Here we need to install the browser Extention of the selected Wallet. So, here I will use the Metamask Wallet option as I have already created and imported my Meta Mask wallet. After installing and importing the MetaMask wallet, we need to open it through the Opensea platform.
Specially, we should make sure to keep the MetaMask network as Ethereum Mainnet.
 |
|---|
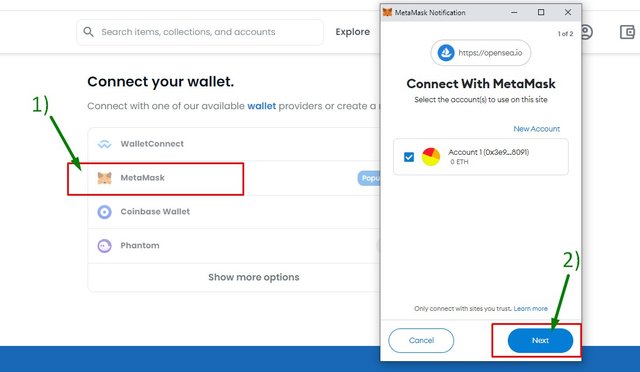
After that, we can click on MetaMask Tab to connect our wallet with this platform. Then, we can click on the "next" icon from the popup window of our MetaMask wallet.
 |
|---|
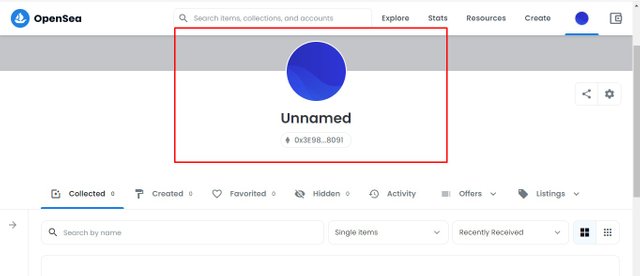
Finally, it will automatically create our account on this Opensea NFT Marketplace. We can further edit our account details from the settings icon.
 |
|---|
.gif)
After logging into our Opensea account, we can further edit our account by updating our personal details, cover image and profile image. It will enhance the quality of our NFT marketplace to attract more buyers.
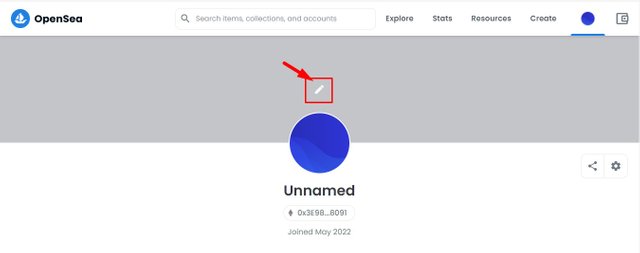
So, first of all, I will click on the custom icon from the cover image section. Then, I have the ability to select any cover picture according to our willingness. Here I will the same cover image that I have used with my Steemit account.
 |
|---|
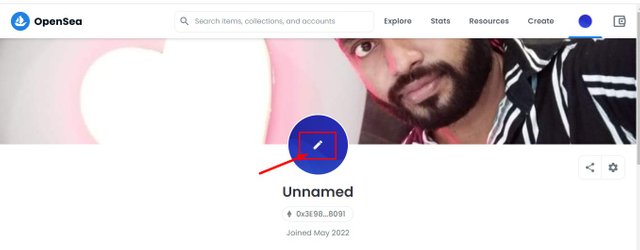
After that, I can edit my profile picture too. For that, I will click on the customize icon from the Profile picture section. So, Here I will upload the profile picture that I have also used with my Steemit account.
 |
|---|
Finally, I can click on the settings icon to include my personal detail in this Opensea Marketplace.
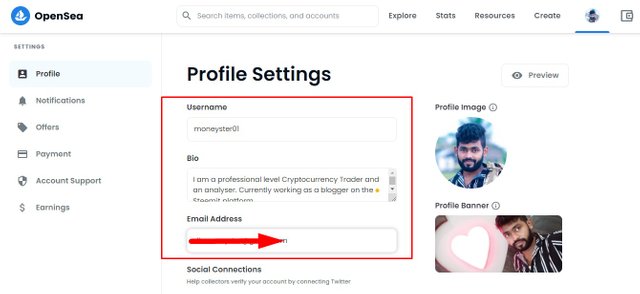 |
|---|
Additionally, we can authorize our Twitter account with this Opensea Marketplace to integrate both accounts together.
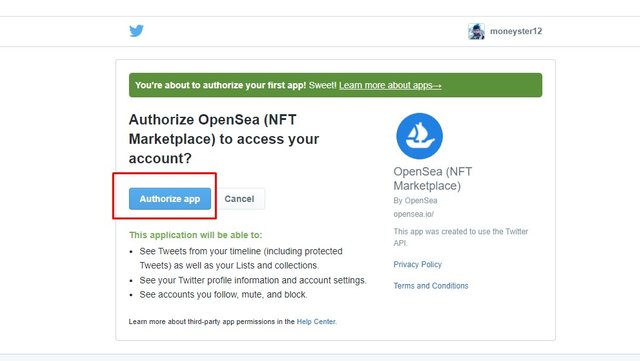 |
|---|
After saving all the above-mentioned details, we will receive a mail confirming all the details. We have to verify that email to complete the entire process.
.gif)
Here I have to use the Polygon network as it doesn't take any gas fee. So, first of all, I will click on the "Create" icon from the right side of the window.
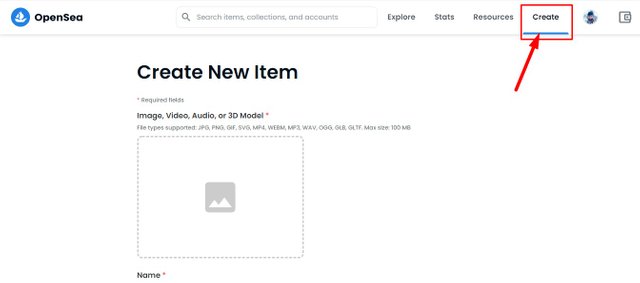 |
|---|
Here I have attached my NFT to the marketplace. Then I need to add the relevant details. So, I will include a unique name in my NFT image.
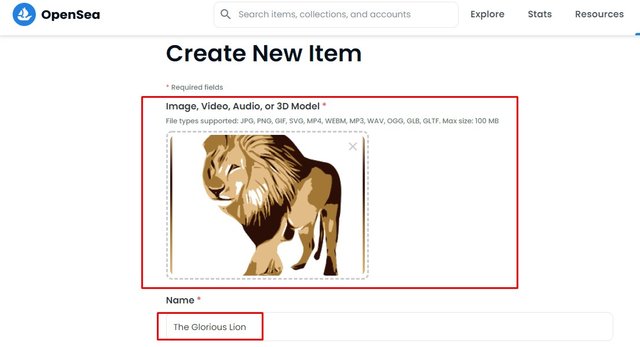 |
|---|
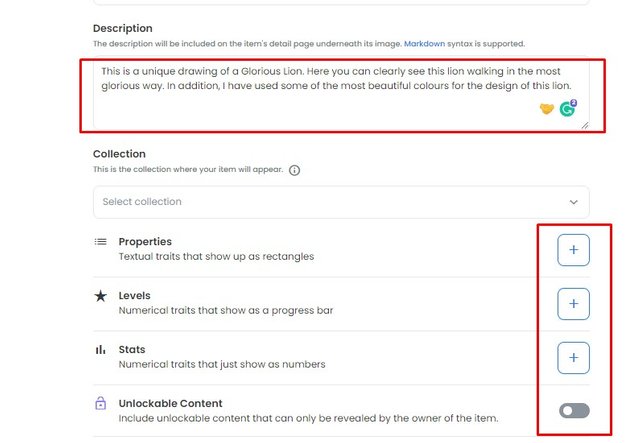
Here I have included a brief detail of this NFT and those details will be listed in the NFT marketplace near to this NFT.
 |
|---|
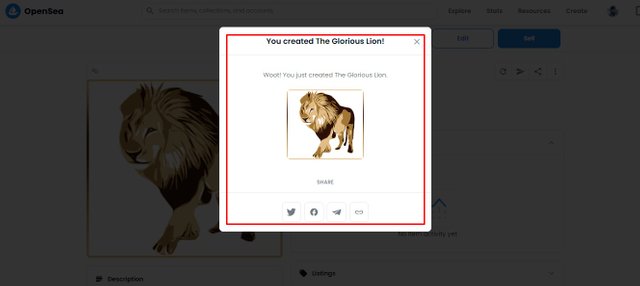
Finally, we can click on the "Create" icon to complete the process. Then it will request a captcha verification process to complete the Transaction. After that, we are almost complete by minting this NFT.
 |
|---|
As a short introduction to this NFT, here I have minted an NFT of a creative Lion illustration created by me. The name of my NFT is "The Glorious Lion". Here you can clearly see this lion walking in the most glorious way. In addition, I have used some of the most beautiful colours for the design of this lion.
.gif)
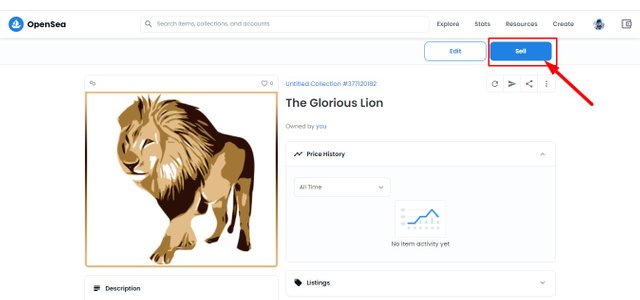
Here I will demonstrate the basic steps to list my Minted NFT to sell it in this Opensea Marketplace. Because we already know that this NFT can't sell without listing in the live auction window. To do that, we have to click on the "Sell" icon from the right side of the window.
 |
|---|
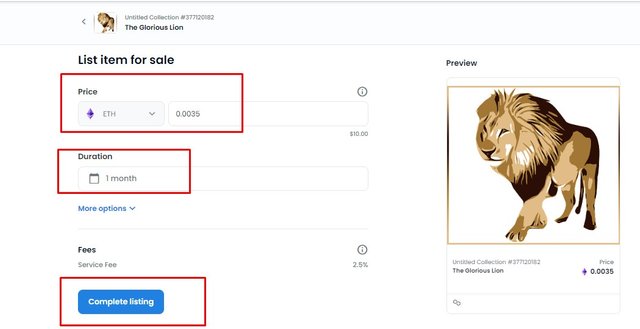
Then, we can see the basic details of my NFT listing window. Here we have to decide a value for our NFT according to our choice. After that, we have the decide the Auction duration. Here I have selected ETH as the default currency and 0.0035 ETH as the value of my NFT. At the same time, I have selected 1 month as the duration of this auction.
 |
|---|
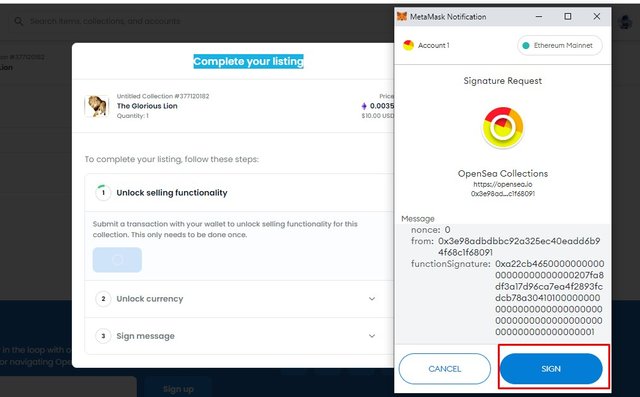
After that, we can click on the "Complete Listing" icon to open the next window. Then, we can see a new popup window for completing our listing. Here we need to unlock the selling functionality by clicking on the "Unlock" button. Then it will pop up a window to sign and complete the Unlock Transaction.
 |
|---|
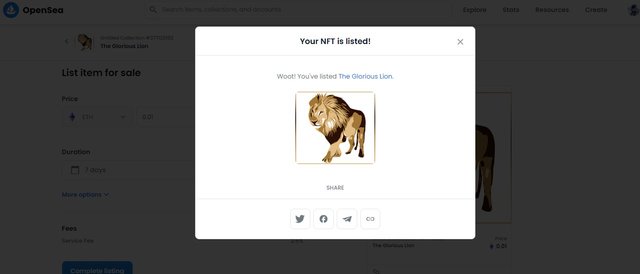
Finally, we can click on the "Sign" icon to complete the listing process. Here you can see, that I have listed my NFT very successfully after following all the steps carefully.
 |
|---|
Here is the LINK to my listed NFT. You can browse it within the relevant period.
.gif)
I have studied the below-sourced articles to further study these topics and I have explained all the above facts in my own words and experience.
10% benificiary set for @tron-fan-club
Twitter Shared
https://twitter.com/moneyster12/status/1521912060510150662?s=20&t=ijaFb1dAbM6X1LSfNF3M4A
Downvoting a post can decrease pending rewards and make it less visible. Common reasons:
Submit
Thank you very much for sharing NFT information with all of us.
Hopefully this can add knowledge for us.
Downvoting a post can decrease pending rewards and make it less visible. Common reasons:
Submit
It couldn't have been more detailed. I love your presentation. I would say it's a masterpiece. Thanks for being detailed.
Downvoting a post can decrease pending rewards and make it less visible. Common reasons:
Submit
You have nicely discussed every topic with us including skinshot. Your presentation was very good. Good luck brother.
Downvoting a post can decrease pending rewards and make it less visible. Common reasons:
Submit
Yeah, I tried to do my best on this Task. I always try to produce high-quality content like you. I have seen your drawings. Those are really very creative.
Downvoting a post can decrease pending rewards and make it less visible. Common reasons:
Submit
Your homework task is really so nice. Thanks for sharing.
Downvoting a post can decrease pending rewards and make it less visible. Common reasons:
Submit
You are most welcome and I really appreciate your comment from the bottom of my heart. I hope to see your contribution as well.
Downvoting a post can decrease pending rewards and make it less visible. Common reasons:
Submit
Nice to see you at home. You have beautifully described everything to us. Your presentation was very good. Good luck to you.
Downvoting a post can decrease pending rewards and make it less visible. Common reasons:
Submit
Thank you very much for your detailed response to my homework Task. These valuable comments really motivate me to do more such works here.
Downvoting a post can decrease pending rewards and make it less visible. Common reasons:
Submit
Thank you for participating in this very educative task.
You have done for yourself a wonderful favour.
Downvoting a post can decrease pending rewards and make it less visible. Common reasons:
Submit
Thank you very much for your appreciation. It really encourages me to do more such works. Thanks again.
Downvoting a post can decrease pending rewards and make it less visible. Common reasons:
Submit