
Hi friends!
Taking the helplines at this stage, those previously drawn in an early post (see: https://steemit.com/hive-185836/@jorgevandeperre/basis-helplines-to-make-patterns-in-islamic-art)

We'll continue by drawing some helplines in the centre. I have highlighted with the red dots the intersections that I will use (on the left) to draw another square (on the right).

Then, we draw a circle inside the square.

Below, the intersection between the circle and the diagonal lines gives us the four points (highlighted in red dots on the left) to draw an even small square (on the right side).
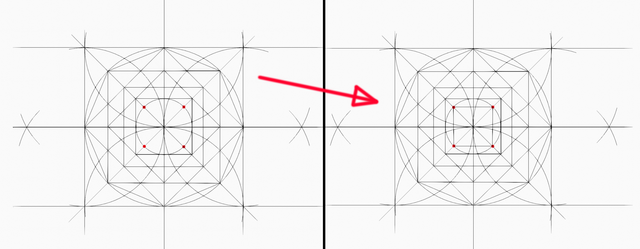
Below, highlighted with red dots the intersection between the square (the circle too) and the horizontal and vertical lines to draw another square. This is also the rotation in 45° of the previous square (symmetry by rotation).

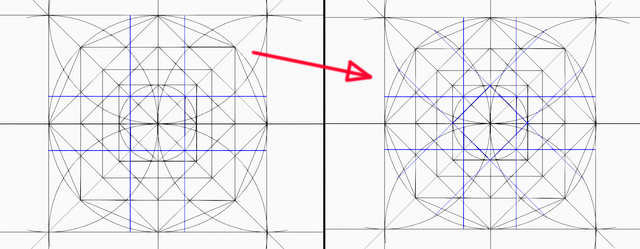
Here the projections of the sides of the smaller squares we just drew are drawn in blue. On the left, in blue colour, are the horizontal and vertical projections.
On the right side, the projection of the diagonal lines was added (in blue).
Once we have finished drawing the helplines, we begin to draw the eight-pointed star that we already know well (if you have read the previous related posts).

Below is the development to draw the eight-petal pattern. As you see, the pattern is obtained by the rotation of the upper shape (on the left side of the image).
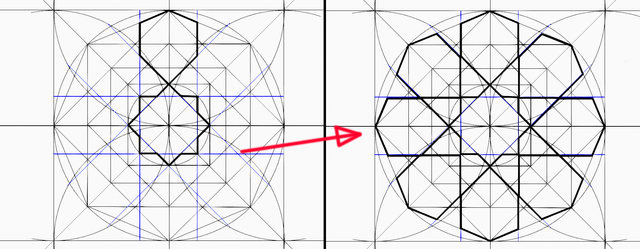
By erasing all the helplines we can clearly see the nice shape of this pattern.
Note the highlighted outer square, which remains the only helpline at this point.

By repeating the shape four times symmetrically, we get the design shown below.
Notice the red lines in the center as a projection of the inner sides of the shapes.
These red lines are our helplines for drawing a perfect octagon (on the right side).
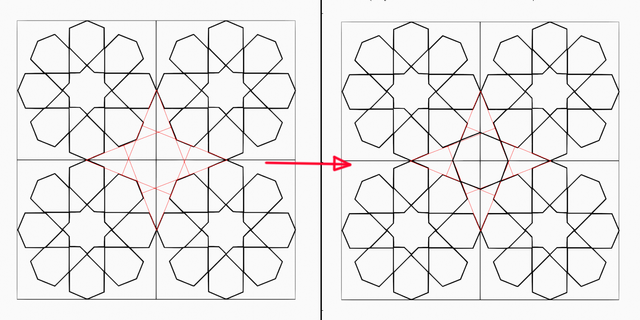
Well, let's use this entire design as a new set of support lines, adding two vertical and two horizontal lines as shown below, highlighted by red dots at the ends.

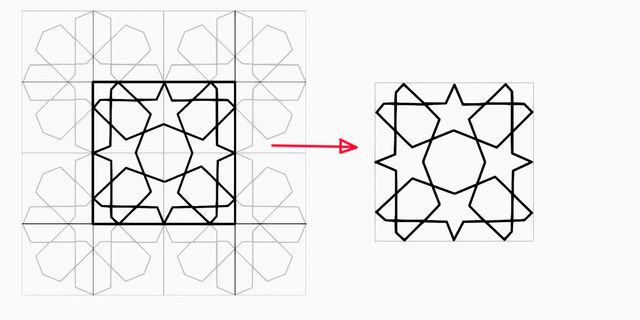
As shown below, we will use only the centre lines of this design as a new pattern (on the left).
On the right, the clean pattern. We keep the outer square, but draw it with a thin line because the purpose of this is to help us by placing the pattern sequence on our drawing surface.
This is the result of repeating the pattern, more complex, of course, but more beautiful also because it breaks the monotony of simpler patterns without becoming chaotic.

I used a blue colour palette to keep the design harmonious, without strident contrasts.

I wish you a very nice day!
Herbarium
Manual Curation of "Seven Network Project".
#artonsteemit
ᴀʀᴛ & ᴀʀᴛɪꜱᴛꜱ
Downvoting a post can decrease pending rewards and make it less visible. Common reasons:
Submit
Thank you!!
Downvoting a post can decrease pending rewards and make it less visible. Common reasons:
Submit
When I see the first colourful image, it associates with stars and maybe snow flakes, due to the colour that they have. I am glad that you presented the study if the pattern and it is so interesting to see how such repetitive patterns comes out with the help of geometry. Beautiful and somehow fit into the Christmas theme :)
Your post has been supported by THE QUEST TEAM. We support quality posts, good comments anywhere, and any tags
Downvoting a post can decrease pending rewards and make it less visible. Common reasons:
Submit
I see the Christmas spirit is with you! Thank you very much!!
Downvoting a post can decrease pending rewards and make it less visible. Common reasons:
Submit