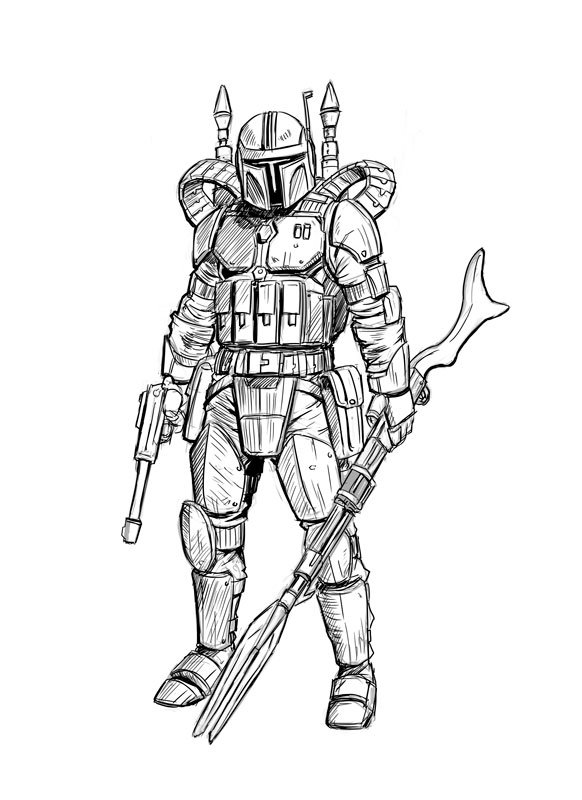
If you have some interest in the Star Wars franchise, you must have come across the figure of the Mandalorians. These individuals were known as probably one of the best mercenaries and bounty hunters forces in the Star Wars universe. So, if you have ever been in awe of Mandalorians, then in this drawing tutorial you are in for a fun ride.
We will be showing you how to draw a perfect image of a Mandalorian from start to finish and we would be doing this in 8 easy steps. The drawing would capture his outfit and weapons. How amazing is that?!. You should also note that the more familiar you are with each step, the more likely your final draft would be flawless and the more likely it would appeal to an audience.
That said, we would start up by drawing a dummy. The manikin would serve as a foundation for our final sketch
STEP 1: DRAWING THE TORSO
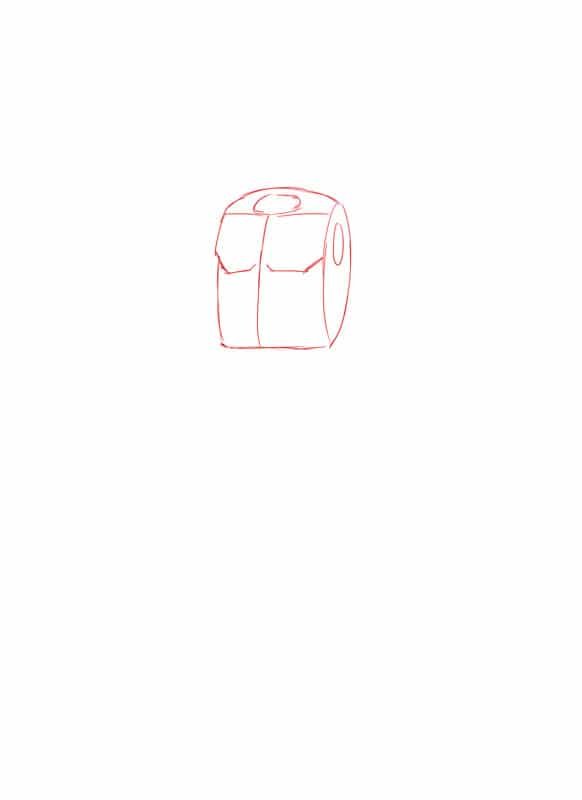
Using the above picture as a guide, the Mandalorian´s torso should be drawn using a 3/4 perspective. This just means that the right side which faces the viewers would be drawn bigger in size than the left side.
Going on, the torso should be started off by drawing two curved horizontal lines. The upper line should have a deeper arc than the bottom line, which is almost straight. Then you should draw two curved out vertical lines that connect the earlier drawn horizontal lines at their extremes. Having done that, divide the rib with a vertical line using the 3/4 perspective. This would serve to highlight the underarm area. Having drawn it, go on to highlight where the head will be by drawing a small circle at the top of the torso. Flowing from that, draw another circle at the top left side of the torso. This would be where the right arm would emerge from.
STEP 2: DRAWING THE HIPS
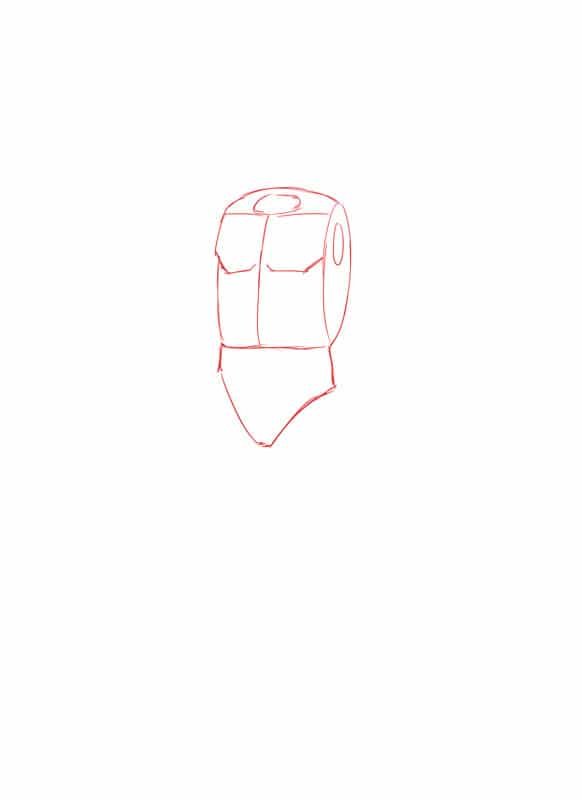
For the hips, you should draw them to take the form of a man’s underpants as depicted in the image. This is where the legs of our character would emerge from.
STEP 3: DRAWING THE LEGS
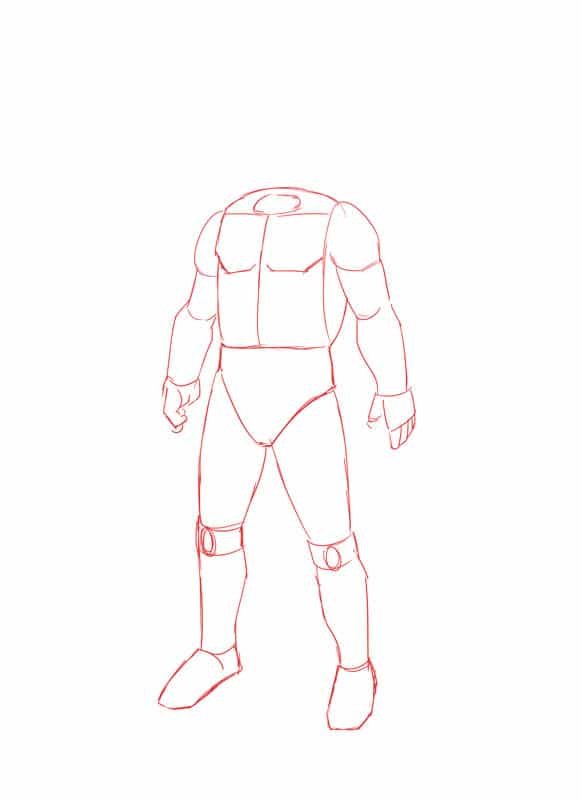
Our Mandalorian character would be drawn standing with his legs a little bit separated and the feet align with the shoulders. Each leg should be started off as a big tube and then you should gradually reduce them as you get to the knees. To highlight the knees, draw two horizontal lines on each knee and then draw a circle in between them as seen in the above picture. When you’ve done that, the continuation of the leg should then extend out a little and should narrow down as you get to the ankles. Then draw the feet as seen.
STEP 4: DRAWING THE ARMS
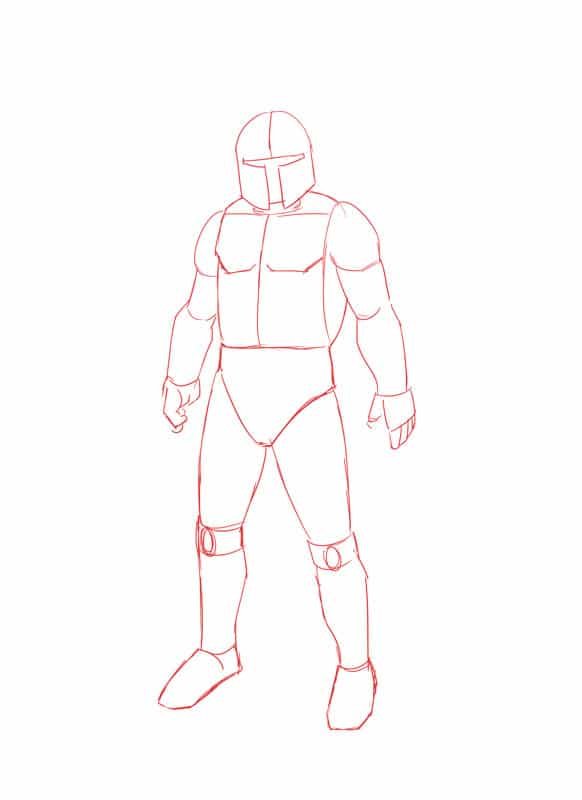
The arms of our character should be sketched slightly extended from the body and they should be drawn using a 3/4 perspective. This entails the right arm is more visible than the left arm because the right side faces the viewers.
Having laid that out, the upper arms should be started off in the form of big tubes and should reduce in size as they get to the elbows. Then they should extend out at the point of drawing the lower arms and should further reduce as you get to the wrist. Having drawn that, draw the hands as seen in the picture. When drawing the left hand, draw only the thumb finger, we will draw the rest when we draw the laser gun he will be carrying on this hand.
The fingers on the right hand should be clenched because our character will be holding in this hand a laser rifle. Finally, draw the arms biceps and triceps by drawing the horizontal lines seen in the image.
STEP 5: DRAWING THE HELMET
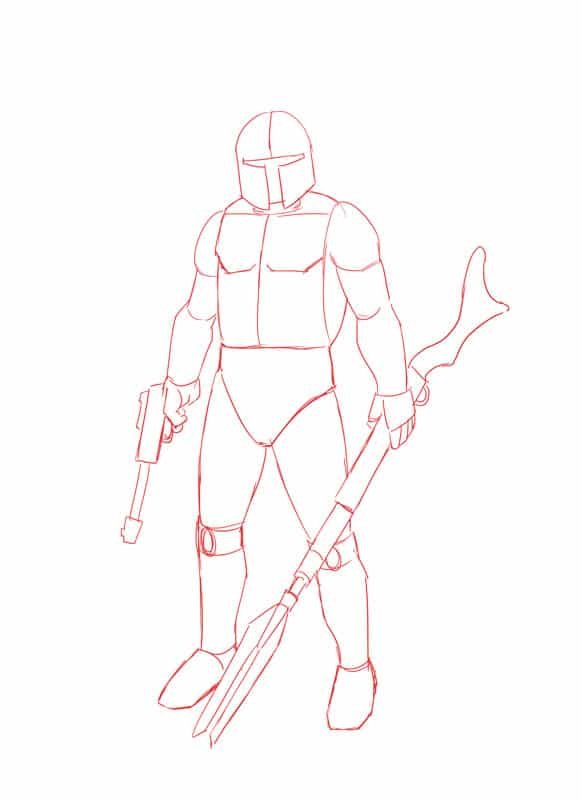
For the helmet, first, draw a medium-sized oval shape with and straight bottom and a “T” shape opening in the middle. This opening will be the helmet’s visor.
STEP 6: DRAWING THE WEAPONS
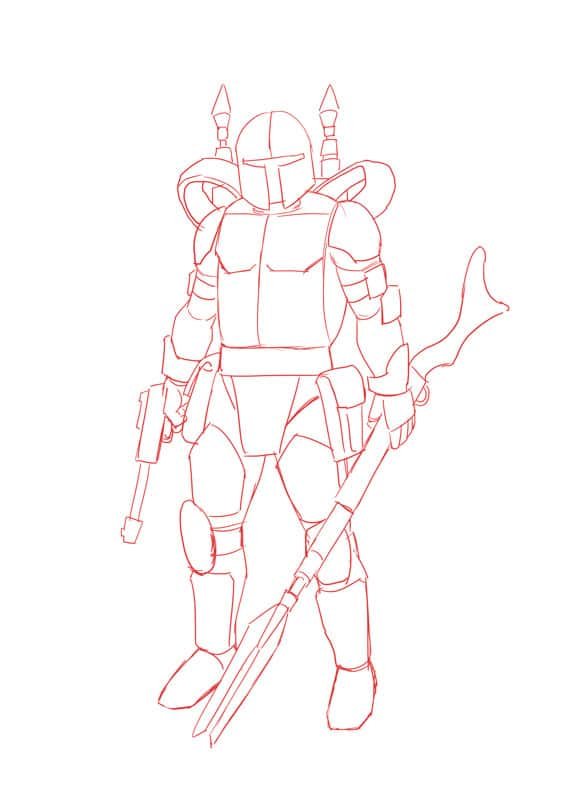
The Mandalorian rifle is the most iconic weapon of the Mandalorian arsenal and according to what’s depicted in the above picture, the rifle should be drawn as a long tube ended in a V-shaped muzzle.
The laser gun on the right hand will be drawn as seen above. A rectangular shape with a thin tube and a trapezoid as a muzzle.
STEP 7: DRAWING THE ARMOR
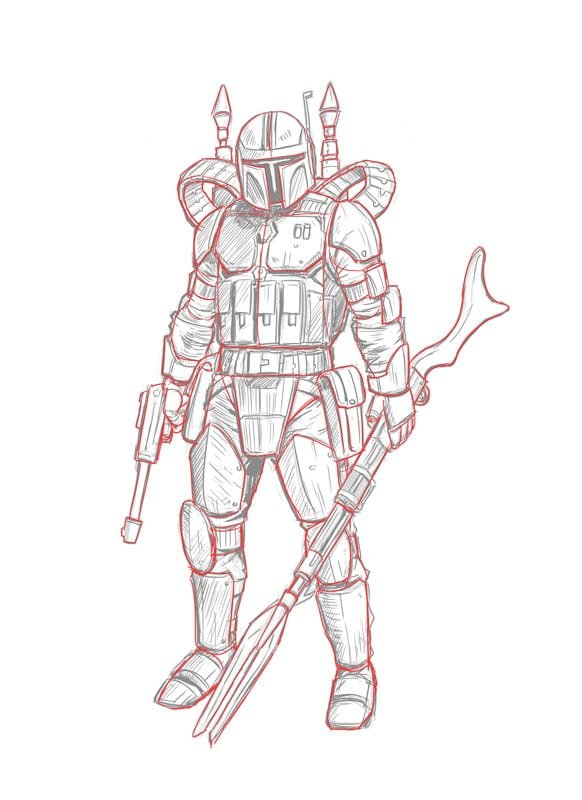
Well, a Mandalorian armor is made up of metallic body armor covering the chest, legs, arms, and abdomen area.
We would include the bracelet, knee pads, and shin protections into our characters drawing by sketching all the lines as shown in the image.
Regarding the back, we will draw the jetpack, with two rocket-like engines sticking out on top and some ammo belts over the shoulders
On the side of each hip, our character will be carrying a military type bag.
STEP 8: DRAWING THE FINAL LINE ART


---------------------------- CURATION TRIAL @worldofxpilar-----------------------------
