
Hello Beautiful and Elegant women.
This post is to quickly run through my handmade wigging method.
INTRODUCTION
As we all know wig has become a part of women dressing in this age and time. People are gradually becoming more fond of wigs Because of the ease and comfort they bring! Rather than spend all day at the saloon, why not wig that Hair.
In this Hot weather you can simply allow your hair breathe in some fresh air or even wash it while relying and trusting Wigs to come through incase you need to go to work or head out for an event, like i do say "wigs saves you alot of stress and money". Come with me through this Mini tutorial to learn how to wig from the comfort of your home, i will be sharing pictures at each step to enhance easy understanding.
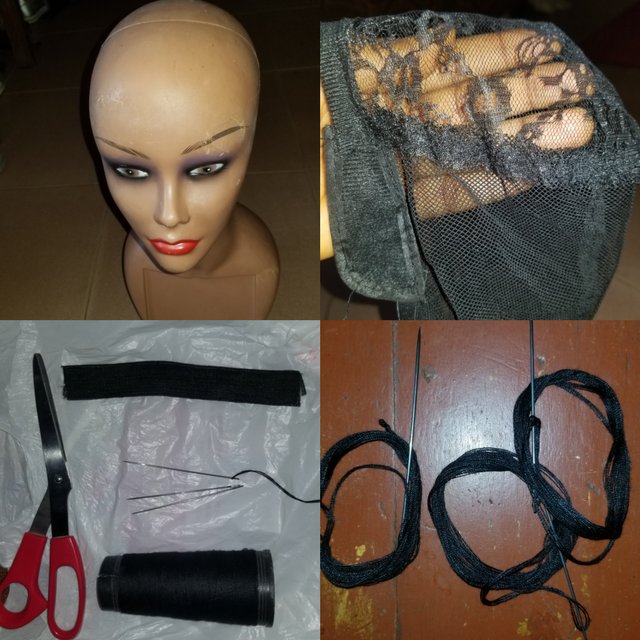
Instruments:-
- Bald head Mannequin
- Wig cap
- Scissors
- Black thread and needles
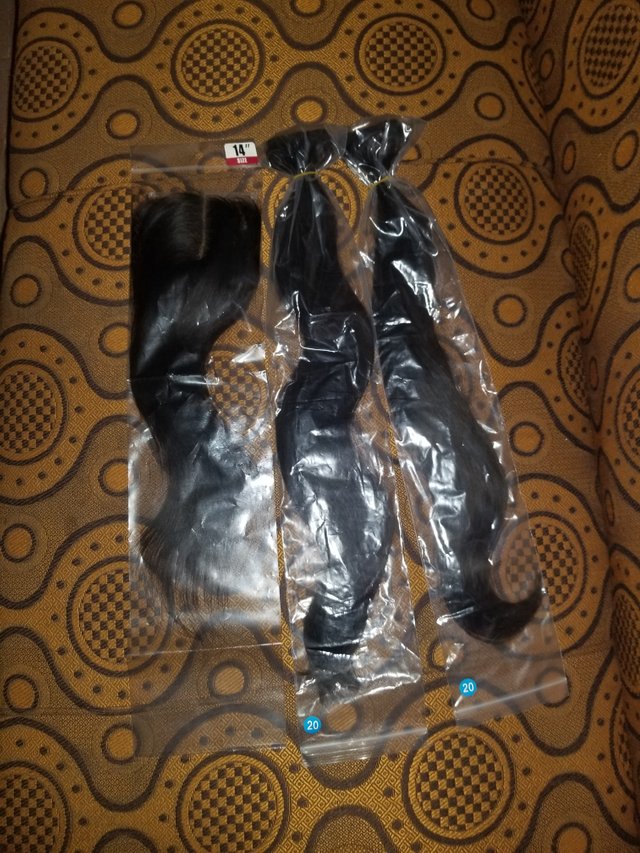
For this tutorial, i will be using 2 bundles of Hair(20inches) and a 4×4 closure (14inches)
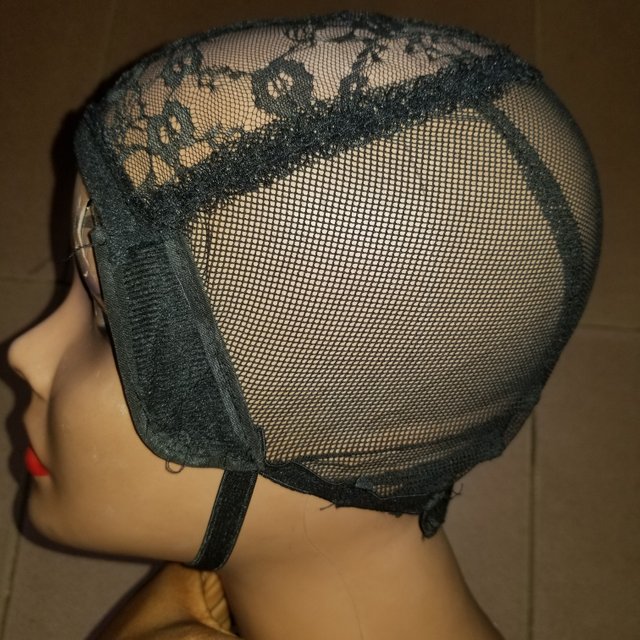
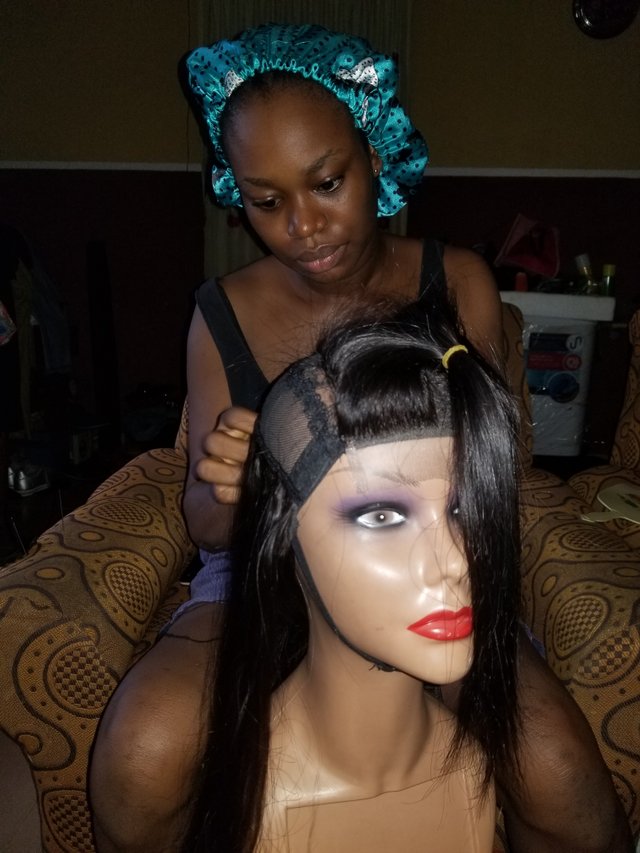
Firstly
Wear the wig cap on your mannequin, securing it firmly by locking the cap strap on the neck of the mannequin.
see image below to understand how
secondly
Start by sewing-in your closure to the center of the wig cap which is directly above the eyes of the mannequin
( I always prefer to sew my closure first before sewing the hair, the is to allow me calculate the amount of space left so I can manage my hair bundle to be enough to cover the remaining space)
see image below to understand how

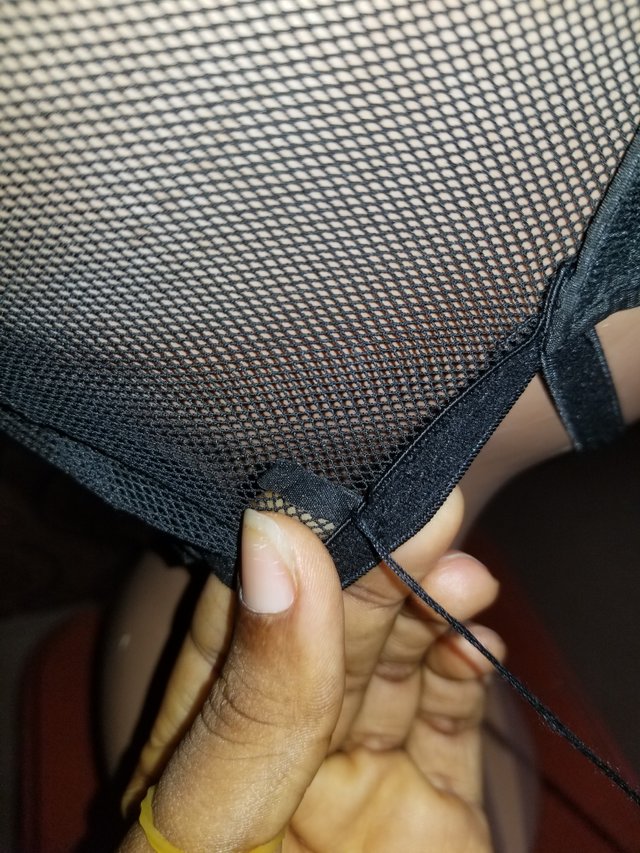
Thirdly
At the ear of the mannequin, there is a tag on the wig cap to signify the ear points on the cap, locate this points on both side and firmly sew in your thread to 1 side of the ear.
see image below to understand how
After that, begin sewing your hair bundle to go from ear-ear atleast twice. After the second time , extend the sewing to go to the area of the teddy( the point before the end of your brows) then keep sewing from left to right going teddy to teddy and moving up gradually as you sew.
see image below to understand how
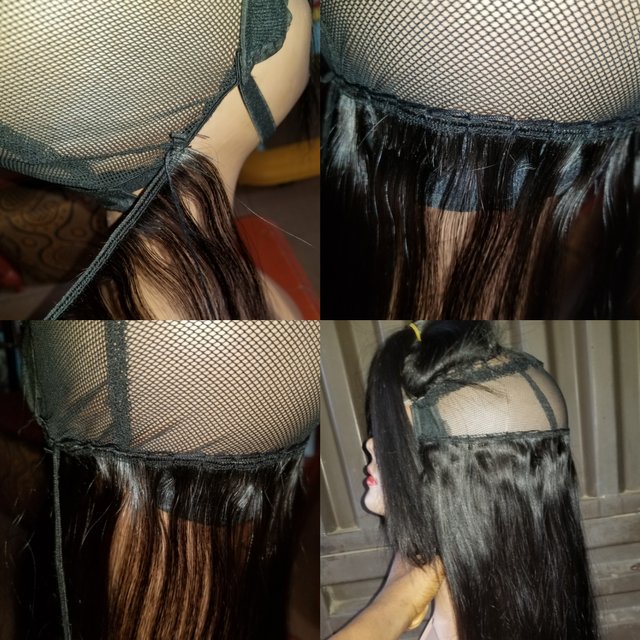
Fourth stage
At this stage, you've probably exhausted a bundle, begin the next bundle at the point where the initial bundle finished and keep sewing from teddy point to teddy point moving up gradually following the shape of the cap on the mannequin.
see image below to understand how
At the end
Once you are done sewing in all your Hair bundles, and you are sure to have covered up all the cap on the mannequin, then you've successfully sewn in your hair bundles into wig. At this point you apply your finishing touches which will vary depending on the outcome of the wig.
see image below to understand how
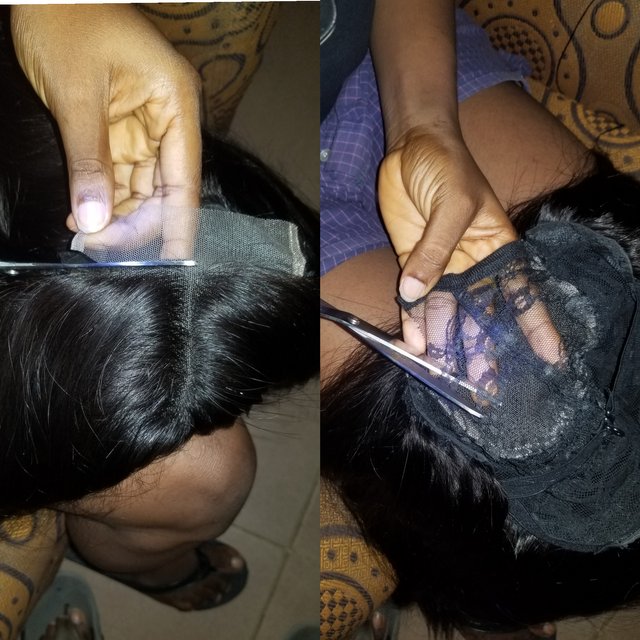
Finishing Touch
-> I cut out the net extending from the closure
->I straighten out the closure, to fall perfectly on the Hair
->I sew in an Elastic band to ensure firmness on the Head when the wig is worn
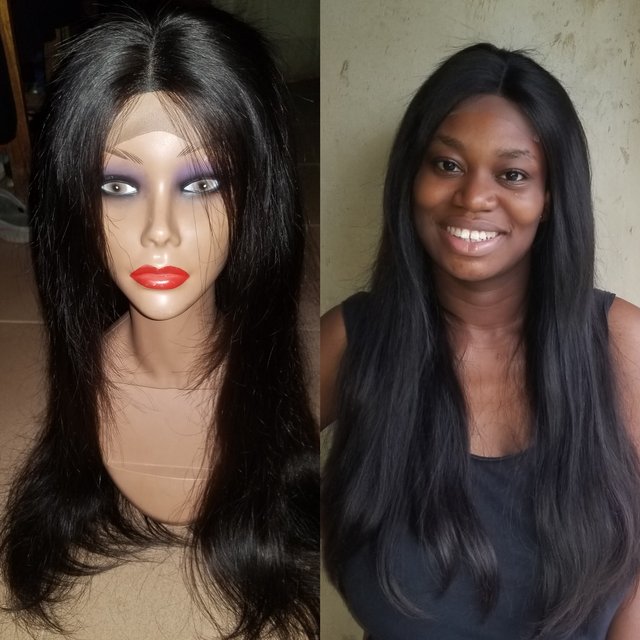
Conclusion
Wig making is very easy and interesting, its cost effective and easy to wear.
If you choose you make your wigs yourself you can follow this easy steps and thank me later
see image below to see me wear my wig to church
The End. Thank you for reading my post, hopefully you have learnt something, see you next time.
Oh I couldn't stop reading, it just feels like I should enter inside the post I start doing mine. I really enjoyed the tutorial thanks.
Downvoting a post can decrease pending rewards and make it less visible. Common reasons:
Submit
Thanks soo much.
Downvoting a post can decrease pending rewards and make it less visible. Common reasons:
Submit
Your post has been supported with the official account of steemwomens club community, keep sharing quality contents with us
Downvoting a post can decrease pending rewards and make it less visible. Common reasons:
Submit
Thank you #steemwomenclub , thank you for this opportunity.
Downvoting a post can decrease pending rewards and make it less visible. Common reasons:
Submit
Beautiful work!
I love the wig. Thanks for sharing.
Downvoting a post can decrease pending rewards and make it less visible. Common reasons:
Submit
Thank you for visiting my post. Have a nice day ahead
Downvoting a post can decrease pending rewards and make it less visible. Common reasons:
Submit
This beautiful. Thanks for sharing
Downvoting a post can decrease pending rewards and make it less visible. Common reasons:
Submit
Thanks for reading
Downvoting a post can decrease pending rewards and make it less visible. Common reasons:
Submit
This is really beautiful dear, how much will this cost in steem? Let me order.... Hahahahaha
Downvoting a post can decrease pending rewards and make it less visible. Common reasons:
Submit
Thanks soo much Dear ,Wigging is about 10steem _20 steem depending on the type of hair
Downvoting a post can decrease pending rewards and make it less visible. Common reasons:
Submit
Alright, thanks.
Downvoting a post can decrease pending rewards and make it less visible. Common reasons:
Submit
This is so pretty dear, it suits you a lot.
Thank you for sharing this beautiful skill with us.
It seems you forgot to put tags in your post. You can edit and add some tags so your post will be recognized.
Thank you and keep engaging in steemwomenclub community.
Downvoting a post can decrease pending rewards and make it less visible. Common reasons:
Submit
Oh ma, thank you for this notifications, i totally forgot. Thanks ma
Downvoting a post can decrease pending rewards and make it less visible. Common reasons:
Submit
Waw, this is beautiful. And the closure is well knitted. Well done
Downvoting a post can decrease pending rewards and make it less visible. Common reasons:
Submit
Thank you so much
Downvoting a post can decrease pending rewards and make it less visible. Common reasons:
Submit
Wow its super idea for wiging
Downvoting a post can decrease pending rewards and make it less visible. Common reasons:
Submit
Beautiful wig sitting on a beautiful head. Thanks for this exposure @mophebe
Downvoting a post can decrease pending rewards and make it less visible. Common reasons:
Submit
Thank you too ma
Downvoting a post can decrease pending rewards and make it less visible. Common reasons:
Submit
hair contents are amazing.. Great job
Downvoting a post can decrease pending rewards and make it less visible. Common reasons:
Submit
Thanks alot
Downvoting a post can decrease pending rewards and make it less visible. Common reasons:
Submit
So lovely dear you have a beautiful handwork keep it up
Downvoting a post can decrease pending rewards and make it less visible. Common reasons:
Submit
Thank you ma
Downvoting a post can decrease pending rewards and make it less visible. Common reasons:
Submit