GOOD DAY EVERYONE !
This is my entry to the new contest about the DIY (Do It Yourself) that initiated by #steemwomenclub community.

I come up with this idea because aside from it is budget friendly, it can beautify your room and turn it into eco friendly room.
I have a lot of ideas that comes to my mind and luckily I found a video in youtube about this DIY, without any hesitation i started making it because sunflower is one of my favorite flower.
Without further adue, let me share to you HOW DID I MAKE MY HANGING FLOWER ROOM DECORATION .
MATERIALS NEEDED:
scissor
Colored paper ( yellow , black, green)
Tissue paper ( black and white) or any color you like
Glue
Glue stick/ glue gun
Nilon ( or rubber band)
Stapeler
STEP 1: HOW TO MAKE A PAPER SUNFLOWER
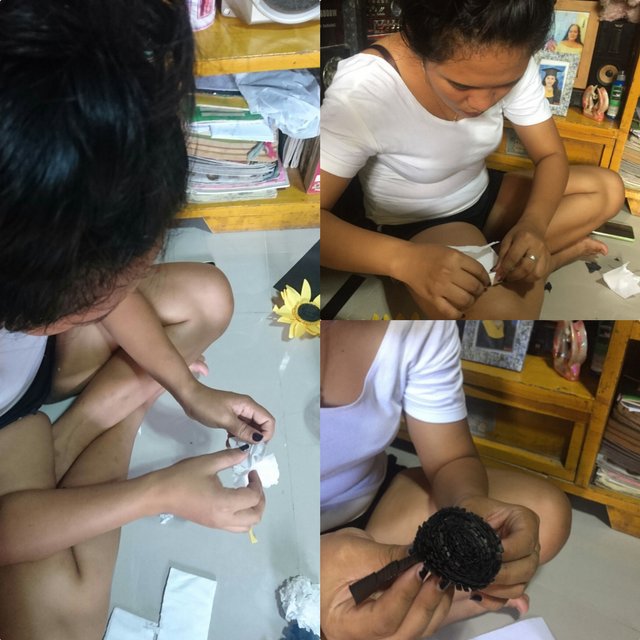
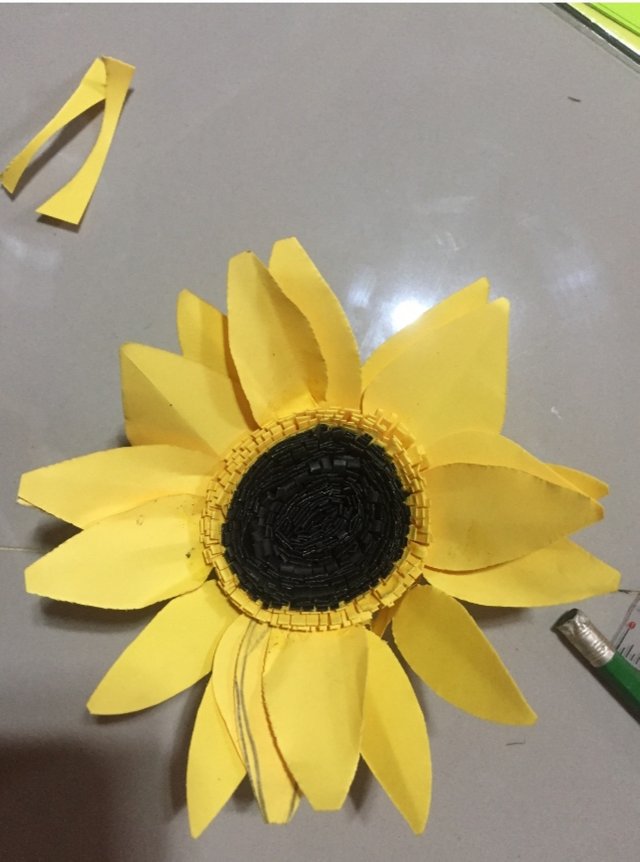
PROCEDURE
1.) Take a flower pattern and create creases on them.
First, create crease from the center towards the tip of each petal. Next, create a crease in between each sunflower petal and towards the center.
2.) Similarly, create a crease on the rest of the sunflower patterns (3 large yellow and 2 medium yellow flower patterns).
3.)Continue to roll towards the center and once you reach the center glue the roll with the center of the spiral pattern to secure it.
4.) Place any one of the large sized sunflower pattern on a flat surface and drop a small amount of glue on its center of it.
5.)Place the other large sized sunflower pattern on the large flower, making sure that the centers of both flowers match.
Be sure to rotate the second pattern so that the tips of the first paper sunflowers pattern and petals are visible.
6.) Now glue the 2 small sized flower patterns (these are actually center of the flower); similarly, slightly rotate the second piece on the first piece to make sure that the tips of the first flower’s petals are visible.
7.) Finally, glue the rolled flower on the center and allow the glue to dry.
STEP 2: HOW TO MAKE TISSUE PAPER FLOWERS
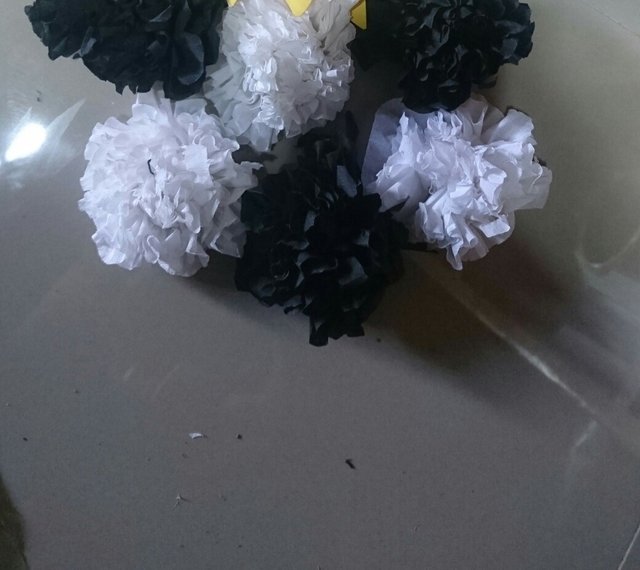
Here are the procedure :
- Stack several layers of tissue paper neatly in front of you. (Refer to sizing chart below)
- Starting at the short end, accordion fold 1 inch sections of the tissue paper until the whole length of the tissue paper is folded together.
- Secure the center using a stapler. Be sure the staple goes through all layers of the tissue paper.
- Use scissors to shape both ends of the tissue paper. Scroll down a bit to see a chart of different ways you can cut the ends and how the flower will look.
- Fan out the folds and begin separating each layer. Fluff and shape the flower until it looks pretty.
And Lastly , STEP 3: HOW TO MAKE PAPER FRAME BOARDER
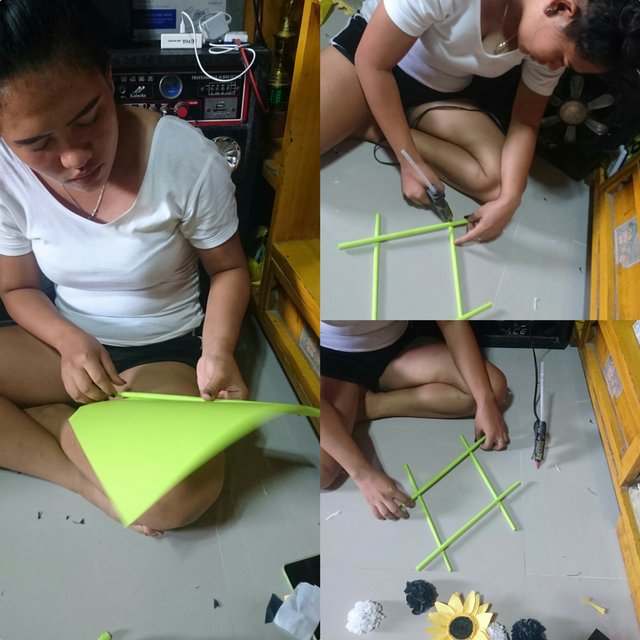
Procedure :
- First of all get your tape ready. Start with a corner of the paper. Any corner will work. The try to get it in about an inch and remember to try to keep it as tight as you possibly can for maximum strength.
- As you continue to roll the paper remember to keep it tight. If it slips any it would be good to restart. I like to use both hands, hence the reason I recommended two hands. I use mainly my finger tips to continue the roll. Try to keep the flat paper on the right and left side somewhat equal.
- When you get close to the corner place the tape on the outside of the corner, then continue to roll over the tape. It should stick to the tape. Your almost done!
- You may have noticed that the ends are sort of weak. We are now going to take care of that. Give it the pinch test which is just the ends lightly until you find the area where it feels stronger, it shouldn't be to far in. Then trim the pinched piece off.
- You can repeat the same steps as before but now start with two sheets at once or as many as you need. The more sheets the more strength. These Sticks o' Paper can be very strong if made correctly, and always remember to keep the paper tight.
FINAL PRODUCT ❤
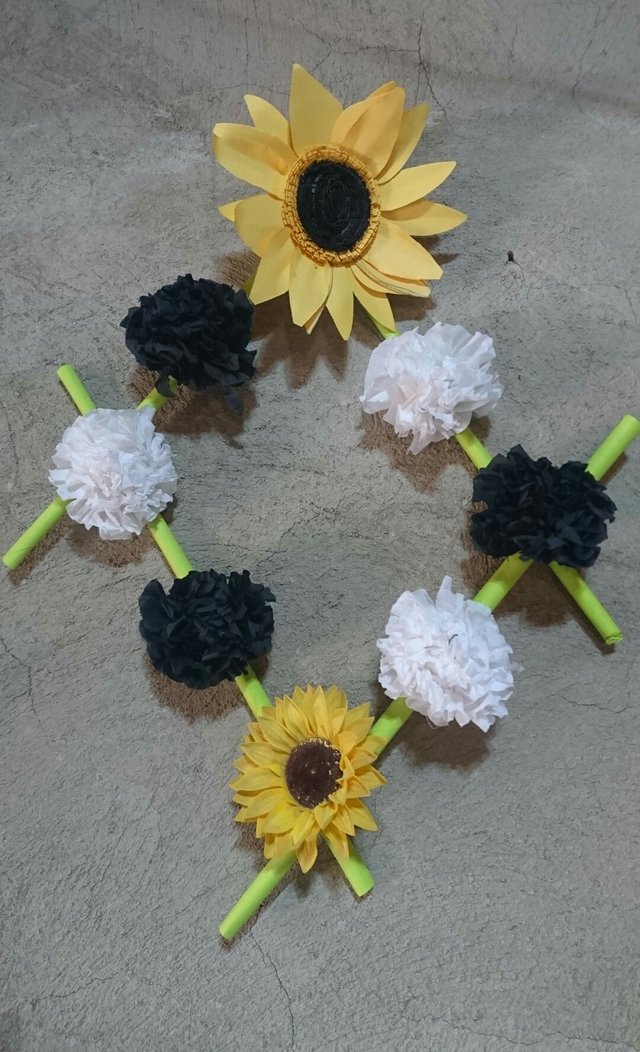
Thank you for watching my DIY . Keep safe and Godbless everyone I hope you enjoy my artwork
Our sister @svm038 @steemwomensclub is currently looking for candidates to provide guidance to newcomers to the Steem Women Club Community.
Let's work together, We are strong together. We are waiting for you in the comments column. Indicate your candidacy in the comment of the post Guide to Welcoming New Users to Steem Women Club Community | Support for New Users
Here is another one!
Steem Women Club & Steem Men's Club Join Contest | Participate in "Register Your Friends on Steemit" Contest | | Grand Prizes Total 150 steem.
Come on, participate. We are waiting for you there.😊
Downvoting a post can decrease pending rewards and make it less visible. Common reasons:
Submit
Guide to Welcoming New Users to Steem Women Club Community | Support for New Users
Downvoting a post can decrease pending rewards and make it less visible. Common reasons:
Submit