Hi students, welcome to the second class of the electronics lessons in electronics academy. This is week 2 and it would be more of practicals. That's what our community is all about.
In this session two, we would focus on electronic component measuring and it's instruments for measurement. And one of the core tool we would use here is a multimeter.
Recall, in our previous lesson (week1), we got familiar with electronics components and their symbols.
Measuring electronic components is very important in the field of electronics.
For instance, If a component of an electronic circuit is damaged or malfunction, it should be checked and replace.
If we have a good knowledge on how to measure and read the feedback of electronics component with a meter, we can easily fix the electronic circuit by ourselves .
Or sometimes, we might be buding a circuit and a component got spoilt, in such situation, a good knowledge of how to operate a meter would be very useful and this is why this lesson 2 is so important.
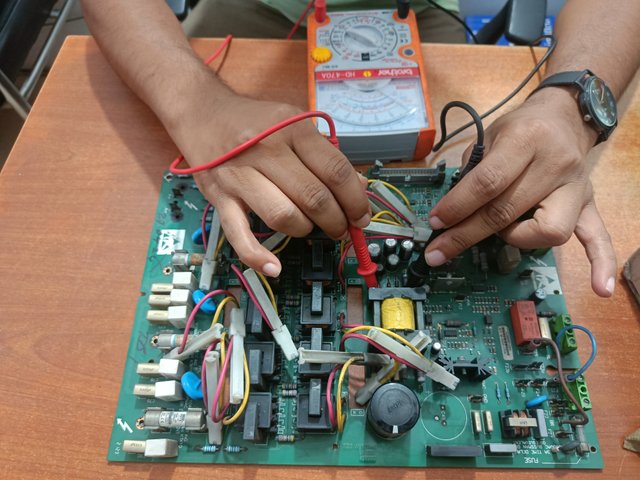
Measuring electronic components with a meter
Workshop 1
Component measuring/testing instruments:
Our journey through the electronic component measuring instruments world begins with the analog multimeter, a device that once reigned supreme in the early days of electronics.
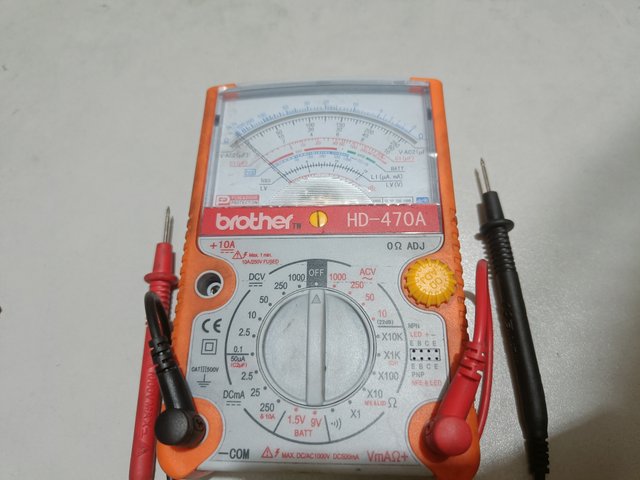
Analog Multimeter
However, with the advent of digital technology, the digital multimeter has emerged as the new standard.
Understanding the use of both analog and digital multimeters is now more important than ever.
Let’s consider how we can measure some common components, mostly the ones we have talked about in our previous lesson.
Example 1: Measurement of Voltage(V)
Remember to connect the black probe to the COM (common) terminal (Check your meter, there is a spot written COM) and the red probe to the VΩ (voltage and ohms) terminal.
- Step 1 : Set your multimeter to the Volts (V) function…(DC)
- Step 2 : Connect the probe of the meter to the component:
Step 3: Place the probe to the component's terminals.
Step 4: Check the value of the voltage value as displayed on your the multimeter’s screen.
Example 2: Measurement of Resistance
In this case, we want to measure a resistor and to do that, we need to tune our knob to the Ohms function of our multimeter.
Remember to connect the black probe to the COM (common) terminal and the red probe to the VΩ (voltage and ohms) terminal.
Step 1: Set the knob of the multimeter to the Ohms (Ω) function
Step 2: Connect the probes to the resistor
Step 3: Place the probe to the component's resistor’s terminal.
Step 4: Check for the resistance value on the multimeter screen.
Now your turn...
Task 1 : Demonstrate how to measure each of the following components using the selector switch or knob of your multimeter.
- On each of them, show the steps you took with your own pictures or videos and the results.
- What did you observe on each of them?
- What precaution did you take?
(Your picture NOT downloaded picture online, there should be evidence on those pictures that you owned them. If you can use a video, that's even much better.)
- Resistance (Resistor- use anyone)
- Continuity ( Use LED or just the multimeter)
- Capacitance (Capacitor- use anyone)
- Voltage ( use any battery e.g 9V, 12V etc
- Get a wire, measure the continuity of the wire.Show the connections with photos. What were the results, what did you observe?
Workshop 2
It is also good to consider few tools we would use during the course of our weekly lessons.
Kindly study them below:
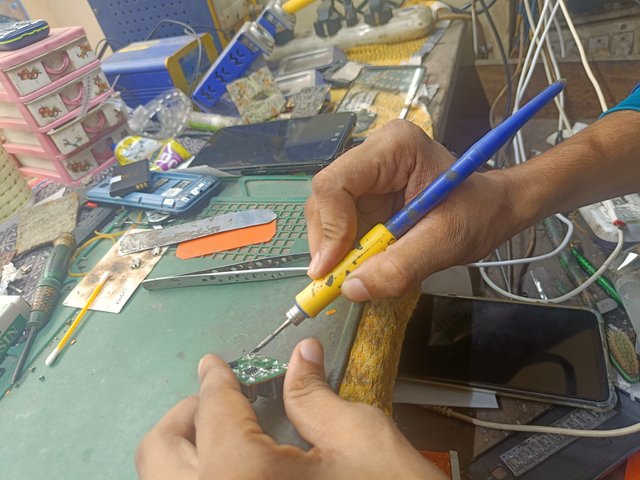
Soldering iron
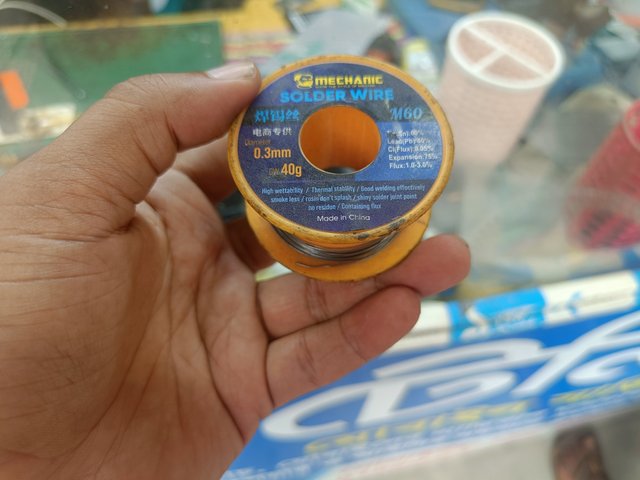
Soldering lead
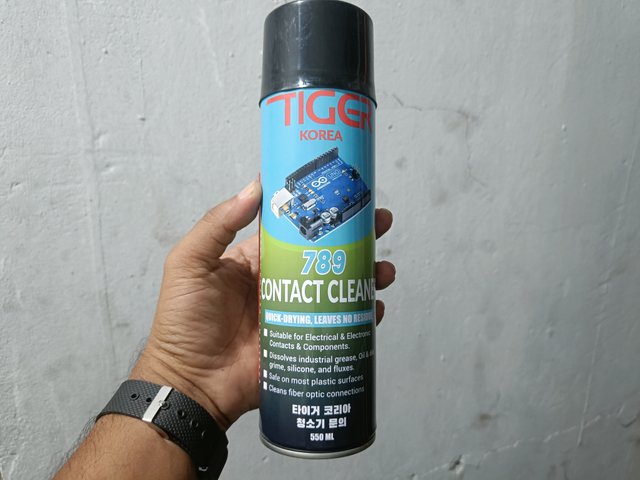
Circuit cleaner
Task 2: Mention 8 more important tools or equipment you feel we would use during the course of our electronics journey for projects within the coming weeks. Briefly explain what they would be used for.
Instructions :
- Please kindly read all the instructions we have on our post entitled: Reminders For Students in Electronics Academy. We would be working with those instructions STRICTLY

The participation schedule is between Monday, July 15 , 2024 at 00:00 UTC to Sunday, - July 21, 2024 at 23:59 UTC.
Feel free to post in any language hence it can be translated on google translator
Please make sure to include our tag #electronicss19w2 among your first four tags for easy search.
DO NOT use any downloaded pictures on task 1, use your picture for that demonstration
Post the link of your assignment in the comment section of this lesson.
Avoid unnecessary long and irrelevant introductory
All our instructions are supper important and all participating students are advised to read and understand those rules/regulations.

Assignment
Task 1 : Answer question on workshop 1
Task 2 : Answer question on workshop 2
Note to community curators:
Please NO community curator should use the SC account to vote any assignment in the "Electronic Academy" when such post is not verified yet by any of the professors.
Note to students:
Additional efforts will be taken into account , so try to be creative , original and show your interest in learning .
We hope you liked this second lesson as we are taking it little by little. If you have completed all the tasks, please kindly wait for the professor's comments and continue studying to be prepared for the third week.
Goodluck
The Electronic Eagles Team
Esto es maravilloso. Un sueño hecho realidad. Mi tío es radio técnico y siempre me gustó observar como había su trabajo. Con el tiempo, vi lo importante que es conocer esta información. Me siento privilegiada, al tener a mi alcance éstas lecciones. Me gustaría participar y aprender.
Muchas gracias por esta estupenda instrucción.
Downvoting a post can decrease pending rewards and make it less visible. Common reasons:
Submit
That sounds interesting, I'll be waiting to see you do those practicals in the assignment.
Downvoting a post can decrease pending rewards and make it less visible. Common reasons:
Submit
I found this meter amongst my dad's electrical tool but there's no component to try it on and I don't know if the multimeter is still functioning or the right one for measuring component. Was wondering if task 2 can be done without task 1
Thank you
Downvoting a post can decrease pending rewards and make it less visible. Common reasons:
Submit
That's a multimeter you have there...
It can serve the purpose. Put the meter ON first to know if it's working.
You can get the components at any electronic repairs shop, they can even give you for free because you don't need much. Other ways to get it could be getting it from some old electronic device.
Still, other option could be buying them from electronic components shop.
Let me know the progress.
Downvoting a post can decrease pending rewards and make it less visible. Common reasons:
Submit
An another interesting topic, I will get some knowledge about basic electronics devices by participating in this week contest.
Downvoting a post can decrease pending rewards and make it less visible. Common reasons:
Submit
https://steemit.com/hive-188837/@manuelhooks/electronic-component-measurement-and-measuring-instruments
Downvoting a post can decrease pending rewards and make it less visible. Common reasons:
Submit
https://steemit.com/hive-188837/@udyliciouz/electronic-component-measurement-and-measuring-instruments
Downvoting a post can decrease pending rewards and make it less visible. Common reasons:
Submit
Hello dear can I use this meter
I have this one.
Downvoting a post can decrease pending rewards and make it less visible. Common reasons:
Submit
Sure you can!
Downvoting a post can decrease pending rewards and make it less visible. Common reasons:
Submit
This is a powerful machine, i love it, it has a lot of functions and good range.
It can measure up to 200uf
Downvoting a post can decrease pending rewards and make it less visible. Common reasons:
Submit
Yes but ai find the original one that mentioned in post. So I try using him.
Downvoting a post can decrease pending rewards and make it less visible. Common reasons:
Submit
Here is my entry:
https://steemit.com/hive-188837/@ahsansharif/s19-wk2-electronic-component-measurement-and-measuring-instruments
Downvoting a post can decrease pending rewards and make it less visible. Common reasons:
Submit
Mi participación
https://steemit.com/hive-188837/@arnoldog25/s19-wk2-medicion-de-componentes-electronicos-e-instrumentos-de-medicion
Saludos
Downvoting a post can decrease pending rewards and make it less visible. Common reasons:
Submit