Good evening all friends, meet me again @chairulrizalx and this time I will take a Graphic Design Class in the Steem Skillshare Community mentored by @atim1234. In this sixth class, I will learn about Designing a Banner with the Pixel lab Apps, this time the Class is tutored by @niglys8. Hopefully, this lesson will be useful for all of us in this community.

Introduction

PixelLab application is a mobile application that is used for simple photo editing, adjusting photo and text combinations, and layouts for posters or banners. PixelLab itself according to the information I read is only available on Android-based smartphones developed by Imagin Studio. PixelLab can be downloaded for free on the Google Play Store.
Like other graphic design applications, some of the functions of the PixelLab application are:
- Text : 3D Text, Text effects, Text color, Text font.
- Stickers : add and customize as many stickers, emojis, shapes, as you want.
- Import images : Add your images from the gallery (import from Gallery).
- Export Image: This feature serves to save or share images with the resolution that suits us. For easy access, you can use the Quick Share button to share images for social media applications.
- Draw : Tool for free drawing and can be adjusted to the shape, color, and thickness of the pen as desired.
- Change Background : replace the background screen with a basic color or image as desired.
- Save as a Project : Save the edited image file in formats such as JPG, PNG, GIF, TIF, etc.
- Remove background : Removes the background from an image and makes the background of the image transparent.
In addition to the above features, PixelLab also has features such as Create memes, Edit image perspectives, and add effects to images.

1). What site is used to remove backgrounds from images ?

Removing the back screen on a photo or image is sometimes an important thing to do when editing, removing the back screen to replace it with another object is sometimes not easy for beginners. On computers or smartphones, there are many software/applications for editing photos, but beginners will have a hard time removing the background. Even if there is a software/application to remove the photo background, how to do it is quite complicated and takes a lot of time. Usually, designers use Photoshop, but this method is quite confusing, especially for beginners. We have to cut the part of the photo that will be replaced with the background first and then separate it.
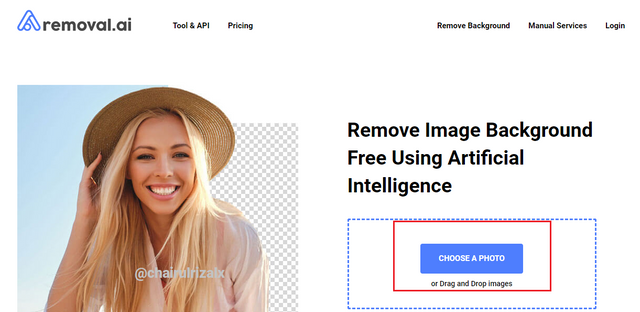
 removal.ai and remove.bg
Here's how to use Remove.bg:
- Visit the website https://www.remove.bg/ or download the Mobile Application on the Google Play Store.
- Upload the photo that you want to remove background screen.
- Then after the photo is successfully uploaded, Remove.bg will remove the background screen from the photo. Wait a moment then the back screen of the photo we uploaded earlier has been successful.
- To make changes to the previous image Click on the Edit menu.
- After the editing process is complete Click the Download button to download the edited image via Remove.bg
Very easy isn't it?
We don't need to use complicated editing software to remove the background screen on the image, just use Remove.bg to remove the background easily and quickly.

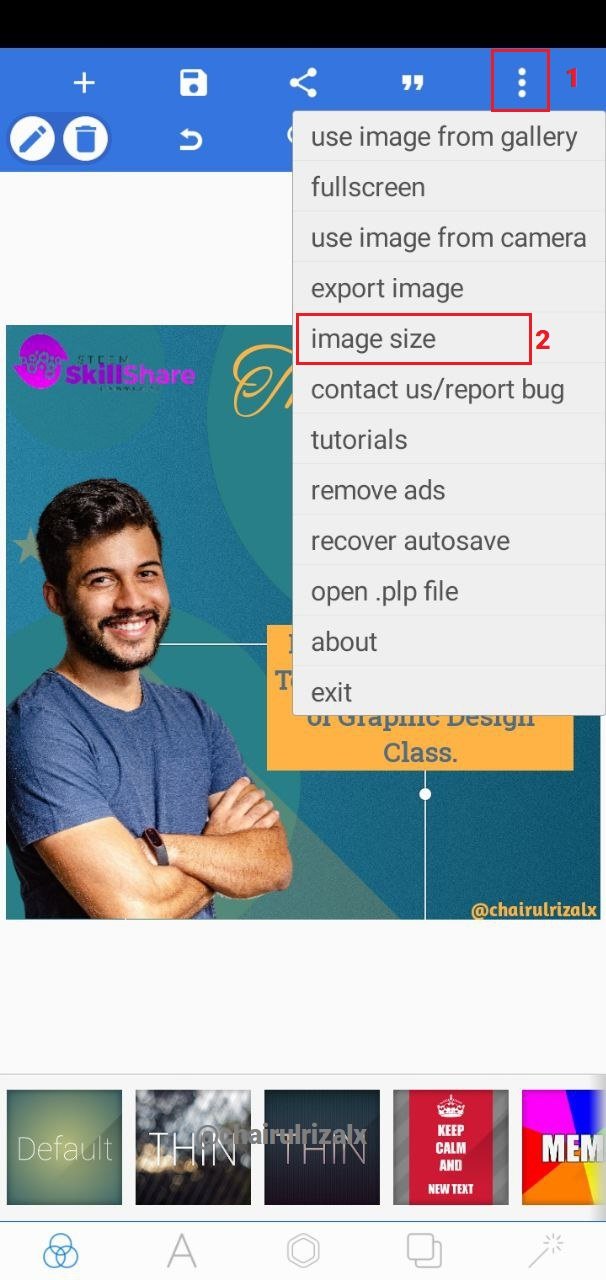
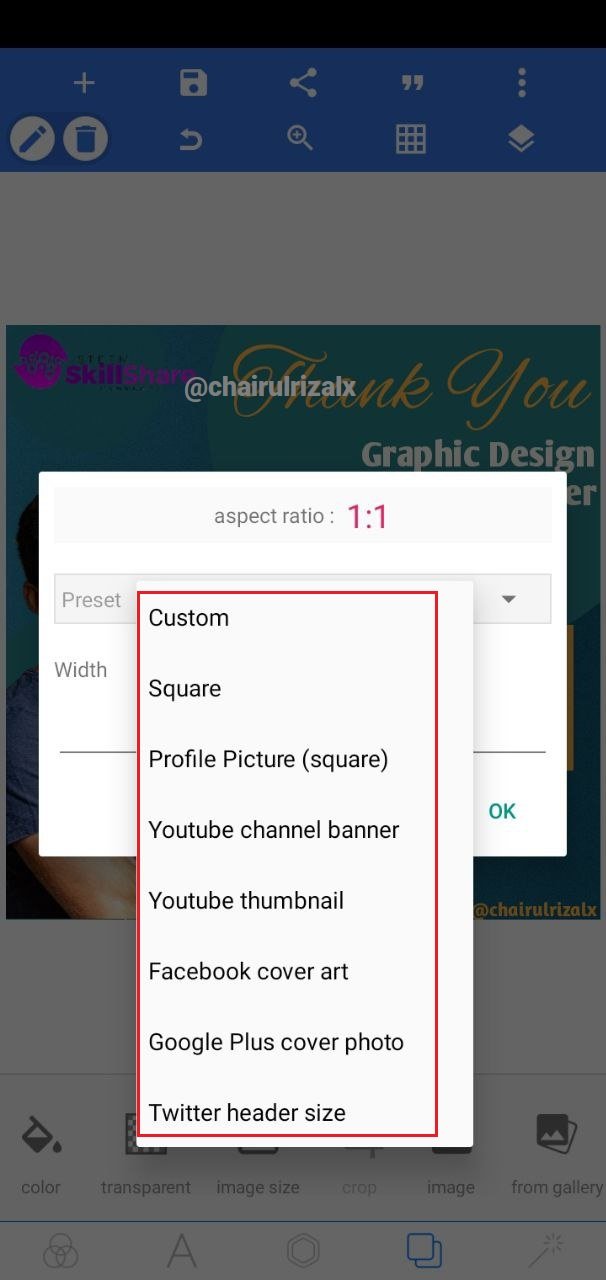
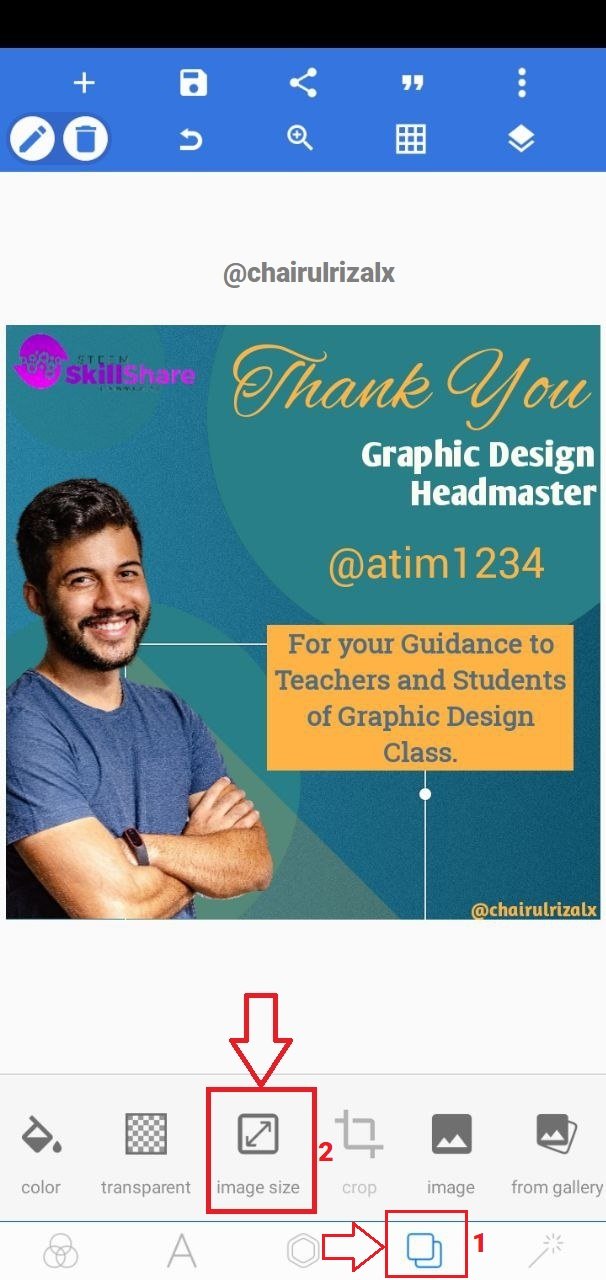
2). State 2 ways in which the banner size can be set and with picture illustrations tool !

1. Click the 3 dots button to enter the image size menu.
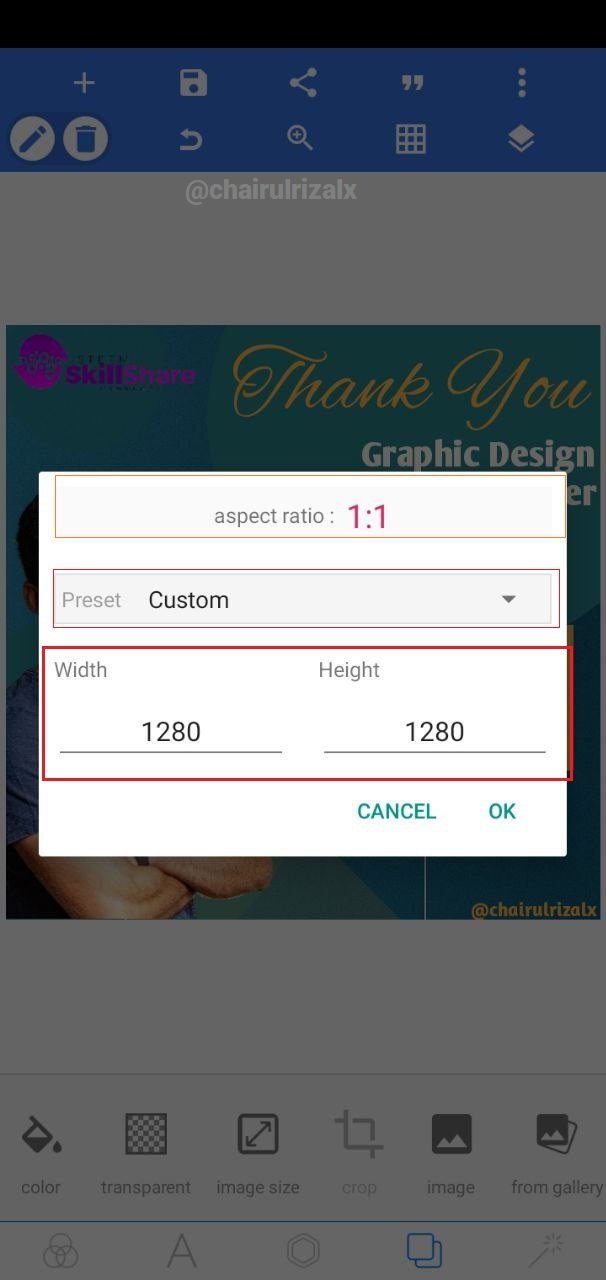
2. Click on the Background menu located at the bottom of the menu row number 4.
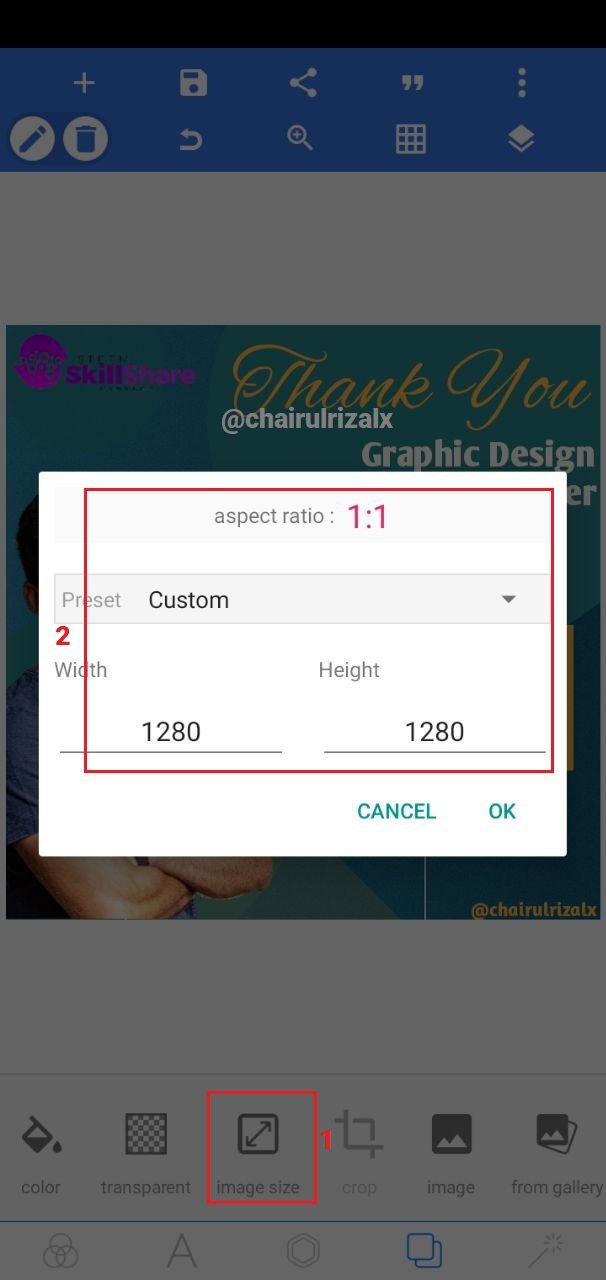


3). Create a simple " THANK YOU" banner design appreciating our able graphic design headmaster @atim1234 for organizing this amazing Graphic Design Class in the Steem Skillshare Community

 My Banner Design for Graphic Design Class Headmaster @atim1234
Steps to create a banner using the PixelLab application.
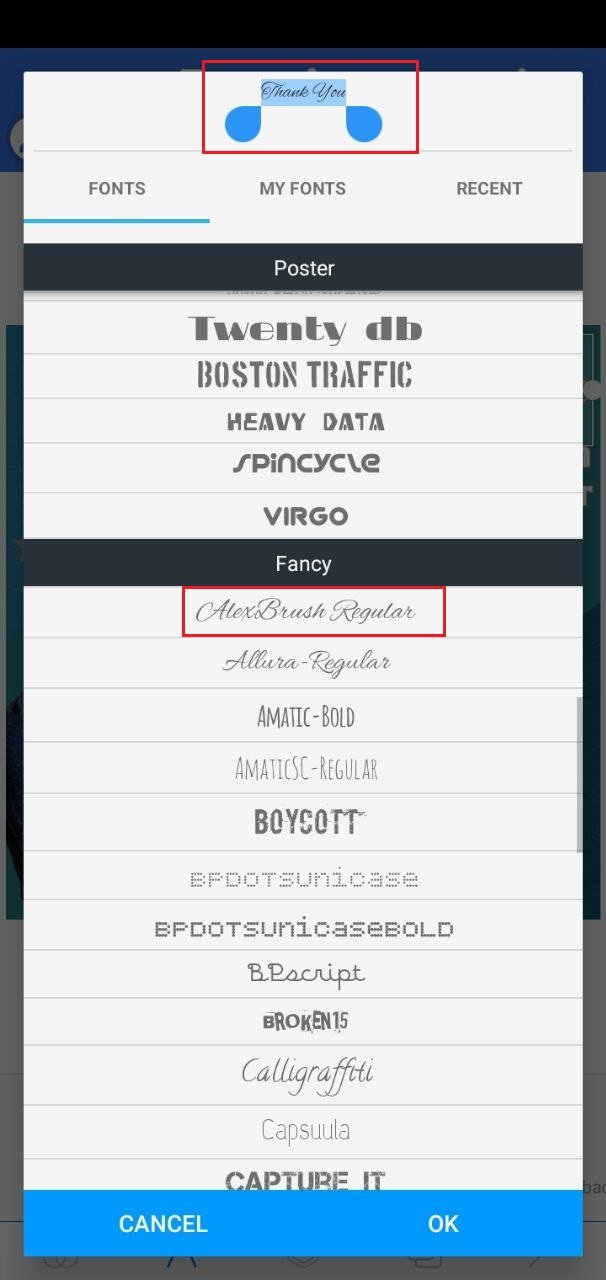


Graphic design is one way to keep your mind positive and creative, because positive thoughts will produce creative and innovative ideas which will be very useful when designing


Thank You
cc : @milakz @daytona475 @arie.steem @steem.skillshare @papi.mati @slon21veka @dwarrilow2002 @jenesa @atim1234 @printskill @niglys8 @lhorgic

cc : @milakz @daytona475 @arie.steem @steem.skillshare @papi.mati @slon21veka @dwarrilow2002 @jenesa @atim1234 @printskill @niglys8 @lhorgic


Dear @chairulrizalx
Thank you for your participation in the Design App Class on Banner creation with the Pixel Lab Application.
Considering the content of answers, depth of knowledge, attachment of images, the layout of markdowns, style of presentation of the assignment, we have set the grading system for each question.
Here are your grades for Class-6 dated 27th Sept, 2021.
Wish you all the best. Keep engaging in upcoming classes.
Regards.
@niglys8
Downvoting a post can decrease pending rewards and make it less visible. Common reasons:
Submit