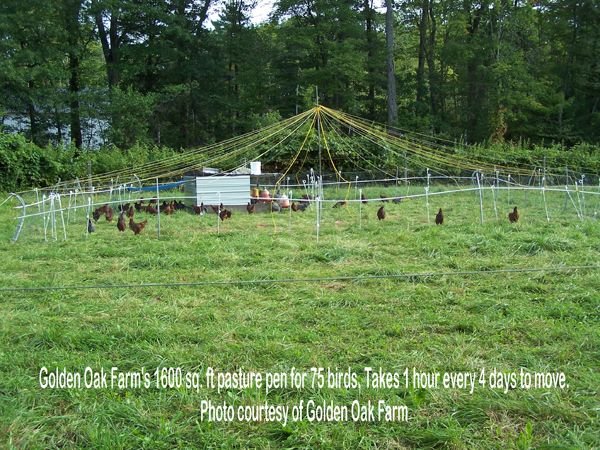
We’d discovered the Salatin pen: https://steemit.com/homesteading/@goldenoakfarm/building-the-salatin-pen would not work for heritage birds. We designed a mobile coop: https://steemit.com/homesteading/@goldenoakfarm/building-the-pasture-coop and it would need a safe enclosure due to our high predator load. So we built this pen and have been using it very successfully for over a decade.
Some of the things we wanted in the new system:
• Easy human access
• More room for the birds, as close to free range as possible
• Ability to move coop easily
• Aerial predator protection
• Land predator protection
• Ability to move pen easily
The sides had to be strong enough to support the rope system resting on them. They had to stop predators, though when we built the pen, we had mother cows and calves. The momma cows were highly defensive and chased everything out of the pasture. And it had to move very easily as we planned to move it every 4 days.
We figured a 40’ on a side pen would give 75 birds 1600 sq. ft or 21.33 sq. ft per bird, what we considered the bare minimum to prevent behavior problems.

We found these posts at Premier1 Fencing*. They were strong enough and easy to fasten the chicken wire to. We’d decided to use chicken wire as it was light enough to move in 40’ sections.
*Note: Years later when we went to get more, Premier1 no longer carried them. We found them at Wellscroft Fencing.
This was our original list:
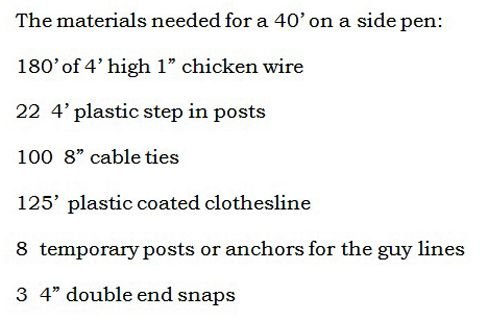
To build:
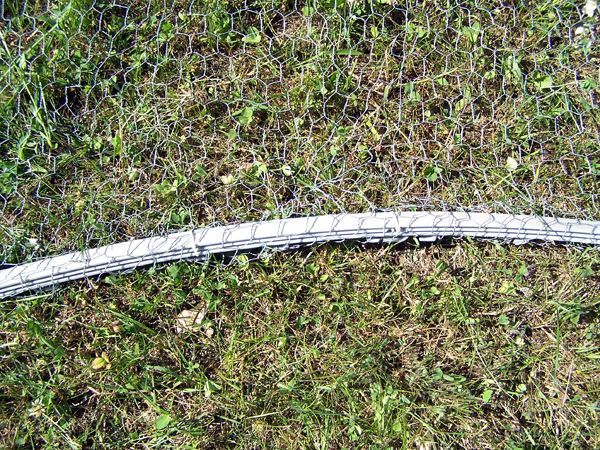
Wrapping chicken wire around post
Lay out at least 42’ of wire but don’t cut it. Take the loose end and wrap it around the post allowing about 4-6” beyond the step-in at the bottom of the post and secure the ends of the wire tightly back onto itself.
Using the cable ties*, make sure the step-in piece is accessible from what will be the OUTSIDE of the pen, then put one cable tie at the very top, preferably around one of the wire holders on the post, and around and through the chicken wire. Another at the bottom, in the same manner, and then 2-3 up the post, as needed.
*We found cable ties broke too easily. We got garden twist tie material and used that instead the second year. We wrapped it around twice before securing, and put it on as described above.
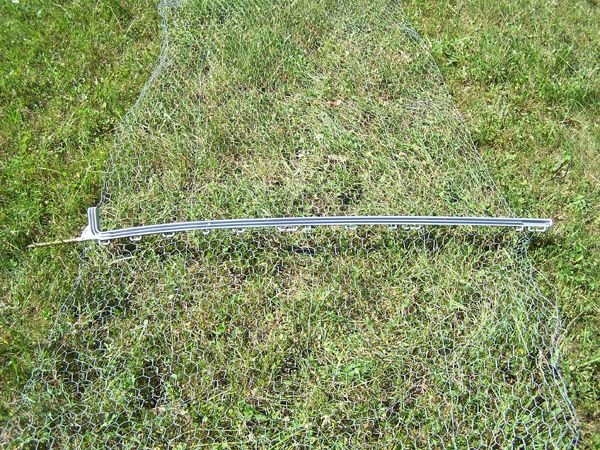
Measure 10’ from this completed post, and cable tie the next step-in post to what will be the OUTSIDE of the pen, making sure the step-in piece is facing out and accessible.
A third post 10’ from that one, in the same manner, and a 4th from that one. After measuring off 10’ more, allow as much wire to wrap around the post as you used for the first one, and cut the wire. Repeat the procedure for the first post. Repeat this entire process 2 more times, giving you 3 sides.
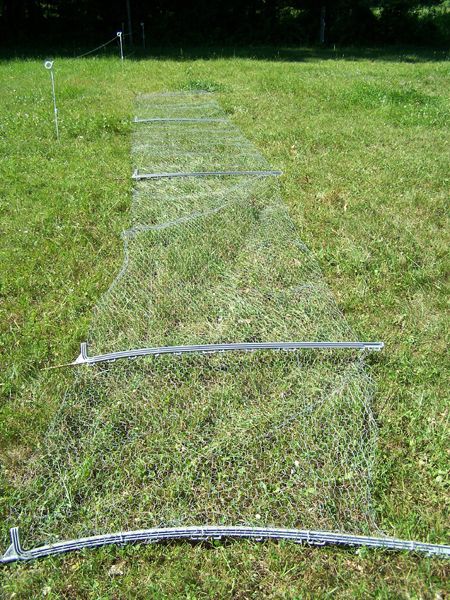
The completed length
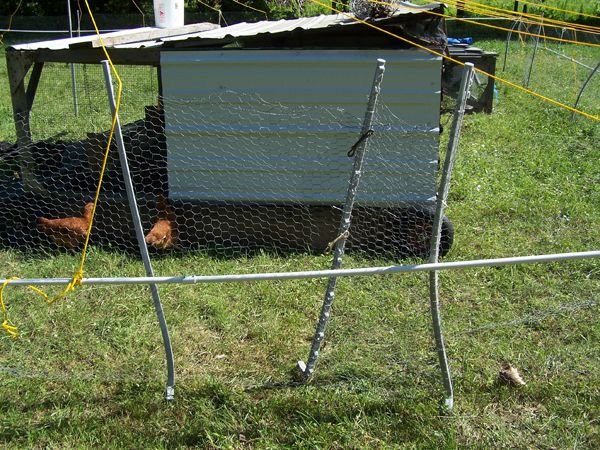
The entry gate
The fourth side will have a gate.* Start off the same as the first side and put in the 3 middle posts, but wrap the fencing around that 4th post and secure, as an end post, but make sure the loose end is towards the INSIDE of the pen.
Wrap the wire around another post making sure the loose end is to the OUTSIDE of the pen. At about 12’ cut the wire and wrap it around the post, as an end post. This end will be the corner, the other, the gate opening. Put a post in the middle, at 6’, with the cable ties. This will be the gate post. It will overlap the short side fence about 1.5 - 2’.
*We found the gate to be more trouble than it was worth, and in the 3rd year, re-built that side without one.
To assemble the pen:
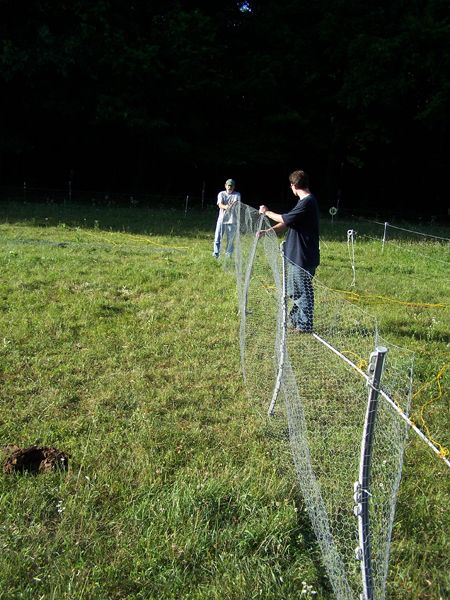
Using 2 people, have one on each end of a full side, and one sights along the fence and the other steps in the posts as directed. It is important to get the sides as straight as possible to keep from having to adjust the Circus Tent so it either does not lie on the ground, or be as high on the wire as to flip off into the pen.
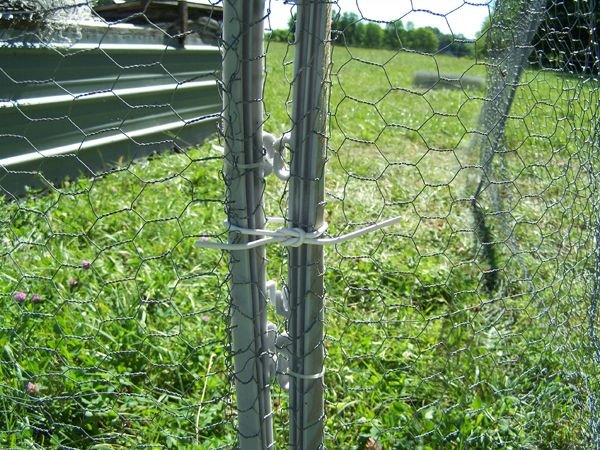
Corner secured with square knots
Line the 2nd full side corner up with an end, trying for a right angle, and repeat the sighting and stepping in. Using about 1’ of the clothesline for each tie, tie the top, center and bottoms of the 2 posts together tightly with square knots.
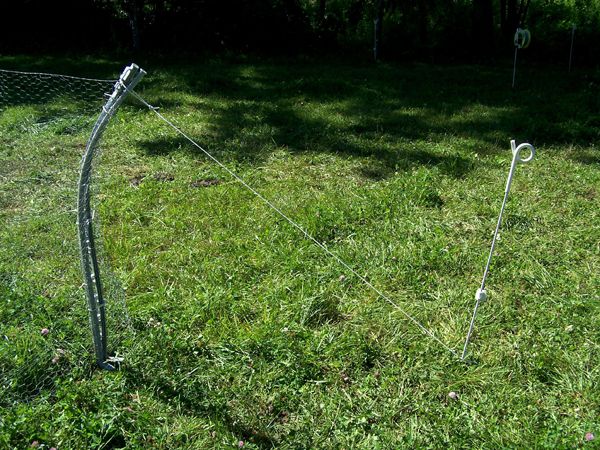
Using about 6-7’ of the clothesline, knot non-slip loops at each end, at least 3” diameter. Put one loop over the tops of the corner and put the temporary post or stake through the bottom loop. Pull the top of the fence about 3-4” off perpendicular and push the temporary post in place to hold it.
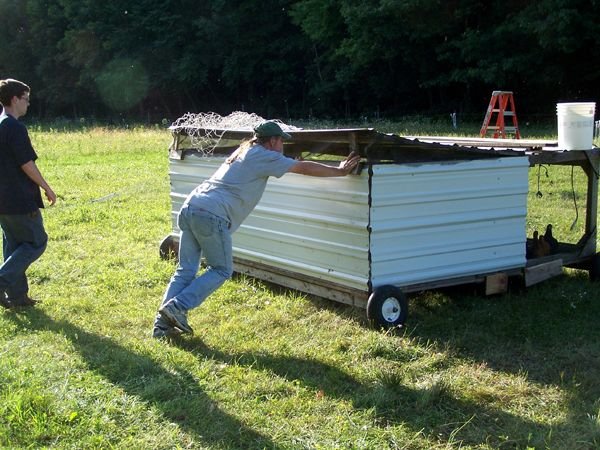
Do the third full side. Move the coop inside. Last do the short side with 4 posts.
You may have to move the end post of the first side done, in order for the gate section to overlap the short side by at least 1.5’.
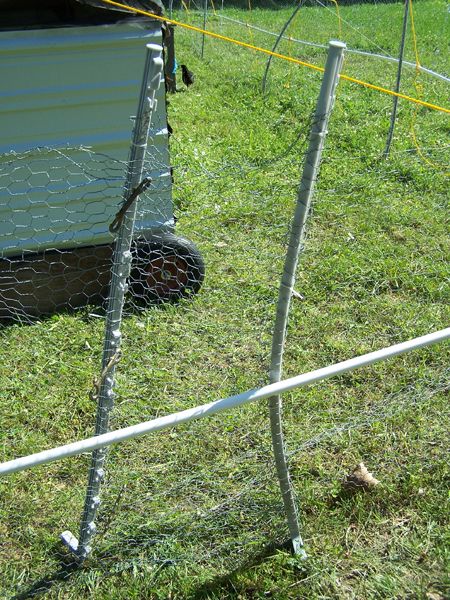
Guy the corner consisting of the first section post and the gate section, and make sure the gate still has the overlap. Use the double end snaps on the top, middle and bottom to close the gate.
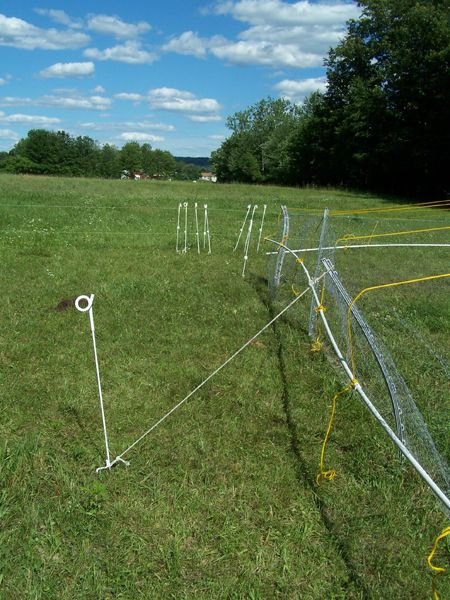
Next cut 4 of the 6-7’ pieces of clothesline and make the loops on each end of them. Using the temporary posts, guy the centers of each side (the 3rd posts), pulling 4-5” off perpendicular. This completes the pen assembly.
Note: Look at the photos and notice the height the Circus Tent poles are at down the sides.
To move the pen:
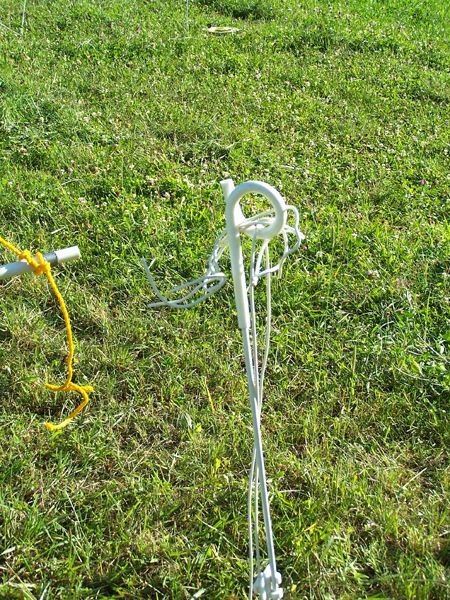
Remove all guys and temporary posts and keep their ties and guys with each post.
Then move them roughly around where the pen will be moved to, leaving a side open for dragging sides, the circus tent, and the coop through.
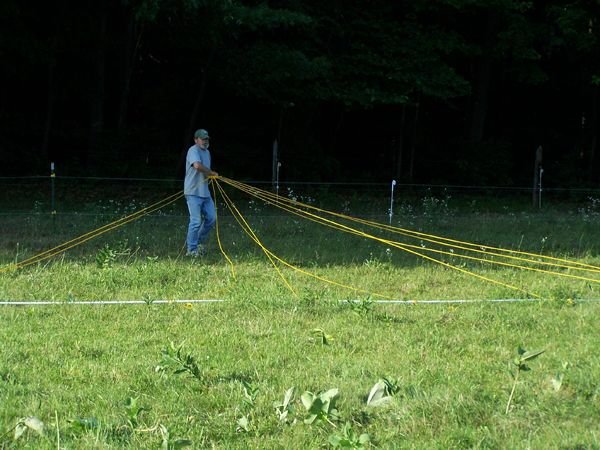
Take down and drag the circus tent sections into place, just outside the places the fences will be. Take down the circus tent support pole.
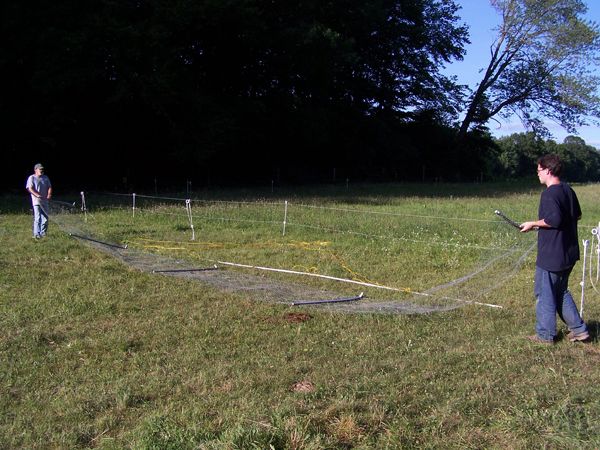
Untie, pull up the posts and lay down the fence, post step-ins up. It can be dragged by one person if moving straight forward, if they are careful to keep the post stakes elevated. Two people is easier though. Move one section at a time and put it up in the new area.
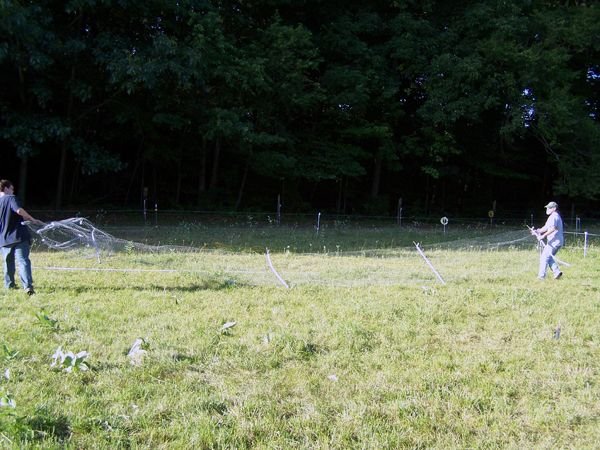
If having to move sideways, 2 people are needed. Keep the stake ends elevated and the fencing off the ground.
Move the coop full of chickens, support pole, and equipment into the new area and then move the last side and put it up.
Put the pole up, pull the circus tent ropes over the sides and put the wire rings on the T on the pole.
Guy the 3rd post in the center of each side and adjust the PVC to hang ½ way down the sides. This is done by untying the ropes and adjusting their length. This is where keeping the sides straight saves a LOT of time.
It took us 1 hour to move the whole thing each time.
Notes:
Grass more than 8” high will lift the chicken wire allowing free rangers.

As the sides got older, even though they were repaired and straightened at the end of each season before being put away, they would curl up inside, from the ground. So we took to fastening them down with the pigtail posts.
Gates not overlapped seem to invite escapes.
After posts have been in use for a while, they tend to become bowed. When sighting, just use the base of the post to get the sides straight.
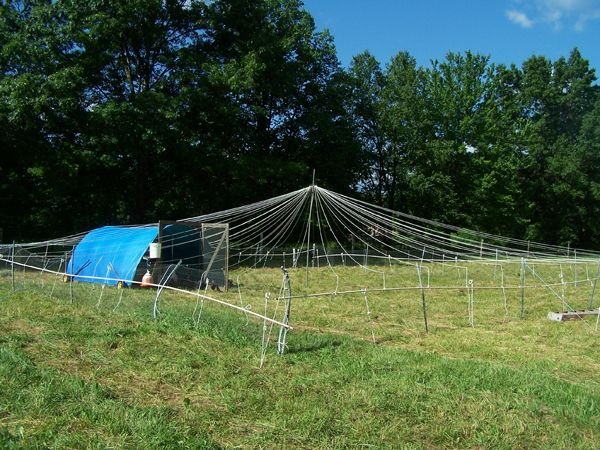
When we built the hoophouse coop, it would not fit in the 40’ pen. So we extended the sides 10’ for a 50’ pen. It took 2 guys on a side to hold them upright. This much larger pen is moved only once a week and takes an hour to do.
Repairing the Pen:
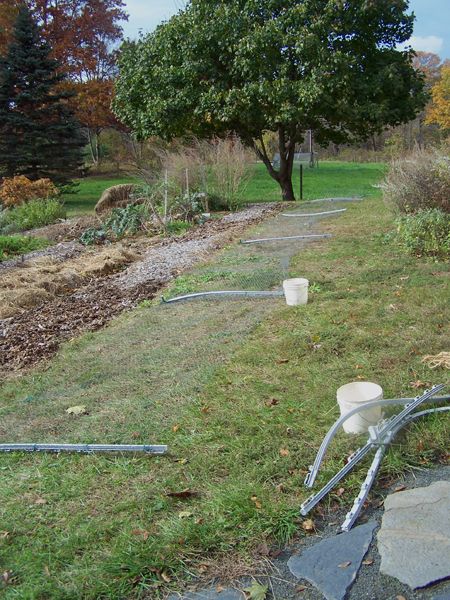
As the pen is taken down for storage, each side should be laid out flat. Check each twist tie on the posts to make sure it has not broken. Flatten the wire and stretch it back into the original size and shape. If there are holes, patch them with small pieces of chicken wire or some of the twist tie material.
Storing the pen:
Once the repairs are done, while each section is down, remove organic debris, and roll tightly and secure with rope band. They will form a roll about 12-16” diameter.
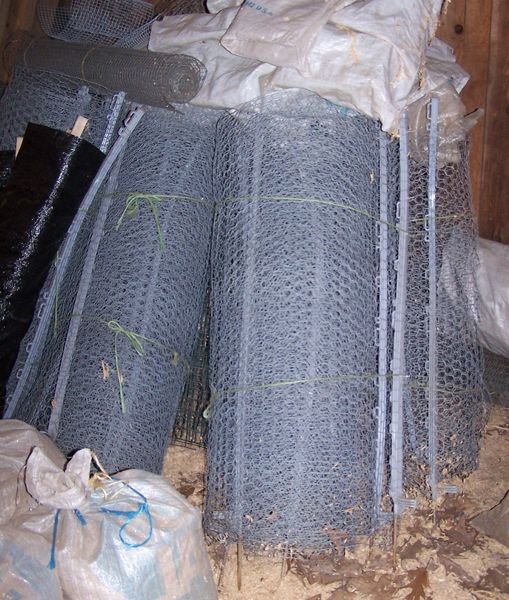
Keep the corner ties and guy ropes together. Leave the double end snaps on the gate. They will all take about 3 sq. ft. to store.
.jpg)

nice! great to see the mobile pen! 1 hour every 4 days isn't too bad, especially considering that it keeps them healthy/they have enough forage and that it's aiding your soils! thanks for sharing with such detail!
Downvoting a post can decrease pending rewards and make it less visible. Common reasons:
Submit
Cool idea.
Have you not had any issues with predators going through the chicken wire?
We raised meat rabbits for a while and always read to never use chicken wire for grazers because predators can literally rip it apart.
Downvoting a post can decrease pending rewards and make it less visible. Common reasons:
Submit
Normally I do NOT advocate using chicken wire for prey animal containment. It really is a poor material except in a few specific applications.
We were successful with this because of the momma cows. They'd chase chickens out of the pasture if loose!
The thing about predators ripping it apart is they must have it stable (ie stapled to a frame) and be able to get purchase with the hind legs to pull. This is not stable enough for that.
It's not stable enough for any animal of any weight (raccoon, 10 lbs+) to climb as it would lean back over them, unless they selected a corner.
They could dig under it, but that takes a while and during the day they would be noticed. At night they would have to dig under, then figure out getting through poultry netting on a dedicated charger, then figure out getting into the coop with hardware cloth.
So for this application, it has served well for over a decade.
Downvoting a post can decrease pending rewards and make it less visible. Common reasons:
Submit
That makes sense!
Downvoting a post can decrease pending rewards and make it less visible. Common reasons:
Submit
Dang that’s nice!
We don’t have flat tree barren land or we would do this.
Very cool
Downvoting a post can decrease pending rewards and make it less visible. Common reasons:
Submit
Yes, we are flatlanders here in New England. Some of the equipment I post about I know would not work on rocky or hilly areas. But I hope there's some take away ideas that could be used in different terrains.
Downvoting a post can decrease pending rewards and make it less visible. Common reasons:
Submit