As a quasi-nomadic gardener I often have to figure out ways to make do with whatever is available. Of course this is a good skill for permaculturists, and well, for life in general!
This year, I'm in Chicago. The house I'm in has a patio in back with raised beds roomates have maintained the last couple years, as well as some chickens. In these past years, folks have applied some finished compost to the beds and gotten starts from stores in the area. Which, unfortunately, usually means large chain stores with starts that most likely have received artificial fertilizer, perhaps even pesticides.
I was feeling inspired to shift this dynamic, and, incidentally we attended a really amazing seed swap a couple weeks ago. Sooooooo many people rushing those tables of seeds, it was a seeding frenzy! And I hope so many back yards will yield enough to have a feeding frenzy too!
So, although we don't have too much room to play around with, we have seeds and some space, so we can get creative! In the meantime, as Midwestern weather does that weird back and forth dance it always seems to do in February and March, my partner and I decided to get things started indoors.

We don't have any plastic starter trays, nor do I particularly like them, so I got us going making our own seed starters.
It's incredibly simple to do and all materials can be found in the recycling bin!
Materials needed:
Non-glossy Paper products (brown paper sacks, newspaper, cardboard, scrap printer paper, etc.)
NOTE You want to make sure your paper products are biodegradable and biosafe; as the soil that your sprouts are feeding on will be breaking this paper down slightly. Almost all newspapers use soy based biodegradable ink and the "glue" (usually plant-starch based) used to hold cardboard together is generally considered safe. The OMRI website has info on what they consider safe: https://www.omri.org/ubersearch/results/cardboard Essentially it boils down to non-glossy paper, non-waxed and non-fungicide treated cardboard. MANY gardeners have used cardboard, however this continues to be a debate. I invite you to do some research as well.Bowl of water
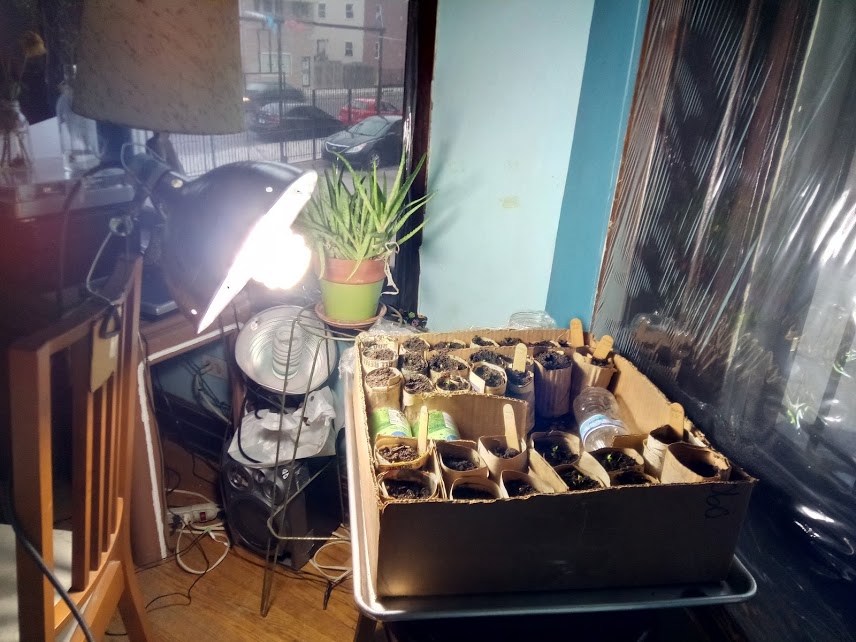
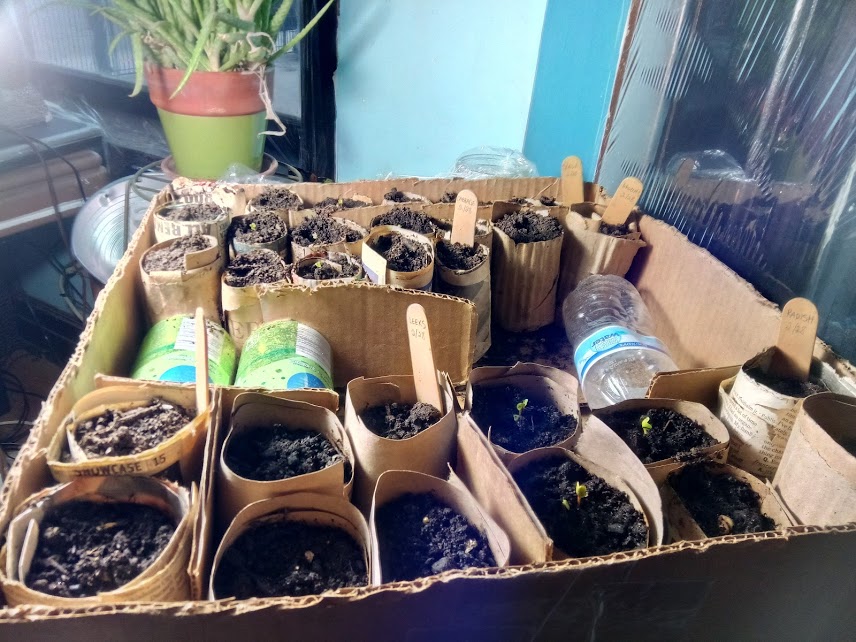
Container for starts (We used a cardboard box and cut the walls down. The extra bits left over help stabilize the starts too!)
Form/mold for starts: You need something to wrap your wet paper product around. It depends on what you want to grow, but for starting seeds, I've found the best are herb/spice jars, soda/beer cans, water bottles, etc.
Potting soil
Seeds!
Spray bottle
Grow lights (optional)
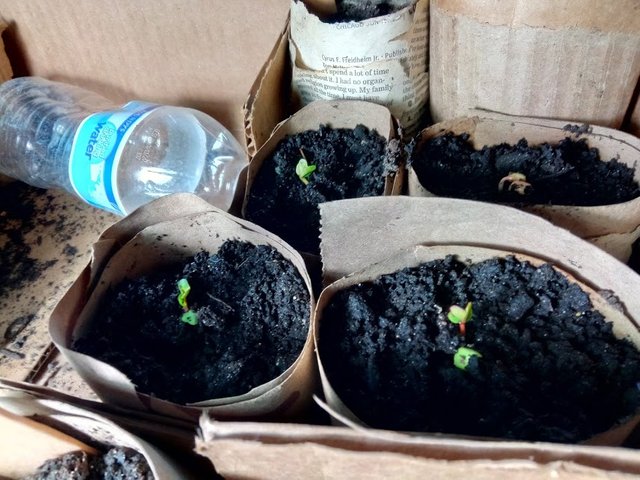
After soaking paper in the bowl of water for a couple minutes, simple wrap it around your form. There are a lot of methods for doing this, but I found a really good way was to place the form at an angle to the paper. As you wrap from one side to the other, keep tucking the paper into the bottom. This is really helpful once you have healthy seedlings that can take a bit more watering; the extra paper in the bottom will help to balance moisture levels in the soil.
It's also quite helpful to have a few forms handy, so that once you wrap one, you can let that sit for a minute, so the paper can adjust. When you're ready, slide the paper off the form carefully and place it in your starts container.
When you have a bunch of paper starters ready, I'd recommend letting them dry a little bit, then fill with potting soil. as much as you can, try to eliminate variables such as:
- Lots of different soil levels in the starts
- Packing some tight, leaving others loose
- Different heights of starts
This last one isn't a huge deal, mainly you just want to make sure the seedlings can get even sun/warmth/moisture. So level them out, give them a little shimmy and shake and wet lightly.
If you can, try to moist the soil and let it sit that way for a few hours or overnight before seeding, it helps activate and prepare the soil.
Seed according to packet instructions, and use the spray bottle a few times a day to keep it soil lightly moist (not too much!)

The grow light has certainly been helping as our only viable windows are East/Southeast.
The other really nice thing about this method is that we won't have to pull the seedlings out of the start containers. Since they are compostable, we'll just open up the bottom and cut a few slits in the sides, then plop them in the ground! In past years I've found this to be really helpful in mitigating transplant stress. However, I definitely would recommend dunking the whole thing in some water or rooting hormone tea before transplanting.
Stay tuned for more updates on how this years urban garden adventure is shaping up, as well as the homesteading property I'm working on!
And please reach out with ideas, questions or comments!
Happy seeding!


Interesting DIY and you dont have to take rhe plants out to plant them
Downvoting a post can decrease pending rewards and make it less visible. Common reasons:
Submit
@ligayagardener, exactly! I wish we would have taken pics while in the process, but you get the idea ;) Yeah and while planting just make sure to open the bottom and a few cracks for them to explore. I really do recommend dunking in a rooting hormone tea too, like willow tea. I'll likely be making a post or a few about willow at some point as well. Thanks for reading and commenting! I've been enjoying your page and look forward to seeing more. Peace!
Downvoting a post can decrease pending rewards and make it less visible. Common reasons:
Submit
I certainly understand the need to improvise planting containers. Last year I took the lid off of my toilet tank (the back, not the bowl) and hung net pots. Improvised hydroponics, lol.
Have you any experience with soil cubes?
Downvoting a post can decrease pending rewards and make it less visible. Common reasons:
Submit
You have to be careful with paper pots. If they are too thick, it can actually prevent oxygen exchange in your potting soil. Without O2 the roots can rot or you will end up with stunted plants.
I learned this the hard way when using commercial plant trays made with recycled paper. They turned into a pasty, impermeable shell around the roots.
Downvoting a post can decrease pending rewards and make it less visible. Common reasons:
Submit
Totally @beyondordinary, that's a good point. What I really like about layering paper is that you can peel off thickness or add on if need be. Also a good reason to not pack the soil too thickly. Honestly I think having the extra wadded up bits of paper at the bottom creates more air flow. I appreciate you reading and commenting!
Downvoting a post can decrease pending rewards and make it less visible. Common reasons:
Submit