Have you ever faced this proverb “God helps those who help themselves”? It means that only numerous trials and errors bring about a desirable effect. Thus, whoever you are entry level or profi, the only way you can hone your skills is to practice them all the time, interacting with some objects. Hence, the obvious example is drawing a cool autumn wind gust and its realistic effects. For instance, when a storm causes a tree to bend, followed by spinning, colorful leaves. So let’s start with this step-by-step tutorial of how to draw wind in autumn foliage.
Needed Supplies
First of all let’s find out which tools will be necessary in your art set during drawing. Actually, don’t be afraid, there is nothing extraordinary, but there is a basic set of tools that consists of a paper sheet, an eraser and pencils #2 or HB, H2, and B2. In addition, you may want to use a device that performs shading and a knife, since the softer the lead, the more often you will need to sharpen your pencil. In addition, you can embellish your picture, thus an overview of top crayons turns your drawing into a masterpiece with the utensils that are the best and should be among your the most favorite pigmented devices.
Step 1: Let's Illustrate the Ground Line

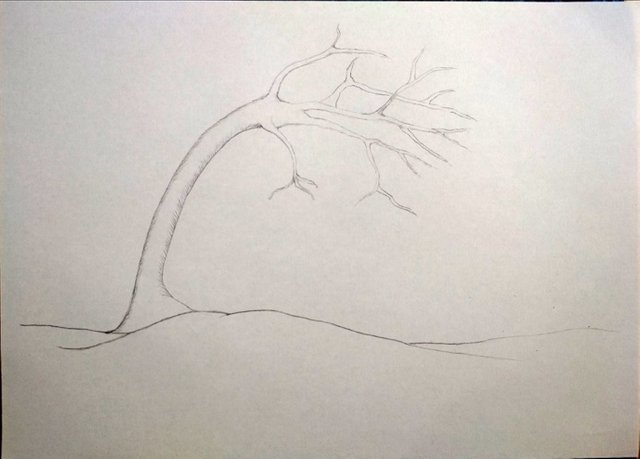
For the beginning, the device to be used is the ordinary pencil #2. Place a sheet of paper and put it in portrait orientation in front of you. Then, virtually divide this paper into 3 horizontally equivalent fragments and contour the lower border only. This line will be an edge of the ground. As a consequence, the tree and other plants will be depicted there.
Step 2: Drawing Wind-Blown Trunk and Branches of Tree

The next stage is, trying to achieve a nature scene of a swaying wooden trunk. Let’s imagine it tilting to the right side. As you know, that, a trunk curves from the lower part, so the next step is to contour a natural curve of the trunk. Another thing that you should keep in mind is that the lower part is always more voluminous compared to the upper part, hence you should diminish the trunk at the end. Particular result can be performed with light strokes, however, the tree outline can be also visualized by light hatching too; this will add some authenticity to this illustration.
Another significant thing is limbs - of course, you can’t leave only a simple trunk. Likewise, drawing branches doesn’t require lots of effort either; the only thing is to draw them swimmingly and prevent angularity. Identically to the massive trunk, branches should narrow down at the end. There shouldn’t be any evident lines but make strokes as the tree borders have, as an alternative they can be thinner compared to the major hatching. This is the reason why there is a piece of advice to sharpen the graphite to a sharp point in advance.
Step 3: Add Wind Streams

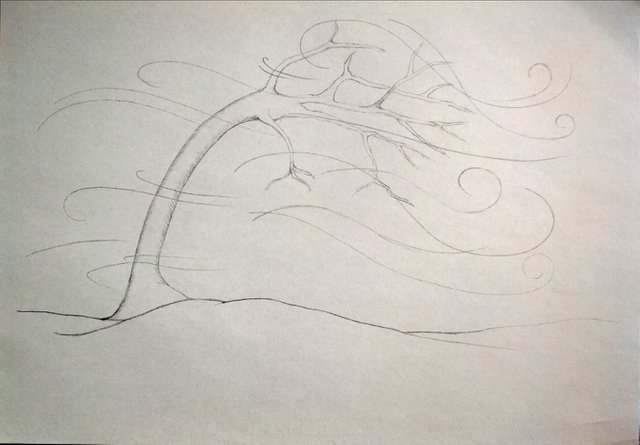
Now, we’ve come up to the most challenging task - drawing how air masses move. This will be performed by drawing a wind stream that constantly changes. Do you remember that the drawn tree is previously bent according to the airflow, as a result, the undeniable wind flow is from left to the right?
Softly, make a whirling flow, and apply longer strokes spinning at the end; this will show what happens with a blown flow when it loses its power. Lighter wind should be depicted with shorter and intermittent lines.
Step 4: Flying Leaves Through Wind

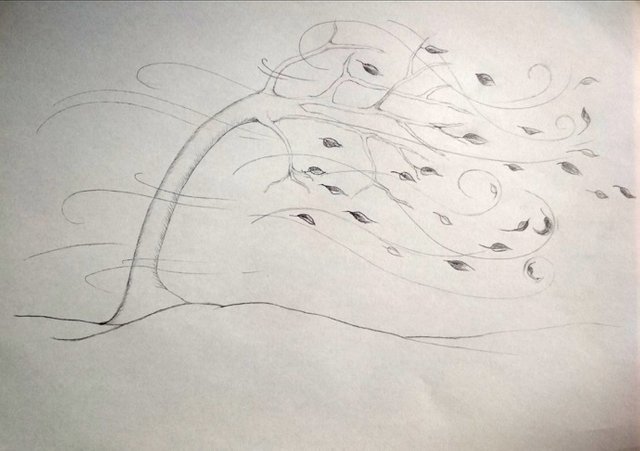
This stage involves the visualization of flow power; this can be determined with foliage and plants flying through the air. Now, a softer core will be more suitable; which means you should use a softer lead. You can’t miss a detail that foliage has to fly according to the stream - from left to right. Nevertheless, some spinning can also be present, since the direction can’t be the same all the time.
The leaf shape should not be straight, otherwise they would be unrealistic, thus experiment with their shapes randomly - this is a secret of professional thinking. For example, imagine them outside: carried by the blast, they spread in regular intervals and become twisted and bent. Volume is an alternative trick that delivers liveliness to your drawing; for this purpose a hatching approach is pretty convenient.
Step 5: Make Ground Realistic with Grass and Stones

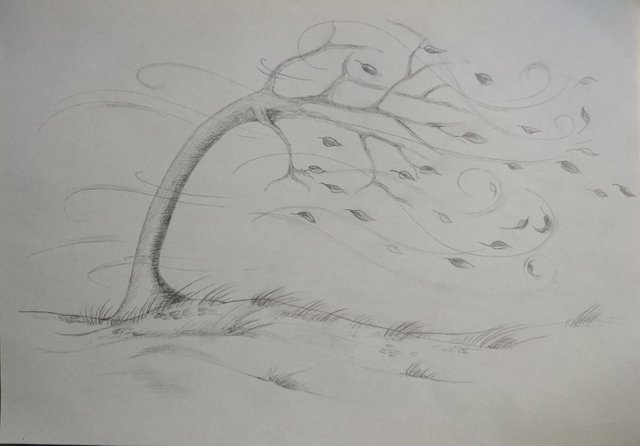
Another marker of moving flow, and that is miniature details such as grass on the ground. Thus, the next step will be depicting the grass that is around the tree. Wind also causes the grass blades to react air movements, but they can’t be identical in direction and movements. Nevertheless, the majority of the blades should curve to the right, because the blowing wind dictates their course, and all these things can be performed with a softer lead. Simultaneously, you are welcome to add some tiny stones on the ground, that aren’t redundant; on the contrary, the picture would have a tedious nature scenery without them.
Step 6: Shading Work

The last step is, adding more and more realistic things. One of them is shadow, which is an integral part of things in daylight, and it’s full of volume and shine. Consequently, taking into account that the place of the light source doesn’t matter, eventually, there appears a shadow, thus project the shape of the trunk’s shadow, and shade with hatching. Nevertheless, don’t press onto the pencil at the time when you are hatching the shadow.
Shading is also important. Thus, tinting the bottom segment of details, such as limbs, may give them, it appears more voluminous and more understandable. This approach works with the air stream too: first hatch the next add the shading along the stream course. This result can be accomplished with a harder core, thus use either #5 or H2 core.
Let's Summarize
Hopefully, this tutorial was pretty understandable and simple and will help achieve your worthwhile outcome, particularly, natural wind. So next time it’s not necessary to spend too much time in order to research how this effect can be drawn. Nevertheless, it doesn’t imply that you shouldn’t try and add things that you want, rather than attempting and honing your drawing mastery all the time. And don't forget about muse. Look at this wind art board at Pinterest.
Hello @yuliyaskryp! This is a friendly reminder that you can download Partiko today and start earning Steem easier than ever before!
Partiko is a fast and beautiful mobile app for Steem. You can login using your Steem account, browse, post, comment and upvote easily on your phone!
You can even earn up to 3,000 Partiko Points per day, and easily convert them into Steem token!
Download Partiko now using the link below to receive 1000 Points as bonus right away!
https://partiko.app/referral/partiko
Downvoting a post can decrease pending rewards and make it less visible. Common reasons:
Submit