Introduction
Eliminate those ugly and often dangerous extension cords. You can add a new outlet quickly and easily without tearing open a wall, if you already have an electrical outlet in the other side of the wall. No extra holes. No messy patching and repainting. The procedure we show here allowed us to center our TV against a wall in the family room that had no outlet. Since there was already an electrical outlet in the other side of that same wall (facing into an adjacent bedroom), we just added a new outlet in the family room, drawing power from the bedroom outlet
Tools Required
4-in-1 screwdriver
Drywall saw
Needle-nose pliers
Voltage tester
Wire stripper/cutter
Materials Required
Electrical cable
Receptacle (outlet)
Remodeling box
Wire connectors
Step 1
Shut Off the Electrical Outlet
Turn off the power at the main panel. Find the correct breaker and turn it off.
Once you’ve determined the electrical outlet to use as a power source and shut it off, use an electronic stud finder to locate the studs on both sides.
You can put your new outlet anywhere between these two studs.
Unscrew the outlet and use a voltage tester to double-check that the power is off.
With either lead touching a ground wire (bare copper), touch the other lead first to the neutral terminals (silver colored), then to the hot terminals (gold colored).
If the light glows with either contact, the circuit is still live.
Hold the face of the new electrical box against the wall where you want it to go, and trace around it with a pencil.
Cut out the hole with a drywall saw.
Pro tip: Be sure to buy a “remodeling” box that can be secured to the drywall, not one that must be mounted on a stud.
Next, using a screwdriver, unscrew the existing outlet on the other side of the wall outlet from its box and punch out one of the knock-outs at the back of the box.
Step 2
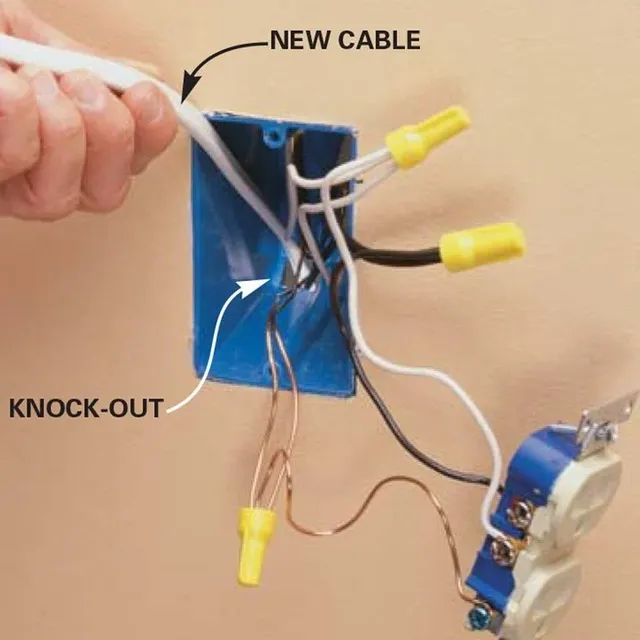
Feed a length of new cable through one of the knock-out holes at the back of the existing box (punch out the hole with a screwdriver).
Feed through enough cable to reach the new box plus an extra foot.
Use 14-gauge wire for a 15-amp circuit.
Feed new cable into the wall
Step 3
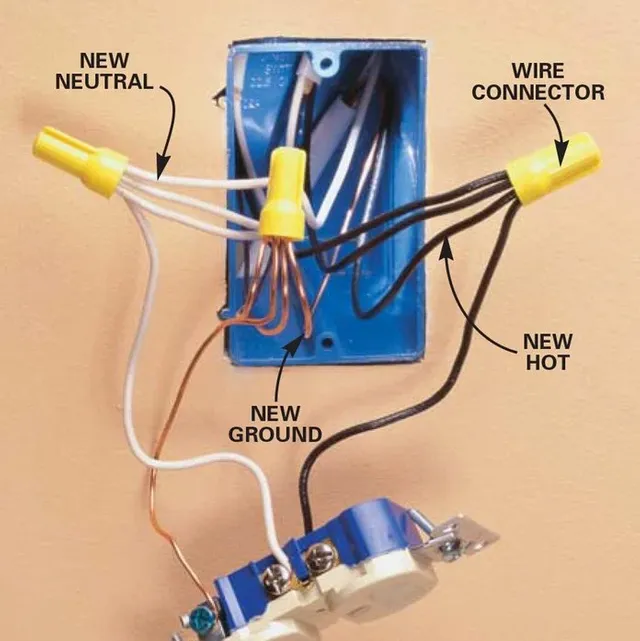
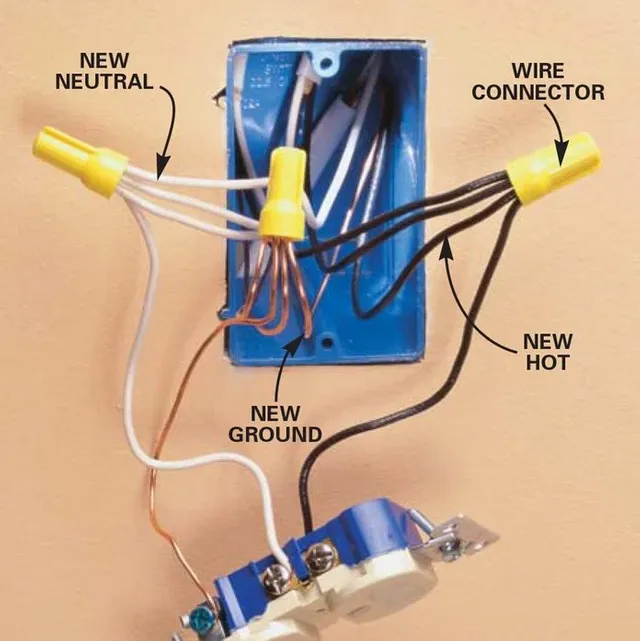
Rewire the Existing Electrical Outlet
Connect the wires of the new cable to the existing wires.
Strip about 10 inches of plastic sheathing from the new cable to expose the black, white and copper wires.
Run the new cable, with sheathing, at least two inches up inside the box, and double over the excess wires to help hold the cable in place.
Strip 5/8-in. of insulation off the ends and connect the wires from the new cable to the existing bundles — white to white, black to black, ground to ground.
Use new wire connectors of adequate size for the four wires in each bundle
Step 4
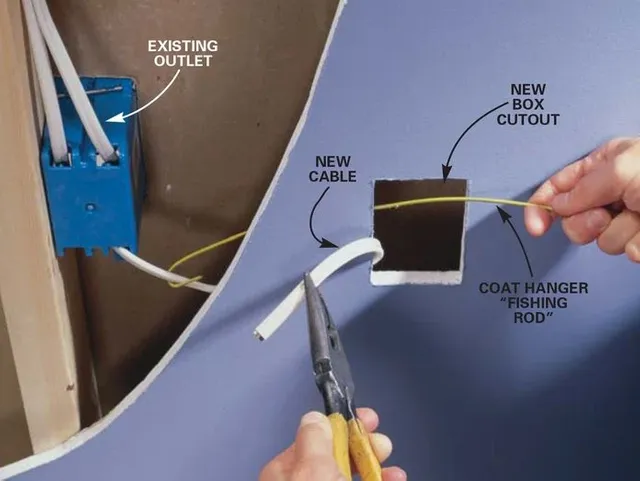
Fish the Cable to the New Location
Mark the opening for the new box and cut it out with a drywall saw.
Fish for the new cable with a hook made from a wire coat hanger.
Pull the cable through the opening cut in the wall.
Then strip about nine inches of sheathing off the end of the cable. Insert the cable so the sheath extends about one inch into the box and mount the box in the wall.
Step 5
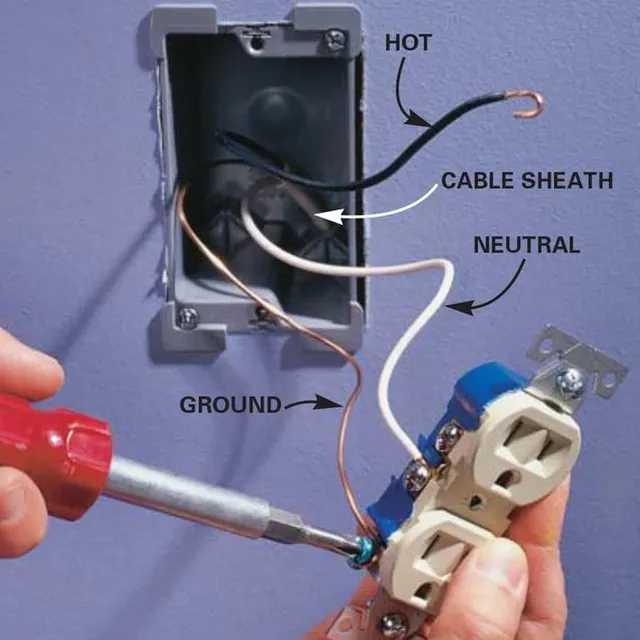
Wire the New Electrical Outlet
Mount the new box in the opening.
Connect the new wires to the new outlet: white (neutral) wire to a silver-colored terminal screw; black (hot) wire to a gold-colored terminal screw; bare wire to the green grounding screw.
Make sure the cable sheath remains secured inside the box