This post assumes you are familiar with NetBeans and the JPMS specs, because we'll describe creating JavaFX modular projects.
One other prerequisite would be that you download and unpack somewhere the JavaFX SDK so that you can configure it as a library in the IDE, or you're familiar with Maven projects and setting up dependencies in such a project.
Things were simpler back in the day when JavaFX was part of the JRE and before modularization but don't let these two small issues scare you away. I tend to aggree that making JavaFX independent was necessary and the benefits of modularization are well worth the small effort required to learn that.
I used NetBeans 12.3 for illustrating this article. I have to ashamedly admit that I wasn't able to properly configure NetBeans so as to be able to use the project templates in the "Java with Ant" > "JavaFX" category. So I'll go ahead and showcase what I have managed to do.
The path to the SceneBuilder installation must be set in Tools > Options > Java > JavaFX.
Option 1: The Gluon-provided Java FX Maven Project Templates
In NetBeans, go to File > New Project. In the "New Project" dialog, select the "Java with Maven" category and then the "FXML JavaFX Maven Archetype (Gluon)"
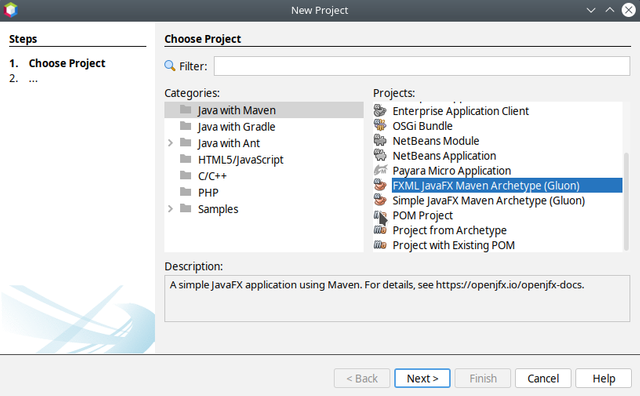
Hit "Next", fill in the required fields considering maven-specific as well as package naming conventions and click on "Finish".
The Project panel in NetBeans should look like this:
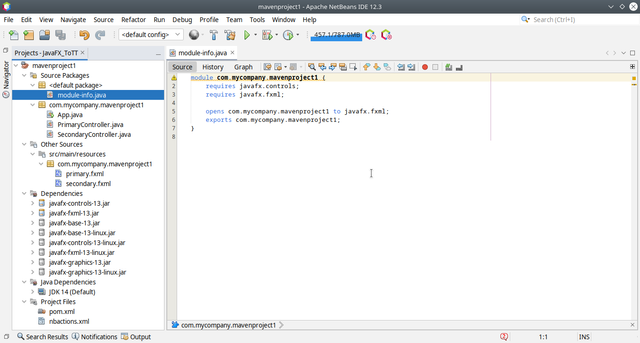
In the above screenshot the contents of the module-info.java file is visible. You can see that the javafx.controls and javafx.fxml modules are required and also this application's module is "opened" to javafx.fxml so that the FXML Loader can reflectively access the controller fields and methods within our code.
Also visible are the application's entry point, the App.java and the primary and secondary fxml files with their respective controllers. These FXMLs and controllers are provided as samples within this project template.
If you open the pom.xml file, it's contents would look something like:
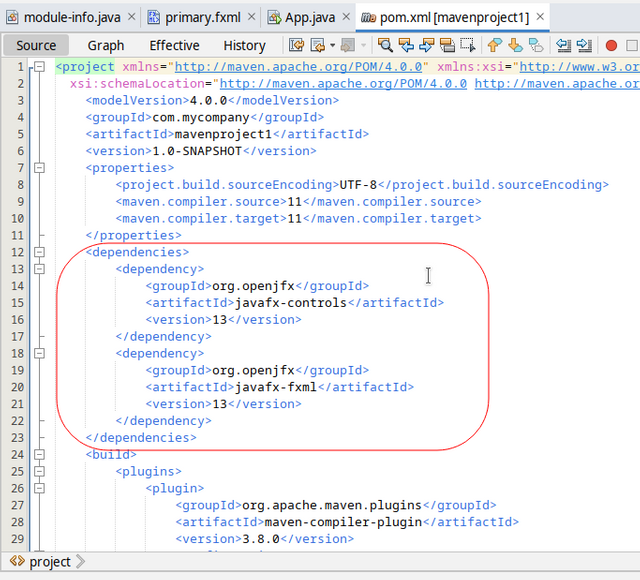
I have highlighted the dependencies, in our case the controls and fxml modules of the JavaFX framework.
Option 2: Java Modular Project
This one uses the Ant build tool instead of Maven and for this you'll have to configure the JavaFX library in NetBeans.
Go to Tools > Libraries, click on "New Library", enter a name, for example "JavaFX 13" and hit "OK". The new library will appear in the left-hand list and you can click on "Add JAR/Folder" to select the jar files that make up the library. Also the "Sources" and "Javadoc" tabs allow you to select folders/jars/zip files containing those respective elements.
Should look something like this:
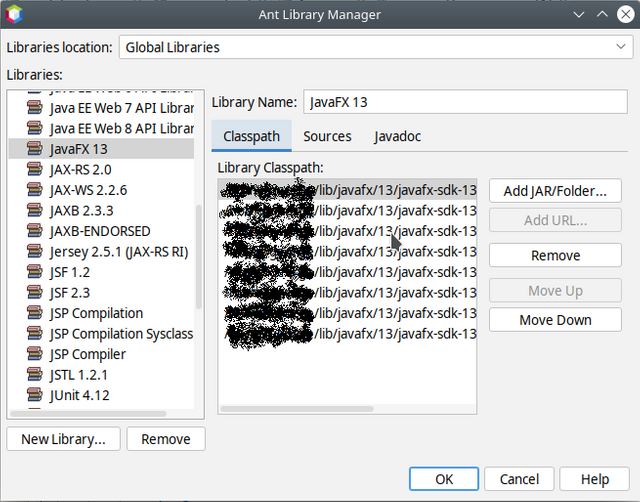
Now hit "OK" and we can create the project.
File > New Project, select the "Java with Ant" category and "Java Modular Project", click on "Next" and enter a project name and location, then click on "Finish".
It's somewhat strange now because the project doesn't have anything underneath it in the Projects pane, it can't be expanded. We're good though; right-click on the project's name, select New > Module...
You'll be prompted to enter a module name, do that and click "Finish".
Now we're getting somewhere; the Project pane should look like this:
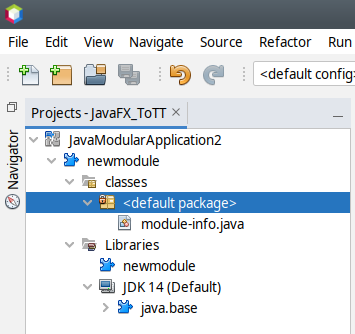
Notice that a module-info.java file has been created. We'll get back to this one later.
Right click on "Libraries" and select "Add Library..."; then you can select the "JavaFX 13" library that we've defined earlier.
Right click on the module name, select New > Package and enter the package name.
Now let's add a new FXML file, shall we?
The thing is in my NetBeans installation I couldn't find an FXML file template so I had to add an XML file, change it's extension from xml to fxml (right click on the file, Properties and change the extension); then cleanup the file and open it in SceneBuilder either with double click or right click and Open.In SceneBuilder, drag a Pane from the Library in the left hand side (you can filter the elements in there) into the design area. Then drag a Button onto that Pane. Double click on the button and you can edit it's text.
With that Button selected go in the right-hand Inspector pane, in the "Code" section and in the On Action field write "sayHello".
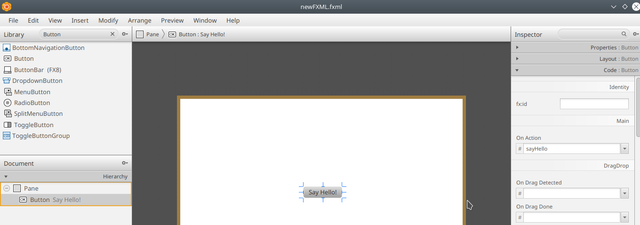
Save the FXML File and now back into NetBeans, right click on the fxml file and select "Make Controller". A new java source file will get generated with a @FXML private void sayHello(ActionEvent event) { method. Let's write something in it, such as System.out.println("Hello!");.
Oh, you might find some strange stuff in the import statements at the beginning of the file but those are easily fixed by hand.
If you edit the .fxml file you'll notice that the newly created controller class was added into the fxml root element's fx:controller attribute.
Right click on the new package, select New > Other... and from the "Java" category select "Java Main Class"; enter a class name and click on "Finish". In the newly created file, make this new class extend the Application class:
public class NewMain extends Application {start(Stage stage) method. Your main(String[] args) method must call launch(args).The main class's
start method should look along the lines of:
    @Override
    public void start(Stage stage) throws Exception {
        FXMLLoader fxmlLoader = new FXMLLoader(NewMain.class.getResource("newFXML.fxml"));
        var scene = new Scene(fxmlLoader.load(), 640, 480);
        stage.setScene(scene);
        stage.show();
    }
Now, if you run the project you should see a window displayed with the "Say Hello!" button inside; clicking on the button should cause the "Hello!" text to be displayed into the IDEs output console:
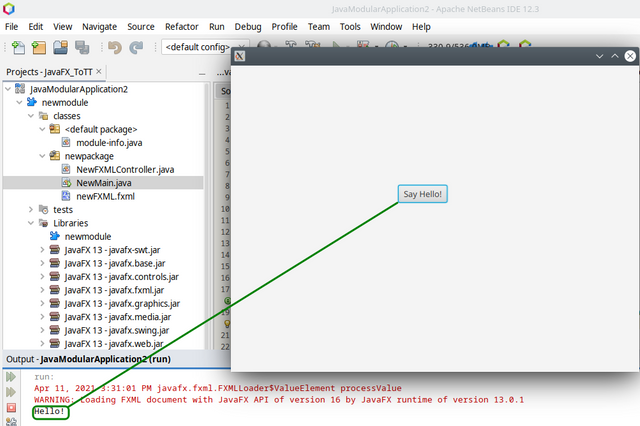
That's all for now, next article will be on Eclipse.