HOW TO TRACING IN ADOBE ILLUSTRATOR WITH EASY
This time, I will tell you how to do tracing in Adobe Illustrator easily. For those of you who deepen the world of graphic design is certainly no stranger to this Adobe vector application. Tracing, originated from the word trace, which intends to search or search. The tracing itself is almost the same as the process of drawing or tracing, only this time using the app instead of using a pencil. Adobe illustrator that I use here is the CS6 version. So it looks so dark-dark, so quite comfortable to the eye. Okay go ahead ..
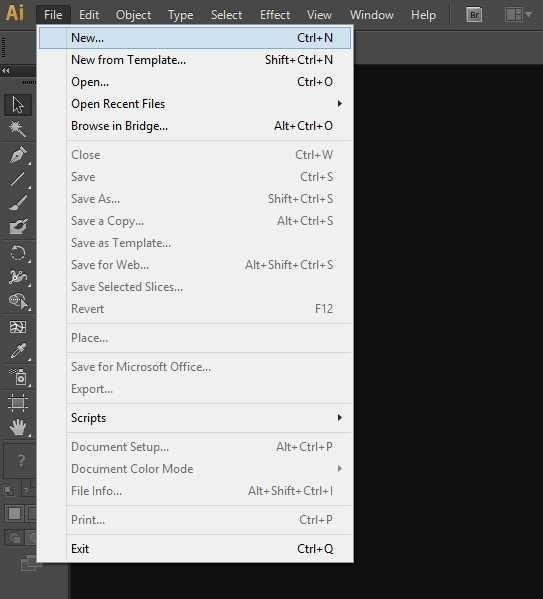
- Open the Adobe Illustrator app and choose File - New

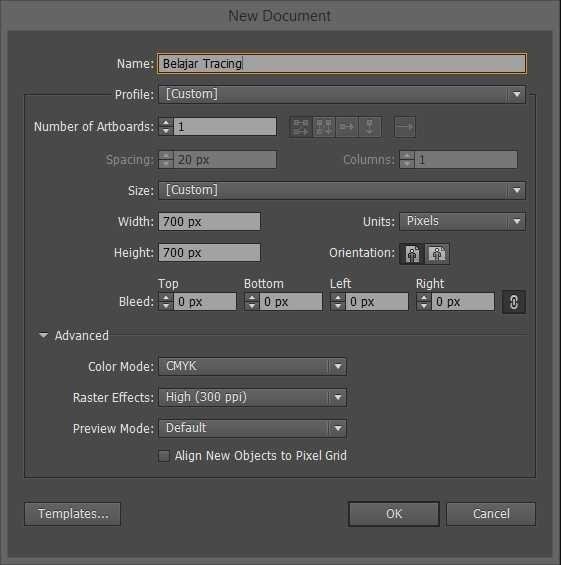
- Here I create a new square-shaped document with a size of 700x700px, and I named it with Learning Tracing

- Now enter the image you want to tracing, I'm here using the sigma symbol image. How to insert it is to click and hold the image and then drag it to the new document that you created earlier
- Set the size of the image to fit in your document, as for how to change the image size by holding the Shift key and zoom out the image
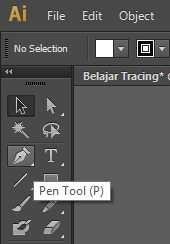
5 .Clock the image by pressing Ctrl + 2 Okay until here already understand, now we begin to enter the stage tracingnya - Select Pen Tool or by pressing (P)

- Click on the starting point of tracing (see picture),then click on point 2 (next point) and so on

- For a straight line, press and hold the Shift key so that the line is straight 4. For the curved line, click the point then hold and drag (see picture)

- When tracing process, I suggest to empty / disable its fill color, so that only live outline color, because if the active fill color can block the view when doing tracing


Here Tracing Results with Fiil Color On

Following Tracing Results with Fill Color Off

- The picture below is to change the outline size (stroke)

- For zooming press and hold the Alt key while scrolling the wheel in the mouse up or down
- After the tracing is finished, unlock the sigma image by pressing Ctrl + Alt + 2
- Delete the reference image, and now the sigma image of the tracing you can edited at will.

- Good luck Easy really right? Hopefully Tutorial tracing way in Adobe Illustrator is useful for you. See you in my next tutorials!
Truly admire your graphic art expertise.
Thanks for mentoring via your posts.
Namaste,
JaiChai
Downvoting a post can decrease pending rewards and make it less visible. Common reasons:
Submit