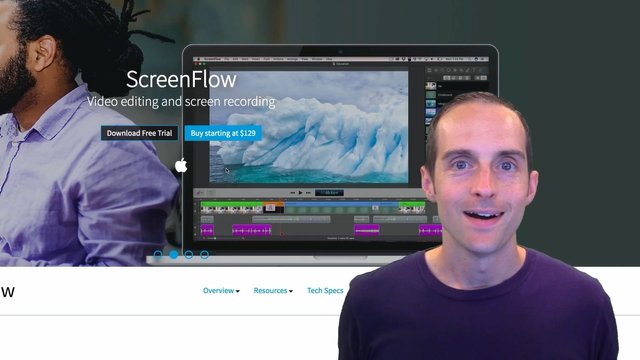
Are you ready to see how to use ScreenFlow to capture video on Mac because ScreenFlow will help you make beautiful screen capture tutorials very quickly and it works really well on Mac.
If you will enjoy reading and contributing to the discussion for this post, will you please join on the YouTube video above and leave a comment there because I read and respond to most comments on YouTube? I trust you’ll join the Jerry Banfield family by subscribing to my YouTube channel if you are enjoying this.
I've been using another program (Camtasia 2019) and it has not been working very well on my Mac. ScreenFlow has been working beautifully. I've downloaded it and bought it to show you how to install it here in this tutorial.
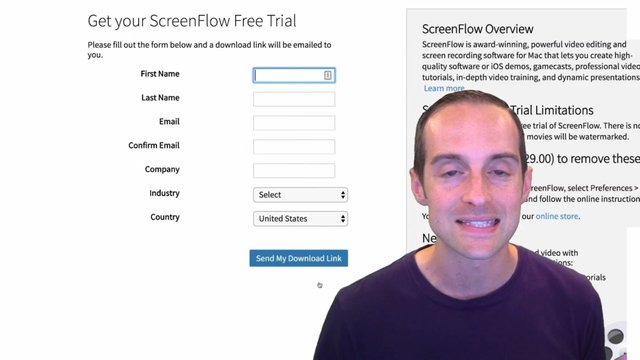
If you'd like to help me out and you want to try downloading and using ScreenFlow, will you please click on the ScreenFlow link here, it will take you to the page where you can download a free ScreenFlow trial. Fill in the form and then click Send My Download Link and then if you do buy ScreenFlow for $129 I would be grateful to receive 15% of that.
What I’ll do in this tutorial is to show you how to get started using ScreenFlow to help you decide if you want to use it. I love ScreenFlow, the workflow is amazing, chroma key is very easy to use. I just can't get off OBS and Final Cut Pro 10 though, because my setup is so fast with OBS and Final Cut Pro 10, I've got a tutorial on that here, showing you how to use OBS.
I've got a lot of experience filming and it’s easy for me to talk straight like this without having to edit a bunch. However, if you need to make a lot of edits you’ll probably want to use either Camtasia or ScreenFlow. I am recommending Screenflow for Mac and I will show you how to get started using it in this tutorial right now.
Once you've had this free trial and you go through and purchase it, I will walk you through the installation on Mac. I just bought ScreenFlow, now it’s time to download and install it. First thing is I used download link I got, immediately upon ordering I hit Agree. I am installing this on Mac, open up the file, let it install here, then I imagine I will be dragging it into application folder and start to set it up.
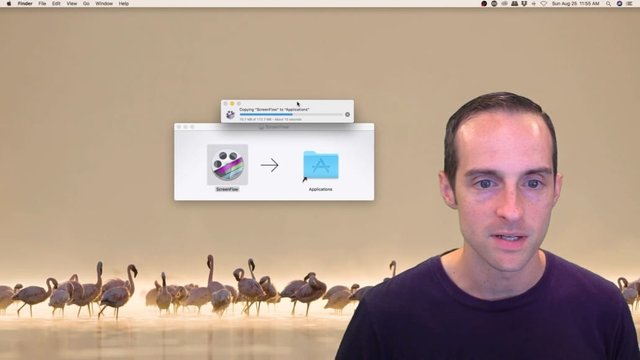
In order to do that, we’ve got the little icon over here, we drag it into applications. Now what I can do, once it copies over as it's copied right now, I'll copy that over, then I'll be able to open it and start taking a look as soon as it's done. Once it's done I can use Launchpad on my Mac to go open ScreenFlow.
I opened it up and clicked Yes to continue loading and now I am all ready to top go.
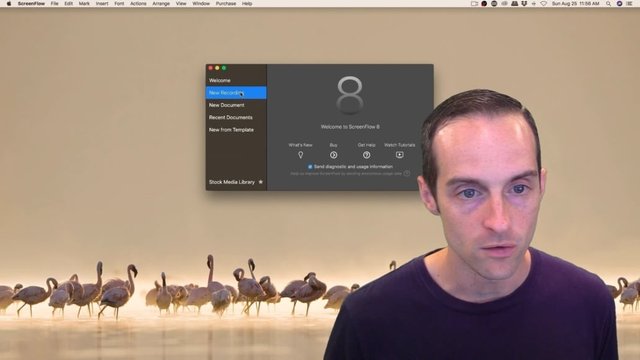
All I need to do now is activate ScreenFlow. I can do a new recording, make a new document but what I need to do to activate it.
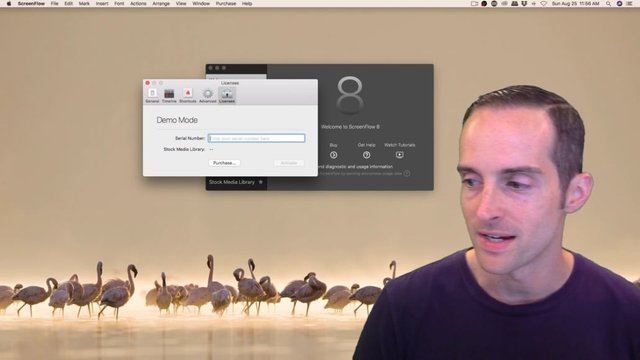
Go to the menu where I can purchase online or I can go over to ScreenFlow > Preferences, then click on License and I copy and paste my serial number here from my order and this will allow me to activate.

Now that you've got ScreenFlow downloaded and installed the key thing this tutorial will show you is how to check on your recording preferences. You'll find this button here on top or it will pop-up right when you install it.
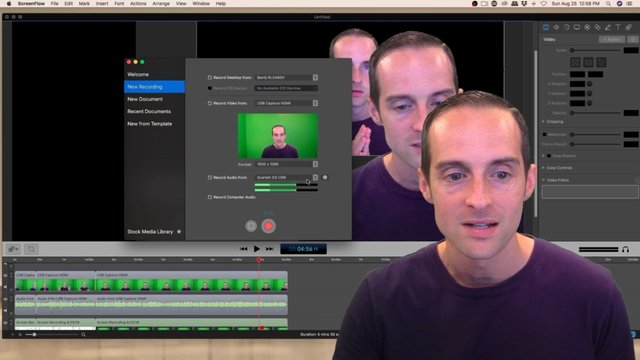
You can click on Configure Recording… on Configure Recording to make sure you've got every input source selected correctly. It's very important to make sure your format from your camera, if you've got one, is set to the right resolution up here. Make sure you've got the correct monitor selected, for example, if you have multiple monitors it will have a red outline come across the right one. If you're recording on an iPhone you can put it up there, if you are recording from different microphones make sure you've got the right one selected here. You can also mix your tracks if you like right there.
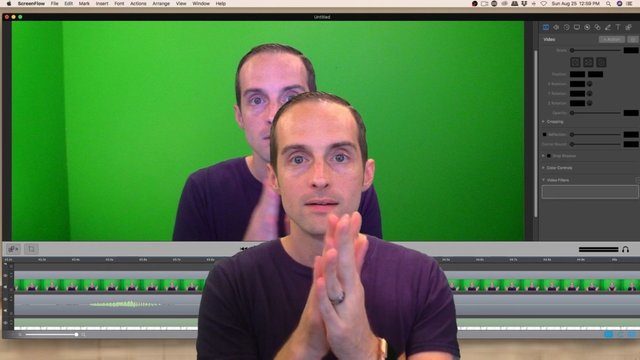
The first thing you want to do, once you've got your input sources configured, is to make sure you don't have any weird audio or video delays. You can do this by doing a little clap test like this, hold your hands out, clap and bounce your hands off of each other.
Once you’ve recorded that go into your timeline and you can use the plus and minus buttons on the keyboard to zoom way in. Find exactly where the clap happens right, and for me it's down here in the middle where I zoomed in, you can see the audio spike. What you want is for your hands to be touched in the exact same way that that sound spikes in the video.
This way your video, your mouth, and your movements are perfectly synced to whatever it is you’re saying in the video. I’ve got about a tenth of a second of audio delay in mine, which is why I am using OBS to film everything because it's too much of a pain for me to go in every single video and slightly move my audio. I would need to detach the audio to even get it to this point and then slightly move my audio. You can check this before you've even bought ScreenFlow, if you know you need to move your audio every single time you might consider using something like OSB to record. I’ve got an OBS tutorial right here.
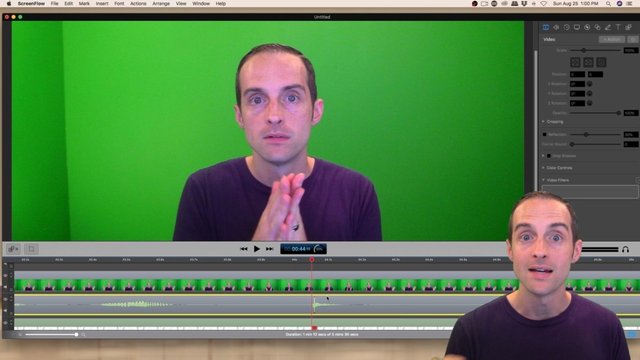
If you find there is no delay, that your clap test works perfectly, then this is a good indication that you're ready to go to the next step in ScreenFlow.
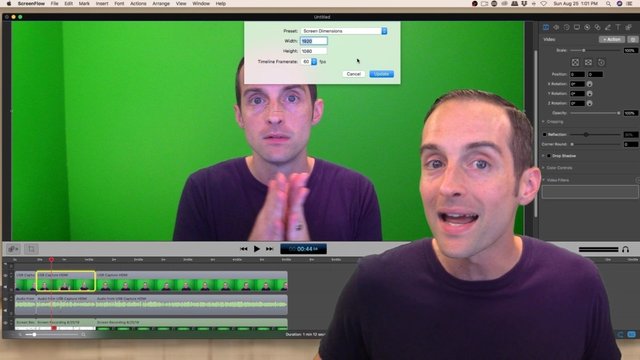
Once you have verified your audio and your video is synced correctly in ScreenFlow, you want to make sure you've got your document settings that are here properly. You can go up the menu to view your document settings under File > Document Settings then make sure your width, height and timeline frame rate are all exactly where you want them. I like to film 1920 by 1080 because this is the highest resolution that is consistently supported and used, on YouTube it gives me a little smoother and crisper movement, it’s standard for video games and I've already got my studio set up this way. However, you probably don't need to use probably more than 30 for frame rate and that will save you some data. Make sure you've got this setup before you do any recording. I have seen a bunch of times people recording screens not getting that aspect set up properly, even established and experienced instructors. Make sure you've got your document settings right before you do anything else.
Once you get your documents setting right then you'll also want to be aware of the File > Save Frame option. The Save Frame option can be very helpful for you to make a quick thumbnail for your video which is how I make my thumbnails. I just took a quick screenshot of the video and threw them text on it.
Once you get those down then get the basic shortcuts, you can hit ⌘+F to make it full screen or not full screen, you can zoom in and out on the timeline with the plus (+) and minus (-) key, if hold command you can zoom in on the video itself with the plus (+) and minus (-) keys. Those are very helpful commands you will want to use.
If you don't want the audio to scrub like it did on mine, just take View > Scrub Live Audio off. This will help you not have the audio bleeping while you're moving it.
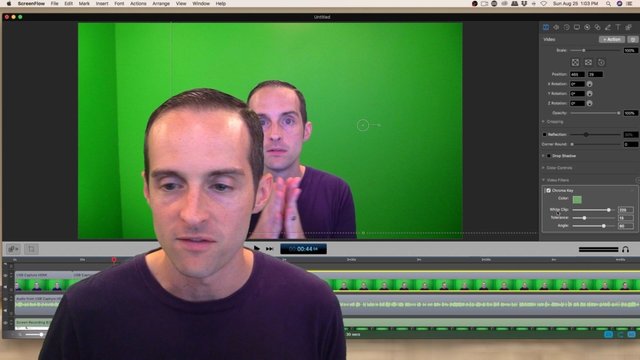
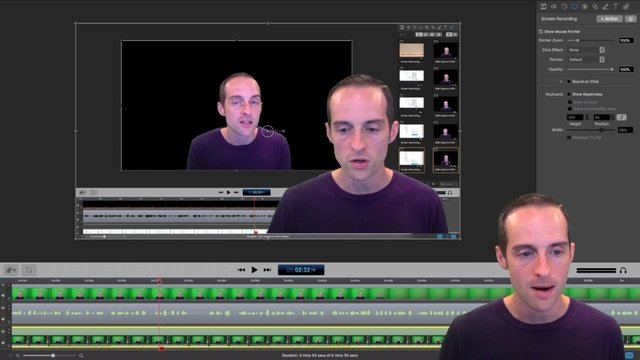
The next thing, if you’ve got a green screen like me, which I highly recommend, you want to go into chroma key and learn how to use that. The chroma key is over on the right of the video, when you click on a clip the property bar is on the right. If for some reason you don't see these properties you can find this on the View menu, if for some reason you don't see it you can click on Hide Inspector and Show Inspector.
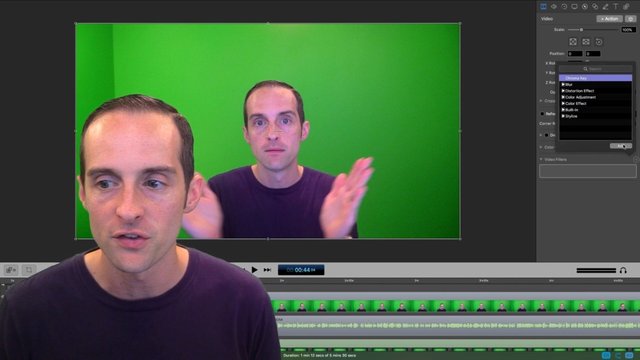
When you go over to video filters, you hit the plus button on the video filter and then click on add Chroma Key. Then to adjust the color you can click up here and move the color around and you want it to be so everything is faded out but you don't look weird or anything. You can move the key around to get it in a good spot and once you've got it in a good spot you can leave it. You can play with things like the White Clip and the Tolerance in Chroma Key settings if you need to, depending on how you're looking. Ideally you'll be in a consistent studio setup where you can just do this really quickly and easily. Again, I'm using OBS because my chromakey is set by default every time and I don't need a mess with it which speeds things up a lot.
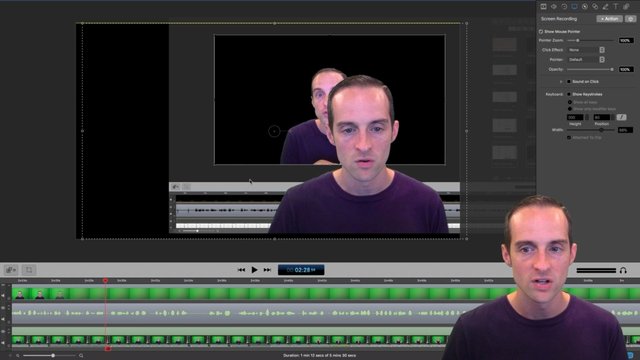
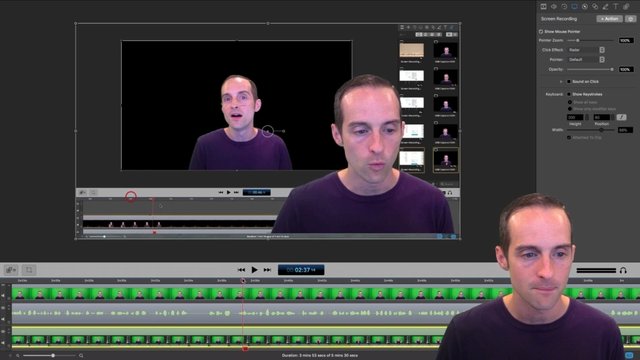
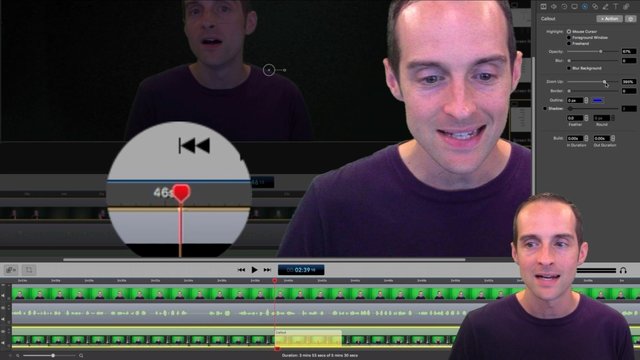
You can change the scale of the video into properties, you can add things like drop shadow, you can, if you get the audio attached, you can move the audio here and this is where you really get the value out of ScreenFlow, being able to use some of these options here to highlight what you're doing. For example if you go down and click on an actual screen recording like I've got here in the lower left then you go back up you can do things like highlight the mouse pointer, you can put an action on over here that will make things show the actual keystrokes you're using while you're using them, you can do click effect where you're zooming in on the clicks, you can make the pointer really large or really small if you want to, and if you zoom in on a timeline you can see these effects can be limited to a certain period of time, you don't need to have them for the whole duration. If you want, you can just delete it if you don't want the effect there.
If you can move around, I'll go to a different part of the screen recording in a timeline, I’ll zoom down and give you a better example of how this works. You can see it looks like the screen got moved off somehow., the whole thing got moved sideways, you can just drag it in here to position it again properly.
I'll show you how these mouse effects work. I can have huge radar click effects when I click on something to help it pop up. See how that red ping came on, there is a red ping when I click on it.
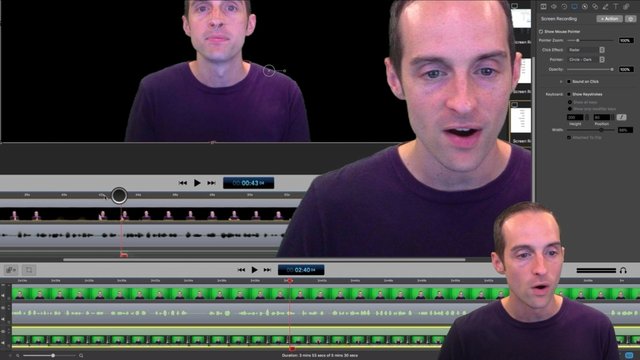
You can also do a big, lighter or darker, pointer here and that will help you see. For example, you can see right here that there is a pointer on the screen and when you move it back and forth you can see that's my mouse right there. If you want it to be that way. You can also turn all these effects off if you want.
You can even zoom in to make the pointers super ridiculously huge if you want. These features can be really nice to help people understand what you are doing on screen.
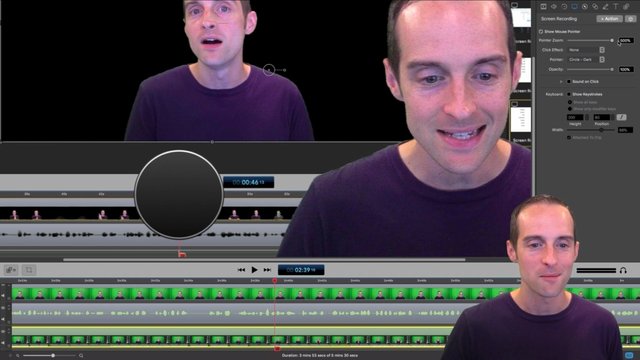
You can do mouse callouts for example, you can play around, quick on Callout Action, you can zoom in specifically on the cursor, you can even close everything else you can’t even see the cursor, you can even blur the background if you need to hide personal details and that's a really nice feature to help you not need edit all of your personal information out of a video.
You can even zoom in, this is a really nice ScreenFlow feature. You can zoom in and see very clearly what is happening in that section of the video and that'll allow people watching to get a very clear idea of what you are doing. If you’ve got some kind of a device that does touch you can do the same thing here.
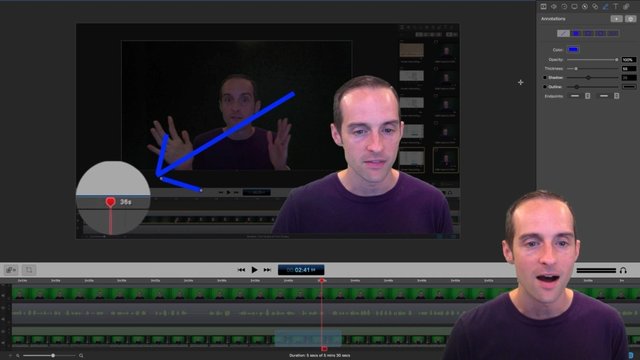
You can also make small annotations on videos which can be very helpful, for example, you can put a little arrow over things or draw things. If I click on Annotation I can do a big line right there and I can make it an arrow like this. This can be really helpful to increase the quality of your tutorials.
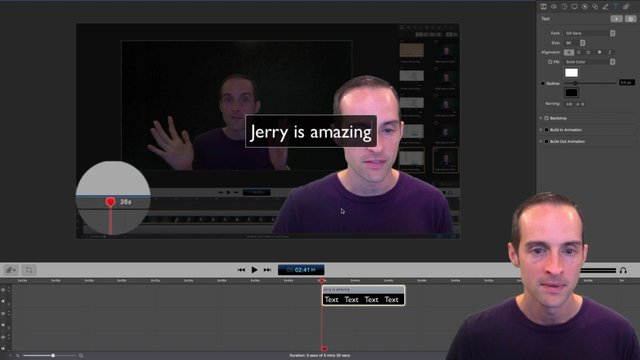
You can go up here and put text and keep drawing like that if you want to. If you decide you don't want to do anything you should be able to delete it. You have an annotation and you can just delete all of these in your timeline or you can undo it if there's something you don't like that you did. I'll just delete these annotations here, we’ll go and put some new text on the screen Jerry is amazing, you can click on it and move around and put whatever you want to.
These little updates can make for a really high quality tutorial, these can help you really show somebody how to do something.
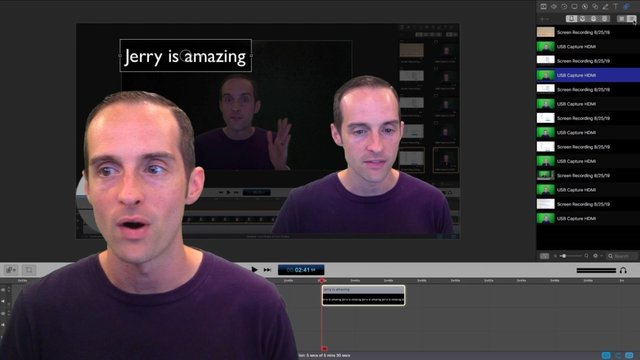
If you've lost your video clips, this happened to me as I couldn't figure out how to find all the video clips, the last button on the upper right will show you your video clips. You can click to see them in a column to have them listed straight up and down. You can also have music on there or other things you pull in. collect this column to have them listed straight up and down so that you can also have music and there are other things you pull in.
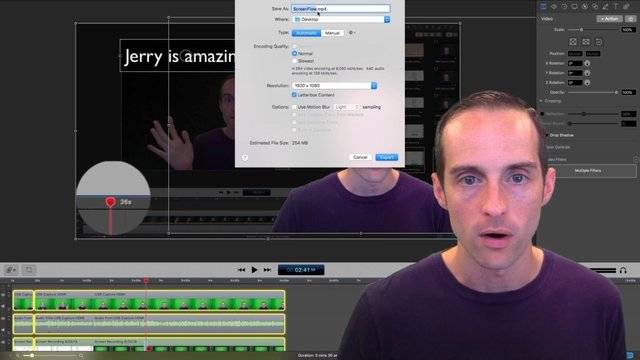
These are the basic functions you need to know to make a video on ScreenFlow. Once you've got all of these put together in your timeline, then what you can do is go to File > Save. Make sure to save consistently and then once you've got this finished you can hit File > Export and this will allow you to put out the actual video. Make sure you put the Save location where you can find it and make sure the resolution matches the document size.
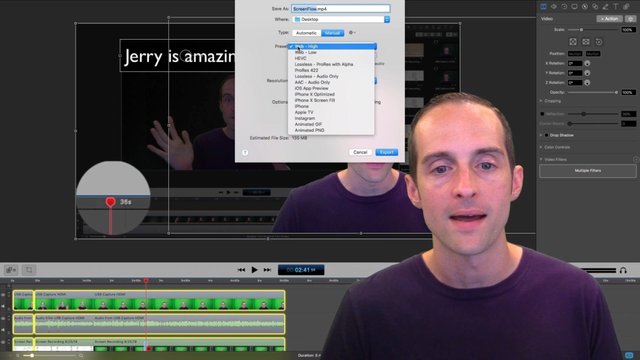
You can go here to manually pick an exact setting and note that automatic in many cases will work just fine. If you want to change you can test out different ways, then you hit Export. Again, I mention I use OBS because as soon as I click on the report button my video is finished, I don't have to render it unless I need to go through and edit it. In order to get an actual video you can use on ScreenFlow you need to be able to hit this Export button and wait for it to be exported to your video. Then you have a video you can use. If you need to make any edits you will need to export it again, therefore, make sure you are very happy with what you've got on the timeline before you go and export it.
If your export takes really long, one of the ways you can fix that is to use a hard drive and an SSD hard drive, put all of your recordings an SSD hard drive, render them directly to the SSD hard drive that can help you do this a lot faster. One of my earliest recording computers was really slow because the hard drive slowed down the rendering process, it took like 30 minutes to render a five minute video. If you want to make 10 or 20 videos for a video, of course, that slows things down a lot.
I don't recommend doing too much on your computer, although you can test yours out. Sometimes if you do a lot of things on your computer the export can mess up and then you have to go back and start over. Make sure in your editing, before you export export, you start your timeline at zero, make sure all of your camera and video line-up correctly, they should all be an exact same point, you can shift and move to connect everything in the timeline, to overlap it if you want to and then you should be all set with the information I've got you to make some great video in ScreenFlow.
I hope this was helpful for you if you are interested in filming video tutorials.
I trust that if you enjoy this, you’ll hit the Subscribe button, turn those notifications on and check in the feed and/or follow on Facebook, to see the newest videos, make sure to turn See First on.
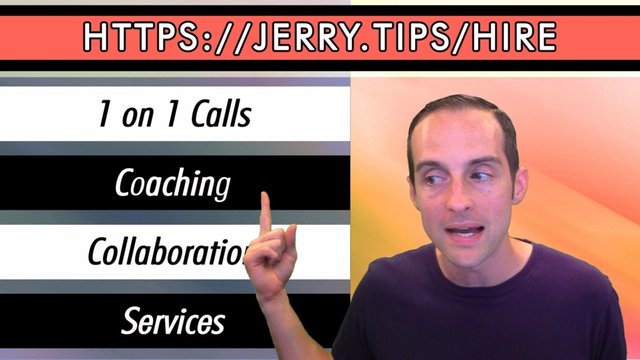
If you’d like some help and coaching, specifically on the best strategy to use for your specific setup, go to jerry.tips/hire and from there you can get a few hours with me for coaching or one-on-one call.

If you'd like to join my online teaching mastermind go to jerry.tips/partner, we have a lot of online instructors that have amazing business online, we love helping new members and we have great information in this group.
Thank you for reading to the end.
I love you, you're awesome and I hope this ScreenFlow tutorial has been helpful, this has taken a lot longer than I thought it would so i hope this is useful to you.
Love,
Jerry Banfield.
Posted from my blog with SteemPress : https://jerrybanfield.com/screenflow-mac-beginners-tutorial/
Hello, Jerry! 🤣
Long time! Hope all is well with you and your family.
Doing pretty good over here!
Downvoting a post can decrease pending rewards and make it less visible. Common reasons:
Submit
Hi Jerry I signed up for your newsletter on email because you promised daily upvotes for it. This was more than a week ago and I still have not received any upvotes worth 63¢ as promised.
Posted using Partiko Android
Downvoting a post can decrease pending rewards and make it less visible. Common reasons:
Submit
They will not come
Downvoting a post can decrease pending rewards and make it less visible. Common reasons:
Submit
lololol
Downvoting a post can decrease pending rewards and make it less visible. Common reasons:
Submit