Interzone is a fork of DASH with the rock-solid CPU/GPU mintable C11 algorithm from Quark/Chaincoin.
Interzone offers fast 90-second transactions, low fees, scalable block sizes, automatic checkpointing, Darksend (we call it Perplexion) for truly anonymous transactions, masternodes (we call them NetworkNodes), and easy mining with our in-client one-click SimpleMint system.
NetworkNodes take center stage on the Interzone network, offering 25% of block rewards blocks 20,000 through block 250,000 and 50% block rewards after. Interzone aims to build on the masternode technology and integrate customizable attributes to allow node-holders to add avatars, messaging, and other customizations to their node listings. Building a community of decentralized nodes strengthens the network and we encourage node creation with a low 5000 ITZ entry point to secure a node.
Our plan is to enhance masternodes and transform the Interzone network in to a decentralized social networking engine. Encrypted messaging, customizable clients, and a community based social network.
We're working to build Mastodon.social in to our client for decentralized microblogging and groups.
Eventually your NetworkNode will be your digital home on the Interzone blockchain!
( On this tutorial the masternode run on a vps with ubuntu 16.04 and wallet on your pc with Windows.)
STEP 1 DOWNLOAD INTERZONE CLIENT
https://github.com/projectinterzone/Windows-Client
Launch the wallet,during synchronization, go to step 2
STEP 2
You have already 5000 or more ITZ coins :Go to step 4
You already have bitcoins, litecoins : go to step 3
Now we must buy some coins to exchange in ITZ
go to coinbase :
https://www.coinbase.com/join/5a50ec49b412ce03c75cee83
and create an account
buy LTC with your credit card
(At the day of the article you need ~100$ to mount a masternode)
you can check how cost 5000 itz on coinsmarketcap :
https://coinmarketcap.com/currencies/interzone/
buy more LTC than just the value of 5000 ITZ to cover different fees ( like 110%)
STEP 3
Now create an account on Cryptobridge
https://wallet.crypto-bridge.org/?r=%3Calwin666%3E
Send LTC from Coinbase (or BTC / LTC you have on a wallet) to Cryptobridge
In Cryptobridge you can now sell your LTC to BTC and buy ITZ
STEP 4
Return to Interzone CLIENT
If your client was not synchronized, wait it.
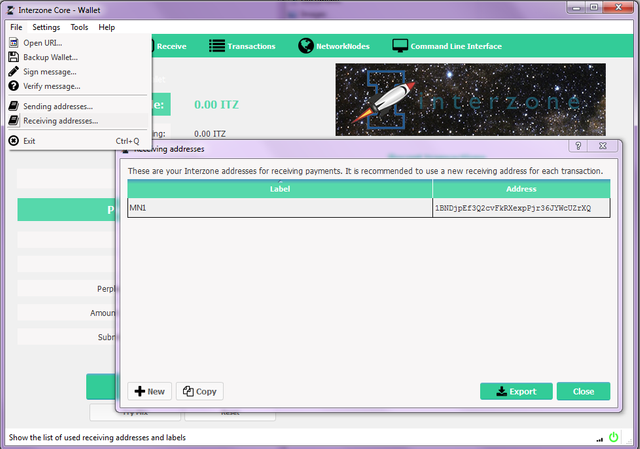
Go to File / Receiving addresses / +New
Create new adresse with label MN1

From cryptobridge send 5000ITZ to this address
STEP 5
If you don’t know how to find a good vps, you can go on digital ocean :
https://m.do.co/c/d7982982b833
The first droplet 1GO,1VCpu,25go is good
Install ubuntu 16.04 on it
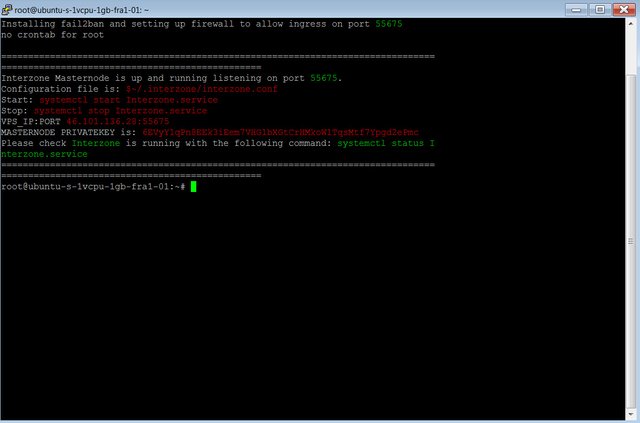
Now SSH to your vps and launch this fabulous script :
https://github.com/eskaryo/interzone-mn-setup
two lignes for install it ! :
wget -q https://raw.githubusercontent.com/eskaryo/interzone-mn-setup/master/interzone_install.sh
bash interzone_install.sh
After installation copy this :

You have all needed for the next step
STEP 6
Return to the wallet
Go to tools / command line interface
Type command : masternode outputs
In return you can see
{
"TXHASH " : " TX-ID "
}
If you setup a second masternode you have two lines in return, etc.
copy values on notepad
close wallet
Edit %appdata%\interzone\masternode.conf
Add a line with the following information separated as follows:
MN1 VPS_IP:PORT MASTERNODEGENKEY TXHASH TX-ID
If you setup a second masternode add second line :
MN2 VPS_IP:PORT MASTERNODEGENKEY TXHASH TX-ID
etc...
Save masternode.conf
Edit %appdata%\interzone\interzone.conf
He should look like that :
rpcuser=randomid
rpcpassword=randompassword
Rpcallowip=127.0.0.1
rpcport=55680
listen=0
server=1
daemon=1
logtimestamps=1
maxconnections=256
mnconflock=0
addnode=107.172.196.203:55675
addnode=142.44.194.222:55675
addnode=188.213.168.177:55675
addnode=212.237.24.106:55675
addnode=45.76.149.139:55675
addnode=45.77.217.225:55675
addnode=45.77.33.195:55675
addnode=5.230.195.47:55675
addnode=66.70.142.219:55675
addnode=80.211.177.236:55675
addnode=89.47.160.30:55675
addnode=94.177.243.234:55675
Start wallet again
Go to 'NetworkNodes tab
Choose 'My NetworkNodes
Click Start All
The status must switch to ENABLED
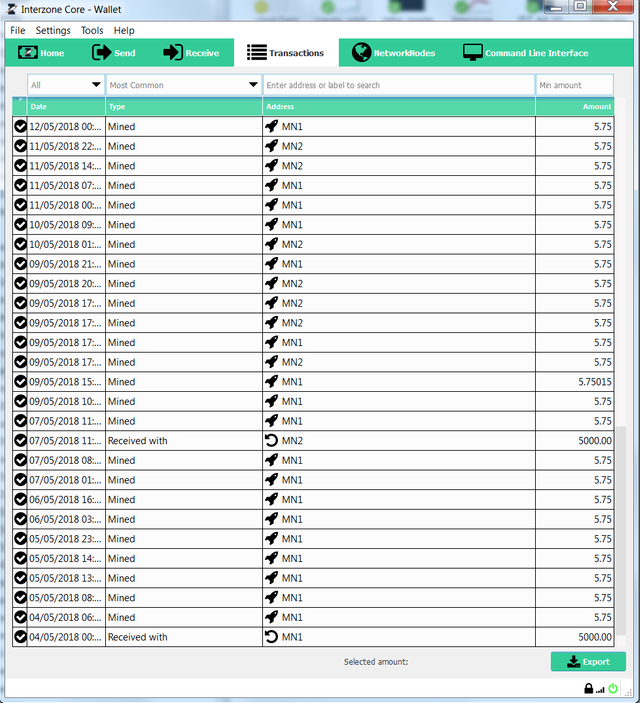
after few hours you can see first transactions :

Hi! I am a robot. I just upvoted you! I found similar content that readers might be interested in:
https://bitcointalk.org/index.php?topic=2158960.0
Downvoting a post can decrease pending rewards and make it less visible. Common reasons:
Submit