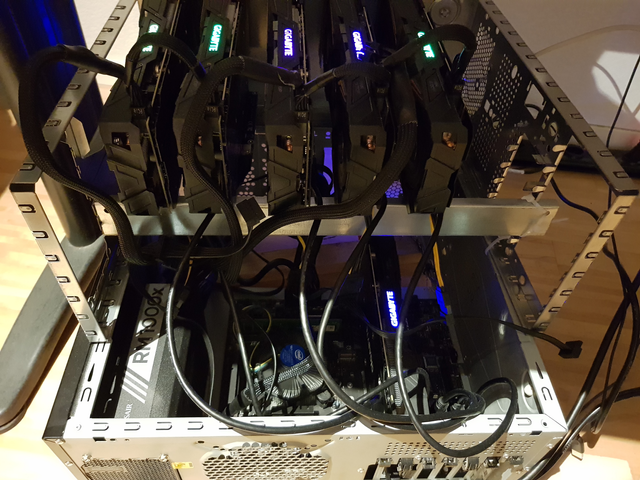
As everyone knows: never touch a running system or only if you have a enough time to fix the problems that will come up as usual. So, the Christmas time is a good time to do a upgrade of my miner rigs OS system. I was upgrading from ubuntu 16.04 to ubuntu 18.04 Server. Following you find my steps that was necessary to upgrade successful.
My rigs are based on MSI Z270 motherboard and GeForce GTX 1070 graphic cards.
Step make an USB bootable stick to install ubuntu 18.04 Server
First, I had to download the proper ISO file
http://releases.ubuntu.com/18.04/Second, I had to download a program to make a bootable USB Stick with this ISO file.
I used the program unetbootin-windows-661.exe.
I gotten it from: https://unetbootin.github.io/Step install the new OS ubuntu 18.04
I just had to insert the USB Stick in my mining rig and hit F11 during the boot process and
to follow the instruction on the screen.After this step you should be able to login to your rig.
Now the real work begins. We have to configure everything, so the miner rig works as before with ubuntu 16.04. I logged in the server over ssh client.
Step we prevent the system to make system updates automatically
If the system would do so, we are in danger that the mining process will stop and errors during restart occurs.So, I edit the file 20auto-upgrades and set Update-Package-Lists from ‘1’ to ‘0’
sudo vi /etc/apt/apt.conf.d/20auto-upgrades
--begin file--
APT::Periodic::Update-Package-Lists "0";
APT::Periodic::Unattended-Upgrade "1";
--end file--
Step I changed ssh login in this way that it is not possible to login with username and password
For that you need a private and public key pair. If you don’t know how to create such a key pair there are a lot of web site which explain how to do that. For Windows with the ssh program PuTTY e.g. https://docs.joyent.com/public-cloud/getting-started/ssh-keys/generating-an-ssh-key-manually/manually-generating-your-ssh-key-in-windows
At my home directory I created the folder .ssh and created the file authorized_keys to enter my public key. Then I chaned my ssh config file, so it is only possible to login with my key. At the end I restarted the ssh process
cd .ssh
vi authorized_keys
  --> copy pub key string to file

sudo vi /etc/ssh/sshd_config
  --> PasswordAuthentication no

sudo service ssh restart
Step Now I installed the newest CUDA libraries from nvidia.
First, I had to install the C++ compiler
sudo apt install gccSecond, I did download the CUDA install file and installed the CUDA libraries
wget https://developer.nvidia.com/compute/cuda/10.0/Prod/local_installers/cuda-repo-ubuntu1804-10-0-local-10.0.130-410.48_1.0-1_amd64
sudo dpkg -i cuda-repo-ubuntu1804-10-0-local-10.0.130-410.48_1.0-1_amd64.deb
sudo apt-key add /var/cuda-repo-10-0-local-10.0.130-410.48/7fa2af80.pub
sudo apt-get update
sudo apt-get install cuda
At the end, I did export some paths and reboot my rig
 export PATH=/usr/local/cuda-10.0/bin${PATH:+:${PATH}}
 export LD_LIBRARY_PATH=/usr/local/cuda-10.0/lib64${LD_LIBRARY_PATH:+:${LD_LIBRARY_PATH}}
 sudo reboot
Step in this step I installed the lightweight X system lightdm
sudo apt install --no-install-recommends xorg lightdm lightdm-gtk-greeter
sudo service lightdm start
Step Now I configured the X system
First, I created the xorg.conf file. Then I edit the file and chaned the screen optionssudo nvidia-xconfig sudo vi /etc/X11/xorg.conf --> add Option Section "Screen" Identifier "Screen0" Device "Device0" Monitor "Monitor0" DefaultDepth 24 SubSection "Display" Depth 24 EndSubSection Option "AllowEmptyInitialConfiguration" "True" Option "ConnectedMonitor" "DFP-0" Option "Interactive" "False" Option "Coolbits" "12" EndSection --end file--This is only the configuration for one card.
Step I installed the mining software
Actually, I do mining ravencoin with the t-rex program. So, I did install some additional libraries, download the current program versionmkdir trex cd trex sudo apt-get install libcurl3 wget https://github.com/trexminer/T-Rex/releases/download/0.8.9/t-rex-0.8.9-linux-cuda10.0.tar.gz tar -xvf t-rex-0.8.9-linux-cuda10.0.tar.gzStep in the last step I did created a service that will start automatically if I reboot the system
sudo vi /etc/systemd/system/rvn-miner.service
sudo systemctl daemon-reload
sudo systemctl enable rvn-miner
the rvn-miner.service files entries:
-->begin file
[Unit]
Description=Mine Raven
After=lightdm
[Service]
Environment=GPU_FORCE_64BIT_PTR=0
Environment=GPU_MAX_HEAP_SIZE=100
Environment=GPU_USE_SYNC_OBJECTS=1
Environment=GPU_MAX_ALLOC_PERCENT=100
Environment=GPU_SINGLE_ALLOC_PERCENT=100
Environment=DISPLAY=:0
Environment=XAUTHORITY=/var/run/lightdm/root/:0
Environment=PATH=/usr/local/cuda/bin
Environment=LD_LIBRARY_PATH=/usr/local/cuda/lib64
WorkingDirectory=/home/<user home>/
ExecStartPre=/usr/bin/nvidia-settings -c :0 -a '[gpu:0]/GPUMemoryTransferRateOffset[3]=1300'
ExecStartPre=/usr/bin/nvidia-settings -c :0 -a '[gpu:0]/GPUGraphicsClockOffset[3]=100'
ExecStartPre=/usr/bin/nvidia-smi -pl 100

ExecStart=/home/matthias/trex/t-rex -a x16r -R 5 -o stratum+tcp://rvn.pickaxe.pro:3636 -u <wallet address>.<rig    name> -p c=RVN
Restart=always
[Install]
WantedBy=multi-user.target
--> end file
Thank you so much for sharing this amazing post with us!
Have you heard about Partiko? It’s a really convenient mobile app for Steem! With Partiko, you can easily see what’s going on in the Steem community, make posts and comments (no beneficiary cut forever!), and always stayed connected with your followers via push notification!
Partiko also rewards you with Partiko Points (3000 Partiko Point bonus when you first use it!), and Partiko Points can be converted into Steem tokens. You can earn Partiko Points easily by making posts and comments using Partiko.
We also noticed that your Steem Power is low. We will be very happy to delegate 15 Steem Power to you once you have made a post using Partiko! With more Steem Power, you can make more posts and comments, and earn more rewards!
If that all sounds interesting, you can:
Thank you so much for reading this message!
Downvoting a post can decrease pending rewards and make it less visible. Common reasons:
Submit
Congratulations @amhohwa! You received a personal award!
You can view your badges on your Steem Board and compare to others on the Steem Ranking
Vote for @Steemitboard as a witness to get one more award and increased upvotes!
Downvoting a post can decrease pending rewards and make it less visible. Common reasons:
Submit