
Wait, What is Verus and why do I want to mine it?
Verus is an altcoin which bases it's consensus on a mixture of 50% Proof of Work and 50% proof of Stake. This new consensus method is being called Proof of Power. The team also aims to provide Public Blockchain as a Service or PBaaS as the website calls it. The full details of their offering, as well as the whitepaper can be found at their official website (https://verus.io/)
The bonus here is that you get to mine the currency, and stake the mined results too. This provides real room for growth of your mined assets!
So how do I start?
Step 1
First we need to download a copy of the wallet and get it installed. (This is assuming you don't already have a Verus wallet. If you do, skip ahead to Step 9)
Head to the Verus wallet link (https://verus.io/wallet) and click on the download option which best suits your needs. For the purposes of this tutorial, I'll be downloading the Android wallet.
Step 2
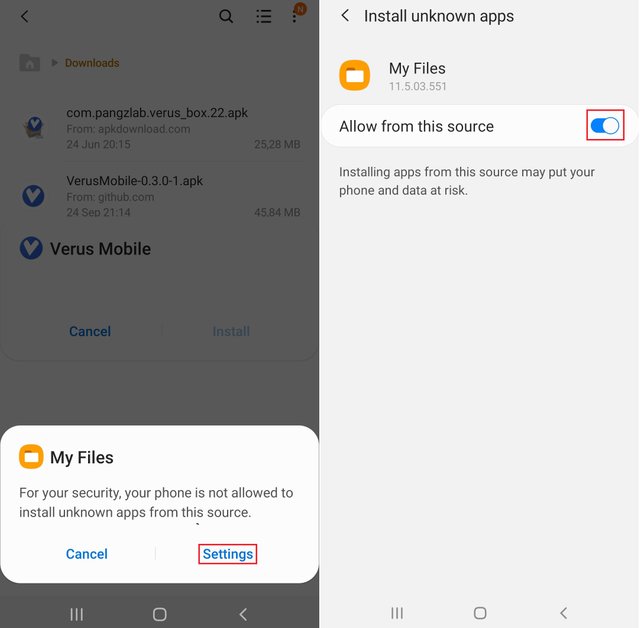
Once the APK is downloaded, go to your file explorer on android and tap the app to start the install the process. Most Android systems will prevent the install of apps from an unknown source, to get past this you can change the settings to allow the install.
Step 3
Once the app is installed, find it in your app drawer or home screen and tap on it to open it.
Step 4
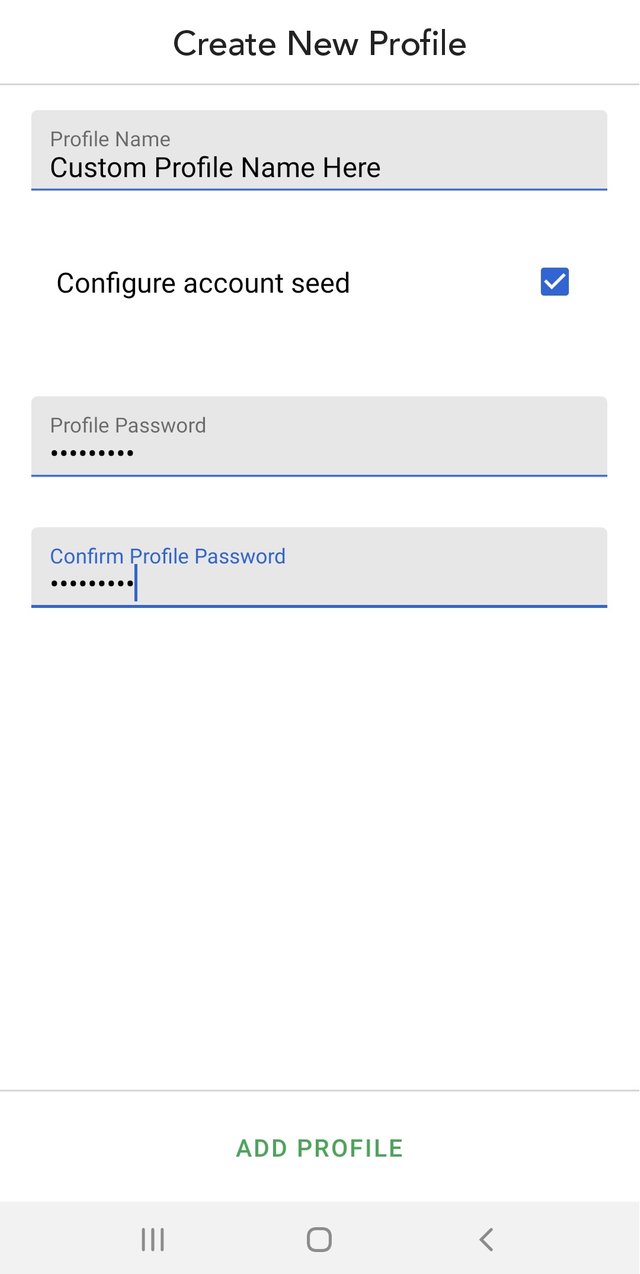
You should be presented with a blank version of the page below. Go ahead and fill in a custom profile name (Anything you like), and tick the box to "Configure account seed".
Step 5
This should present you with a series of three screens that look like the one below:
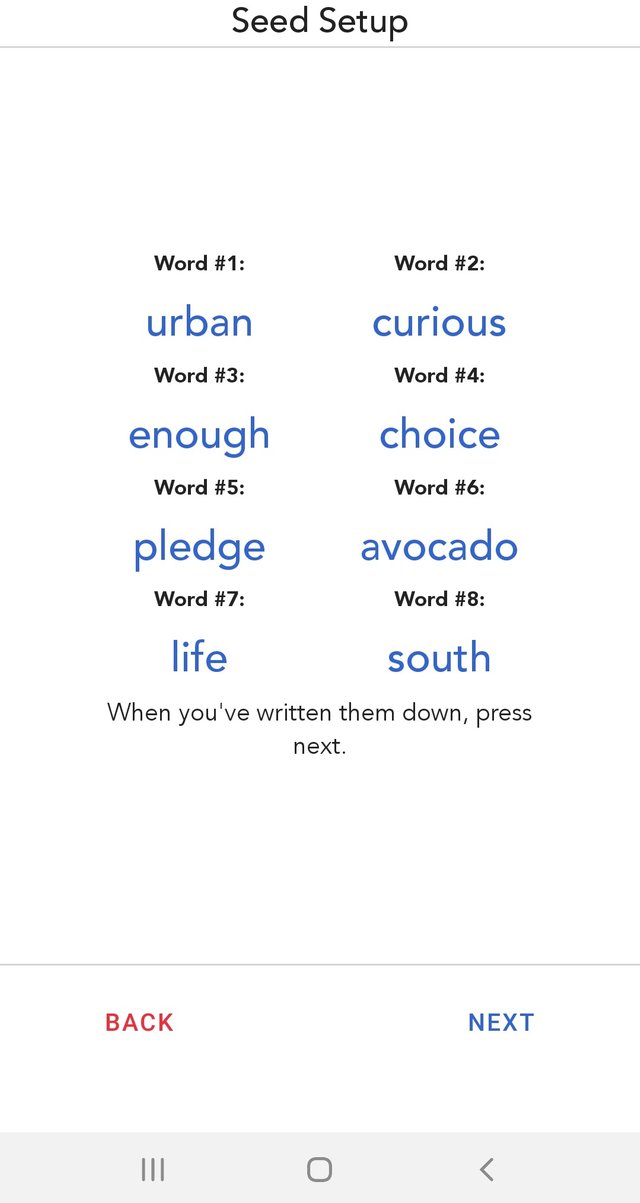
You want to store these words in the order they're shown here in a VERY safe place. These words are called a Mnemonic key, and they are your ONLY way of ever recovering your wallet if it is lost. I usually stick these in my password manager.
Once you have stored your seed phrase the app is going to ask you to enter three of the keys it chooses randomly to confirm you have the words stored and in the correct order. Once you pass the test, you will move on to the next step
Step 6
The next step is to enter a password of your choosing and confirming it in the two blocks on the setup screen of the app.
Step 7
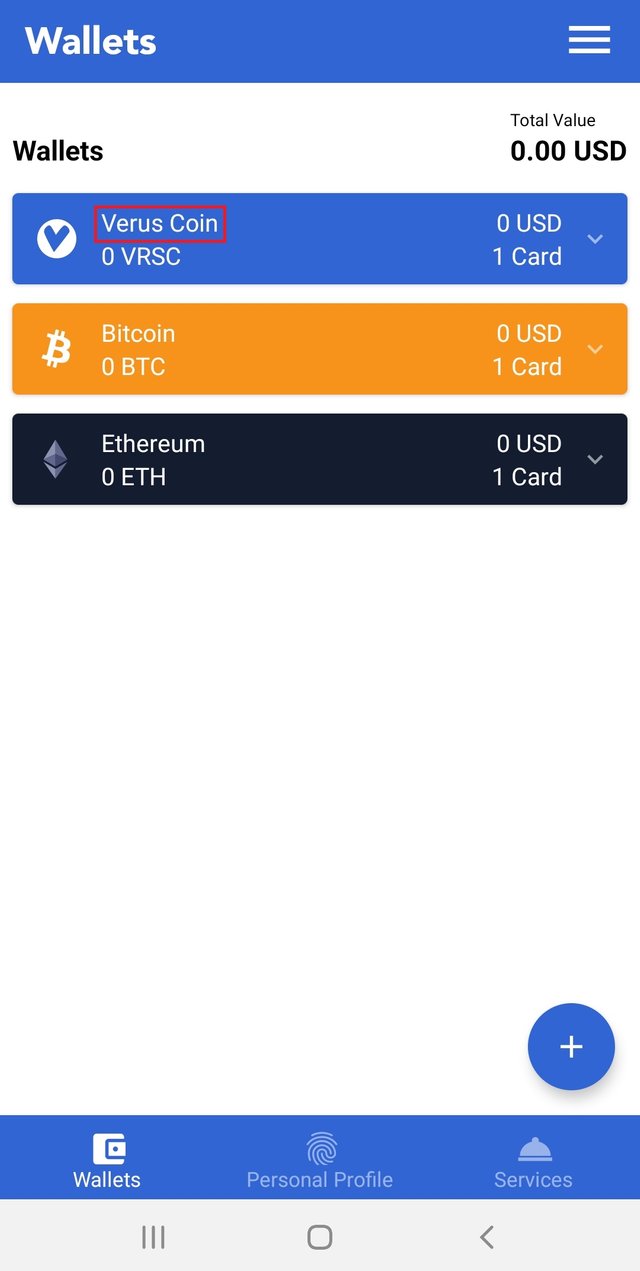
Once your passwords are in, the app will finish creating your wallet and you will be taken to the home page of your new wallet. Tap on the "Verus Coin" wallet to open it.
Step 8
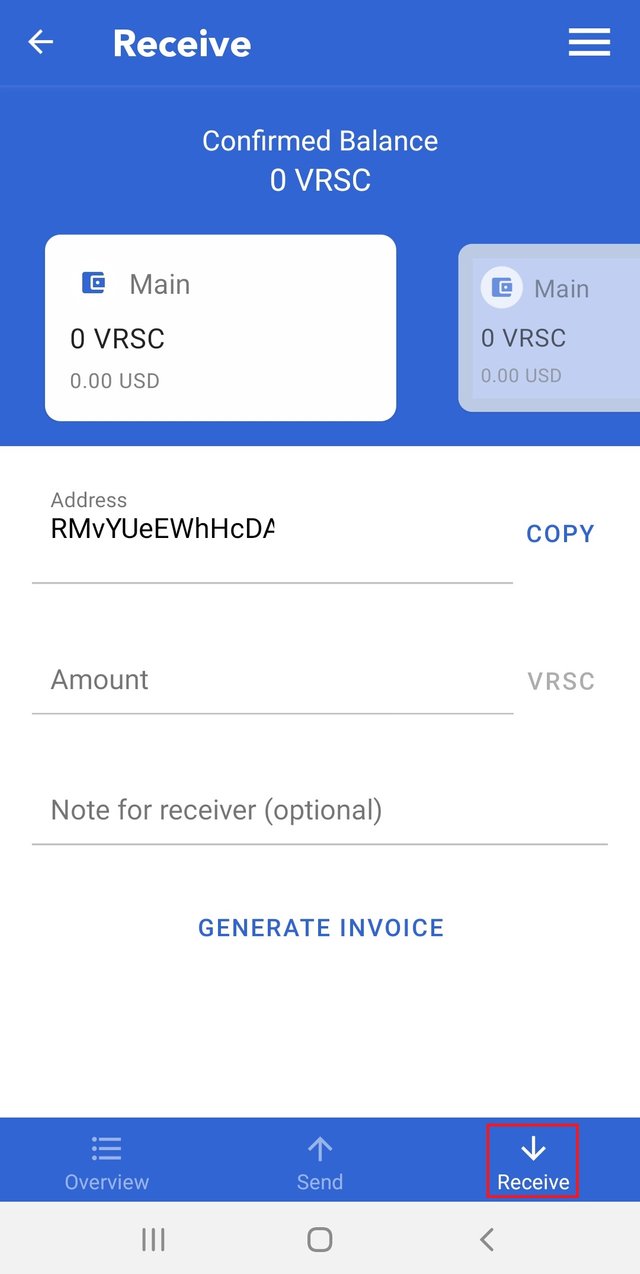
Once you have the Verus wallet, now tap on the "Receive" tab at the bottom of the screen to view your receive address (Mine's cut off in the image). You'll want to save this address for Step 13 and Step 15 below.
Step 9
Place to store hard-earned coin - ✅
Mining tool to generate the coin - .......
There's an app for that! Head on to the google play store and search for "VerusBox", or just tap on this link (https://play.google.com/store/apps/details?id=com.pangzlab.verus_box&gl=US) to get there quicker.
Download and install the miner.
Step 10
Now that you have the software to mine, as well as the wallet to receive your profits at, we'll need to look at mining pools to join. A pool allows you to join your mining power with multiple other miners so that everybody can guarantee more frequent and predictable pay outs. The pool list at the time of writing is at this link (https://miningpoolstats.stream/veruscoin) or this link (https://docs.verus.io/economy/start-mining.html#mobile).
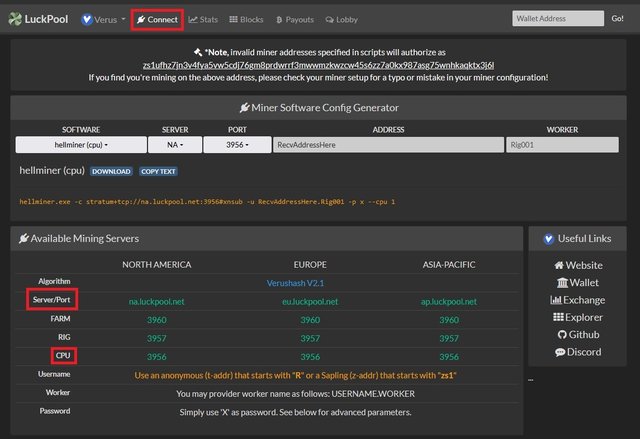
The pools all have different fees, and some even offer pay out structures which are weighted differently. This is a whole topic of it's own, and it comes down to personal preference. For the purpose of this post, I'll be going with LuckPool (https://luckpool.net/verus/) and I will show you how to configure your mining software for that.
Step 11
Your chosen pool should have a "Connect" page which will give you the "Server address" and "Port" to use when mining in the pool. It's usually best to pick the address which is geographically closest to you.
Step 12
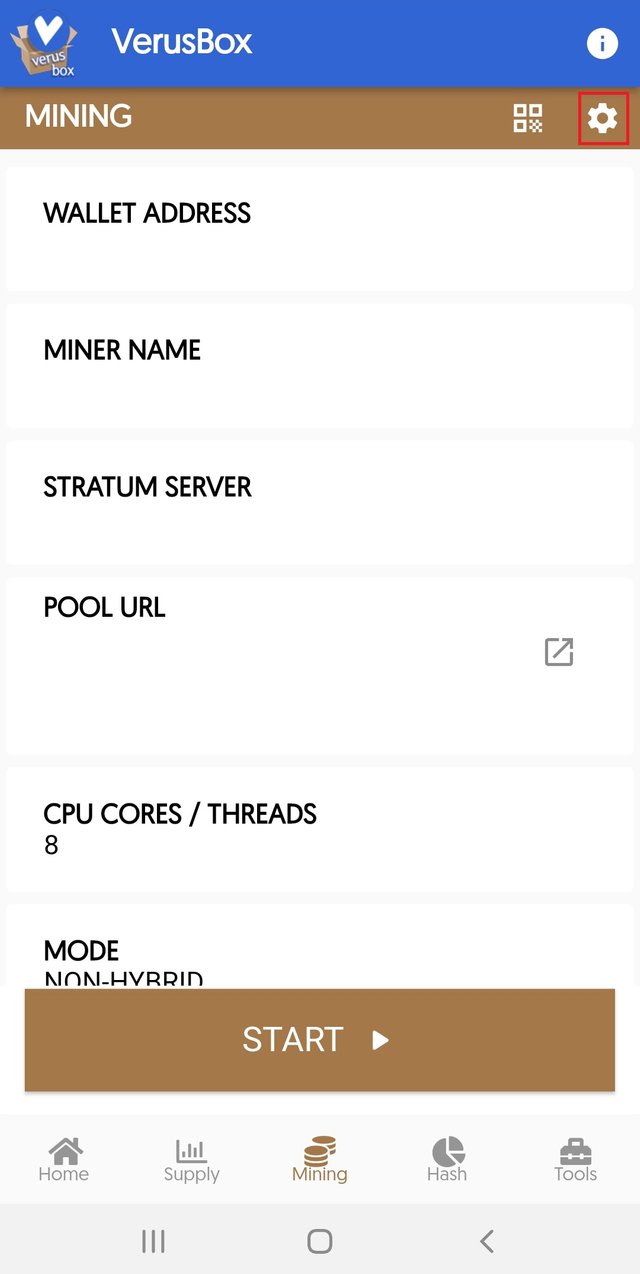
Now you should have all the ingredients needed for your miner. On your phone, head back to the miner and open it up. Under the mining tab, tap on the "Settings"
Step 13
You should now have a screen to configure your miner. Under "Wallet Address", paste in the "Receive Address" from Step 8. Under "Miner Name" type in anything short which you can use to identify this worker. Under "Stratum Server", select the server address which matches your server. In my case, it is "eu.luckpool.net:3956".
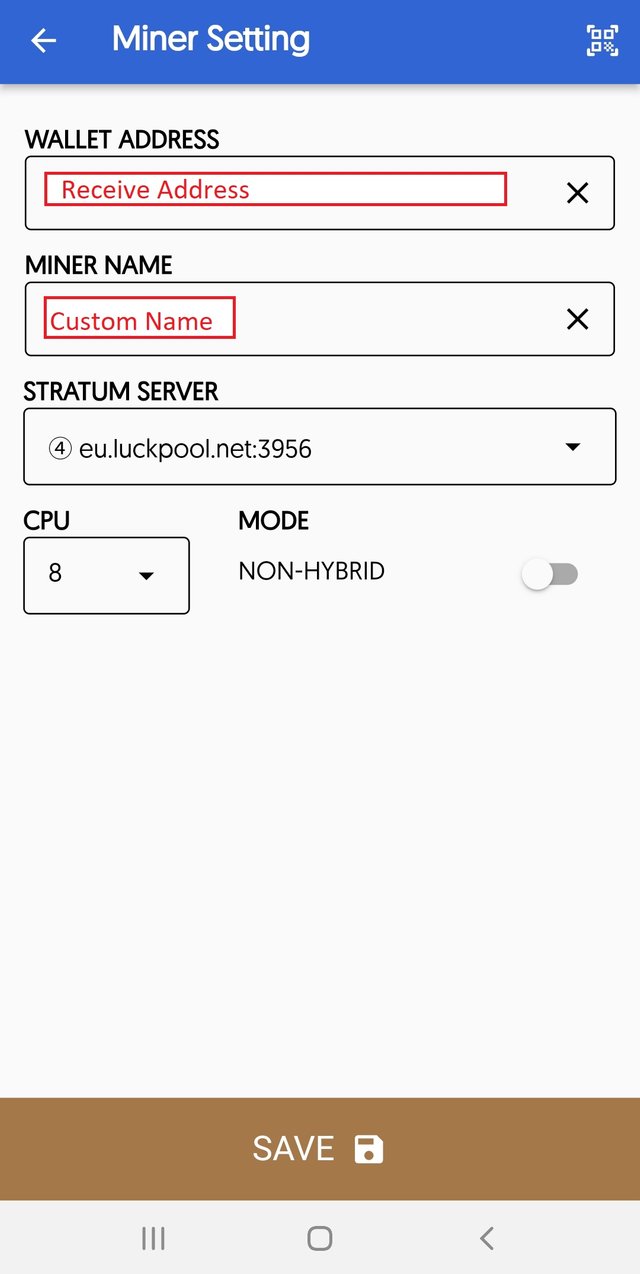
Now you have the option of how many cores to use. Depending on your phone's hardware, you may opt to use half the recommended cores to avoid overworking the device. In my case, it's an old phone which doesn't matter to me, so I use all 8 cores. The ideal is usually one less than the maximum so that you have some spare power for normal functions.
Once you've filled in all the gaps, go ahead and tap the save button at the bottom.
Step 14
Start your miner by tapping on the "Start" button at the bottom of the screen. Press "OK" when prompted about the dev fee. Developers of mining software usually charge a percentage fee for using their software. This fee comes in the form of mining, so roughly 30 seconds of your mining power will go to the developer every hour. The miner will prompt you for which screen mode to use, and you can pick either one based on your preference.
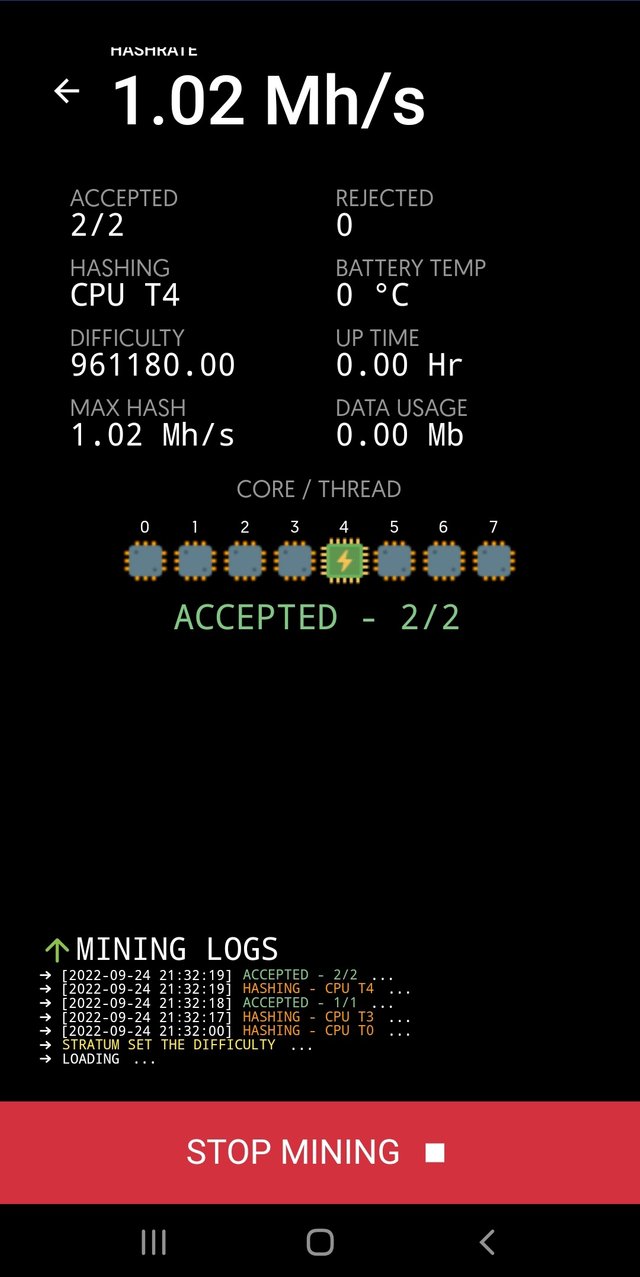
It shouldn't take too long before you start seeing "Accepted" on your screen. This means that shares of work from your miner have been accepted into the pool and you are successfully mining!
Step 15
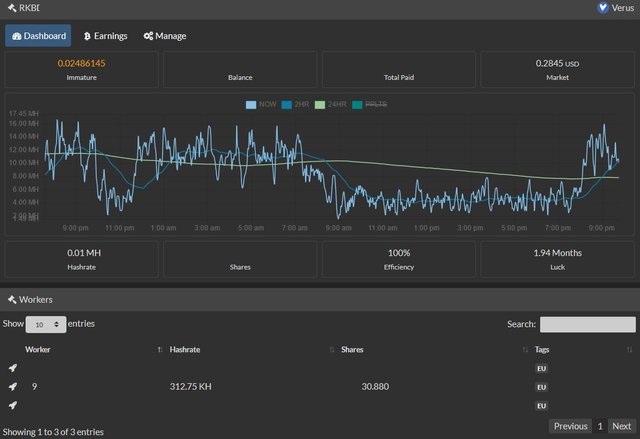
Now head on to your pool (From Step 10) and find their "Stats" page, or anywhere to enter your "Wallet address". Paste in the "Receive address" you found in Step 8 to start tracking your progress on the pool. If your mobile is showing accepted shares, then you should see a nice dashboard of your mining progress and projected pay out. This is an example of what the LuckPool dashboard (https://luckpool.net/verus/miner.html?zs1ufhz7jn3v4fya5vw5cdj76gm8prdwrrf3mwwmzkwzcw45s6zz7a0kx987asg75wnhkaqktx3j6l) looks like:
It is super important to remember that mining is an intensive process for your hardware to go through. If you mine excessively on a phone or laptop, there is a tiny chance you could permanently damage it. I don't recommend mining with your primary phone, but rather to use an older phone from an upgrade, or one that you're comfortable with losing.
You will also find your phone will heat up a lot while using the miner. Some phones will even stop mining because they start to overheat. I find that removing all covers and placing the phone face-down on a heat-conducting surface (Glass or metal table) allows the phone to spread the heat over a larger surface area and cool down more effectively.
This is, however, a super easy way to turn an old device into some spare pocket change. And the best part is that you can still stake the coins in the wallet to achieve further appreciation!
I hope this helped you to get started. If it did, why not leave a like and a tip below? If you start an account, you even get some of the tip for reading!
Until next time.