It's amazing how much Facebook has grown over the past 10 years. It seems like absolutely everyone (for better or for worse) is on Facebook. It's no surprise that booking agents, festival organizers, and venue owners use Facebook as a tool for selecting and evaluating performers!
If you're a performer who doesn't have a Facebook artist page yet, or if you're looking for ways to improve your page to get the best results, you've come to the right place!
Why should I create an 'Artist Facebook Page'?
Creating a facebook page is a great idea no matter who you are, or what you do! It's a simple and free way to connect with and build your audience. Also, it's a way for booking managers to easily check out your music. By being well connected, you avoid the chance of losing a gig because someone didn't know how to contact you.
Keep reading to learn the six simple steps to create a musician's Facebook page.
STEP 1: Create the Page!
The first step is to actually "create" the page. Log in to your Facebook account on a computer. (Put down your phone, this is way easier on a laptop!) Then, click the little down arrow on the top bar of your Facebook. From this menu, select "Create Page".
STEP 2: Choose Your Category
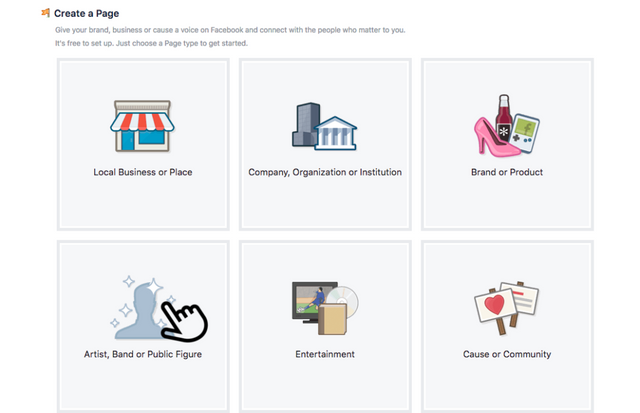
You will then be directed to a screen that has options for all kinds of page types. You'll want to select the one called "Artist, Band or Public Figure".
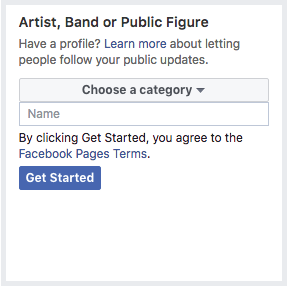
Once you select your page type, you'll be prompted to select your category. Choose either 'Band' or 'Musician', depending on what you're making the page for. Then, fill in your name! (Or the name of your band, of course!)
STEP 3: Upload your Profile Picture/Cover Photo
Your profile picture is one of the most important parts of your page. After clicking "upload a profile picture", you'll be able to select a photo from anywhere on your computer. Choose a picture that is high quality, shows your primary instrument, and clearly displays your face. After all, you want people to be able to recognize you instantly.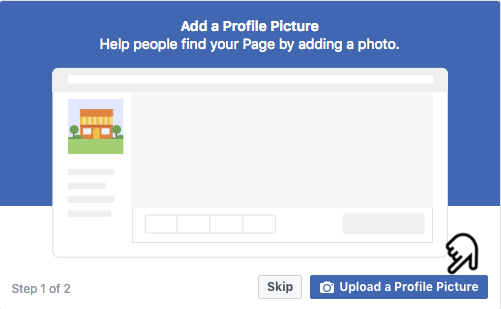
Next, it's time to add your cover photo! This is the picture that is featured at the top of your page. It really sets the tone. Try to find a picture that is wider than it is tall so that you won't need to do any awkward cropping.
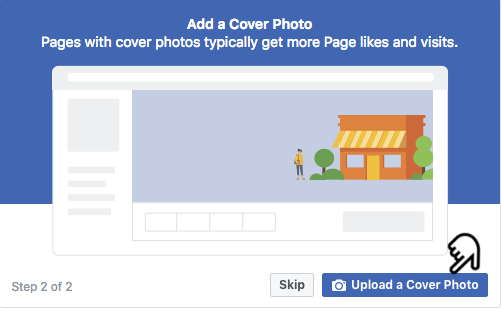
Alternatively, I recommend using Canva to create your cover photo. Canva is a fantastic graphic design website/tool that is super easy to use! They have templates that will help you make a cover photo that is the right size and looks great. You can easily layer text on top of the image you choose.
Check out the example below! The profile picture features our sample musician with his instrument. You can clearly see his face, and the cover photo looks great. . . . . I give it an A+!
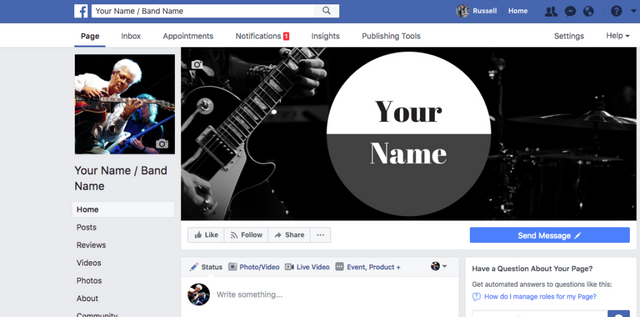 I created this cover photo in 5 minutes using Canva![/caption]
STEP 4: Update your 'About' section
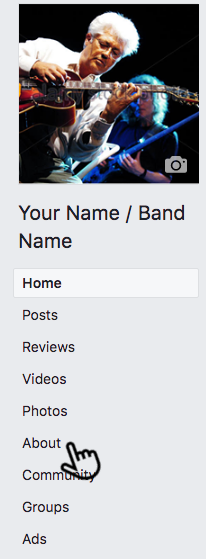
Now that you've dealt with the profile picture and cover photo, it's time to get a little more personal. Click the 'About' button on the sidebar (the left side of your page).
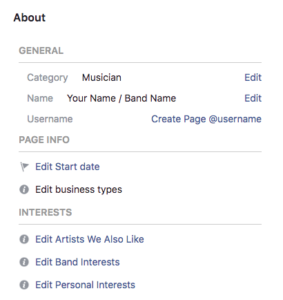
Here, you should fill in as much information as possible. Make sure to keep it related to your music, though. It's best to keep the entire page focused on displaying yourself as a musician.
STEP 5: Create a Button that Showcases your Music
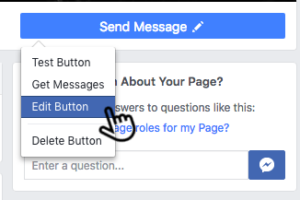
On the main page of your site, you'll notice a button that says 'Send Message'. This button can be changed so that it links to a video of your music. This step can be skipped if you don't have a high-quality video of yourself yet.Hover over the button, then select 'edit button' from the drop-down menu.
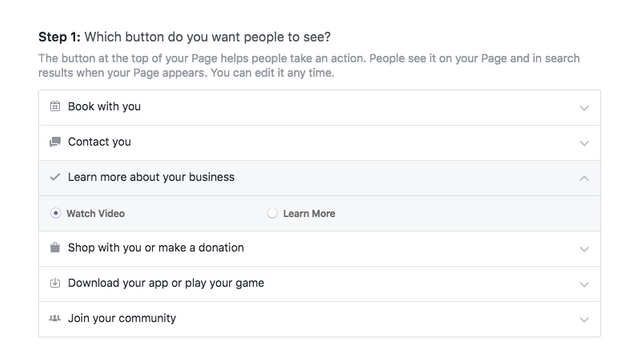
You'll be directed to a menu that has all kinds of options. Select 'Learn more about your business', then choose 'watch video'.
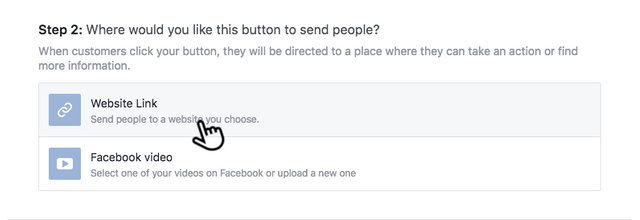
After clicking next, you'll be able to choose 'Website link'. Open a new tab and go to the YouTube video you'd like your audience to see, and copy the web address from the top bar of your internet browser. Then, paste your link into the button setup.
After clicking finish, you'll have a fully functioning button! This is the easiest way for booking managers, agents, or festival coordinators to check out your music. The easier life is for them, the higher the chance that you'll get the gig!
STEP 6: Extras!
At this point, you've completed the essential steps necessary to create the perfect musician's Facebook page. Of course, there's always more you can do to make it even better! Try adding some of your promotional photos by clicking the 'photos' link on your sidebar.
You can also go ahead and invite friends to like your page. Start off by inviting the friends who you know will be interested. Don't worry if you start with only a few likes, building likes on a Facebook page takes time! But, if you post regularly and make an effort to connect with your audience, your growth will only accelerate!
You're Done!
Just like that, you've created your very own musicians Facebook page. Congratulations, you've taken a step that has furthered your career as a musician, and given you a way to connect with potential bookers online!


Congratulations @fellows! You have completed some achievement on Steemit and have been rewarded with new badge(s) :
Click on any badge to view your own Board of Honor on SteemitBoard.
For more information about SteemitBoard, click here
If you no longer want to receive notifications, reply to this comment with the word
STOPDownvoting a post can decrease pending rewards and make it less visible. Common reasons:
Submit
Stop
Downvoting a post can decrease pending rewards and make it less visible. Common reasons:
Submit
Congratulations @fellows! You received a personal award!
Click here to view your Board
Downvoting a post can decrease pending rewards and make it less visible. Common reasons:
Submit
Congratulations @fellows! You received a personal award!
You can view your badges on your Steem Board and compare to others on the Steem Ranking
Vote for @Steemitboard as a witness to get one more award and increased upvotes!
Downvoting a post can decrease pending rewards and make it less visible. Common reasons:
Submit