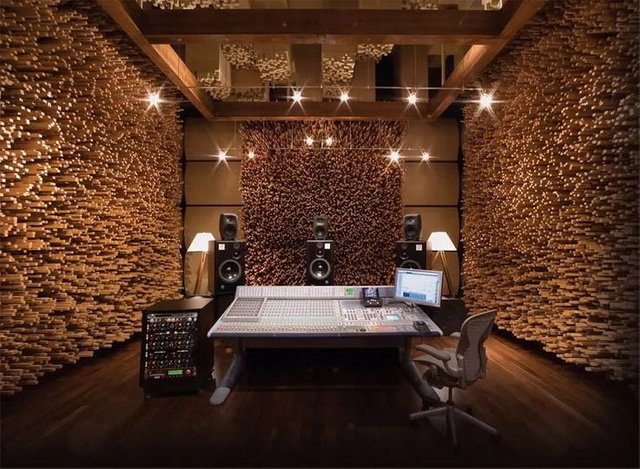
Continuing the line of ideas from my last post, about what we need to do a home studio or home recording studio. Our next step would be to give ourselves to the task of conditioning our workspace, giving us more professionalism to our recordings or projects at home.
If you ask yourself what are the benefits provided by the conditioning of the recording spaces and why I do not have to record as is and how ?. Simple, the answer more punctual would be that due to certain additives or sound phenomena characteristic of our work space in terms of acoustics refers, these intervene directly in the clarity and quality of our recordings.
Therefore we must first understand what are the characteristics of harmful type in our work stay to specify, how to deal with the problem that is present using various tools.
I want to emphasize for this guide that they never use egg cartons to soundproof spaces, because they attract large numbers of insects and insects like crickets and other cockroaches, being harmful to health not to mention that it is very aesthetic.
Some of the most common problems are perhaps floating echoes that easily filter in our recordings by modifying the timbre of any sound emission in the room, commonly coined to a rebound effect due to parallel walls with little absorption on its surface (small spaces) . Since an acoustic principle mentions that rigid surfaces generate rebound while soft surfaces work in an absorbing way.
Another characteristic that small places have are resonance variations due to sound pressure changes in points of the same, being perceived as they travel through the space due to an acoustic imbalance in the room also coined to the type of surface. We can also highlight a certain metallic sound produced by the concentration of sounds on a surface with little absorption or diffusion of reflective character close to our microphone in question. On the other hand, larger spaces present other problems such as unwanted reverberation etc.
To combat most of these problems we must soundproof the workspace by adding panels with a soft cloth surface, which gradually absorbs the sound by positioning them strategically in the corners giving acoustic balance to the room adding to this, absorbent sponge sheets to the walls .

We must also take into account, what function is given to the recording space because it is not the same condition a space for recording voices as for instruments, as can be seen in the photograph. In the case of recording voices we could completely soundproof a small space to only perceive the voice while for other cases we could make use of acoustic diffusers which are responsible for gradually disseminating the acoustics thus providing a sound improvement, being the wood by its acoustic properties the material indicated for it. This is just a two-dimensional element which seeks to control the reverberation times unlike the absorbent panels which seek soundproofing, the diffuser seeks an acoustic balance.

As a final clarification I want to inform that I am not a great expert on the subject and I make this clarification because the spaces require certain study to be worked and thus to obtain a greater yield, nevertheless this guide is of simple character for the person who wishes of a very simple way to treat and improve the acoustics of a space for small recording projects in your home.
As I always say goodbye with an illustrative video C =