
Heya !
Let's get back on another Miku With You work in progress !
Decorations
We will continue with the organza as, if you haven't notice, she has tiny decorations above her upper skirt. On the figure, we can see that she have that on both side of her waist.
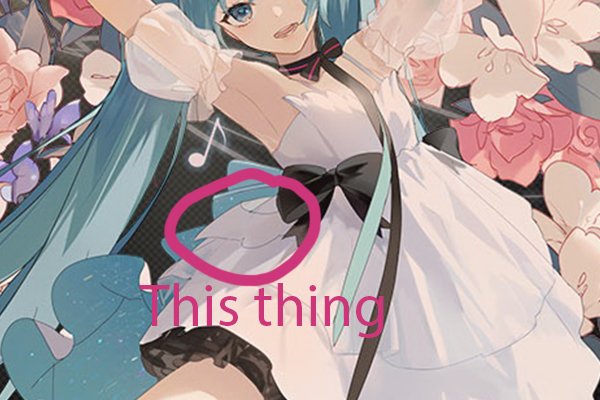
Decoration (yes, I've watched a lot my ref picture to find it)
I asked myself a lot on this part : are they transparent or not ? I finally decided to cut them in organza in order to preserve the future skirt shape : the lycra might have too much weight above an organza skirt.
So the process is pretty simple here : I pinned a bit of my pattern paper on my mannequin and traced the shape that I wanted with a blue pen. Then, I recut this part on the organza and burned the edges before sewing by hand on the organza skirt made after this piece.
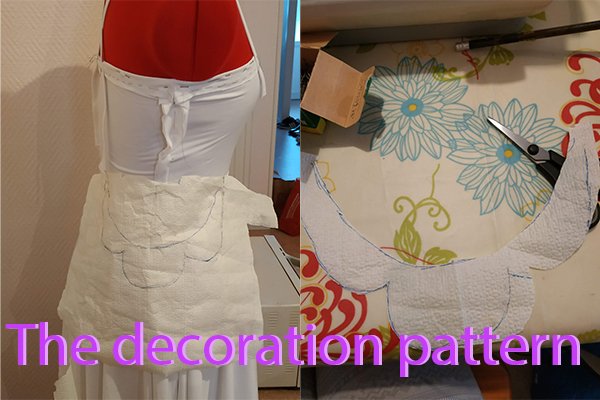
Pattern process
In the future, I want to remake this part with the same process but in white mousseline, a light fabric but with a color to be able to see this part better.
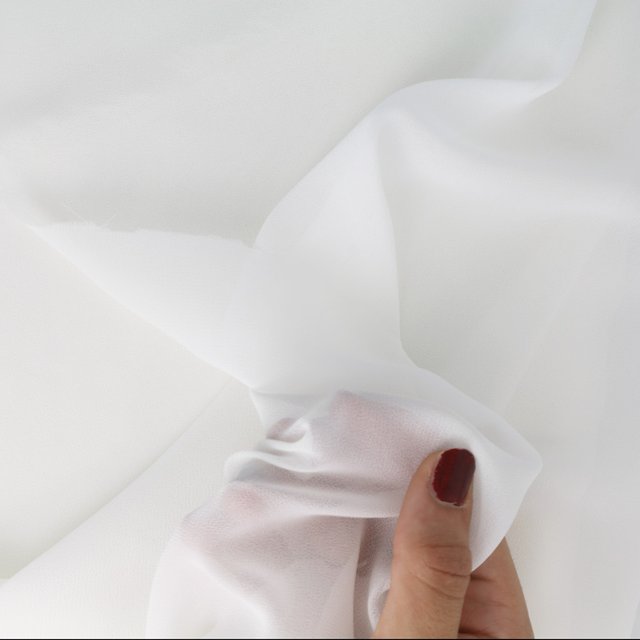
The kind of fabric I want to buy to remake the decoration
Upper Skirt
Let's go on the upper skirt. Made in organza like te bracers and the decorations, it was a simple part for me as well. I even didn't made a pattern for this part ! I fold the organza in two and trace my mesurement (waist circumference * 2 for the length, the desired height for the height). In my case, the height was 27 and the length was 152cm (not so sure for the 152 and I deleted my note that kept my measurement for the skirt T.T).
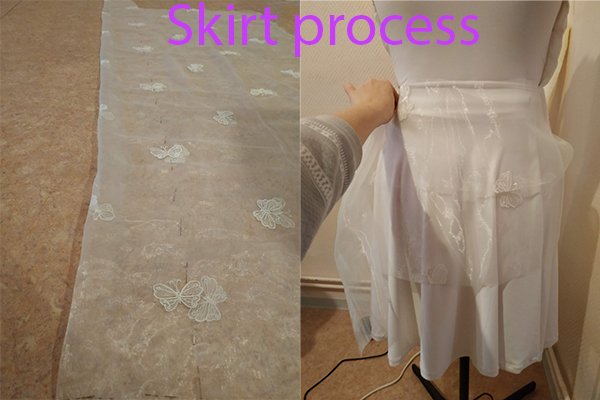
Skirt process
And as I've doubled the waist length, you know what it means ? Gathering ! I used the same idea as the bracers : a thread passed all along the waist measurement. Not kidding, this was hella long ! Once the upper skirt was at my waist circumference, I closed it so I got a real skirt without an elastic band. And attached it to the lycra skirt and my full skirt was made. And it was already time for the big assembly !
The final sewing on the dress
This part will be huge as I realize my mistake. Yes, I made a huge mistake that made me waste a lot of time but fortunately, it didn't impact the result of the whole costume !
So what was that mistake ? I didn't leave an open side on the dress.
You think that's nothing ? Take a look at how I had to mount my dress ! So as everything was closed, I only had one option to get everything together : assembly the skirt like a sleeve. As a reminder, at this moment I had two pieces for the dress : the bust (that we'll call the top for the rest of this post) and the skirt with thhe upper skirt sewed on it.
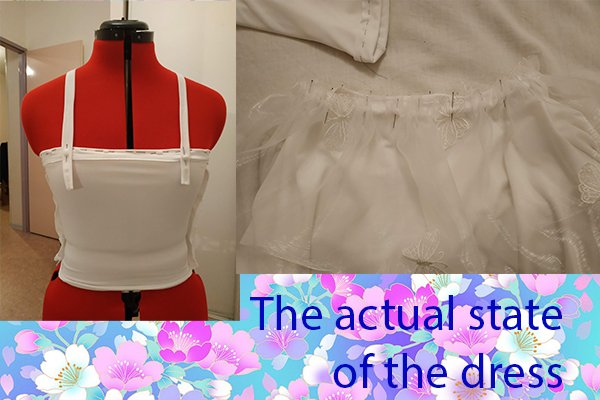
The dress state as a reminder
To get this done perfectly, I used a green thread to make a mark on my top to get the future waist line (my top was too long and I knew it).
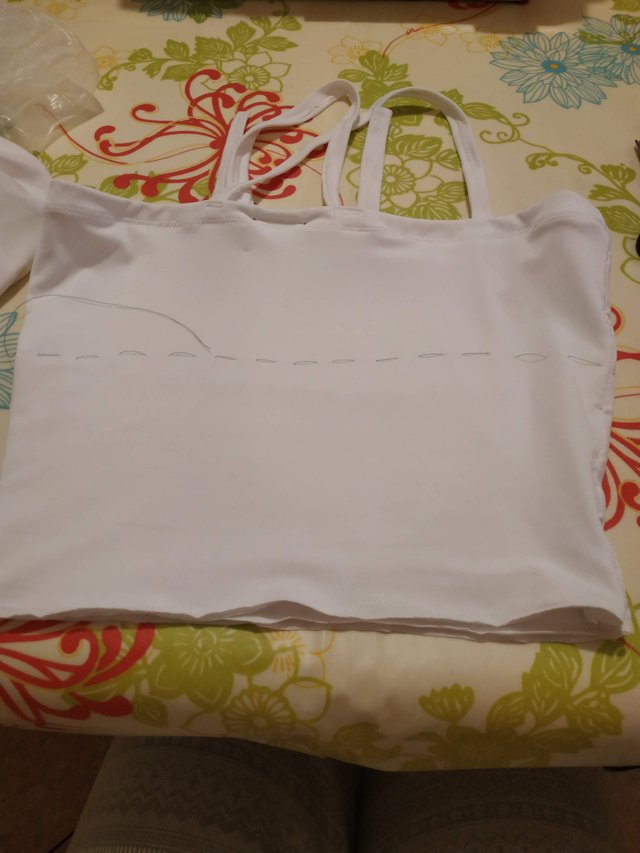
The green mark
Once it was done, I took my skirt on the wrong side and aligned the waist of my skirt on the green mark (without forgetting my sewing allowance).
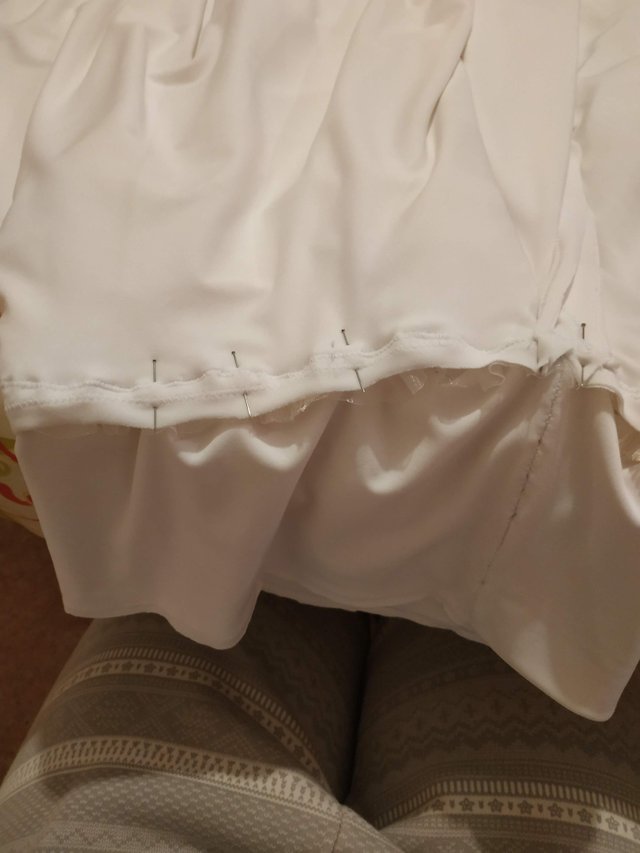
Skirt pinned on the top, right sides facing
And when it was pinned, I sew and finally my dress was done !
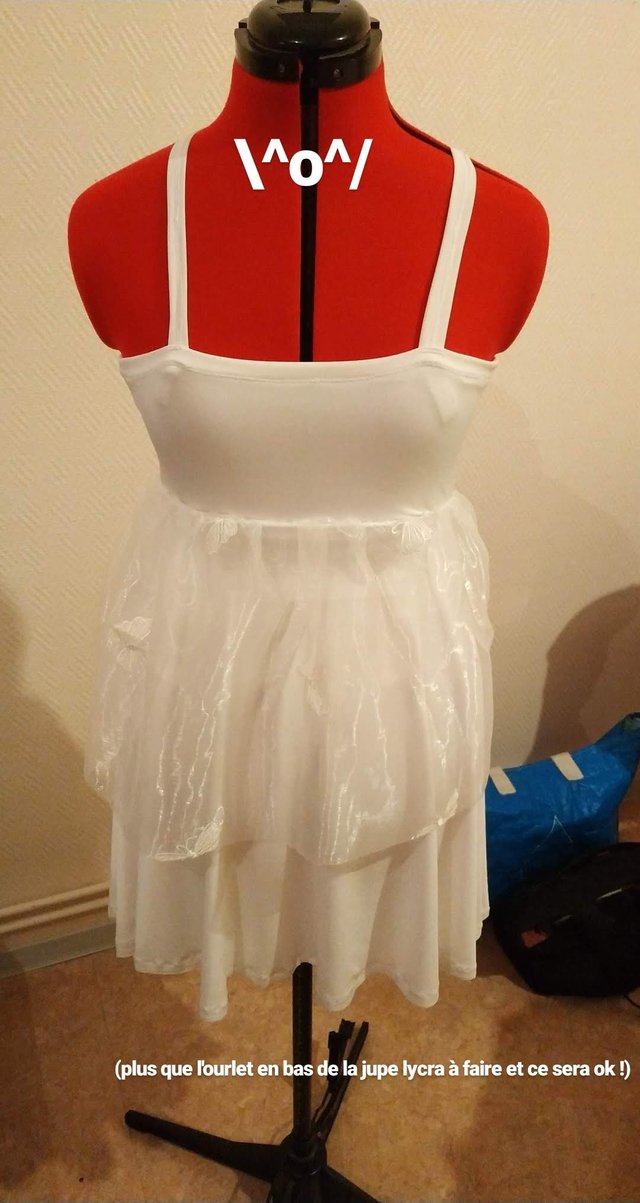
Dress done
After that, I sewed the little decorations on the skirt by hand (I dont have any photo of that step but nothing too fancy here).
The next steps will be more specials as at this moment we were right before the christmas holidays :) If you remember one of my other posts, I told you that I ordered some things for this costume for Christmas :) I can't wait to show you everything !
See you soon !
Thank you for using the recommended tag/s. This post has been manually rewarded with BUILD tokens in the form of an upvote. You can buy, stake, and exchange our "BUILD" tokens for steem on steem engine or SteemLeo
Build-it is a central hub for DIY and How-To projects. It's an opportunity to find and share the latest in DIY, and How-To tutorials. The recommended tags required when creating a DIY article are #diy, #build-it. #how-to, or #doityourself. Please subscribe to our community here
Chat with us on our discord and telegram channels Discord, Telegram.
Downvoting a post can decrease pending rewards and make it less visible. Common reasons:
Submit
This post was shared in the Curation Collective Discord community for curators, and upvoted and resteemed by the @c-squared community account after manual review.
@c-squared runs a community witness. Please consider using one of your witness votes on us here
Downvoting a post can decrease pending rewards and make it less visible. Common reasons:
Submit