Hi hi hi! Happy @NeedleworkMonday lovely Steemians!
Thank you, thank you again to @crosheille and @crystalize for starting and hosting this superb platform for us to share our love for needlework 💟.
So, yesterday, I shared a post on Weaving a Basket with (old) Magazines. You can read all about it and try weaving one for yourself 🙂.

As a continuation to the weaved basket, today, I will share with you on how to sew a fabric lining for the basket so that it is a complete basket 😁! And you can use scraps to do this. For my lining, I used an old bedsheet that was thinning.
And since this is sort of like part 2 to my post yesterday, I will go with the similar presentation theme, hehe 🎨.
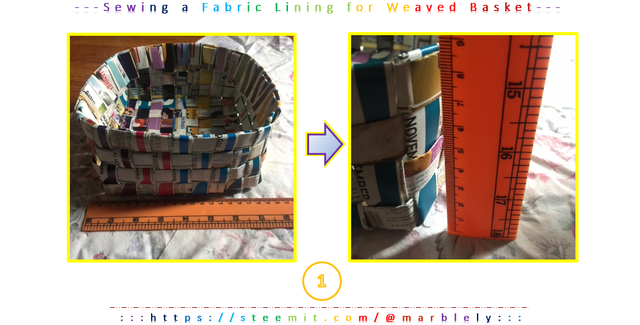
Step 1
- Measure the basket's width, length and height. My basket was about 19cm x 19cm x 8cm (roughly).
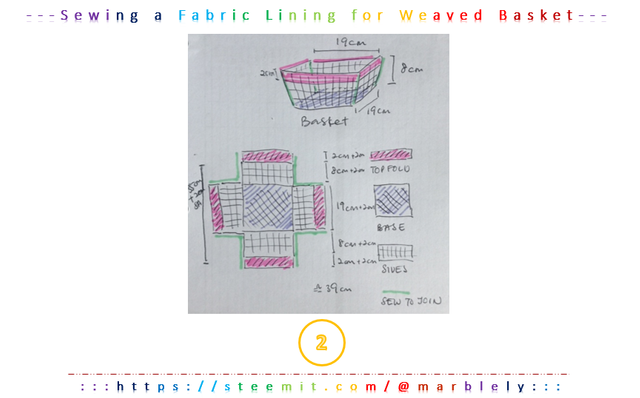
Step 2
- Draw the schematic shape breakdown for the basket to have a better visual of the fabric measurements that you need to cut.
- For my basket, if we were to break down the shapes that makes up the basket, it will consist of 1 square in the middle and 4 rectangles on each side of the square. But I used a rectangle fabric to cover one side of the square plus rectangle to lessen the sewing.
- I also decided to add a pink patchwork to the sides, just for the fun of it.
- For each piece, the sides that you will be sewing, remember to add 1 cm seam allowance (SA) on each side that needs to be sewn to join the fabric.
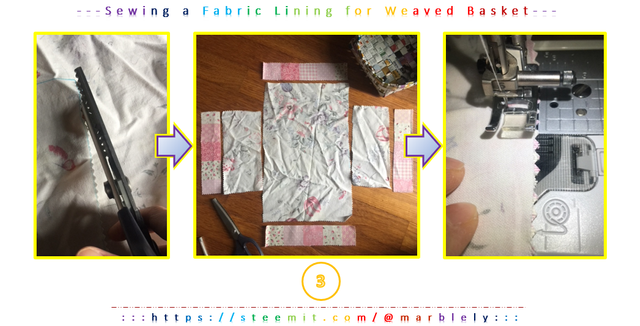
Step 3
- Cut out the fabric pieces according to your measurements.
- Sew to join the fabric pieces according to the schematic drawing.
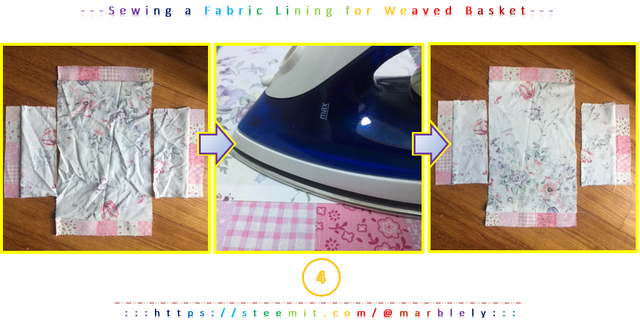
Step 4
- After the pieces are sewn together, iron to flatten the seams for a neater result.
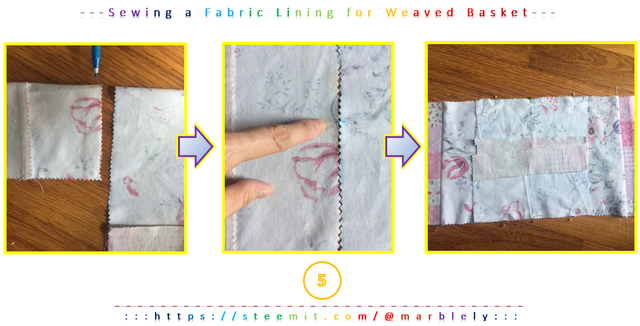
Step 5
- Fold each rectangle to half to get the center point to join and sew the fabric together, and ensuring the rectangles meet in the middle.
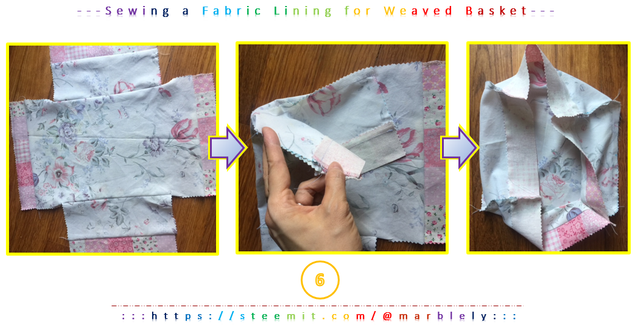
Step 6
- Once the flat rectangle pieces are joined, sew the sides to form the corners.
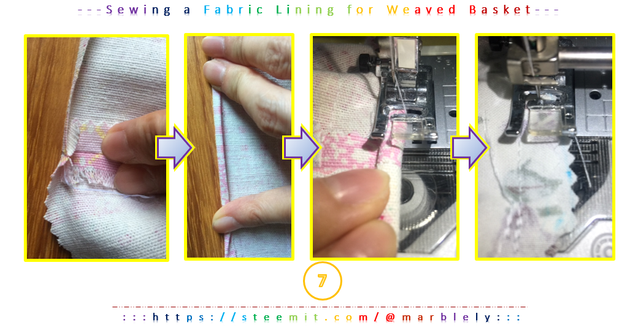
Step 7
- Hem the top edges of the lining.
- You can use zigzag stitch for the hem too or if you have a serger, serge away! 😁
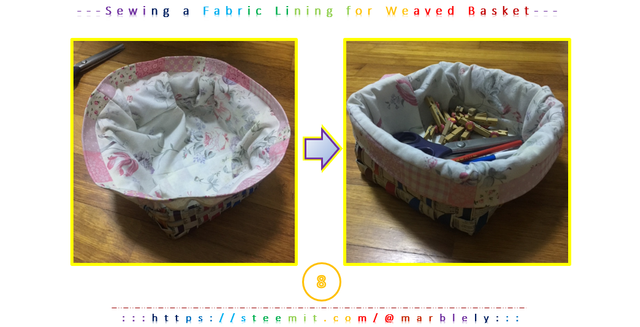
Step 8
- Place the completed lining into the basket, adjust and fold the pink sides to the outer side of the basket.
- Voila! We are done!
Have a happy, happy week!

Wow, there's a lot of work with it but the result is great! I used to do that using paper, newspaper more precisely. That's much more easier. Great job!
Downvoting a post can decrease pending rewards and make it less visible. Common reasons:
Submit
Thank you @erikah! Newspaper works well too!
Downvoting a post can decrease pending rewards and make it less visible. Common reasons:
Submit
That's so cool!
Downvoting a post can decrease pending rewards and make it less visible. Common reasons:
Submit
Yay! Thank you @phoenixwren! Yours is cool too!
Downvoting a post can decrease pending rewards and make it less visible. Common reasons:
Submit
This looks very handy. I like the washable lining.
Downvoting a post can decrease pending rewards and make it less visible. Common reasons:
Submit
Thank you @gmatthe2! I like anything that is washable :D
Downvoting a post can decrease pending rewards and make it less visible. Common reasons:
Submit
Downvoting a post can decrease pending rewards and make it less visible. Common reasons:
Submit
Thank you @pixresteemer!
Downvoting a post can decrease pending rewards and make it less visible. Common reasons:
Submit
Very nice @marblely! Thank you for sharing the steps with us! I really love this basket!! 😍
Downvoting a post can decrease pending rewards and make it less visible. Common reasons:
Submit
Thank you @needleworkmonday! 😘
Downvoting a post can decrease pending rewards and make it less visible. Common reasons:
Submit
😘
Downvoting a post can decrease pending rewards and make it less visible. Common reasons:
Submit
How can you be so multi-talented??? I have two of these baskets and I love them, but I must admit I bought them, with your tutorial I am almost convinced I could try it myself :-D
Thank you for writing down the explanations and the shematics <3
Downvoting a post can decrease pending rewards and make it less visible. Common reasons:
Submit
Aww thank you @neumannsalva! I just tried for fun. You are multi-talented! I love your pieces - poem, needlework, artwork, week by week!
Downvoting a post can decrease pending rewards and make it less visible. Common reasons:
Submit
when you look at the completed basket, you will never guess that it is made of old magazines. great !!!!!
Downvoting a post can decrease pending rewards and make it less visible. Common reasons:
Submit
Awww.. thank you @tali72 😘. Think I'm going to make some more. It is a really good way to make use of the magazines.
Downvoting a post can decrease pending rewards and make it less visible. Common reasons:
Submit
Well done! I especially like your schematics - I may be able to sew a straight line but drawing? Not one of my skills ;)
Downvoting a post can decrease pending rewards and make it less visible. Common reasons:
Submit
Thank you @muscara! :) Your knitting is beautiful!!
Downvoting a post can decrease pending rewards and make it less visible. Common reasons:
Submit
So pretty and well explained your entire post... I love the way you put the photo step by step...
Thank you for sharing! !
Downvoting a post can decrease pending rewards and make it less visible. Common reasons:
Submit
Thank you @tahiaarq! :)
Downvoting a post can decrease pending rewards and make it less visible. Common reasons:
Submit
You just planted 0.12 tree(s)!
Thanks to @marblely
We have planted already 3349.32 trees
out of 1,000,000
Let's save and restore Abongphen Highland Forest
in Cameroonian village Kedjom-Keku!
Plant trees with @treeplanter and get paid for it!
My Steem Power = 25454.15
Thanks a lot!
@martin.mikes coordinator of @kedjom-keku
Downvoting a post can decrease pending rewards and make it less visible. Common reasons:
Submit
Congratulations! This post has been upvoted from the communal account, @minnowsupport, by marblely from the Minnow Support Project. It's a witness project run by aggroed, ausbitbank, teamsteem, someguy123, neoxian, followbtcnews, and netuoso. The goal is to help Steemit grow by supporting Minnows. Please find us at the Peace, Abundance, and Liberty Network (PALnet) Discord Channel. It's a completely public and open space to all members of the Steemit community who voluntarily choose to be there.
If you would like to delegate to the Minnow Support Project you can do so by clicking on the following links: 50SP, 100SP, 250SP, 500SP, 1000SP, 5000SP.
Be sure to leave at least 50SP undelegated on your account.
Downvoting a post can decrease pending rewards and make it less visible. Common reasons:
Submit