♥ Welcome to my blog ♥
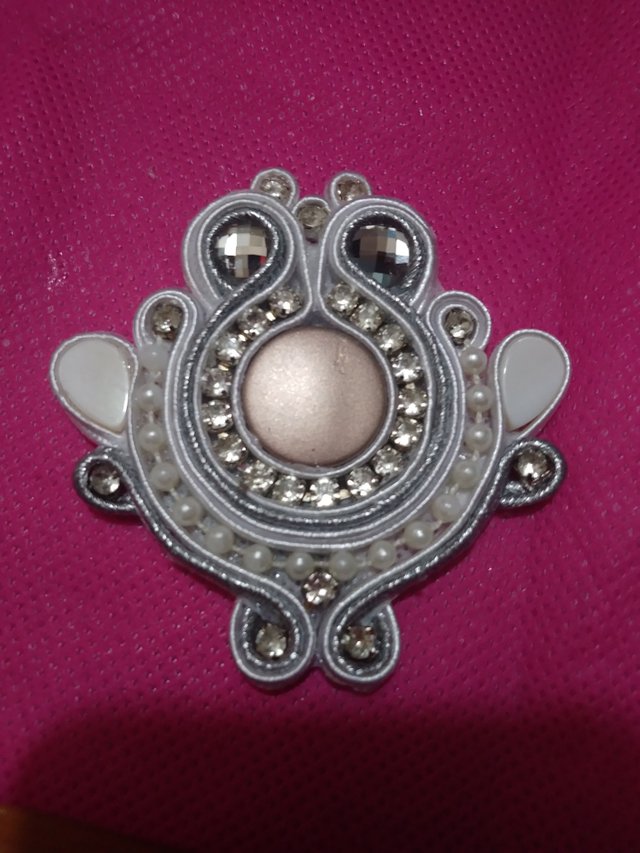
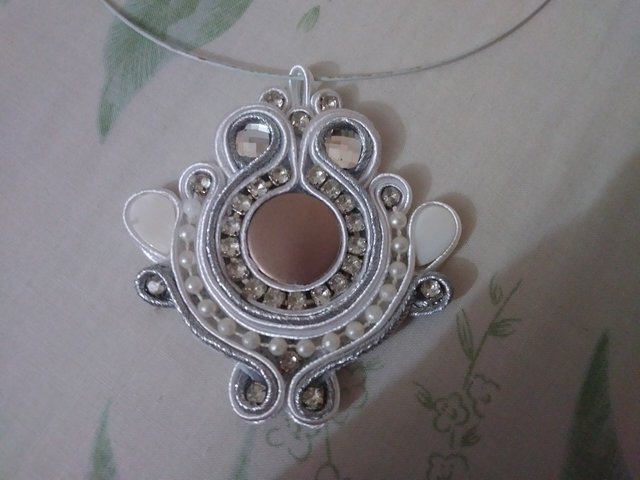
Hola comunidad de @nTOPAZ es para mí un placer estar nuevamente con ustedes trayendo contenido original de mis creaciones en soutache, para esta ocasión le traigo un tutorial paso a paso de una medalla realizada con la técnica del soutache, es práctico, fácil y súper coqueto para la mujer actual .
Hello community @nTOPAZ is for me a pleasure to be with you again bringing original content of my creations in soutache, for this occasion I bring a tutorial step by step of a medal made with the technique of soutache, is paractical, easy and super flirtatious for today's woman .
Materiales:
- Tela P.O.P.
- Silicón líquido.
- Hilo de soutache de color blanco ( o de su preferencia).
- Hilo de soutache plateado.
- Strass plateada.
- Chapa color crema para el centro.
- 2 chapas de cristal plateado.
- Cadeneta plástica color blanca.
- 2 chapas blancas en forma de gota.
- Tijeras.
- Yesquero.

Parte 1
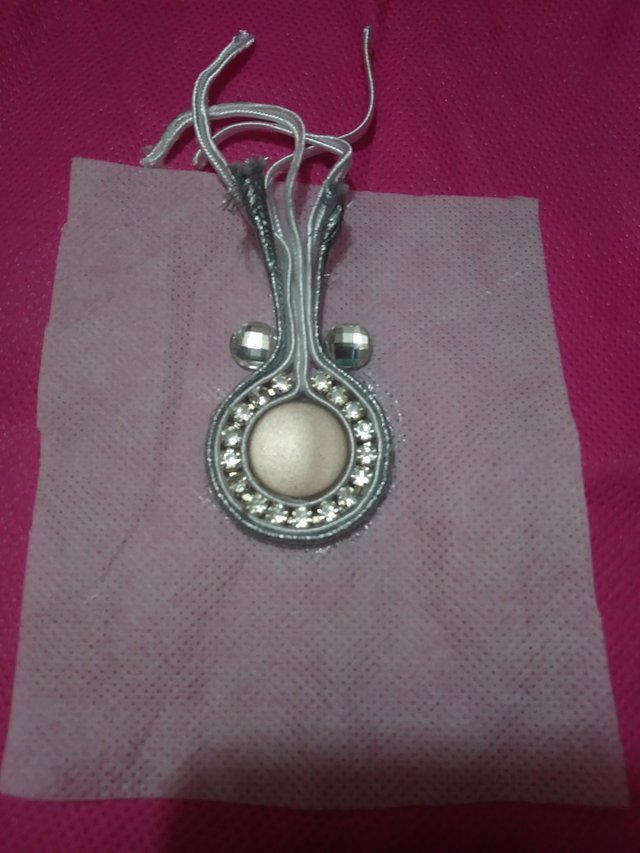
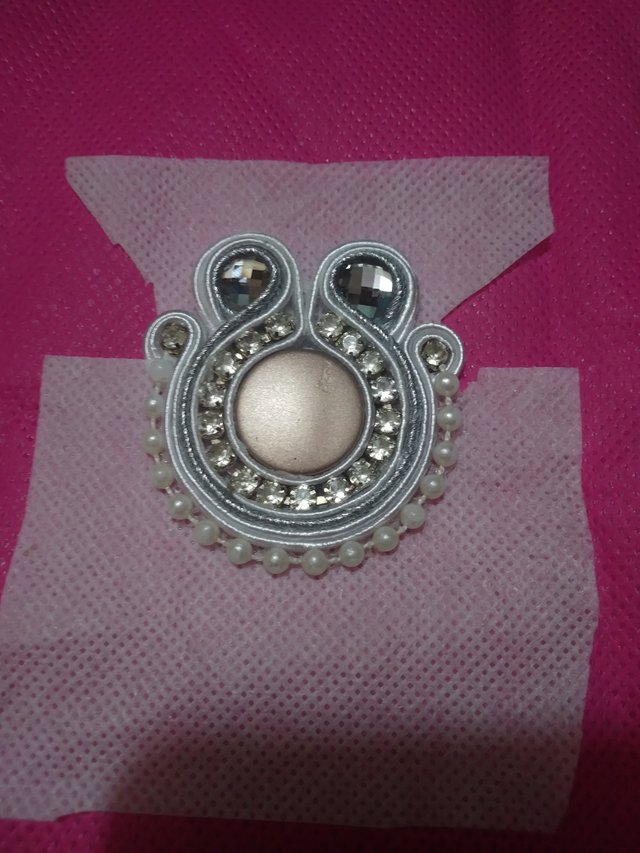
- Comenzamos con colocar nuestra tela y pegarle la pieza principal, una vez seca agregamos silicón y colocamos alrededor un trozo de hilo de soutache blanco aproximadamente de 15 cm, luego pegamos nuestra strass seguido del hilo blanco y después el hilo plateado. Una vez seco procedemos a pegar en la parte superior nuestras piezas planas de cristal, como se muestra en la figura 1.
- We begin with placing our fabric and sticking the main piece, once dry we add silicone and we place around a piece of white soutache thread of approximately 15 cm, then we stick our chain followed by the white thread and then the silver thread. Once dry we proceed to glue on top our flat pieces of glass, as shown in Figure 1.

Parte 2
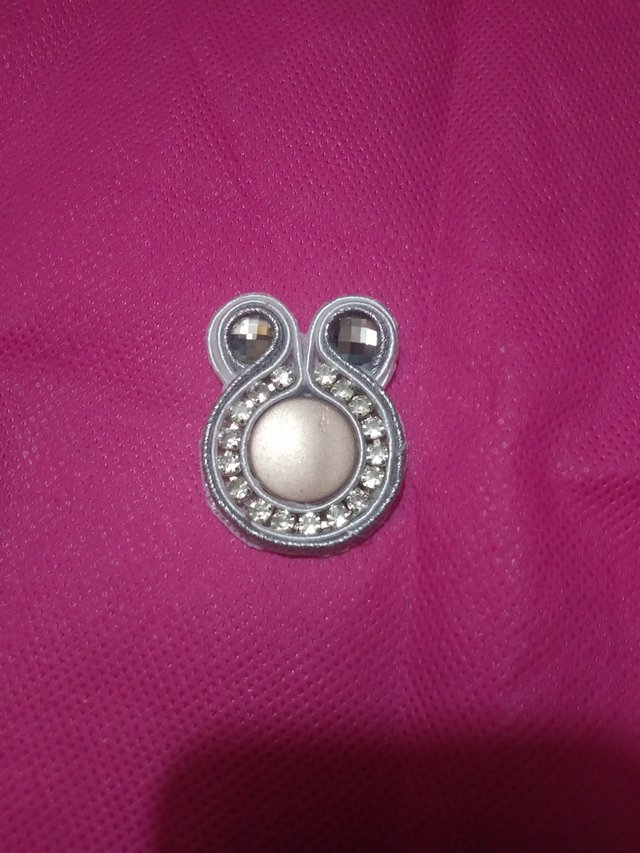
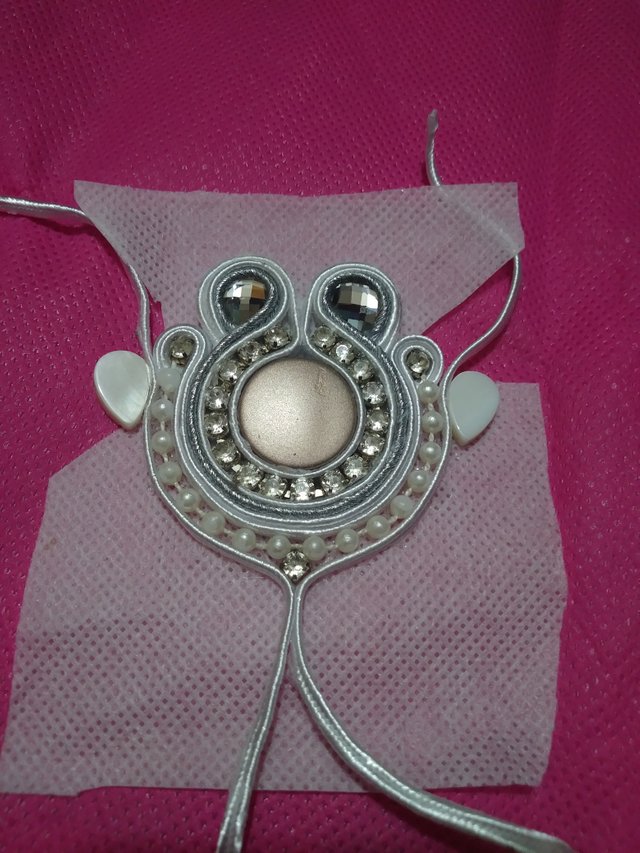
- Luego procedemos a recortar al ras nuestra tela y llevar hacia atrás nuestros hilos restantes pegando con ayuda del silicón, cuidando muy bien nuestros bordes y cualquier resto de tela que se vea. Como se nota en la imagen 2.
- Then we proceed to cut our fabric flush and carry back our remaining threads glued with the help of silicone, taking good care of our edges and any remaining fabric you see. As you can see in image 2.

Parte 3
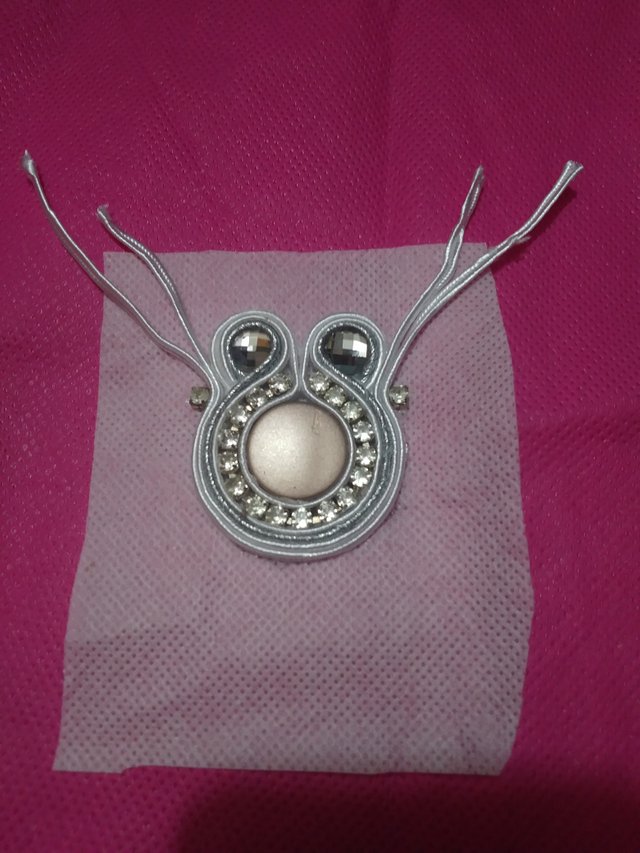
- Para la tercera parte colocamos seguidos 2 trozos de hilo de soutache y agregamos arriba 2 cristales de nuestra cadeneta y esperamos que seque.
- For the third part we put 2 pieces of soutache thread in a row and add 2 crystals from our chain and hope it dries.

Parte 4
- En la cuarta parte recortamos los alrededores de los cristales y llevamos hacia atrás los hilos ajustando bien, luego colocamos silicon y pegamos la cadeneta plástica blanca. Como observamos en la imagen.
- In the fourth part we cut the surroundings of the crystals and we take back the threads adjusting well, then we put silicon and we stick the white plastic chain. As we can see in the image.

Parte 5
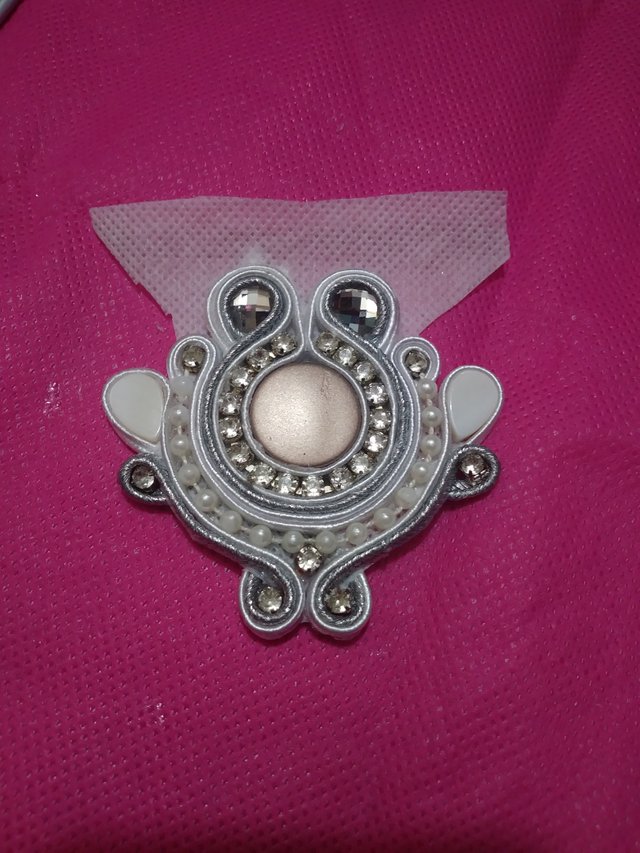
En el siguiente paso tenemos 2 trozos de hilo y lo pegamos debajo con silicón, agregamos un cristal en el centro y las chapas de gotas en la parte superior y esperamos que seque.
In the next step we have 2 pieces of thread and paste it underneath with silicone, add a glass in the center and the drop plates on top and wait for it to dry.

Parte 6
- Colocamos hilo soutache plateado como el paso anterior y le agregamos 2 cristales arriba y 2 abajo, esperamos que seque y llevamos con mucho cuidado hacia la parte de atrás los hilos restantes y acomodamos los detalles de la pieza.
- We put silver soutache thread like the previous step and we add 2 crystals above and 2 below, we wait that it dries and we take with much care towards the back part the remaining threads and we accommodate the details of the piece.

Parte 7
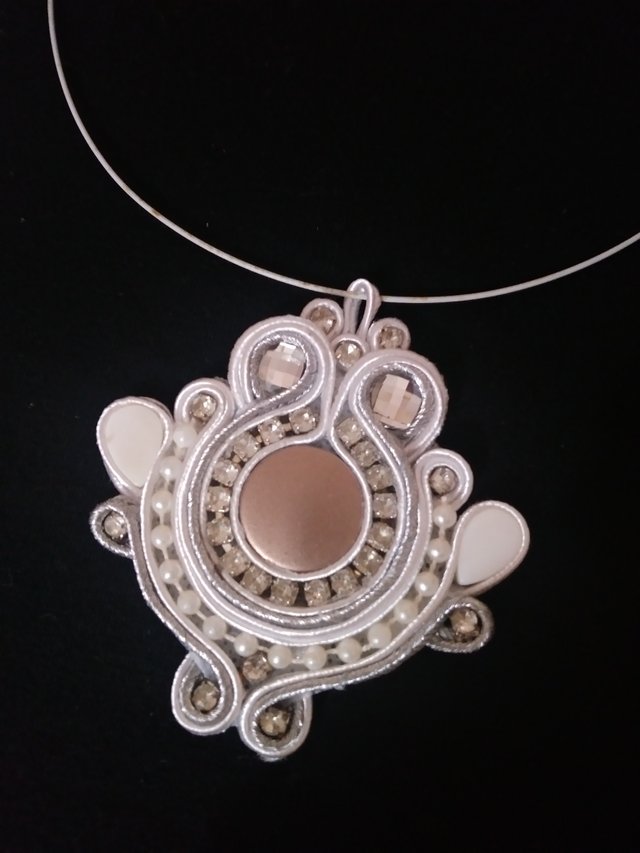
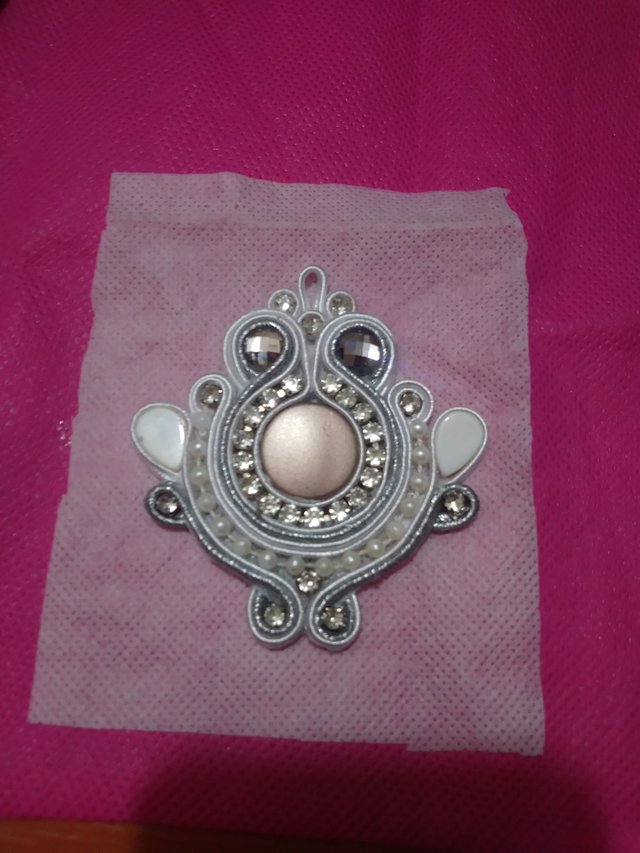
- En este paso solo nos queda colocar en la parte superior tres cristales y cada uno con hilo de soutache blanco alrededor. Luego transferimos nuestra pieza a otra tela para tapar la parte trasera y cortamos al ras con cuidado. Colocamos un pequeño hilo para sujetar y listo.
- In this step we only have to place on top three crystals and each with white soutache thread around. Then we transfer our piece to another fabric to cover the back and cut carefully flush. We place a small thread to hold and ready.

Así de bonita queda nuestra medalla, solo nos queda colocar en la parte de atrás tela P.O.P y cortar al ras, quemar con un yesquero el alrededor y darle forma con nuestros dedos. Finalmente obtenemos nuestra medalla tan bonita y genial para lucir.
That's how nice our medal looks, all we have to do is place P.O.P. fabric on the back and cut it flush, burn it around with a plastersmith and shape it with our fingers. Finally we get our medal so beautiful and great to look. div>
Las fotografías son de mi propiedad y fueron tomadas desde mi teléfono.
El texto es original de: nathyortiz
// Todos los Derechos Reservados / © Nathy Ortiz //
Separadores realizados en power point por: @nathyortiz

Sponsored ( Powered by dclick )
일본의 화이트국가배제, 우리정부의 태도, 우리는 어떻게 해야 하나?
일본이 우리를 화이트 국가에서 배제하는 각의를 했다. 사실상의 선전포고다. 이로서 한일관계는 ...
Looks beautiful, imagine what you could do with fancy raw materials and that talent. I think you'll do well with adding more metal designs too.
Downvoting a post can decrease pending rewards and make it less visible. Common reasons:
Submit
Hola, muchas gracias por la acotación. Exactamente, colocando material elegante quedaría aun mejor. Pronto subiré uno de esas características. Un fuerte abrazo
Saludos
Downvoting a post can decrease pending rewards and make it less visible. Common reasons:
Submit
Downvoting a post can decrease pending rewards and make it less visible. Common reasons:
Submit
Muchas gracias @fridakahlo y todo equipo de @cervantes
Un fuerte abrazo a todos.
Downvoting a post can decrease pending rewards and make it less visible. Common reasons:
Submit
Hermoso dije! muy bien elaborado amiga, me encantó el color que escogiste ya que es mi favorito, es bueno para una ocasión especial. Lo vendes? estoy interesada... Te felicito por tu arte bien elaborado y el paso a paso muy bien explicado. Abrazos.
Downvoting a post can decrease pending rewards and make it less visible. Common reasons:
Submit
Muchas gracias por tu comentario, agradezco cada muestra de cariño que me hacen por medio de esta plataforma.
Saludos.
Downvoting a post can decrease pending rewards and make it less visible. Common reasons:
Submit
Que encanto de aretes, todo una elegancia y categoría, tu técnica de elaboración es bien definida y explicativa, me gustaría uno fuscia, eres muy talentosa amiga @nathyortiz, te felicito
Downvoting a post can decrease pending rewards and make it less visible. Common reasons:
Submit
Gracias por tu comentario, es un privilegio poder recibir mensajes positivos.
Saludos.
Downvoting a post can decrease pending rewards and make it less visible. Common reasons:
Submit
Saludos Nathy, asombrosa tu creación y que bien que te tomes el tiempo para dejarnos el tutorial de como crear este tipo de manualidades.
Gracias por compartir tu arte. <3 <3 <3
Downvoting a post can decrease pending rewards and make it less visible. Common reasons:
Submit
Muchas gracias amiga, siempre a la orden.
Saludos.
Downvoting a post can decrease pending rewards and make it less visible. Common reasons:
Submit
Buen día para ti amiga, espero ver mas de tu arte. ;)
Downvoting a post can decrease pending rewards and make it less visible. Common reasons:
Submit