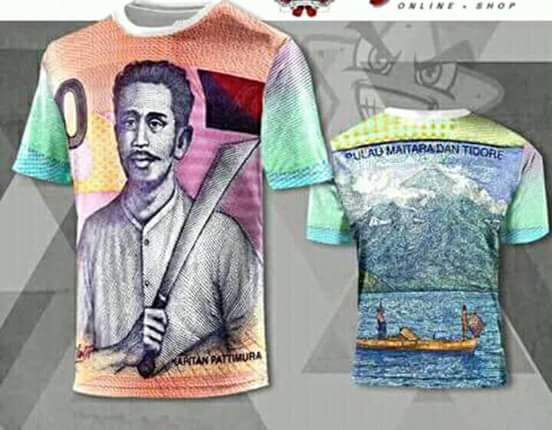
Want to make your own t-shirt?? Here's how easy loh, abis itu itung itung save lah, haha
Karya anak bangsa semua kawan di esteems @usmancb mohon bantuan kawan kawan agar follow .........!!!!
Materials needed for menggambari t-shirts is easy, just:
- plain t-shirt
- the printer ink – jet colors
- paper t-shirt transfers or baking paper t-shirt
- Setrika Listrik
- Program for drawing, could Ms. Word, paint, Photoshop, etc. (here we use ms word.)
Transfer paper for the material, which could move the printout printer ink – jet to the fabric with the help of an iron is hot, you have to buy it a pack, which contains ten sheets.
To make it, follow the steps as follows:
Step 1:
Open the Microsoft Word software, set the magnitude of the paper by clicking on the menu [File] [Page Setup] so that the open dialogue box. Click tab [Paper Size] and set the size of paper to A4. Make a format has become a Landscape or horizontal, then click [Ok].
On this blank worksheet enter the picture. Can use images already available diClip Art or other images you can use as your hearts are already available in your folder.
In order for easy image digeser-geser, right click with the mouse, and then [Picture Format]. After the dialogue box appears, click the [Layout] tab, with the choice of icon [In Front of Text], in the form of a black dog above a row of gray line.
To enter text, use the [Insert] [Text Box]. In order for text handling easier, hilangkanlah its line by right clicking, and then [Format Text Box]. After appearing dialogue box click tab [Layout], with the option [In Front of Text]. Then start entering the text, inline, with the type and size of your favorite fonts. So any color.
Step 2:
With the instructions in step 1 above, the results that we get are as follows:
(To see more good results, view from [File] [Print Preview])
Step 3
When you are already convinced and satisfied with the design, now is the time to print.
Take the paper transfers from its packaging, and put them on the printer. Remember, do not get overturned. The back of the paper, which is not the print field usually marked with lines and or writing. The print field should be facing up.
After that, click [File] [Print], then in the dialogue box click on [Properties]. [Media Type] select [t-shirt Transfers]. This option will automatically generate the inverted molds (mirror), like looking at the reflection of the image on the mirror. Choose a print quality standard, not a draft.
If the settings on the [Properties] you are no amenities such as exemplified above, then on the tab [Features] click [Orientation] select Potrait, and tick on the Flip horizontally. Then you will get the print as image reflection on the mirror too.
Sure everything is ready ..?? Click [to Aplly], then [Ok].
Printer properties menu options one brand printer with others sometimes somewhat different, but the principle of printing is almost the same.
Step 4
Later pictures you'll be upside down. Indeed it must be so, because the images and text that later will be moved to Your plain t-shirts.
Step 5
Take the already prepared, set Your iron level is medium. Ratakanlah shirt in advance with menyetrikanya. After the cooling, the transfer paper tumpangkanlah that have been printed.
Keep so that the surface of the shirt is not wavy. When you need a soft cardboard fouled.
Then set the iron on a maximum level. Rub it slowly, with a little pressure, the field for the sake of the field, according to the guide lines, from top to bottom and vice versa, about 15 seconds. After it is rubbed from the left to the right, and vice versa, about 15 seconds.
Step 6
Put the iron, wait for about 3 minutes to allow the transfer paper to cool. Then lepaslah, such as removing the sticker, slowly. One hand off his other hand holding a paper, t-shirts from raised.
If there are sections that haven't stuck to flattened, rapatkan again kertasnya, and rub it again with an iron.
Step 7
The digambari was finished. Wait for it to cool, new clothes are worn. T-shirt design that you create is finished and ready for use by you and your family. Do not forget to adjust the size of the t-shirt with the person who will wear it. Good luck ....!!