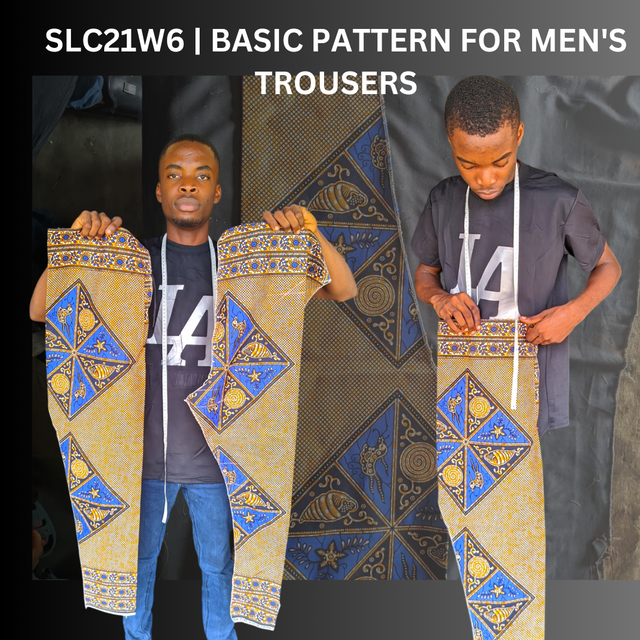
Edited using canva
Patterning men's trousers is always an easy going process but need one to exercise caution to avoid drawing the shape wrongly. The size and shape of a trouser is usually determined by some measurements which I'll highlight in the course of this post. Sewing a trouser is not like sewing a long skirt as trousers aren't straight cut.
There must be a curvature at the buttocks, the thigh, waist and length. This makes the trouser much more shapy and real. Now, before drawing the pattern for a man's trouser, you must take note of the following measurements which includes;
- Length of the trouser
- Waist circumference
- Hip contour
- Hip height
- Knee width and
- Ankle
These measurements are very important to draw this trouser pattern but the most important which is used in making the curve by the pocket side, waist and butt includes;
- The length
- Waist circumference
- Hip height and contour.
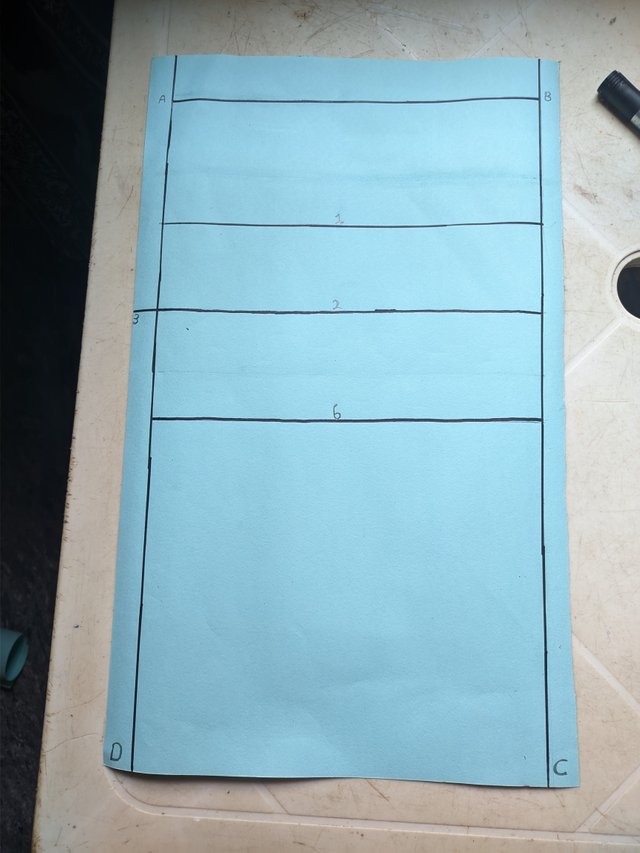
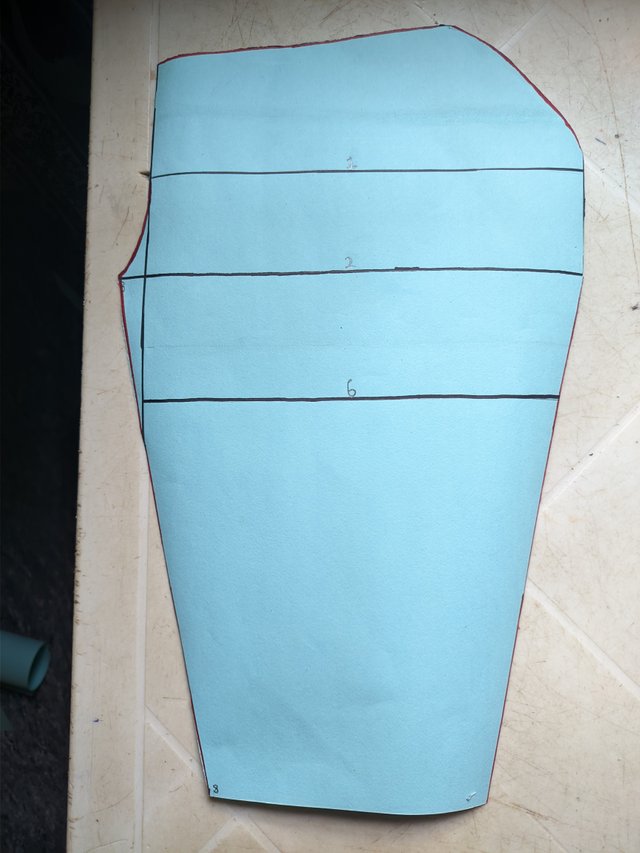
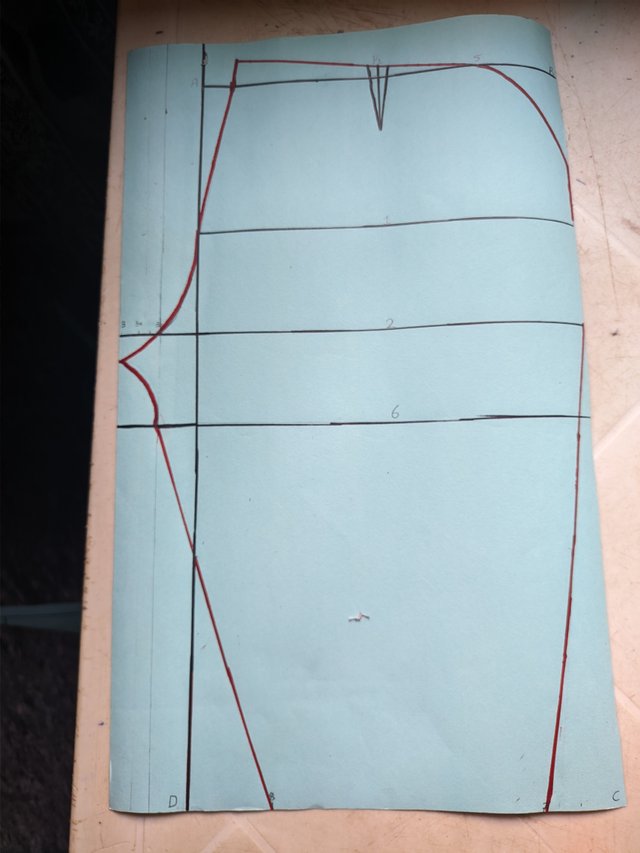
Now, you're to draw a rectangle with same sides, a long rectangle to fit. After drawing the rectangle, we take measurements of 1/4 of the hip with an addition of 4cm and the length of the trouser.
We then label the box for guide, ABCD. From point AD which happens to be the length side of the trouser, you'll measure the hip height by taking some inches down and then connect it with point B. The measurement would be 1/4 + 4cm added from A to D.
The second line after that of the hip is divided by 15% of the measured value to get an actual value. We then connect from A to B on a straight line. We then move to measuring the waist which would be taken as 1/4 of the waist.
From point C to point D, I'll have to use the actual value I got after the division and did my marking, same with the bottom of the trouser. If it's a material placed to portray front and back, we'll place another material under the front part and carve out the back, keeping at least 3 inches from the front part.
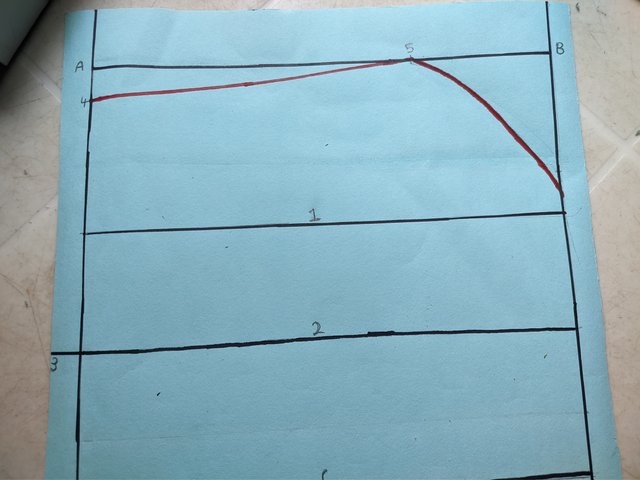
From line 1 down to 3, we make a deep curve by the side to serve as the under pant curve that joins the front and back. We then make a mark from point B to A, 3cm and then joined the marked line by 3cm down to meet point A. This joining serves as the curved part of the waist for joining four sides of the cut with the waist band. I then make a mark for the pocket side which would be joined using the sewing machine. How I was taught was to take 1.5 inches from point B, inside and then cut it out in a line format so that when it's time to sew, it would just bend to meet the mark we created earlier at the top of the trouser. This serves as the pocket, from point B to line A.
From point 2 which is the hip contour line, I made a slanted joining to meet point 7 which I marked at the onset. I then did same by joining a slanted line from the deep curve we made at point 1 to 3 which would serve as the slanted length of the trouser, spotlighting the waist and hips.
 |  |
|---|---|
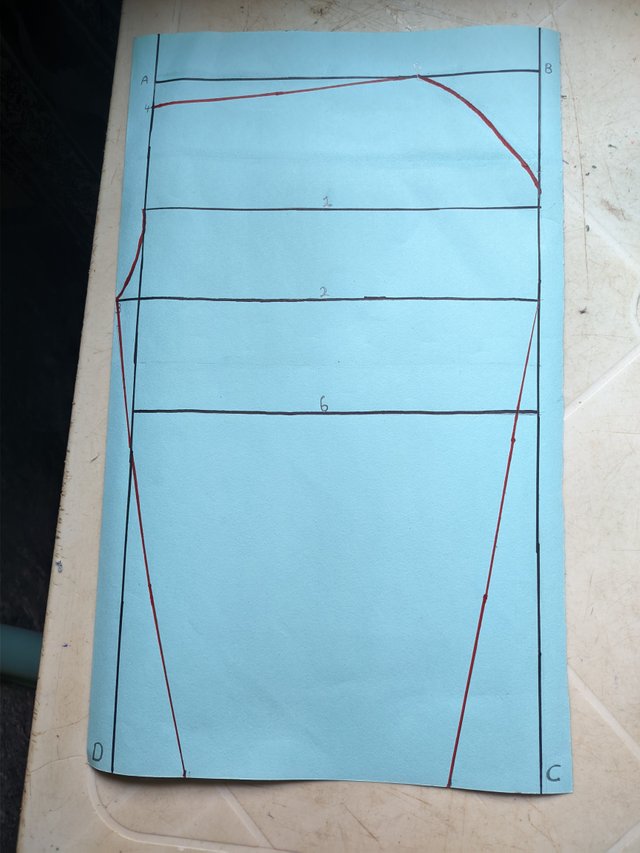 |  |
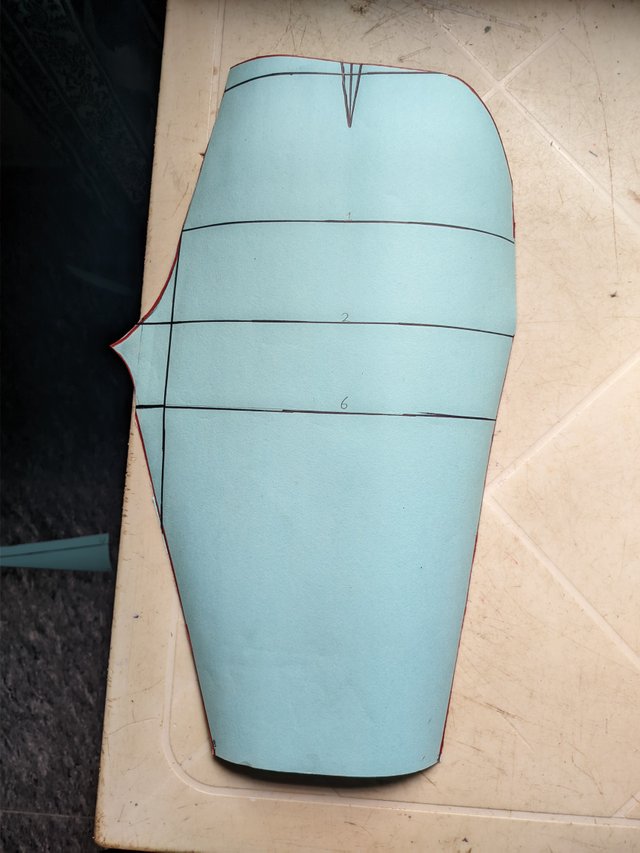
- We are done with the front pattern. To draw the back pattern, I usually replicate the drawing by placing the front pattern on a fabric but with different measurements to avoid spoiling the shape and size. We take the same measurements for the frontals which has to do with the hip but allowance must be made.
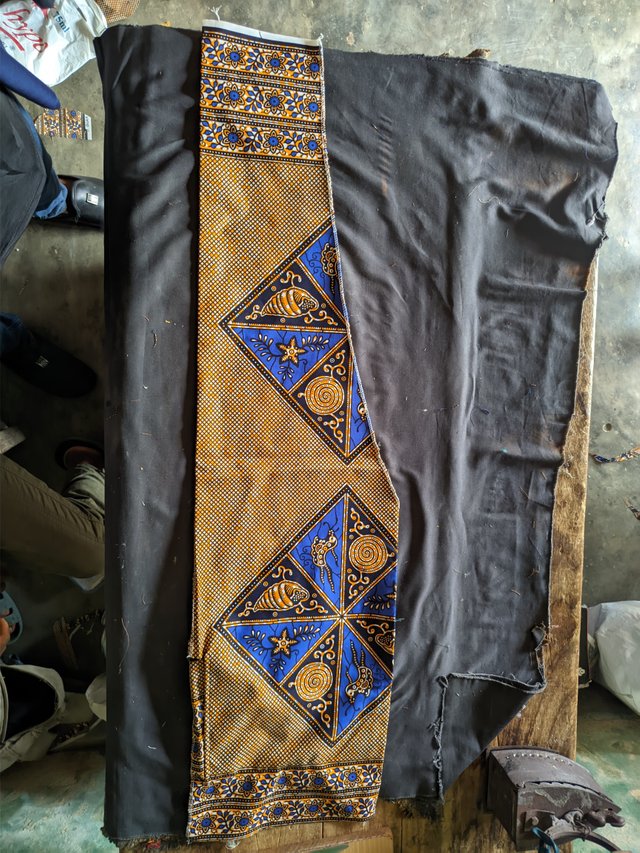 | Trouser front pattern |
|---|
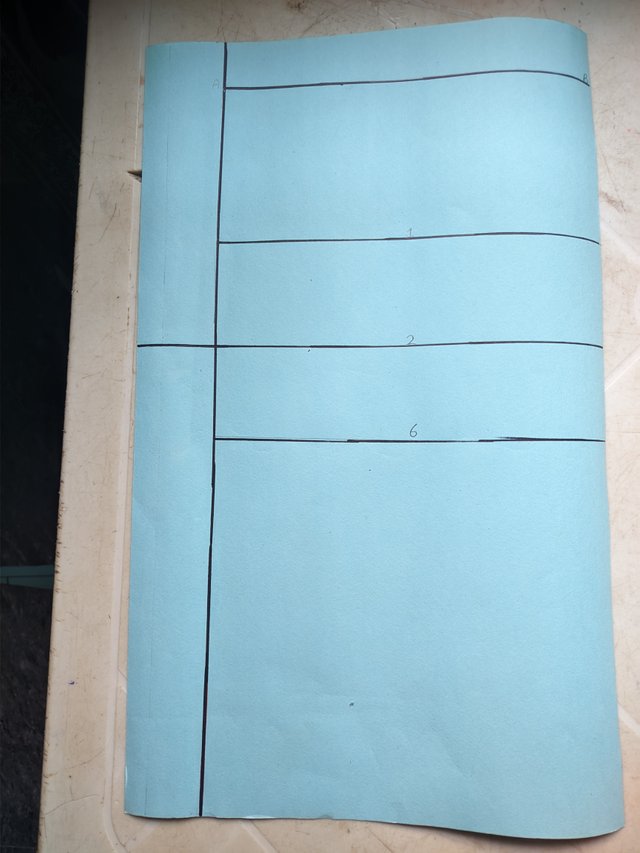
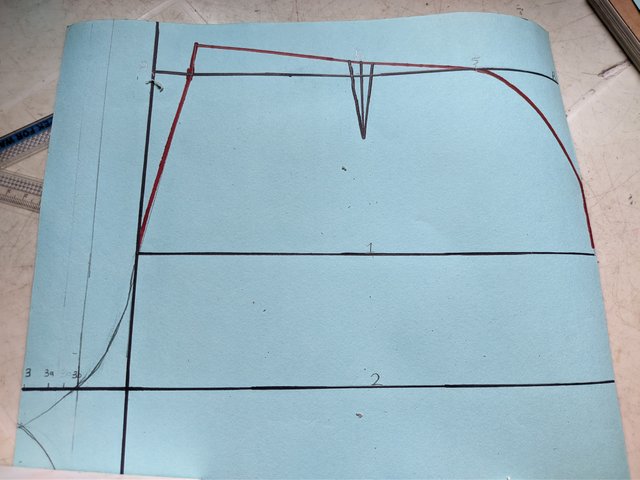
I'll multiply the measurements by 3 to get a back pattern rise and then from points AB, I measured 2cm to the top and also measured 1/4 of the waist by adding 2cm to it.
On the hem line, I'll also measure same with the front part before measuring the space from line 2 to line 6 as shown on the drawing. There's an extension in butt joining to give its full shape at the back. Joining put 1 with line 3 part B with a curve brings out the back shape. I then joined line 1 with 4 and line 4 with 5 in a straight line. Line 5 which is the top of the trouser was made with a curve to meet line 1 but there's no side pocket joining attached to it since it's the back piece.
The length of the trousers were connected with lines from the hip contour to the ankle part of trouser and then we do our cutting carefully.
 |  |
|---|---|
 |  |
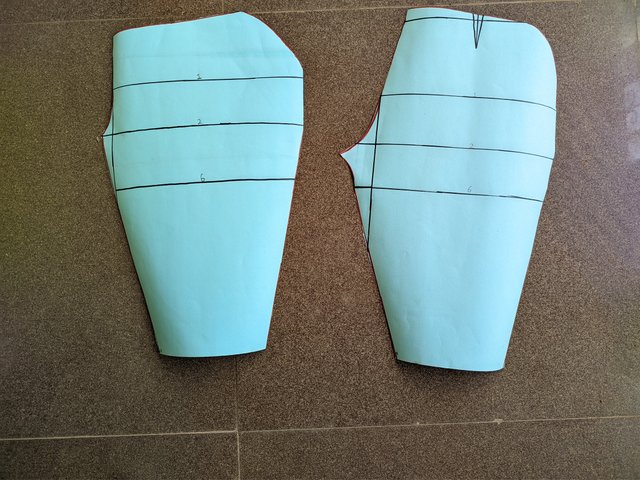
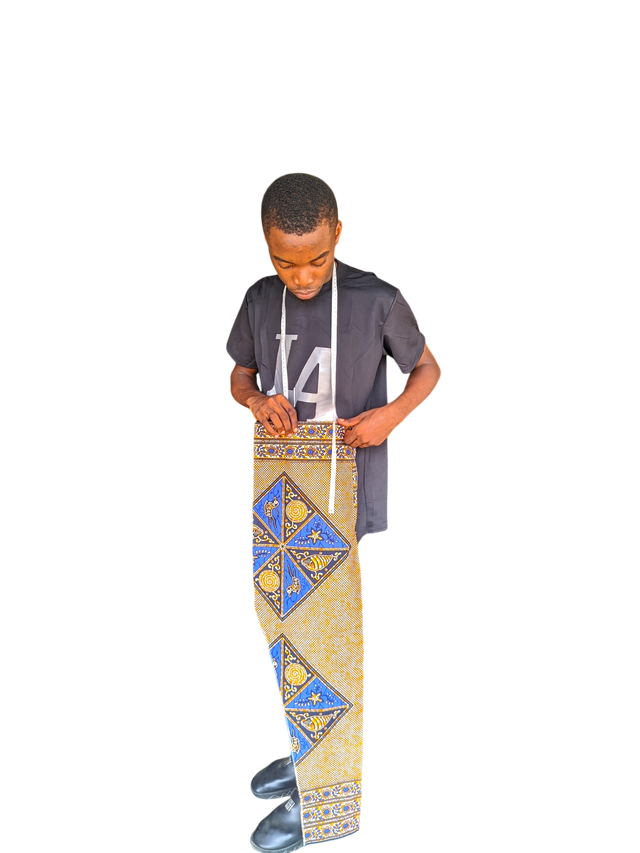
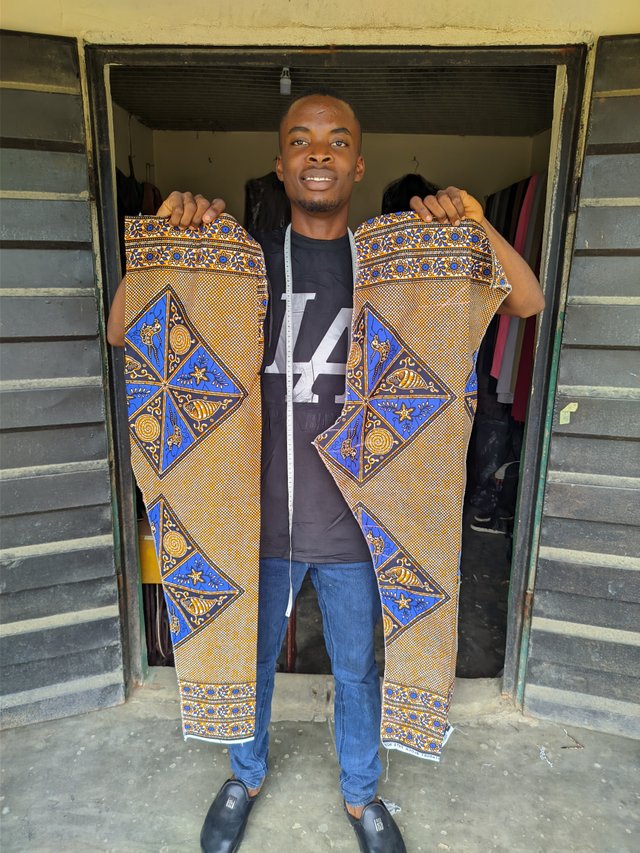
That's how to draw and cut the pattern of a man's trouser. Two days ago, I did this cutting and sewing but the trouser was one with elastic and pockets, not the regular trouser with belt lobes but with elastic. I'd say I really love what I'm learning for the past 6 weeks, starting from how men's shirt is cut
 |  |
|---|
I invite @jewel005, @bleesedlife and @wakeupkitty to participate
Cc,
@lunasilver
You have put a lot of hardwork in your post asthetics and worked theoratically and practically very well.You have truly shown to connect all points with different labellings.
I wish you good luck for leaning challange.....
Downvoting a post can decrease pending rewards and make it less visible. Common reasons:
Submit
Thank you very much. Appreciated. Something that really inspire me to do this is because what is worth doing is worth doing well. I feel asides posting for votes as a content writer, the quality of your post can be informative to Others. It's the creativity for me. Do you believe I learnt crypto from steemit and the knowledge gotten from steemit on crypto has helped me financially and academically? Thanks for stopping by.
Downvoting a post can decrease pending rewards and make it less visible. Common reasons:
Submit
Excelente trabajo, como de costumbre, amigo, se ve muy bien el pantalón, qué bueno que lo muestras, nos sirve a los principiantes para iniciar con modelos sencillos con elástico, después avanzar en incluir pretinas y bolsillos.
Un gusto leer tu participación
Downvoting a post can decrease pending rewards and make it less visible. Common reasons:
Submit
Saludos amigo @bossj23 tiene una buena confeccion de pantalones de caballeros,se ve facil y parece que lo podria hacer pero usted ya cuenta con mucha experiencia y lo felicito por esos buenos resultados. me gustaron los patrones que saco en la tela, mcuhas bendiciones
Downvoting a post can decrease pending rewards and make it less visible. Common reasons:
Submit