Steem greetings from the motherland-Cameroon and welcome to my blog as I share my ideas about pattern making. This is an amazing course organized by one of the seasoned pattern makers on the platform by the name of @lunasilver. Before I go into the details, I will say we are currently observing 2 weeks of imposed lockdown by separatist fighters and I had to deal with what I got at home. I struggled to take the pictures by setting up the camera to auto-snap because there was no one to assist me.
That said, for this beginner course, I will be attempting to give out the measurements for a blouse and skirt, name some of the three important instruments used in measurement, the number of measurements for industrial and personal blouse patterns and most importantly the reason why I am taking this course. Stay tuned while I share my ideas about pattern-making following the guiding questions👇👇.
Name and indicate with your own images where to where the measurements are taken to draw the base patterns of the blouse and skirt for ladies.
The following should be considered when taking a blouse pattern measurement; bust (which entails the bust width, bust circumference, bust height, and bust separation), waist both front and back, and waist circumference. This will be demonstrated below.
Blouse measurements.
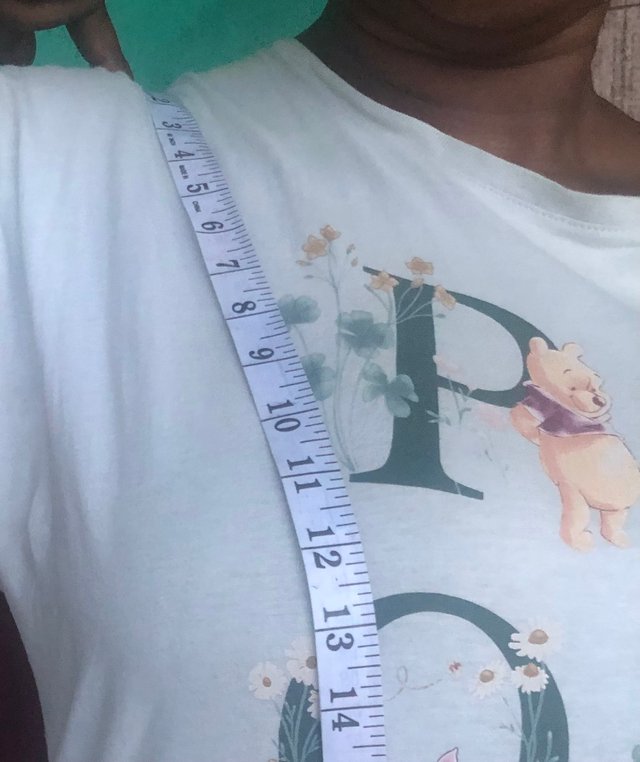
- Bust height: I placed the tape with the start point from the shoulder and ends below the breast.
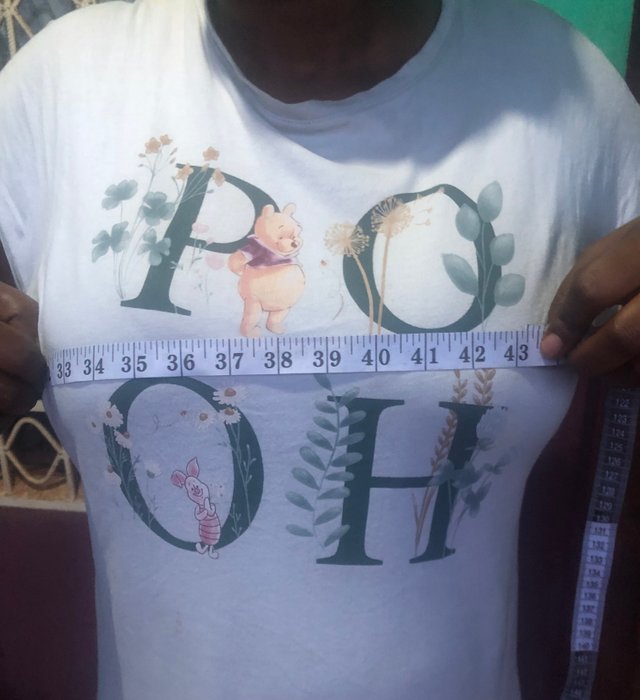
- Bust circumference: I had to pass the tape around the major parts of the bust taking into consideration the base of my arms.
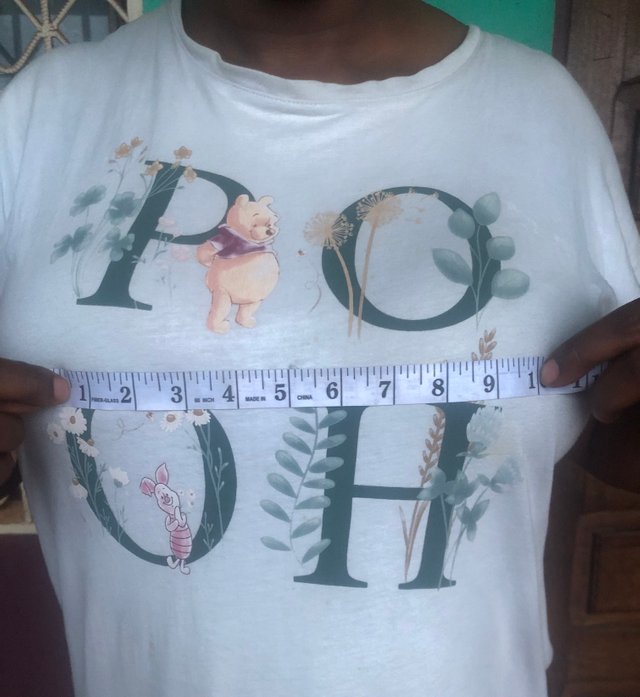
- Bust separation: I placed the tape from one nipple to the other to get the bust separation points.
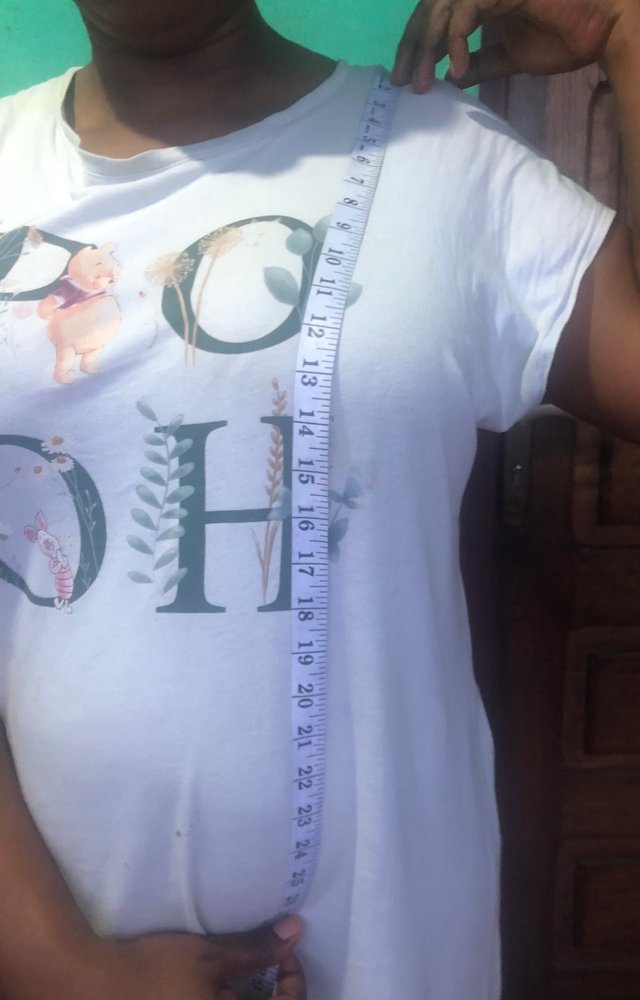
- Front waist: I placed the tape with a start point from my shoulder via my chest down to my waistline.
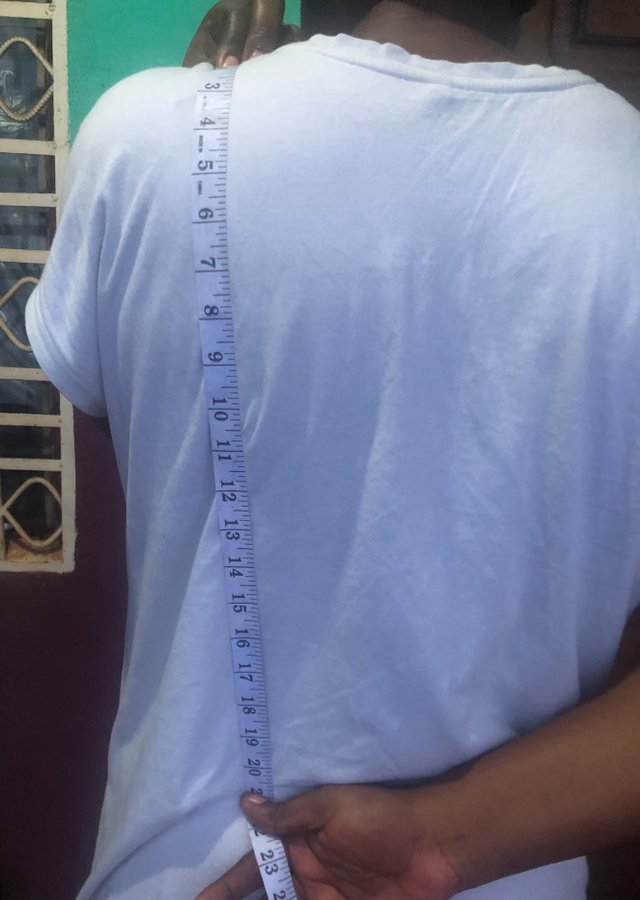
- Back waist: Placed the start point of the tape from the shoulder passing through my back down to the waistline
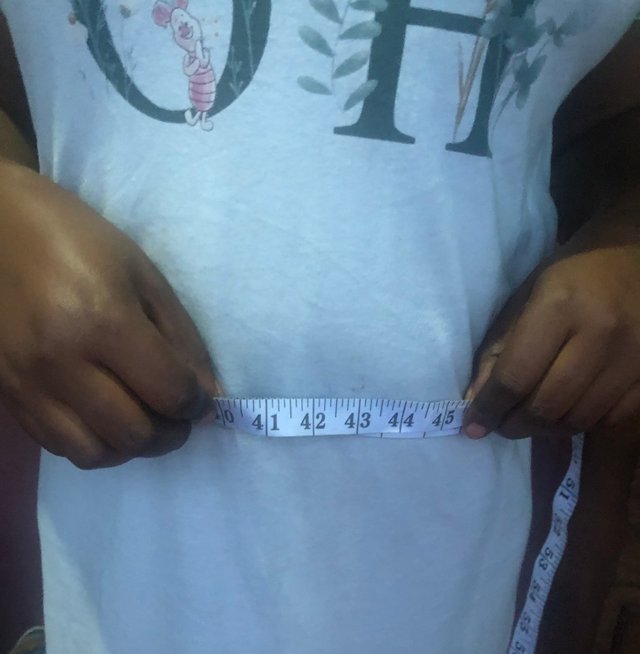
- Waist circumference: I placed the tape around my waist passing over my belly button.
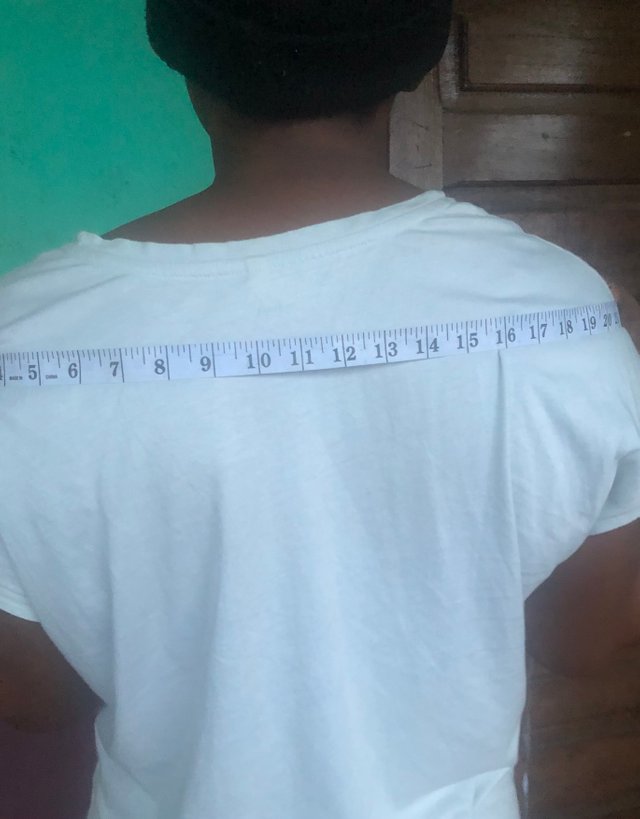
- Back width: I placed my start point with the tape from one shoulder to another with my hands down. Remember I did the measurements myself with auto snap and might not be too precise.
Concerning skirt measurements, the following should be considered:

- Waist: take the measuring tape around your abdomen following the level of the belly button while standing straight.
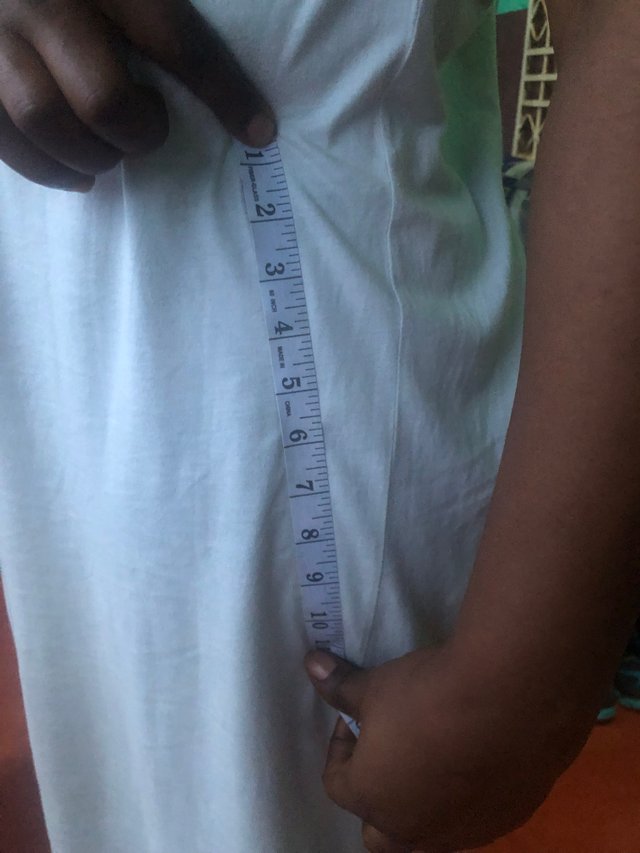
- Hip height: I placed the tape from the upper bone of my thigh down to the lower part of the thigh.
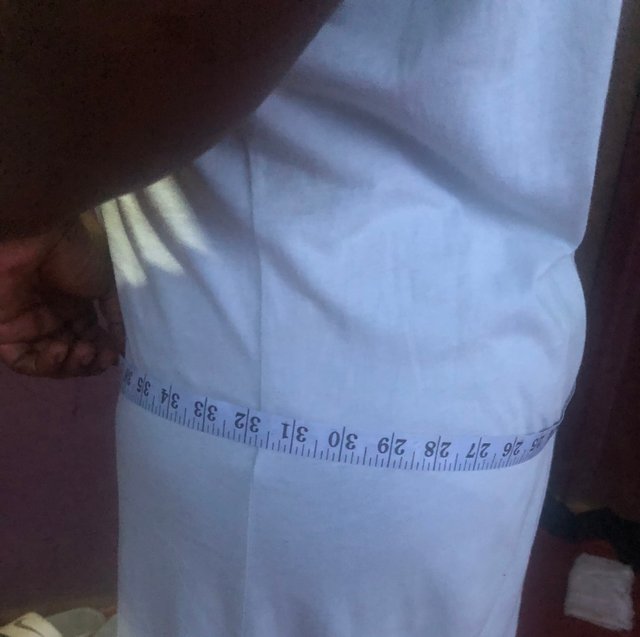
- Hip circumference: Place the tape around your buttocks while standing straight.
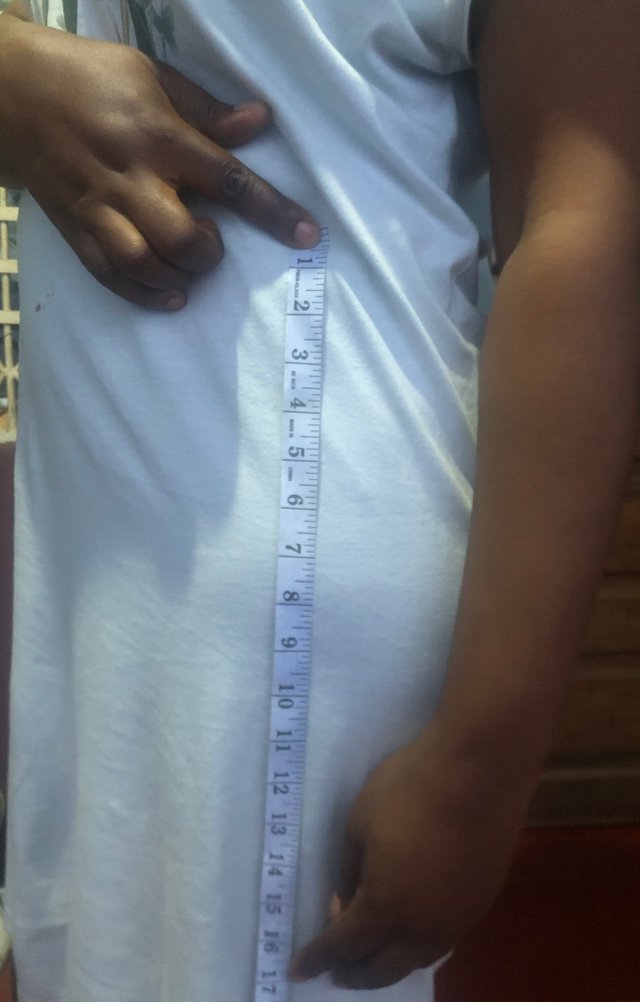
- Length: it depends if it's a mini skirt or a full-length skirt. For my measurement, I took a mini skirt placing the tape from one side of my waist down my knee.
It was pretty hard taking the measurements by myself and doing auto-snap.
How many measurements are taken into account to make the pattern for the ladies' blouse, with personal sizes?
Considering measuring a lady's blouse with a personal size, we need 7 major measurements to consider. They are as follows:
- Bust Height
- Bust contour
- Bust separation.
- Front waist
- Back waist
- Waist circumference
- Back width
How many measurements are taken into account to make the pattern for a women's blouse with industrial sizes?
For the industrial size of making blouse patterns for ladies, 5 major measurement details are required and they are as follows:
- Front waist
- Back waist
- Waist circumference
- Back width
- Bust contour
Shows an image of 3 materials needed to take measurements.
The image below shows the three materials I used to take my measurements.
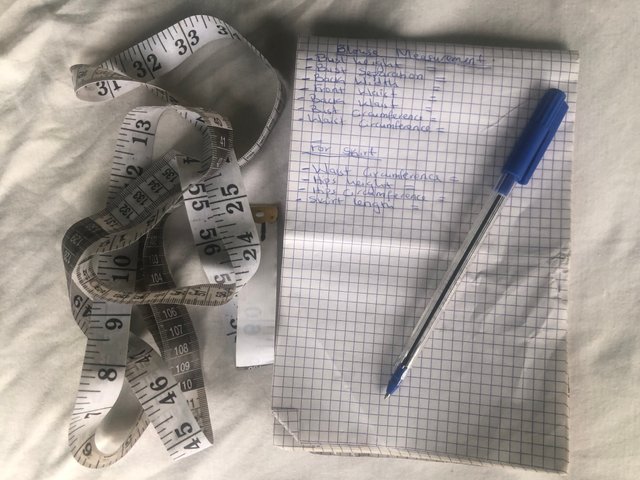
- The Measuring tape: This is the most prominent of all the materials which helps to take measurements. Without this tape, your patterns will not get precise measurements.
- The Pen: I used the pen to write down the measurement details because I could not store them off-hand.
- Exercise Book: This helps to keep the records straight. I input the measurement figures in the book which helps during the cutting of the material before seeing.
Tell me a little about why you are taking this course and what your goal is in real life.
Permit me to share one of the stories I experienced that made me consider learning this course. My mom was a seamstress though when I was a grown-up, she stopped sewing and my elder sister got into the profession. She was so good at bringing out good designs with Ankara (African fabric). She had about 10 apprentices and the workload was in excess.
One day, my mom gave me Ankara to sew an outfit knowing well that my elder sister was good at it. I took the fabric to my sister’s workshop and she took the material and abandoned it after I left for school.
The fabric stayed at her workshop for months and later years until it started fading away. That is how I lost the fabric because I could not make any pattern from it.
When I saw this course, the memories of my lost Ankara fabric resurfaced and I decided to enrol for the course.
Moreover, it will help me to learn a new skill and also save money from paying others to sew my dresses.
I will invite @goodybest, @m-fdo, @crismenia and @rafk to share ideas about this course.
Saludos @chant, disculpa creo que te falta la primera etiqueta patronaje-s20w1.
Downvoting a post can decrease pending rewards and make it less visible. Common reasons:
Submit
Hola mi corazón hermoso.
Cuando hacemos publicaciones desde nuestro propio blog, el post al publicarse toma la primera etiqueta, y quedan las restantes.
Cuando publicamos desde una comunidad, la etiqueta la asume la comunidad en cuestión.
Al inicio de los tiempos en Steemit era así, publicábamos desde la etiqueta. Te invito a que pruebes publicar desde tu propio blog. Desde que lo hago recibo mucho más visitas de los fuertes curadores.
Ya voy a revisar tu participación
Chaoooo
Downvoting a post can decrease pending rewards and make it less visible. Common reasons:
Submit
Thank you for the clarification.
Downvoting a post can decrease pending rewards and make it less visible. Common reasons:
Submit
Congratulations! Your post has been upvoted through steemcurator06.

Good post here should be . . .
Curated by : @𝗁𝖾𝗋𝗂𝖺𝖽𝗂
Downvoting a post can decrease pending rewards and make it less visible. Common reasons:
Submit