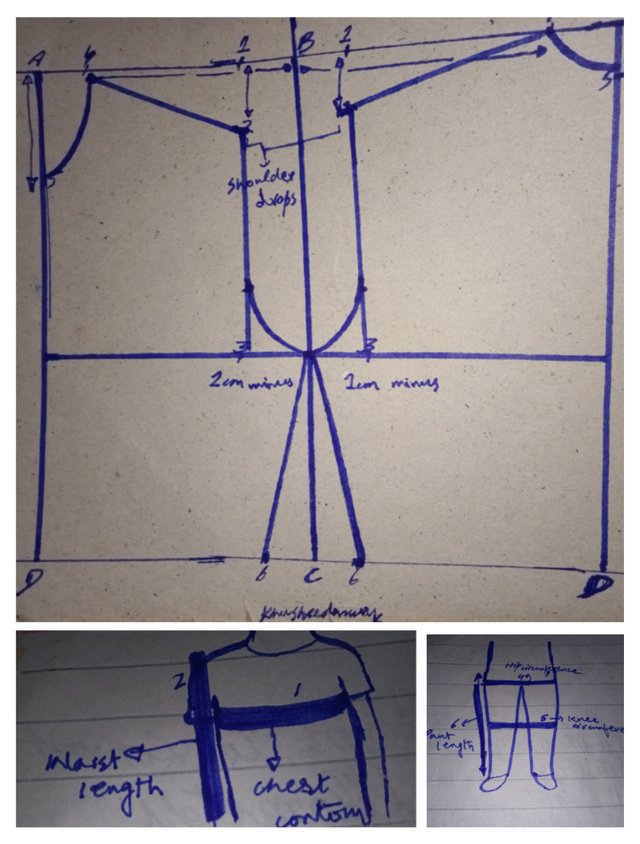
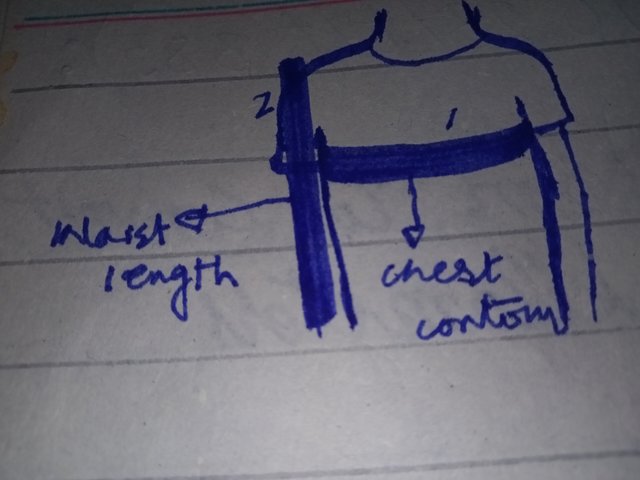
I am working today with personal sizes and for taking personal sizes and fortunately I don't have any children as a model so I imagine that my model is wearing a shirt of size around 8 so according to that following are the measurement that I have to measure by using inches tape as I have illustrated with diagrams that how I am measuring important measurements by using inches tape!
• Length of shirt is taken as 38-40 cm
• Length of sleeves is taken as around 12-14 cm
• Circumference of arm is taken as 18-20 cm
• Length of pant is taken as 78-80 cm
• Circumference of hip is calculated as 76 cm ÷ 4 which is equal to 19 cm
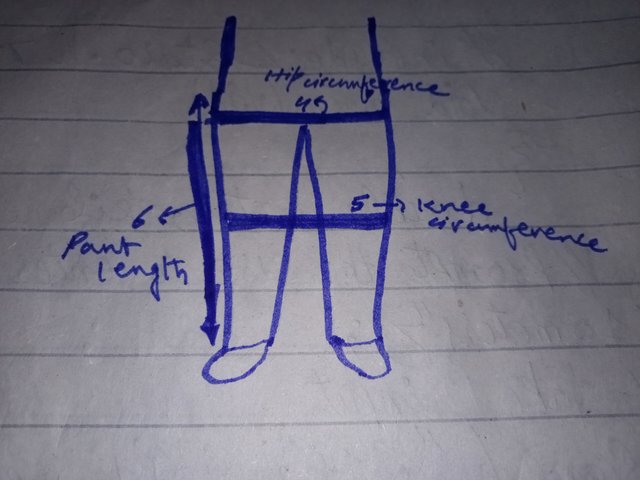
• Circumference of knee is taken at around 24-26 cm.
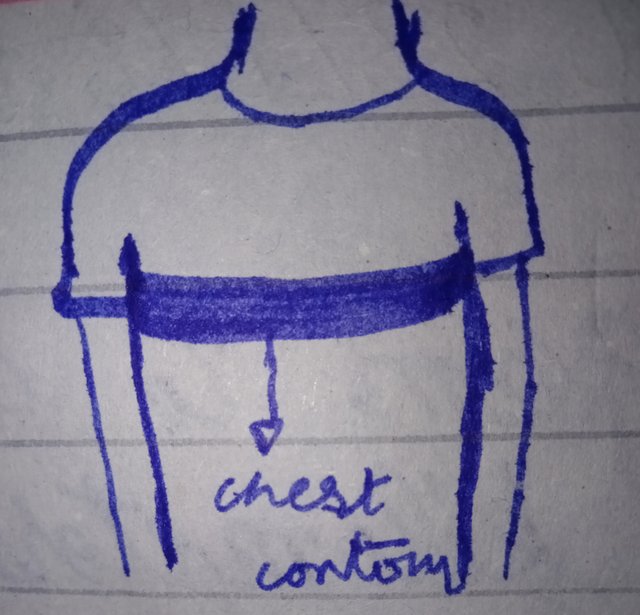
• Chest contour can be calculated as 69 cm ÷4 which are around 17 cm
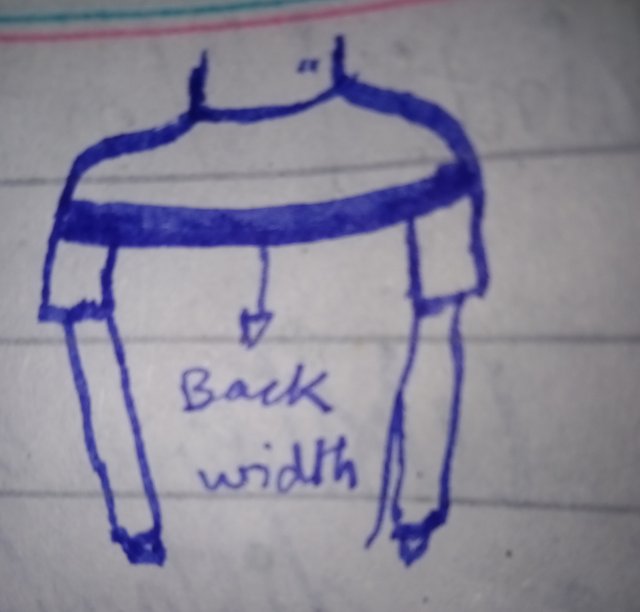
️• Back width can be calculated as 24 cm ÷ 2 which is equal to 12 cm
• Waist length is measured at around 38 cm
• Waist circumference is calculated as 65 cm ÷4 cm which is around 16 cm
• Shoulder drop is measured as around 2.8 cm
 |  |  |
|---|
If I talk about important measurements then above I have explained that which measurements I needed for tracing this pattern as well as I have also explain with my personal photos that how by using inches tape we would measure these measurements!
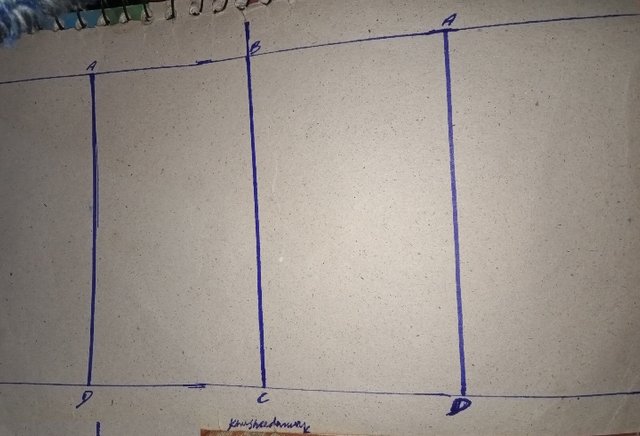
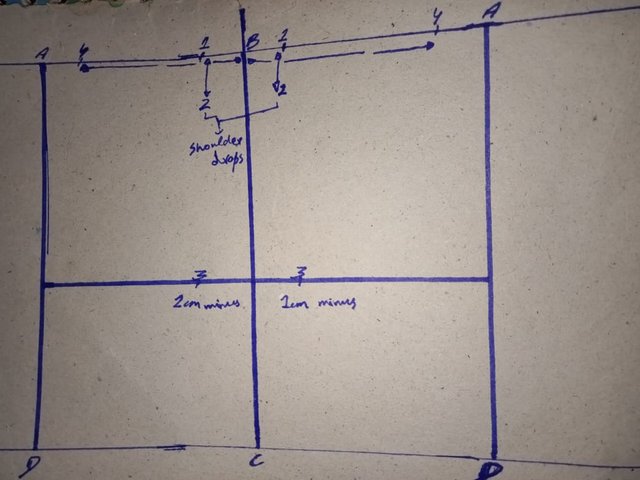
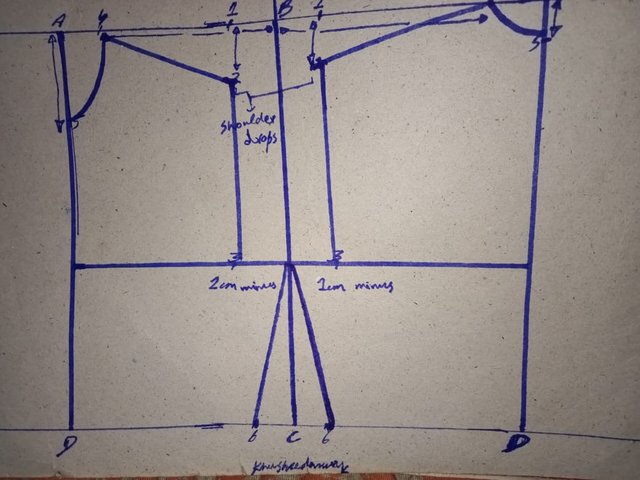
If I talk about step number 1 then I have drawn a rectangle with waist length which I have taken around 38 cm and by taking 4th part of chest contour which is 17 cm around and then I also added 1 cm in it. I have duplicated it now as I am showing you guys front and back patterns both together.
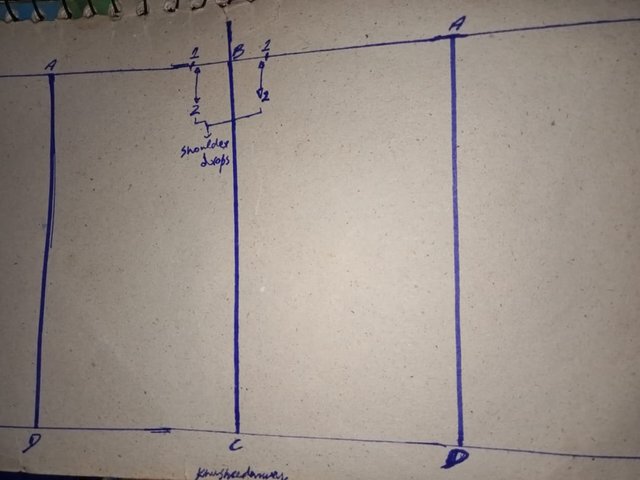
If I talk about step number 2 then I have labelled corners of rectangle as A A at top and D D at bottom and in top centre there is B and at bottom centre there's C so I measured half with of back at both sides (front and back) and this is I have labelled as point number 1.
 |  |
|---|
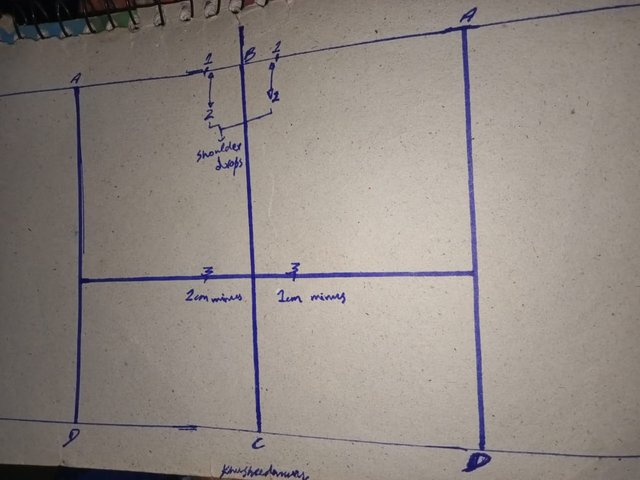
If I talk about next step then I have drawn point 2 by going down in inside of box from point one around 2.8 cm below which is basically my shoulder drop according to size as I have mentioned above and I have mark it as point 2 in both front and back patterns.
If I talk about next step then I have drawn point 3 in inside the box by taking measurement of 1/2 width of back and eliminating 1 cm at least from it and this is basically a way of drawing chest line for children in both front and back pattern.
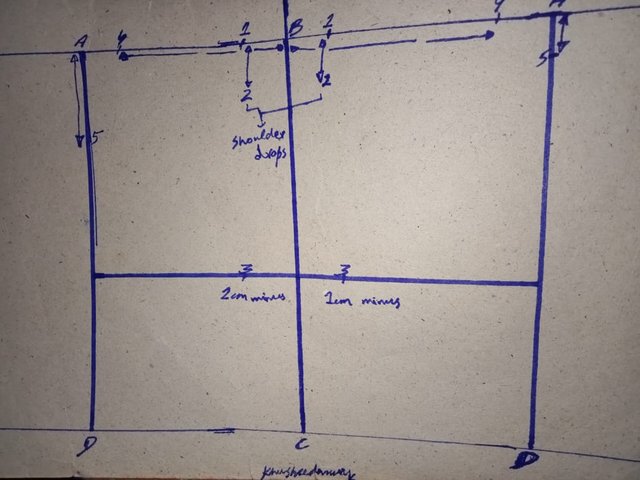
If I talk about next step then I have taken measurement of 6th part of width of back which is already calculated by me so by taking measurements I have labelled it as point 4 in back and front pattern.
If I talk about another step then A to D in both sides are showing vertical lines so point 5 will be labelled by moving below around 6th part of back width and adding 2 cm in it for front pattren and moving below 1.3-1.5 cm for back pattern.
 |  |
|---|
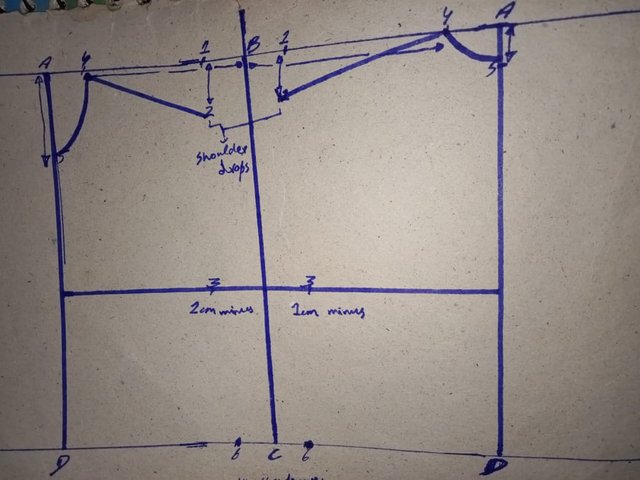
If I talk about another step then here starting from point D to C you need to measure fourth part of total circumference of waste and adding 1.5 cm in it and then it will be labelled as point number 6 as I labelled them in front and back patterns.
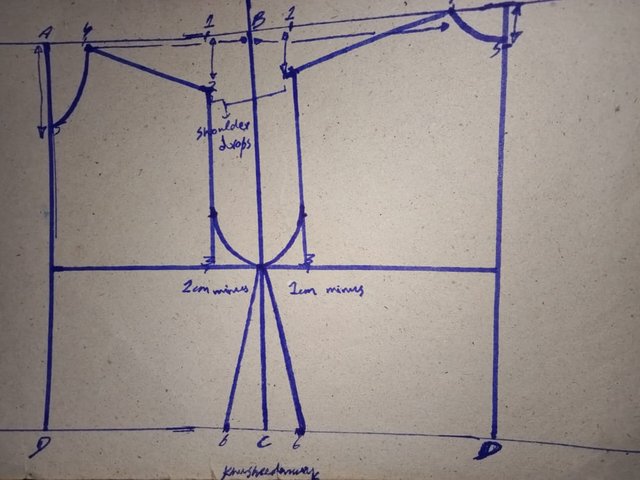
• 4 and 5 points are present in both front and back patterns which should be joined with each other in slight and deep curve.
• Point 2 will be joined with point 4 in straight line in both front and back patterns
 |  |
|---|
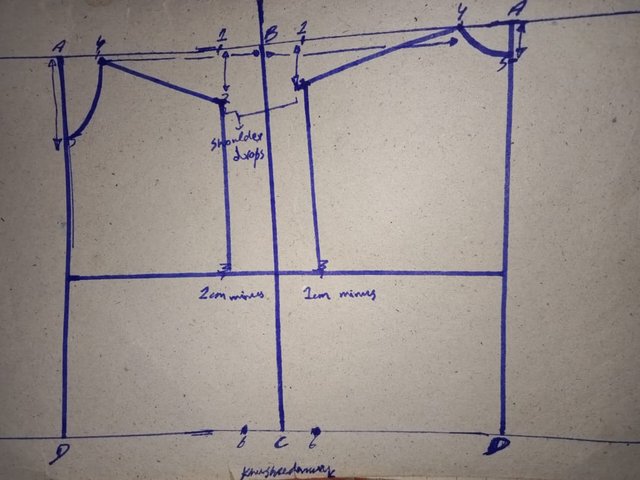
• Point 2 and 3 will be joined with each other in both sides with straight line and similarly.6 will be joined with straight chest line and these are showing an intersection here as they are meeting at same area
• At location of point number 3 1.5 cm will be measured from both sides and then they will be joined for creation of armhole so these are joined in a curve shape.
 |  |
|---|
Finally this is final look of basic tracing pattern for children I have obtained after using personal measurements!
I want to invite @kouba01,@wilmer1988,@josepha to participate
You have done a beautiful work. I will give it a try tomorrow.
Downvoting a post can decrease pending rewards and make it less visible. Common reasons:
Submit
Thank you friend!
Downvoting a post can decrease pending rewards and make it less visible. Common reasons:
Submit
Felicidades me agrado tu explicación aunque no comprendo mucho el trabajo con pulgadas, ya me pondré como objetivo practicar para que en una de las metas pueda realizarlo.
Downvoting a post can decrease pending rewards and make it less visible. Common reasons:
Submit
Thank you for being here and for liking my step by step explanation and believe me to take measurements with inches is also easy just like to take measurements in centimetres!
I hope that in future you can learn about it also
Downvoting a post can decrease pending rewards and make it less visible. Common reasons:
Submit
Felicidades suerte en el concurso.
Downvoting a post can decrease pending rewards and make it less visible. Common reasons:
Submit
Hola 👋 felicidades por tu trabajo, aunque no comprendí mucho las medidas en pulgada sin embargo estaré iniciandome a practicar aunque por el contenido expresas que es muy sencillo.
Downvoting a post can decrease pending rewards and make it less visible. Common reasons:
Submit
Hola amigo, un gusto pasar por acá, al igual que tu no tengo niños pequeños pero usé la tabla en centímetros, es de gran ayuda y así no se nos complica. Me gusta valorar el trabajo de mis compañeros porque sé que tomamos un tiempo para hacerlo, la profesora dicta las sugerencias. Bendiciones, un abrazo.
Downvoting a post can decrease pending rewards and make it less visible. Common reasons:
Submit
greetings ..my best wishes for the competition, I don't have much understanding about the measurements in inches, but after looking at your post, I can get some understanding about it. Your post was useful for my knowledge. Thank you.
@lunasilver
Downvoting a post can decrease pending rewards and make it less visible. Common reasons:
Submit